Elektroda.com
Elektroda.com
X

[Youtube] Removing the SMD module and changing the BK7231 firmware in the RGBCW

p.kaczmarek2 3948 12
This content has been translated flag-pl » flag-en View the original version here.
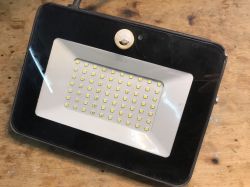
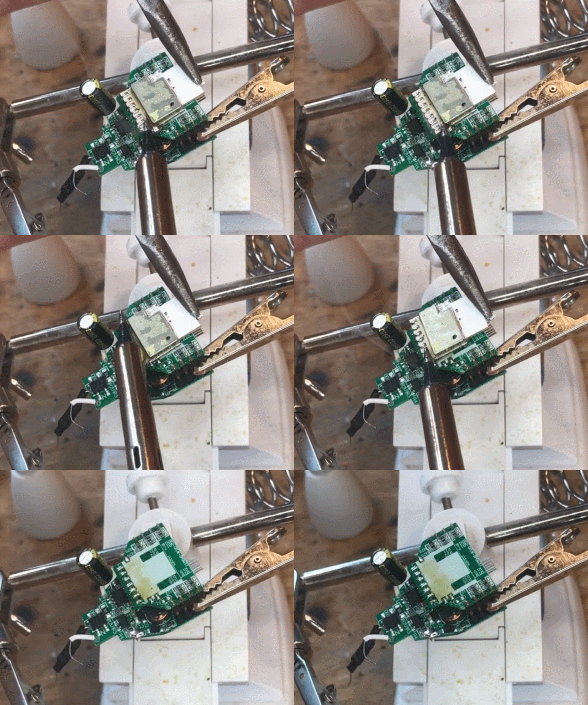
  • Today, together with my assistant, I will present you a RGBCW bulb flashing guide, including WiFi SMD module with a cheap soldering iron. We will flash OpenBeken to WB2L_M1 from BK7231N (i.e. equivalent to older WB2L with BK7231T) so that you can free the LED lamp from the cloud and connect it to Home Assistant. Everything will be shown step by step so that you can repeat our actions:


    I recommend watching the whole movie, but here's a short teaser showing the most interesting part:
    [Youtube] Removing the SMD module and changing the BK7231 firmware in the RGBCW
    This film is somewhat complementary to the topics:
    - 'Bulb' LED WiFi RGBCW Tuya - interior, programming, BK7231N
    - Nous Smart WiFi Bulb P3 RGBCW - CB2L + BP5758 - firmware change
    Also, check out other topics about related products:
    - Light switch from USA - Gosund Smart Switch SW5-A-V2.1 - BK7231T
    - Garden double relay Tuya CCWFIO232PK - BK7231T - programming
    and many other topics, not only mine, from the department "Insides of Devices" .

    It's worth getting to know the Home Assistant tutorial:
    Tutorial Home Assistant - configuration, WiFi, MQTT, Zigbee, Tasmota

    Let's not forget about Tasmota - this firmware is my inspiration when creating OpenBeken, as well as e.g. OpenBeken is compatible with Tasmota through Tasmota Device Groups:
    ESP8266 and Tasmota - controlling the WiFi relay step by step

    As a supplement to the video, I will add that:
    - pairing with Home Assistant can be done either by our HA Discovery, or by hand (with autogenerated Yaml code)
    - you do not need to manually set the pins anymore, on the javascript web panel (Launch Web Application button - the second web panel) there is an online database of devices that is always downloaded from the network, so if you already know the device, you just select the name from the list and you can automatically set its configuration:
    [Youtube] Removing the SMD module and changing the BK7231 firmware in the RGBCW
    - OBK already supports the base protocol DDP - that is, you can run RGB animations on these lamps

    Links mentioned in the video:
    - OpenBeken https://github.com/openshwprojects/OpenBK7231T_App
    - hid_download_py: https://github.com/OpenBekenIOT/hid_download_py
    - bkWriter 1.60: https://github.com/openshwprojects/OpenBK7231T/blob/master/bk_writer1.60.zip
    - ready builds for various platforms (BK7231T, BK7231N, XR809, W800, W801, T34, BL602) to download: https://github.com/openshwprojects/OpenBK7231T_App/releases

    Tuya-cloudcutter, an alternative way to upload firmware without soldering wires, but only for supported devices:
    https://github.com/tuya-cloudcutter/tuya-cloudcutter

    And remember that the contest:
    Present your own construction or send an article and receive a 64GB SD card
    It also applies to topics placed in " IoT devices ", section.

    This is our first video on YT. I apologize in advance for the shortcomings, I am aware of them. It was really hard to manipulate the soldering iron with the stand in front of me, so I'm glad something came out of it anyway. Also, the way to remove the LED board was unfortunate. Normally I grab the base to the vice and pry with two hands / two screwdrivers, but how to do it in front of the camera?

    Do you like this form of presentation? Accelerated video + commentary + subtitles on the video? Let me know, and maybe we'll record something else for you.
    Finally, thanks: to my assistant for the audio, small help with processing, corrections and testing and to @TechEkspert for technical support with the video, noise reduction, etc.
    About Author
    p.kaczmarek2
    Moderator Smart Home
    Offline 
    p.kaczmarek2 wrote 5843 posts with rating 5827, helped 279 times. Been with us since 2014 year.
  • #2
    ArturAVS
    Moderator HP/Truck/Electric
    It's nice to listen to a female voiceover :D . However, "ArGeeBee" sounds a bit strange as a term for RGB LEDs, it would sound better in our RGB. The movie is very cool, it shows that you don't need super-hyped soldering equipment for such work.

    p.kaczmarek2 wrote:
    Do you like this form of presentation? Accelerated video + commentary + subtitles on the video? Let me know, and maybe we'll record something else for you.

    Of course!
  • #3
    p.kaczmarek2
    Moderator Smart Home
    Cheap soldering equipment will do the trick, you just need to remember about the hygiene of the soldering tip, and flux and braid are also necessary. And a lead binder for the method from the movie ... (supposedly there is something better for this - some low-temperature "Chip Quik PbBiln" which I saw reviewed, among others, by Dave Jones, but I never used it for simpler situations like the one in the movie, ordinary Pb does the trick)

    "ArGeeBee" maybe from the momentum, because we are also working on an English version for colleagues from abroad. i.e. this version already has English subtitles (we compromised that it could be in English), but we also want to try to record a 100% English voiceover + English Windows version (because it's Polish in the video).
  • #4
    ArturAVS
    Moderator HP/Truck/Electric
    p.kaczmarek2 wrote:
    Cheap soldering equipment will do the trick, you just need to remember about the hygiene of the soldering tip, and flux and braid are also necessary.

    I myself use not the highest-flying equipment and even with one efficient hand I can do it. "Hygiene" of the tip is the basis and additionally matching the tip to the activities performed. Pb solder is probably the basis, I used PbFree several times when repairing medical equipment and it is a technological massacre unfortunately. I changed my computer to a little newer, just because of @TechEkspert. Finally, he persuaded me to record a podcast, problems with drivers and the flu that was decomposing me a little "postponed" in time. Something will show up in the near future :D . As for phrases in English, there are some so-called untranslatable, and then, in addition to the original name, an approximate translation that would make sense should be provided.
  • #5
    TechEkspert
    Editor
    In the comments on YT, there was a question about the purpose of such a modification, it seems that the topic of freeing the equipment from the application and ecosystem provided by the manufacturer is still new.

    @p.kaczmarek2 there was also a question whether it is possible to copy the original firmware, but it is not necessary for the change?

    If you can please elaborate on the topic, here is the original question:
    "... I'm just wondering how is it possible to download the original firmware? Did the microcontroller not have read protection set, did you use some bug by resetting the microcontroller by disconnecting the power supply for a fraction of a second? Or are the microcontrollers that are mounted in the lamps not any protection against reading the batch?"

    @ArturAVS a random event prevented us from recording the podcast, let's not reveal the topic of the episode, and let's try to arrange the recording date again in PM.
  • #6
    ArturAVS
    Moderator HP/Truck/Electric
    TechEkspert wrote:
    let's not give away the topic of the episode

    That's why I didn't even mention it :D .
  • #7
    p.kaczmarek2
    Moderator Smart Home
    TechEkspert wrote:

    @p.kaczmarek2 there was also a question whether it is possible to copy the original firmware, but it is not necessary for the change?

    In the sense, the user asks why we are making a backup of the batch in the video? I understand correctly?
    It is not necessary, you can upload new firmware without it, but we do it for two reasons:
    1. It is worth making a backup of the entire 2MB firmware (preferably after pairing with the test SSID - not our private one - because the dump contains our SSID and password) because then you can send them to the tuya-cloudcutter project:
    https://github.com/tuya-cloudcutter/tuya-cloudcutter/issues
    which then will allow you to program other products from the same series (with the same firmware version) remotely, via WiFi (this is a tuya-convert for Beken, but per-device support is offered)
    2. a backup should also be made in case of any problems after changing the firmware and to be able to return to the previous one if necessary

    Unless I misunderstood the question and the user asks if it is possible to modify the old Tuya firmware to add, for example, Home Assistant - if so, I will answer that it is simply impossible, the compiled program cannot be easily modified and you will not recover the C code from it Even if you download the firmware, you can only view it in a dissampler like Ghidra, but it won't be the same as C code.

    Nevertheless, it is worth remembering that there are also other types of solutions - there is, for example, LocalTuya as a plugin for HA (only they do not modify the existing Tuya input...).

    TechEkspert wrote:

    If you can please elaborate on the topic, here is the original question:
    "... I'm just wondering how is it possible to download the original firmware? Did the microcontroller not have read protection set, did you use some bug by resetting the microcontroller by disconnecting the power supply for a fraction of a second? Or are the microcontrollers that are mounted in the lamps not any protection against reading the batch?"

    These chips don't have any load protection, at least that I'm not aware of.
    Interesting fact: you can also connect to them in SPI mode (without UART bootloader) and then they identify themselves as an SPI chip and you can also read everything.
    Details: https://github.com/OpenBekenIOT/hid_download_py/blob/master/SPIFlash.md


    TechEkspert wrote:
    did you use any bug by resetting the microcontroller by disconnecting the power supply for a fraction of a second

    As above - it's not a bug, just their bootloader works so that it "checks in" only a moment after power cut/reboot (the other way is to reset the CEN pin instead of power cut).
    Other systems are different - e.g. BL602 has a separate "BOOT" pin and either when it is shorted to ground, it is in bootloader mode all the time, or the program starts normally. And you don't need to "catch" the bootloader. And these BK7231 have so that there is no "BOOT" pin, only the bootloader "checks in" at reboot and waits a short moment for a response from TX / RX and if there is no response, it starts the program normally.

    For this reason, 4 signals are enough for programming - power supply (+3.3V ground) and RX and TX. Nothing more.

    Another interesting example, photos from today from programming another BK7231N, a new module, EB01-B (I didn't find anything about it on the web), the photos show where the RX and TX are:
    [Youtube] Removing the SMD module and changing the BK7231 firmware in the RGBCW
    [Youtube] Removing the SMD module and changing the BK7231 firmware in the RGBCW
    Soldered 3.3V:
    [Youtube] Removing the SMD module and changing the BK7231 firmware in the RGBCW
    Soldered GND:
    [Youtube] Removing the SMD module and changing the BK7231 firmware in the RGBCW
    RX and TX are here:
    [Youtube] Removing the SMD module and changing the BK7231 firmware in the RGBCW
    RX and TX and the whole layout:
    [Youtube] Removing the SMD module and changing the BK7231 firmware in the RGBCW
    and as I wrote above - if we download 2MB flash and send it to tuya-cloudcutter and the authors of this project manage to do a "hack" for programming this particular version of the batch / device via WiFi, then with the next products you do not even need to open the case to upload a new batch. The only problem is that when Tuya updates the batch (and, for example, we have a device with a different version than the one in tuya-cloudcutter), the process must be repeated, i.e. we solder the wires again (because, for example, the new lamp is from a newer series)
  • #8
    TechEkspert
    Editor
    Thanks for explaining the topic, it was about the possibility of copying the original software and protection against writing / reading the module memory.

    p.kaczmarek2 wrote:

    1. It is worth making a backup of the entire 2MB firmware (preferably after pairing with the test SSID - not our private one - because the dump contains our SSID and password) because then you can send them to the tuya-cloudcutter project


    This puzzles me, as this may be the weakest point of the system. If we want to interfere in the IoT network that supports such light bulbs, is it enough to unscrew one and replace it with a new or damaged one so as not to arouse suspicion, and then read the memory contents and we already have access to WiFi that supports light bulbs and maybe other devices?
  • #9
    p.kaczmarek2
    Moderator Smart Home
    In the case of a "bulb" built on ESP8266 with Tuya firmware (I haven't tested the others personally), it is enough to rip its memory (a regular UART to USB converter and esptool.py is enough, or directly from the bone) and we get access to the SSID and password in plaintext - tested I've posted it many times on the forum as well.
    (a bit strange, because what is the problem, even with some simple XOR to change the bytes, and this alone would make it difficult for many people to recover the password)

    In the case of the "bulb" from BK7231T/BK7231N, in addition to flash memory download, you still need to decrypt it, but unfortunately it is very easy at the moment, because there are tools for this (and Tuya has provided the SDK itself, so you know what and how it works):
    
    $ pipenv run python bk7231tools.py dissect_dump -e -O dump_extract_dir dump.bin
    
    RBL containers:
            0x10f9a: bootloader - [encoding_algorithm=NONE, size=0xdd40]
                    extracted to dump_extract_dir
            0x129f0a: app - [encoding_algorithm=NONE, size=0xfd340]
                    extracted to dump_extract_dir
    

    dump.bin is a ripped binary file with the methods from the video from the first post.

    Fun fact: I don't remember it exactly, but one of the devices I tested on the forum (probably one based on ESP8266), but not with the Tuya charge, but some other (maybe Magic Home? which, surprisingly, was not a Tuya modification) worked in in such a way that when starting on the UART, it printed together with the boot log and all the SSID and password of our network ...

    so this security thing is very bad. Probably the only safe way to dispose of IoT Tuya equipment is to destroy it in such a way that the WiFi module itself is also destroyed (unless we know how to erase flash for a given system).


    EDIT: Oh, I know where I saw in the debug log on UART my password and SSID, It was on BL602, this topic:
    https://www.elektroda.pl/rtvforum/viewtopic.php?p=19944184#19944184
    [Youtube] Removing the SMD module and changing the BK7231 firmware in the RGBCW
  • #10
    khoam
    Level 42  
    p.kaczmarek2 wrote:
    so this security thing is very bad. Probably the only safe way to dispose IoT hardware is to destroy it in such a way that the WiFi module itself will also be destroyed (unless we know how to erase flash for a given system).

    It's not that bad at all. It only comes down to choosing the right SoC and framework.
    Hardware Security By Design
    How to Secure ESP32
    Flash Encryption
  • #11
    p.kaczmarek2
    Moderator Smart Home
    All in all, a valid comment with this bold, I will emphasize there that it was mainly about Tuya "light bulbs" (or I would extend it to Tuya products in general) on ESP8266 and BK7231. Tuya (and any smaller producers - probably the Magic Home mentioned - the log shows that it is not a Tuya painting and does not use their SDK) made absolutely no effort to secure their products, they did not even release this simple XOR on bytes. It's probably similar with RTL, the more so that you can desolder the Flash chip from the board there.

    As for the ESP32 itself, I will not say, because although I have been testing IoT products for several years, somehow I have not found it yet (and I rather buy products at random, I do not choose them specifically for the thesis, although the fact is that I test the popular and budget ones from Ali/Ale/Eba).
  • #12
    janek_wro
    Level 29  
    A huge plus for all the work, and for the film documentation. Accelerated video is cool :)
    One minor caveat - the instruction in the video from 3:11 to 3:22 is a bit risky, especially for the inexperienced, when someone is just starting their adventure with SMD. It is worth noting that during such cleaning from a blot of tin, only one pad of the element should be heated, and for a short time. Otherwise, SMD resistor/capacitor unsoldering guaranteed. Or shifting and merging with those next to it. Unless they are glued there, then only then you can go crazy.
    Not that I pick on, I point out little things to improve the substantive quality of such materials.
    For old-timers, this is an obvious activity, so it is not even mentioned. Beginners should learn from somewhere. They usually learn "the hard way" ;)
  • #13
    Anonymous
    Level 1