The Arduino Mega (ATmega2560) + ESP8266 module on one board contains Arduino Mega and a WiFi module based on ESP8266 with a printed antenna and an external uFL antenna connector. The cost of the module on auction portals is ~ $ 12
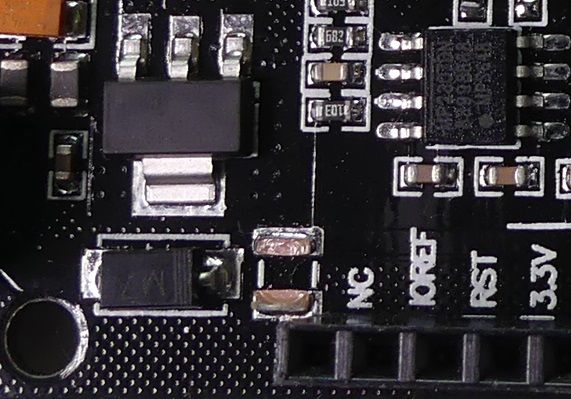
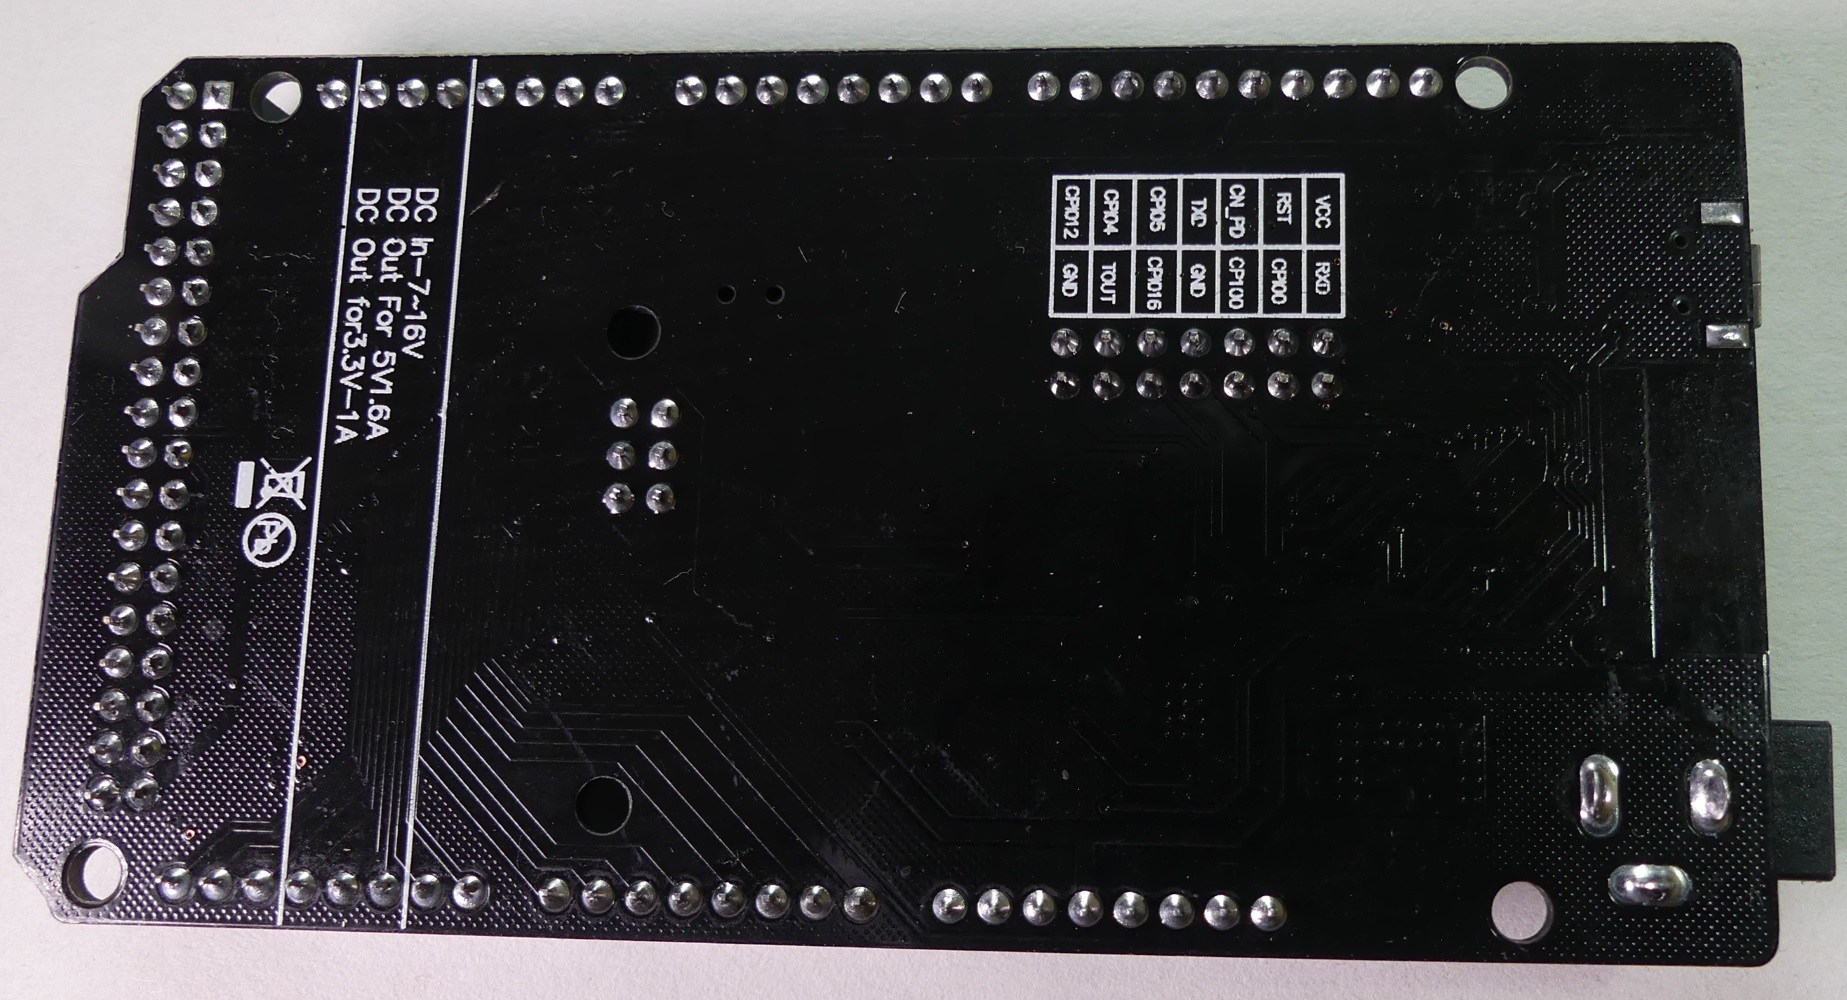
Link . The module can be powered from a micro USB socket or DC 7-16V connector, there is a DC / DC converter (MP2307) on the board. Communication with the modules takes place via the USB UART converter based on the CH340 chip. Arduino Mega works with a voltage of 5V, while the ESP8266 is 3.3V. ESP8266 pins are available on an additional connector with a description on the other side of the PCB. ISP connector allows for ATmega2560 programming without bootloader.

In the previous material, Fr.
ESP8266 + Arduino UNO You have developed a very interesting discussion about whether such a combination of modules on one board makes sense.
Could ESP8266 and ATmega2560 find better applications? We have more I / O, 16 ADC inputs 10b, 4xUART and 2xtimer 8bit and 4xtimer 16bit.
There is no SMD capacitor on the board, you can see the impact of price on quality, similar to the previously tested ESP8266 + Arduino UNO module:
When connecting the ESP8266 and UNO pins, remember about different voltage levels, similarly when connecting the peripherals.
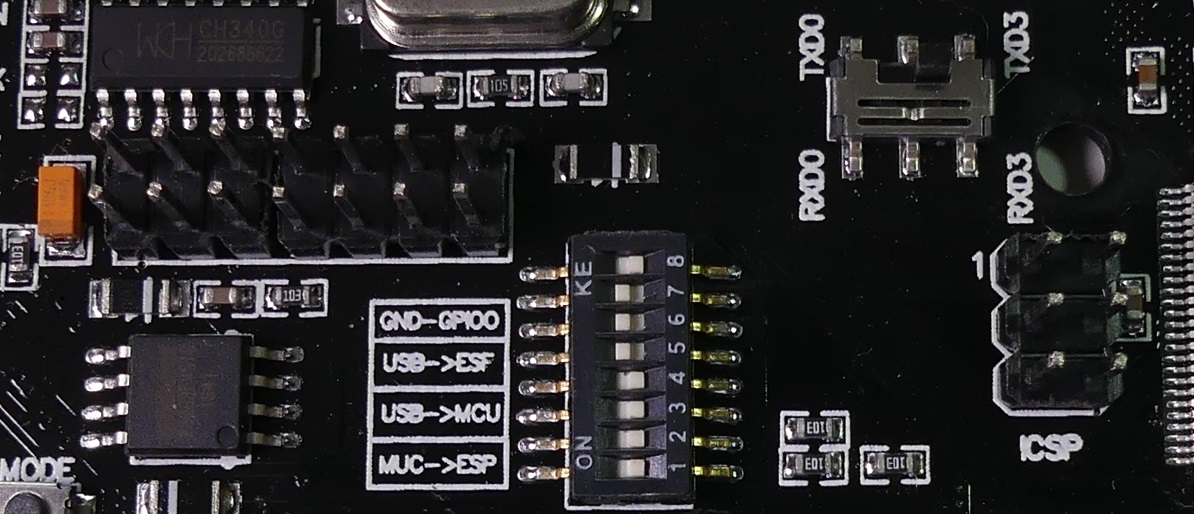
After the appropriate setting of the ESP8266 and ATmega2560 switches, they can communicate using the UART, another jumper setting allows you to connect the UART USB converter with the selected module for programming.

Connection of modules via UART - DIP 1 and 2 ON
USB UART connection with ATmega2560 - DIP 3 and 4 ON
USB UART connection with ESP8266 - DIP 5 and 6 ON
USB UART connection with ESP8266 in programming mode (GPIO0-GND) - DIP 5 and 6 and 7 ON
The additional switch RXD0 TXD0 - RXD3 TXD3 allows you to select the UART after which the ATmega2560 will communicate with the ESP8266.
Setting the switch to the RXD3 TXD3 position and DIP 1, 2, 3, 4 - enables communication via the USB UART converter with the ATmega2560 on the UART0 port, and the ESP8266 communication with the ATmega2560 on the UART3 port.
Do you think such a combination of ATmega2560 with ESP8266 on one board makes sense? Arduino MEGA can significantly expand the ESP8266 capabilities in terms of the number of general-purpose I / O, and the number of ADC inputs, PWM outputs, it is possible to offload / buffer ESP for measurements or communication with peripherals.
It is inconvenient to switch miniature switches to change modes. When connecting the pins, the ESP and Arduino modules should be remembered about the difference in voltage levels between the modules.
Below is information on how to integrate with the Arduino environment part of the module with ESP8266 and connect to the Blynk environment:
ESP8266 WIFI boot, start from IoT, Blynk, Thingspeak The number of available PWM and I / O tempted to perform some RGB controller or multi-channel driver / recorder connected to Blynk or Thingspeak as a practical test, but it was already in the previous material. Let's try something else.
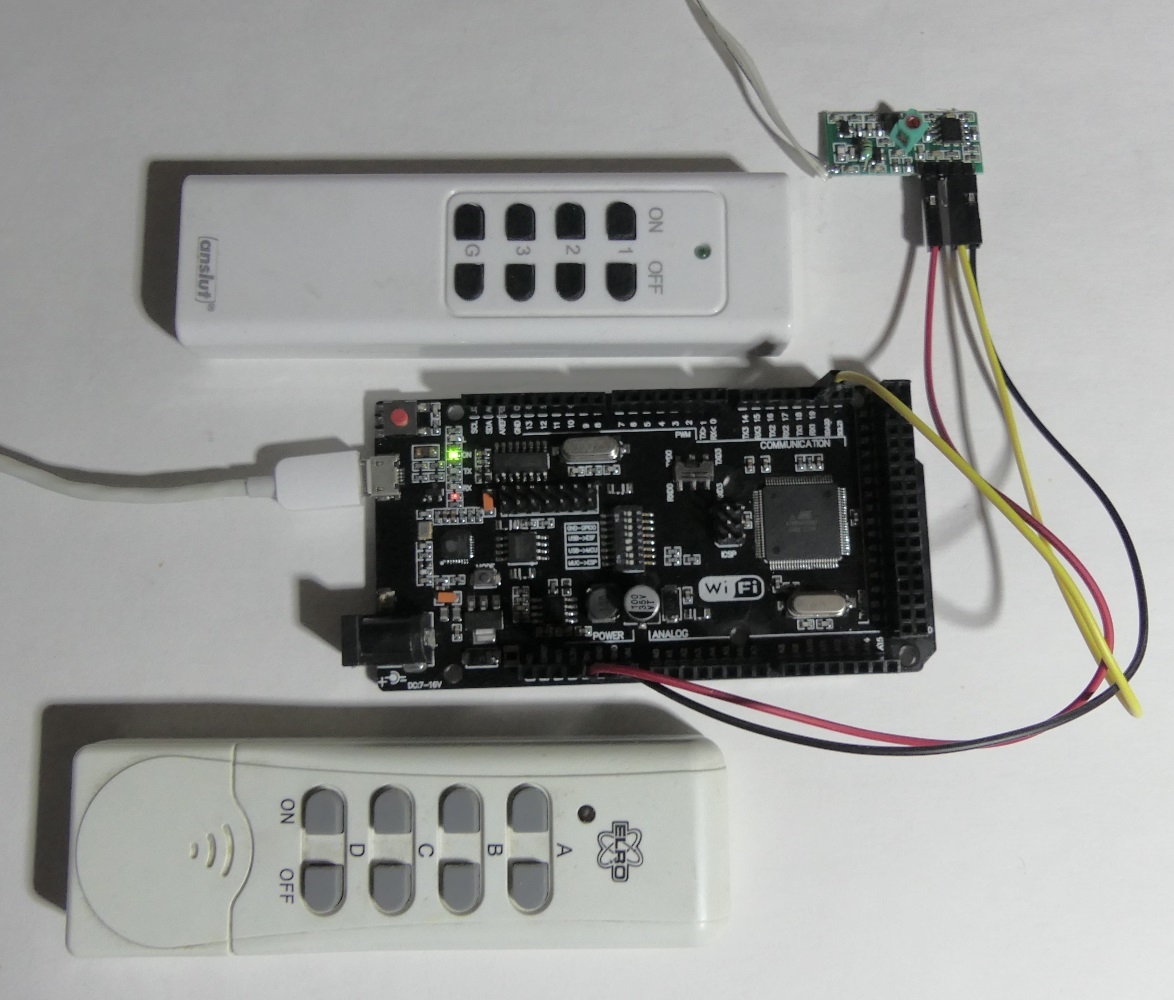
As a practical test of the module, this time I tested the MEGA dedicated to Arduino
RFLINK GATEWAY . The RFLink project allows the decoding of transmissions from
very many wireless devices type weather station sensors, remote controls operating in ISM bands. I connected the data output of a very simple and cheap 433MHz OOK receiver to the D19 pin. The authors have prepared hints on which modules to use:
http://www.rflink.nl/blog2/wiring I checked the operation of the cheap 5V 433MHz CZS-A receiver, and a slightly more complex 3.3V RFM210L receiver. The software for download on the project website
http://www.rflink.nl/blog2/download uses the Arduino bootloader to upload the firmware, which simplifies the testing process. It turned out that two accidentally owned remotes are properly decoded and information about the number of the button I pressed on the remote appeared on the serial console (57600b / s). After attaching a better antenna, control commands sent by remote controls working for one of the neighbors on the estate began to appear. Maybe there will be data from recently popular weather station sensors? After connecting the transmitter, the design also allows you to send commands to wireless devices.
Having the ESP8266 board, we can forward the information using WiFi.


Comments
In my opinion, the connection is very sensible, because simple modules on ESP8266 do not have an antenna output and the ones that have are relatively expensive. Here, for a few dozen zlotys, we have the... [Read more]
@xn_tec thanks for the info, do you know what are the problems with this module? I have this module on the table, maybe I will be able to check these problems in practice? [Read more]
From what I found people had problems with communication between Atmega and ESP8266. There were also a lot of questions like "why doesn't it work for me" and somehow no answer. Someone wrote there... [Read more]
A large number of cases concerned problems with finding (guessing) the "factory" speed at which ESP communicates over RX / TX. Permanently setting this speed in ESP (i.e. so that it is as we wish after... [Read more]
After all, on the espressif site there is a pdf signed as ESP8266 AT Instruction Set, where it says how to do it (AT + UART_DEF == XX). I had little fun esp, but there were no problems with setting the... [Read more]
Assuming there is the original firmware in ESP, and this is quite a rare case where the merchandise comes from ali. [Read more]
Put together such a little thing and you can move someone quite nervously. As for the tile itself, it doesn't make much sense in my opinion. It will confuse the user more than it will benefit. The... [Read more]
@pir In the assumption of the authors of RFlink, it was supposed to be used not so much as a joke, but to use remotely controlled sockets as actuators, remote controls as entry points to the control... [Read more]
ESP8266 has a lot of limitations, ESP32 is definitely better at a slightly higher price. And that unfortunate AVR. ArduinoIDE supports ARM, so why not e.g. STM32F107 + ESP32? The price is probably similar.... [Read more]
I do not understand your complaint. After all, it is a cheap board for simple things based on all the benefits of Arduino. For more serious games, there are many more powerful solutions based on ARM +... [Read more]
I don't really understand AVR + ESP like the 8051 + DigiConnect. However, I did not like ESP8266 as a platform and I use it as a UART-WiFI bridge (why not I2C or SPI - WiFI, that's another topic,... [Read more]
You are looking for hardware. For me personally, it is a very nice module, because I have a lot of projects that are based on Mega and there is no point in converting them into anything else, because what... [Read more]
Tusie, I completely agree. Modernization ok, new design no. I mean CEOs, who start their governments with "cleanup - why this cardboard is here, etc, that is nothing meroteric". I will not divulge... [Read more]
Hello. at the beginning I would like to point out that I am not a specialist in the field and I am just exploring and learning about "topics" related to Arduino etc. For a few days I am the owner of the... [Read more]
The Mega communicates with the ESP over UART when jumpers 1 and 2 are turned ON, the RXD0-TXD0 / RXD3-RXD3 switch allows you to select the UART (0 or 3) on the Mega which will be used to communicate with... [Read more]
If you do not have communication between Atmega and ESP, it is 99% due to the lack of a suitable software in ESP. Program it using a standard tool and it should start working. For me, it was like that... [Read more]
After two years, I will stick to this discussion. In 2018 I started my first Arduino project. In the second version, I used this board because of easy programming. As a beginner, I must say that it helped... [Read more]
Thank you for your opinion and congratulations on a successful project. You will probably raise the pressure for everyone who thinks that arduino is not suitable for more serious things :) While in automation,... [Read more]