logo elektroda
logo elektroda
X
logo elektroda

Lichtenberg pattern burner

pawlik722  15 40422 Cool? (+42)
📢 Listen (AI):

TL;DR

  • A simple Lichtenberg pattern burner was built to etch lightning-style burns into an oak table.
  • An old microwave transformer powers electrodes on long handles, with the housing mounted on a thick plywood base and fitted with fuse protection.
  • The wood is soaked in a conductive mix of water and caustic soda so the current can trace the pattern.
  • Too wet wood only made a burnt spot instead of a branching lightning bolt, so moisture has to be tuned experimentally.
Generated by the language model.

Hello, I would like to boast of a very simple but interesting device from the category: what to do with an old microwave ;)
I decided to diversify my apartment a bit with a new table, it fell on an oak table with a lightning pattern, so I was forced to develop a tool for this.

The most easily accessible microwave transformer was used as the power source.
The electrodes were placed on long handles, I did not want to have cables close to my body, as far as I know the insulation is up to 1000V for higher voltage, I did not find in stores, except for the possibility of using ignition cables from the car.
The housing is an ordinary surface-mounted box.
I used a fuse protection prophylactically.
The housing has been additionally screwed to a thick plywood base to prevent accidental shock. from the bottom of the housing protruded screws screwed to the transformer, it was enough to put the device on a metal table and the tragedy was ready.
In the video, I initially have the wrong cables screwed on, please do not pay attention to them, I just grabbed them to put the cube in the right place ;)
The chair was used by chance, I had nothing wooden in my workshop, the old varnish that soaked into the wood prevented me from firing the pattern.

In order for the pattern to burn out more easily, the wood should be soaked in a solution of water and, in my case, caustic soda, but you can use other electrically conductive mixtures, I just had soda on hand. At the beginning of the movie, you can see that the bow was a burnt spot, not a lightning bolt. It was the fault of too wet wood, you should experimentally find out how wet the wood must be.


A simple but very dangerous device, it should be remembered at every step.

I am posting an overview video of the construction, I am not Polański, so I apologize in advance for the quality.


And here is one of the uses of the burner, a hammer for my forge "


About Author
pawlik722 wrote 976 posts with rating 355 , helped 99 times. Been with us since 2013 year.

Comments

szymon122 01 Jul 2019 06:25

Show photos of the device from the inside ;) Do you have the option to measure the current consuming the transformer at the time of firing? [Read more]

ADI-mistrzu 01 Jul 2019 07:44

The hammer handle looks cool, can you show the pictures? [Read more]

pawlik722 01 Jul 2019 07:52

I have everything in the workshop. When I have a moment in the evening, I will eat it and take pictures ? the device is visible from the inside in the film, but if necessary, I do not see any obstacles.... [Read more]

Euzebiusz23091998 01 Jul 2019 16:47

The effect is very nice, but has such a hammer not lost its durability? I know that tools are not usually decorated in such a way, and in the film it is more for show, but I wonder how much it influenced... [Read more]

zgierzman 01 Jul 2019 21:16

I wonder how you get rid of the electrolyte remnants that soaked into the surface of the wood? Are you indifferent, grinding to zero when finishing? Sodium hydroxide is a very aggressive substance, and... [Read more]

pawlik722 03 Jul 2019 06:30

As for durability, there is no problem. The arch only burns the layer of wood on the surface. Regarding the neutralization of the solution, this measure is not normally used, there are a lot of other... [Read more]

cooltygrysek 05 Jul 2019 10:53

You can use a concentrated solution to clean old furniture before renovation and somehow there is no problem with discoloration, as long as it is rinsed well with water. This hammer dagger looks fabulous... [Read more]

pawlik722 06 Jul 2019 16:53

Exactly. Too high a concentration causes the wood to turn red. It is even used in some situations ? [Read more]

cooltygrysek 06 Jul 2019 18:47

Not all types of trees discolor, others brighten if they get darker than the light :-) [Read more]

pawlik722 07 Jul 2019 12:13

I didn't know about it. Such knowledge is not known when it may be useful. ? [Read more]

carrot 07 Jul 2019 19:57

I would install an additional switch in this device, a "trigger" in the handle of one of the electrodes. Any low voltage low power transformer and relay with coil voltage like Uwy transformer. In the handle,... [Read more]

pawlik722 09 Jul 2019 21:56

In assumptions, I was going to solve it like that, but at the end it turned out as you can see, that's why I used such long electrode handles, before starting it, I always untangle the cable first... [Read more]

sundayman 19 Jul 2019 22:32

Regarding security, I could not forgive myself (until the admin removes ;) - Dear friend, this matter is child's play, and I was convinced that you would easily guess what happened. Holmes reached... [Read more]

pawlik722 20 Jul 2019 16:39

The world is ruled by chance ? good quote, buddy. ? [Read more]

Piotrekdima 21 Apr 2020 01:08

Would you be able to send some pics of the construction of this burner up close, generally speaking, the transformer is all about [Read more]

FAQ

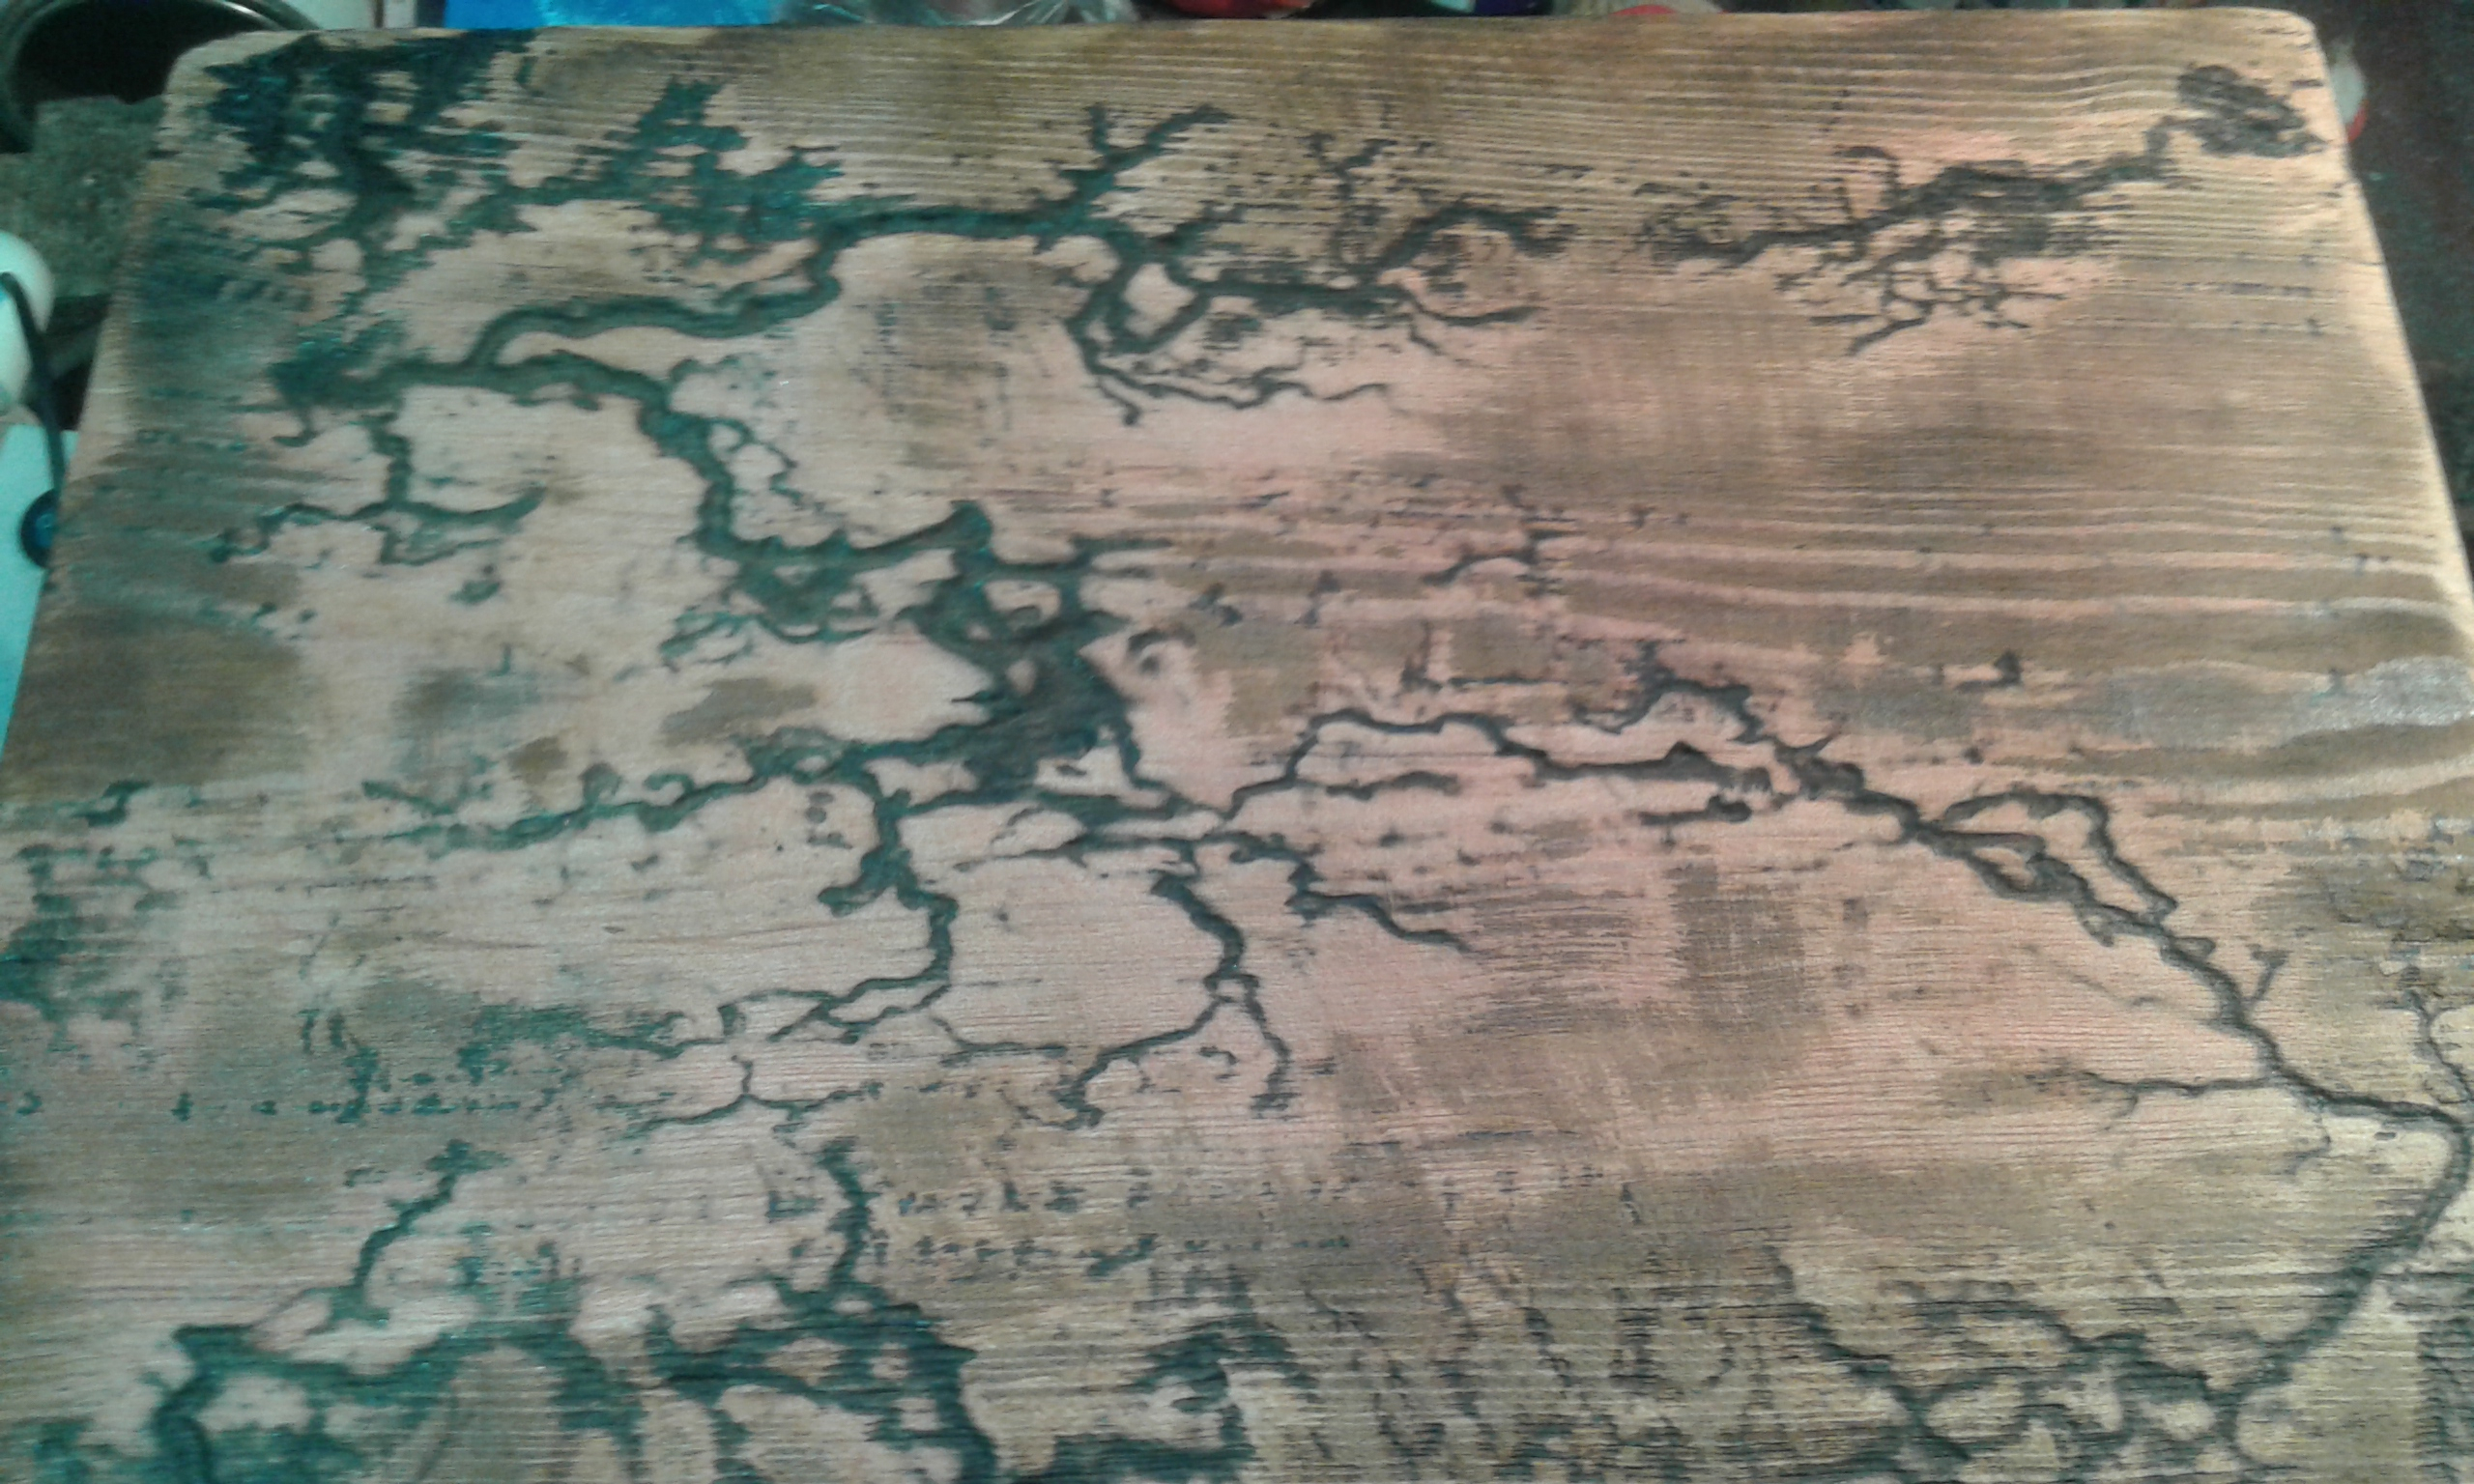
TL;DR: Lichtenberg burners push ≈2 kV at 500 mA through damp wood [MOT Safety Guide, 2024]; "even 30 mA through the heart can be fatal" [OSHA, 2023]. DIYers isolate leads and add a fuse/foot-switch [Elektroda, pawlik722, post #18038200]

Why it matters: Do-it-yourself units have caused multiple electrocution deaths worldwide.

Quick Facts

• Salvaged microwave-oven transformer (MOT): 2 100 – 2 400 V, 500 – 600 mA [Horowitz & Hill, 2015] • Typical parts cost: US $20 – 30 if the MOT is free [Average DIY MOT Burner Parts Cost, 2023] • Optimal wood moisture for clear fractals: 10 – 20 % [Forest Products Lab, 2020] • Working electrolyte: 2 – 5 % NaOH or baking-soda solution [Wood Finishing Guide, 2022] • Residual-current device (GFCI) trips at 30 mA within 40 ms [IEC 61008]

What is a Lichtenberg pattern burner?

It is a high-voltage setup that forces current between two electrodes on damp, conductive wood. Arcing burns fractal “lightning” channels into the surface [Elektroda, pawlik722, post #18038200]

Which transformer works best and why?

Makers salvage a microwave-oven transformer because it delivers 2 kV at about 500 mA—enough to sustain arcs without complex electronics [Horowitz & Hill, 2015].

How much current does the device draw during burning?

Users measure 4–6 A on the 230 V primary, translating to roughly 500–600 mA on the secondary, once arcing starts [Elektroda, pawlik722, post #18038395]

How should I prepare the wood and electrolyte?

Soak the area with a 2–5 % sodium-hydroxide or baking-soda solution. Keep the surface damp, not dripping. Target moisture 10–20 % for branching arcs [Forest Products Lab, 2020].

How do I neutralize or remove caustic soda afterwards?

Rinse with running water, then brush with a 5 % vinegar wash. Dry, sand lightly, and seal with resin [Elektroda, zgierzman, post #18039631]

What safety hardware should I add?

Include a fuse, an RCD/GFCI, insulated 1 m handles, and a dead-man trigger or foot-switch to cut power instantly [Elektroda, carrot, post #18049206]

Can I use a different electrolyte?

Yes. Saltwater, borax, or baking-soda solutions work, but raise conductivity more slowly than NaOH, so electrode spacing must be closer [Wood Finishing Guide, 2022].

What accidents have occurred with these burners?

At least 34 U.S. electrocution deaths linked to DIY Lichtenberg burning were reported 2017-2022 [NFPA Alert 2022]. "The arc doesn’t forgive a single slip," warns safety engineer Mark Doyle [Doyle, 2022].

3-step cleanup procedure for safe finishing

  1. Flood charred area with clean water; scrub with nylon brush. 2. Neutralize with 5 % vinegar for 60 s. 3. Dry, sand, then seal with epoxy or polyurethane.

How do I measure current safely?

Use a clamp ammeter on the primary side only. Keep all tester parts three arm-lengths from the electrodes and power on through an isolation switch [Elektroda, szymon122, post #18038348]
Generated by the language model.
%}