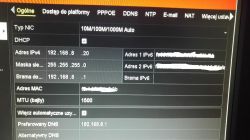
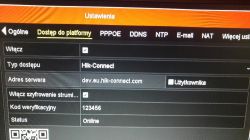
The easiest way to access our cameras from anywhere in the world (from outside our internal network) is to use the so-called "cloud" - this service is offered by practically all serious providers of monitoring equipment
The advantage of this solution is, among others. The advantage of this solution is that:
- we do not need to have a permanent or even public IP address (in mobile networks - nowadays usually LTE - this is an additional and usually paid option),
- we do not need to set anything on the router (port forwarding),
- use DDNS services,
- no IT knowledge is needed for this.
We connect the DVR to our network with Internet access, let it download the network settings from the DHCP router.
In this particular case, we will use the Hikvision DVR as an example (identical operation on network - IP, as well as analog - TurboHD)
We follow the instructions below.
Following the instructions below, you can similarly configure the preview in MW Power devices (MWAPP application)
In the example of DS-7216HQHI-F2-N-A
Following windows should be selected:
Main menu -> Settings -> Network -> Platform access.
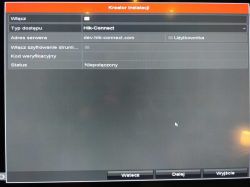
Then check the box next to the "ON" field, it is recommended to select the option "TURN ON STRUCTURE ENCRYPTION". (not every software version has this option) and set the "VERIFICATION CODE" (preferably numbers and letters - here ASD789)
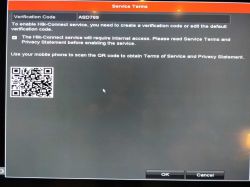
then click on the "NEXT" button. - the status will change from "UNCONNECTED" to "ONLINE" (this means that we almost have the preview configured).
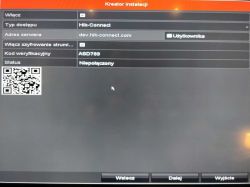
then download the iVMS-4500, Hik-Connect or HiLookVision app from the Play/AppStore (the latest app with the least viewing issues) or directly from the appstore.hikvision.com and hikvision.com . and create our new smartphone account.
Here, the email address or phone number (necessarily with +48 (in iVMS-4500) at the beginning of the mobile number), which we have access to at the moment (this is required to enter the code received on the aforementioned email or number). If it is not possible to register in the first application, we register in the second application - finally on iVMS-4500 and Hik-Connect we will have a preview.
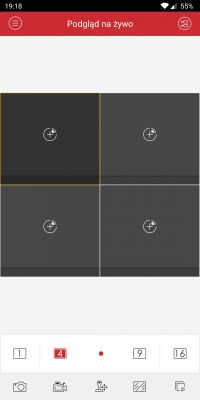
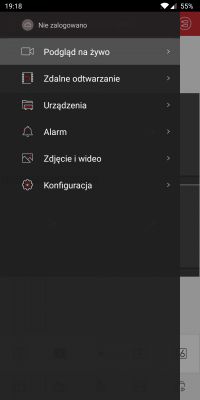
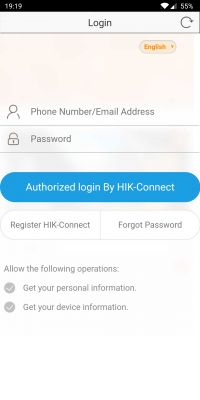
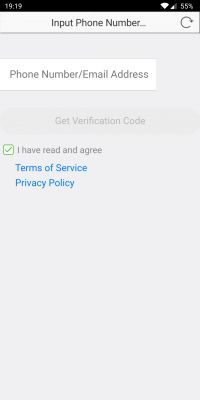
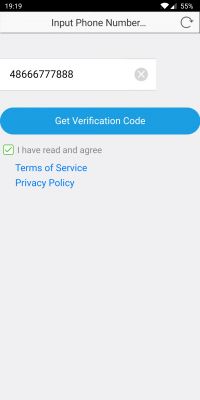
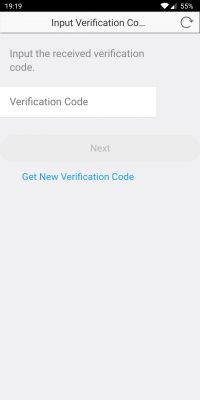
Log in to the previously created account and add our DVR by scanning the QR code or manually entering the serial number in the format e.g. "C12345678". C12345678 (this is 9 characters i.e. letters/digits). An example serial number here is DS-7216HQHI-F2-N-A0820161104CCWR C12345678 WCVU


After the data is entered correctly, we are shown such a window (in my case it is 16 analogue cameras + 2 IP, so 18 channels in total):

If we have selected the option with "VERIFICATION CODE", the first time we start the live view, a window for entering the pre-set code (ASD789) appears. After entering it, we have a fully configured preview and we can now, from anywhere in the world, check what is happening in our absence in our company, house or on the plot.
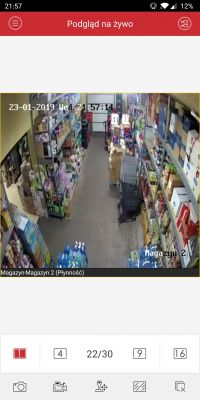
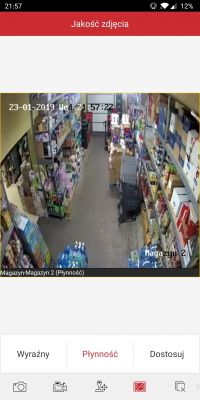
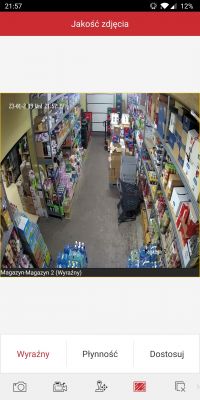
The quality of the reproduced image in the application, by default, is limited to a smooth display of the observed area. To change this, hover over the icon highlighted in red from the bottom drop-down bar and switch to the "EXPRESS" mode. However, it must be taken into account that such a switch may delay the online preview and the image may start to cut out. Changes made on the phone do not affect the recorded image on the DVR.
Because of this,
Because of the fact that it is a preview via the so-called cloud, you have to reckon with the fact that not always our preview will work perfectly (no connection, cropping of the image, loaded network in the evening hours, etc.).
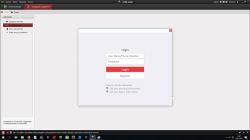
In a similar way, this can be configured on a computer with Windows or macOS. We download the iVMS-4200 programme, create a password for the programme (required and needed for at least unlocking the programme by accidental blocking (in the event that we do not know this password, the programme should be uninstalled and reinstalled). The main programme window appears. From the "TOOLS" menu, select "DEVICE MANAGEMENT", then the "DEVICES" tab and "Cloud P2P"
After doing all of the above, we should have real-time access to our CCTV system - it always works for me personally, and I have already created dozens of clouds at clients this way.
Eventually, when we do everything correctly and don't have a preview, we just wait some time and try again. Everything is done via the manufacturer's servers, so sometimes it can happen that something gets stuck somewhere or is heavily loaded. If the service still doesn't work for us, it's also worth checking that the DVR has downloaded the network settings correctly and is visible on our internal network. In other cases, it wouldn't hurt to contact our internet service provider and ask about possible blocking of our view.
------------------------------------------------
Notification
On behalf of the forum administration, I thank a colleague for writing this tutorial.
mod: suvorov
Read also: Remote viewing of a DVR or camera on the network. General information + configuration examples
Please check out our other tutorials, featured topics, articles, on security systems such as intercoms, gate and barrier automation, alarm systems, cameras, access control:
Tutorials on. Security Systems If you do not find an answer to your question in the above topics, please visit the forum:
Security systems
We also encourage you to visit the General Guides section, where you will find material from the other sections of the forum, including for those just starting out in electronics:
General Guides .
Helpful post? Buy me a coffee.
The advantage of this solution is, among others. The advantage of this solution is that:
- we do not need to have a permanent or even public IP address (in mobile networks - nowadays usually LTE - this is an additional and usually paid option),
- we do not need to set anything on the router (port forwarding),
- use DDNS services,
- no IT knowledge is needed for this.
We connect the DVR to our network with Internet access, let it download the network settings from the DHCP router.
In this particular case, we will use the Hikvision DVR as an example (identical operation on network - IP, as well as analog - TurboHD)
We follow the instructions below.
Following the instructions below, you can similarly configure the preview in MW Power devices (MWAPP application)
In the example of DS-7216HQHI-F2-N-A
Following windows should be selected:
Main menu -> Settings -> Network -> Platform access.

Then check the box next to the "ON" field, it is recommended to select the option "TURN ON STRUCTURE ENCRYPTION". (not every software version has this option) and set the "VERIFICATION CODE" (preferably numbers and letters - here ASD789)

then click on the "NEXT" button. - the status will change from "UNCONNECTED" to "ONLINE" (this means that we almost have the preview configured).

then download the iVMS-4500, Hik-Connect or HiLookVision app from the Play/AppStore (the latest app with the least viewing issues) or directly from the appstore.hikvision.com and hikvision.com . and create our new smartphone account.
Here, the email address or phone number (necessarily with +48 (in iVMS-4500) at the beginning of the mobile number), which we have access to at the moment (this is required to enter the code received on the aforementioned email or number). If it is not possible to register in the first application, we register in the second application - finally on iVMS-4500 and Hik-Connect we will have a preview.


Log in to the previously created account and add our DVR by scanning the QR code or manually entering the serial number in the format e.g. "C12345678". C12345678 (this is 9 characters i.e. letters/digits). An example serial number here is DS-7216HQHI-F2-N-A0820161104CCWR C12345678 WCVU


After the data is entered correctly, we are shown such a window (in my case it is 16 analogue cameras + 2 IP, so 18 channels in total):

If we have selected the option with "VERIFICATION CODE", the first time we start the live view, a window for entering the pre-set code (ASD789) appears. After entering it, we have a fully configured preview and we can now, from anywhere in the world, check what is happening in our absence in our company, house or on the plot.
The quality of the reproduced image in the application, by default, is limited to a smooth display of the observed area. To change this, hover over the icon highlighted in red from the bottom drop-down bar and switch to the "EXPRESS" mode. However, it must be taken into account that such a switch may delay the online preview and the image may start to cut out. Changes made on the phone do not affect the recorded image on the DVR.


Because of this,
Because of the fact that it is a preview via the so-called cloud, you have to reckon with the fact that not always our preview will work perfectly (no connection, cropping of the image, loaded network in the evening hours, etc.).
In a similar way, this can be configured on a computer with Windows or macOS. We download the iVMS-4200 programme, create a password for the programme (required and needed for at least unlocking the programme by accidental blocking (in the event that we do not know this password, the programme should be uninstalled and reinstalled). The main programme window appears. From the "TOOLS" menu, select "DEVICE MANAGEMENT", then the "DEVICES" tab and "Cloud P2P"

After doing all of the above, we should have real-time access to our CCTV system - it always works for me personally, and I have already created dozens of clouds at clients this way.
Eventually, when we do everything correctly and don't have a preview, we just wait some time and try again. Everything is done via the manufacturer's servers, so sometimes it can happen that something gets stuck somewhere or is heavily loaded. If the service still doesn't work for us, it's also worth checking that the DVR has downloaded the network settings correctly and is visible on our internal network. In other cases, it wouldn't hurt to contact our internet service provider and ask about possible blocking of our view.
------------------------------------------------
Notification
On behalf of the forum administration, I thank a colleague for writing this tutorial.
mod: suvorov
Read also: Remote viewing of a DVR or camera on the network. General information + configuration examples
Please check out our other tutorials, featured topics, articles, on security systems such as intercoms, gate and barrier automation, alarm systems, cameras, access control:
Tutorials on. Security Systems If you do not find an answer to your question in the above topics, please visit the forum:
Security systems
We also encourage you to visit the General Guides section, where you will find material from the other sections of the forum, including for those just starting out in electronics:
General Guides .


