Ch4ist0 wrote: I use the WeMos D1 module to avoid lugging my laptop around with me....
.
If you need this as a useful tool and you don't have much strength or time to fight with the software (where you would have to accept some compromises to the original anyway), some simple but effective solution to your problem came to my mind.
I took this display from D1 and a normal common OLED I2C 128x64 0.96" and noticed that the width of these boards is identical.
What's more, I took the "universal" for D1 and it turned out that here not only the width agrees but also the position of the leads on the OLED board with the free points on the universal (exact as if they were made for this application):
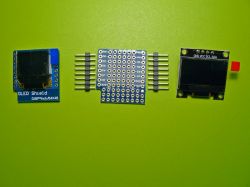
.
Here so "dry" put together:
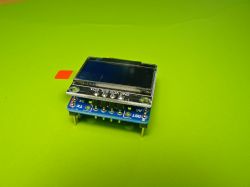
.
and here in comparison with the OLED for the D1.
Only the pins on the sides are covered from above, but this does not harm anything, because no board is inserted above the display:
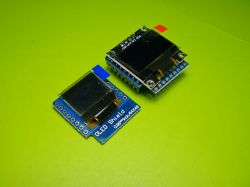
.
That is, from such a universal and a simple Arduino OLED module, you can literally make, in 15 minutes, a decent display module for D1 128x64 by soldering this module to this board and stress-free pulling the four wires from the bottom to the corresponding D1 bus signals (+3,3V, GND, SDA and SCL). And fit within the dimensions of D1.
Upload a ready-made 128x64 OLED and you're done.
Alternatively, you can solder a goldpin socket (e.g. a piece like the one supplied with the universal) to the universal to simply insert the display into it. This will, however, increase the board gap to somewhere around 10.6mm compared to 2.6mm when soldered directly. If it doesn't make any difference, it is probably better to use this socket, especially as such sockets will be left over after the job is done if you buy a universal with a choice of connectors included:

.


