Hello my dears
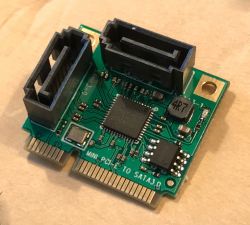
I will describe my experience with it here ASM1061 i.e. a pass Mini PCIe SATA (two ports), which allows you to connect additional drives SATA even for a laptop. I'll test it here with two drives 2.5" .
I must admit that I became interested in the subject out of pure curiosity - I wanted to check if this product really works and what transfer speeds it provides. After all, I think that such a gadget can be useful, for example, to DIY enthusiasts converting a laptop into a multimedia station or a simple server for experiments.
Purchasing and receiving a package
I found the product on the website Banggood in less than $15 (counting with the shipment):
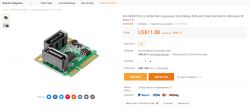
The seller in the product description provides the following information:
Quote:
Brand SSU
MINI PC-E model is SATA3
Main control chip ASM1061
Product interface 2*SATA interface
Suitable for plug-in MINI PCI-E
Operating environment 0°C-50°C (used); 20°C-70°C (storage)
Support Windows(R)XP/Server2003/Vista/7/8, (32/64 bit)/MAC/inux
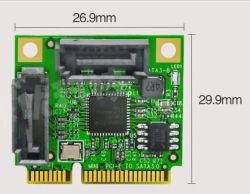
Board dimensions:
I did not wait too long for the shipment; barely two weeks. This is normal for purchases from China. The postman put the package in the mailbox, there was no requirement for acknowledgment of receipt.
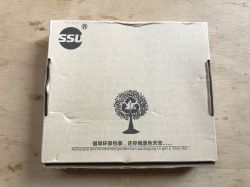
There was a rather large box in the package:
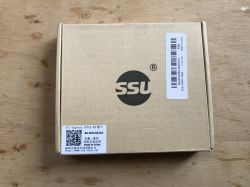
In the box, the module itself and an additional plate and screws useful for mounting it in the appropriate slot Mini PCIe :
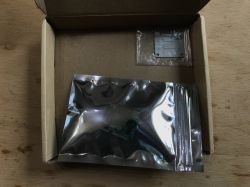
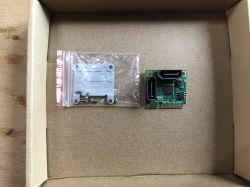
We are looking at the pass
First, I took a closer look at the board. The shape of the plate corresponds to the so-called PCIe Half Mini which is half the normal size PCIe Mini .
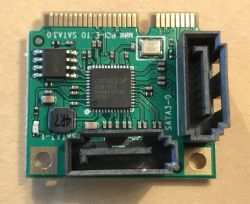
The heart of the board is the integrated circuit Asmedia ASM1061 in the housing QFN 48L :
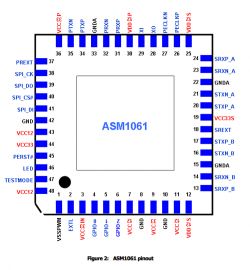
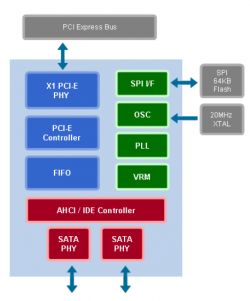
It is described by the manufacturer as PCI Express 2.0 is a SATA 6Gbps Controller '. In his catalog note you can find some information about him, e.g. his block diagram:
Next to it is a flash memory, signed A25Z408 and a clock generator 20MHz .
Catalog note ASM1061 :
It is worth mentioning that the modules z ASM1061 are available in different versions, including those for a normal desktop computer.
What else will be needed?
In addition to the Mini PCIeSATA adapter itself, you will need two more SATA cables, you can buy them cheaply at most computer stores:
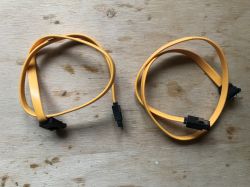
You will also need a power cable for the drives. Only SATA signal connectors are brought out on the adapter, there is not even a place to power the drives.
We have to take care of their power supply ourselves. 2.5" drives need only 5V to operate, so there is no problem with that - we can buy a SATA power cable with USB, or make the same.
I made this cable myself using plugs from an old ATX power supply:
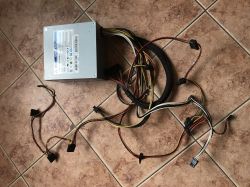
and from the 'breakout board' of the USB connector:
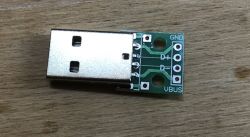
I just soldered the wires properly, although the redundant ones could still be insulated. I recall the colors of the ATX wires:
Orange - 3.3V
Red - 5V
Yellow - 12V
Black - mass
Here we only need ground and 5V.
My pass went like this:
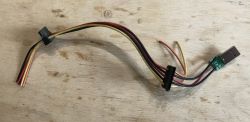
After soldering the adapter, I recommend verifying with a multimeter whether everything is ok, because if we apply voltage to the wrong pins of the disk, we risk damaging it. In addition, you need to insulate the other wires so that they do not touch anything. In general, I do not recommend making power cables for disks on your own, it is best to buy ready-made and of good quality.
First try - Dell Inspiron 1545 - failed
At first, I tried to connect the adapter to an old laptop Dell Inspiron 1545 :
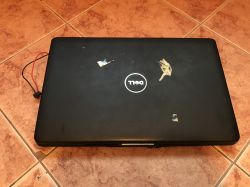
(Yes, I know, this laptop has an 'unusual' plug-in connector for the power supply, because I got it from someone in the form of electronic scrap and I had to deal with it somehow)
I had to put the converter from the topic in place of the WiFi module, which I had removed earlier:
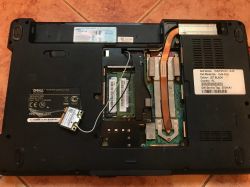
It was a bit of a problem because the Mini PCIe slot in this laptop is covered with a housing and I had to remove the entire housing:
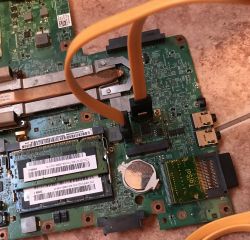
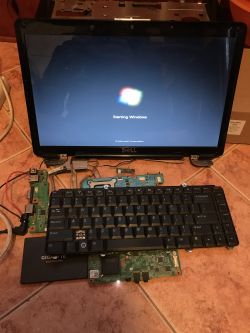
Unfortunately, the experiments failed - with the adapter connected (with or without disks) the laptop always hung right after the 'Dell' screen, I couldn't even enter 'boot select' or the BIOS:
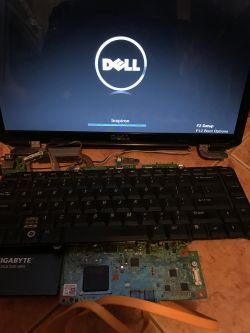
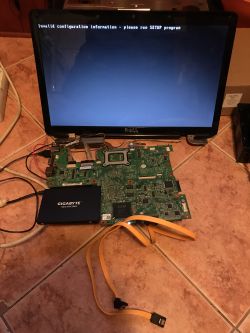
Resetting the BIOS settings did not help. I could still try to update the BIOS, but I haven't done that yet. I gave up trying with this laptop and decided to try my luck with another one.
Second attempt - Lenovo IdeaPad Y530 - success
The second attempt was made on an over ten-year-old Lenovo laptop from the IdeaPad series:
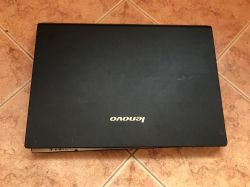
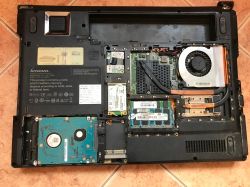
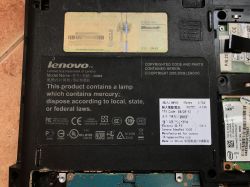
This laptop already had two HDDs in it (one in the normal slot, the other instead of the CD/DVD drive). In addition, unlike the previous laptop, it had one free Mini PCIe slot and did not require removing the WiFi module from it:
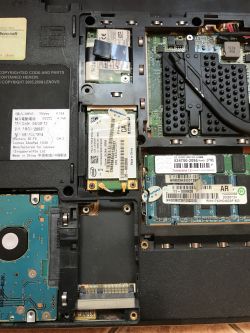
I installed the adapter in it using the plate that was included in the set:
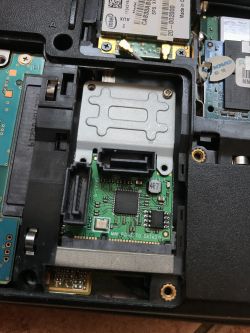
I connected two drives (one SSD and one HDD) to the adapter and checked if the laptop starts:
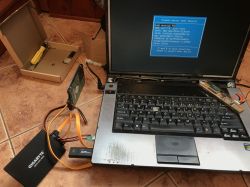
(the picture also shows a separate CCFL inverter for the screen of this laptop; I used it because this laptop is waiting for the ribbon to be replaced; the way the inverter is connected is not related to this topic)
Full boot selection list:
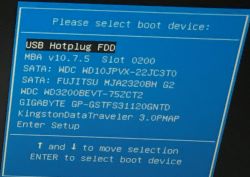
On the boot selection screen, you can see two HDD drives that were already in this laptop, you can see the SSD and HDD connected via the tested adapter, and an additionally connected Kingston flash drive.
In addition, I made sure in the bios that the correct boot order is selected and booted the system.
I didn't install any drivers.
When turned on, Windows immediately recognized the new drives:
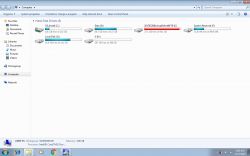
I checked the status of all four drives with Crystal Disk Info :
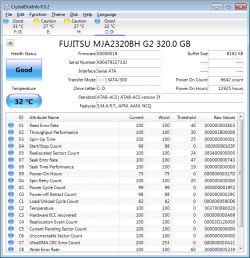
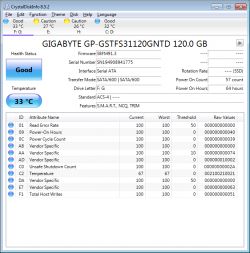
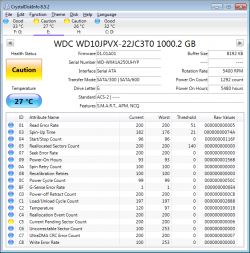
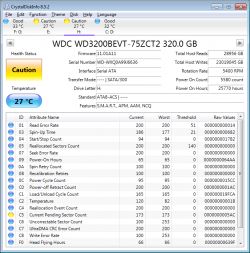
Two HDDs from here are already at the end of their life, they have sectors pending relocation ('Current Pending Sector Count' parameter with SMART), I use them only as so-called. 'cold storage' for backups, and for experimenting with hardware like the one described here.
Then I checked what is on the motherboard's PCI bus using a free tool lspci (for Windows!) from the package pciutils-3.5.5-win32 , downloadable here:
https://eternallybored.org/misc/pciutils/
https://github.com/pciutils/pciutils
Command lspci is probably known to users of Unix systems - that's where it comes from.
Packet backup lspci as a forum attachment:
lspci for Windows is easy to use, you can just run it in the console, or for convenience, add the path to it to the $PATH environment variable to be able to use it from any folder on the system.
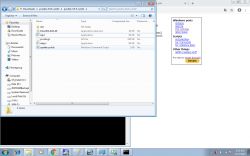
Command result lspci from the above package on my system windows :
00:00.0 Host bridge: Intel Corporation Mobile 4 Series Chipset Memory Controller Hub (rev 07)
00:01.0 PCI bridge: Intel Corporation Mobile 4 Series Chipset PCI Express Graphics Port (rev 07)
00:1a.0 USB controller: Intel Corporation 82801I (ICH9 Family) USB UHCI Controller #4 (rev 03)
00:1a.1 USB controller: Intel Corporation 82801I (ICH9 Family) USB UHCI Controller #5 (rev 03)
00:1a.7 USB controller: Intel Corporation 82801I (ICH9 Family) USB2 EHCI Controller #2 (rev 03)
00:1b.0 Audio device: Intel Corporation 82801I (ICH9 Family) HD Audio Controller (rev 03)
00:1c.0 PCI bridge: Intel Corporation 82801I (ICH9 Family) PCI Express Port 1 (rev 03)
00:1c.1 PCI bridge: Intel Corporation 82801I (ICH9 Family) PCI Express Port 2 (rev 03)
00:1c.2 PCI bridge: Intel Corporation 82801I (ICH9 Family) PCI Express Port 3 (rev 03)
00:1c.3 PCI bridge: Intel Corporation 82801I (ICH9 Family) PCI Express Port 4 (rev 03)
00:1d.0 USB controller: Intel Corporation 82801I (ICH9 Family) USB UHCI Controller #1 (rev 03)
00:1d.1 USB controller: Intel Corporation 82801I (ICH9 Family) USB UHCI Controller #2 (rev 03)
00:1d.2 USB controller: Intel Corporation 82801I (ICH9 Family) USB UHCI Controller #3 (rev 03)
00:1d.3 USB controller: Intel Corporation 82801I (ICH9 Family) USB UHCI Controller #6 (rev 03)
00:1d.7 USB controller: Intel Corporation 82801I (ICH9 Family) USB2 EHCI Controller #1 (rev 03)
00:1e.0 PCI bridge: Intel Corporation 82801 Mobile PCI Bridge (rev 93)
00:1f.0 ISA bridge: Intel Corporation ICH9M LPC Interface Controller (rev 03)
00:1f.2 SATA controller: Intel Corporation 82801IBM/IEM (ICH9M/ICH9M-E) 4 port SATA Controller [AHCI mode] (rev 03)
00:1f.3 SMBus: Intel Corporation 82801I (ICH9 Family) SMBus Controller (rev 03)
01:00.0 VGA compatible controller: NVIDIA Corporation G96M [GeForce 9500M G] (rev a1)
02:00.0 Ethernet controller: Broadcom Limited NetLink BCM5906M Fast Ethernet PCI Express (rev 02)
03:00.0 Network controller: Intel Corporation PRO/Wireless 5100 AGN [Shiloh] Network Connection
07:00.0 SATA controller: ASMedia Technology Inc. ASM1062 Serial ATA Controller (rev 02)
08:03.0 FireWire (IEEE 1394): Ricoh Co Ltd R5C832 IEEE 1394 Controller (rev 05)
08:03.1 SD Host controller: Ricoh Co Ltd R5C822 SD/SDIO/MMC/MS/MSPro Host Adapter (rev 22)
08:03.2 System peripheral: Ricoh Co Ltd R5C843 MMC Host Controller (rev 12)
08:03.3 System peripheral: Ricoh Co Ltd R5C592 Memory Stick Bus Host Adapter (rev 12)
08:03.4 System peripheral: Ricoh Co Ltd xD-Picture Card Controller (rev 12)
We should be interested in this line:
07:00.0 SATA controller: ASMedia Technology Inc. ASM1062 Serial ATA Controller (rev 02)
You can see that the connected module is seen as ASM1062 even though the integrated circuit on its board is signed ASM1061 .
SSD transfer speed test
Finally, I did a small transfer speed test, I used the laptop described earlier Lenovo IdeaPad Y530 and disk SSD 120GB Gigabyte GP-GSTFS31120GNTD .
To begin with, I'll show the transfer speeds of this drive from userbenchmark.com as a reference:

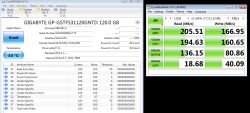
I performed my test in two configurations.
Configuration 1: SSD connected via adapter ASM1061 from the topic:
Configuration 2: SSD connected to the second SATA slot from the laptop (the slot where the CD/DVD drive is usually located):
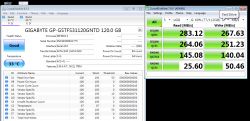
The results show that when connected via the Mini PCIe -> SATA converter, this SSD retains some 60-70% of your transfer speed it has when connected directly to SATA.
Summary
Two-port converter Mini PCI Express on SATA I was able to run it with my laptop Lenovo IdeaPad Y530 (there was also an attempt with another, older Dell, but failed). The converter did not require any driver installation or bios settings changes. It was visible from the beginning and even in boot select it showed connected drives.
Transfer speeds of the SSD connected to this converterdropped some thirty% , which seems to me a pretty good result, especially since the main system SSD will be on a normal SATA port and not on this adapter anyway.
I have also noticed that the laptop starts for quite a long time if we leave this adapter in it and do not put any disks on it.
Cool? Ranking DIY Helpful post? Buy me a coffee.


