

 .
.
Hello my dears .
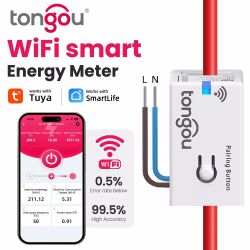
In this topic I will look at the inside of a WiFi controlled relay called the BW-SS1, the equivalent of the Sonoff made by Blitzwolf. I'll see how it's built inside, if and by how much it differs from the more well-known Sonoff, and I'll check if it can be easily uploaded with some custom batch (e.g. Tasmota). I will also measure how much current it draws when powered from 5V.
Related topics .
I have already written several topics on WiFi-based ESP products. I mainly show interiors there, list below:
- BW-LT30 or WiFi adapter for bulb - test, teardown and ESP firmware upload .
- WiFi-controlled electrical socket - BW-SHP8 - commissioning and testing
- Test and interior of the BW-SS3, a WiFi controlled light switch from Blitzwolf .
- Socket/plug with WiFi PS-16-M and eWeLink/Coolkit app - test and teardown
- SmartLife switch - test, interior and programming of light switch on WiFi
Plus, a topic about the DIY version of the relay and about Tasmota:
- ESP8266 and Tasmota - step-by-step WiFi relay control .
Purchase of BW-SS1 .
I purchased the BW-SS1 at a bargain price of $5, or about PLN20. I used a coupon I came across online for this:
 .
.
Normally it can be slightly more expensive:
 .
.
The vendor describes it as follows:
| Brand | BlitzWolf® | |
| Model | BW-.SS1 | |
| Color | White | |
| Dimensions | 75*40*25mm | Dimensions|
| Net Weight | 53g | |
| Material | ABS+PC | |
| Input | AC100~240V 50/60Hz | |
| Rated Power | <0.5W | |
| Max. Power | 3300W | |
| Max Current | 15A | |
| Wireless Type | 2.4GHz Wi-.Fi | |
| Wireless Range | Wireless Range | 30M |
| Working Temperature | -.10~45℃ | |
| Working Humidity | ≤80% | |
| Certification | CE, RoHS, FCC | |
| Online User Manual | EN, FR, GER, IT, ES, JP |
Additionally, it gives (quite rightly!) a warning:
Quote:.Risk of AC electrical shock causing injury or death!
If you are not sure how to install the switch, please find a professional electrician to do it for you.
BW-SS1 dimensions:
 .
.
Test with BlitzWolf app .
As a matter of principle, I tested the BW-SS1 with an app from its manufacturer, BlitzWolf. This is an app that connects a wide range of Blitzwolf products, various switches, sensors and other IoT hardware for the 'smart home'. It allows you to create all sorts of scenarios, time loops and dependencies. I have already discussed this app in more detail here:
https://www.elektroda.pl/rtvforum/topic3687040.html#18652154
The pairing went off without a hitch:

 .
.
Once paired, you can conveniently control the bulb via the app (but note that the BW-SS1 only cuts one line, it has a single relay...):

 .
.
You can also set it up with a schedule, stopwatch, etc. just like other BlitzWolf devices:

 .
.
All standard, you can look inside.
Interior of BW-SS1 .
The BW-SS1 on the outside has no screws. The cover is held on by clips, you have to lever it up:
 .
.
After removing the cover. You can immediately see that the tracks from screw terminal to screw terminal are thickened and tinned. The relay just cuts off one of them...:
 .
.
The board itself inside is already held on by screws:
 .
.
Plate removed:

The plate can now be looked at:
 .
.
The blue board tucked into the main board is the module with the ESP8266 from Tuya. I associate it with the BW-LT30:
https://www.elektroda.pl/rtvforum/topic3736876.html
One black 'box' is a relay. The other, signed SETT1A250V, is the fuse:
 .
.
The blue element next to it is a varistor, also in the role of surge protection.
The relay is RD-105DM-A:
 .
.
Next to the relay is the IC responsible for the power supply:
 .
.
This is the PN8016. I have already seen it in another BlitzWolf product, in the BW-SS3:
https://www.elektroda.pl/rtvforum/topic3729892.html#18929996
It is a so-called "Non-isolated Off-line PWM converters Width Modulator (PWM)", i.e. a converter circuit without galvanic isolation.
PN8016 application diagram:
 .
.
In the schematic, it is worth noting that the ground of the entire circuit is connected directly to the mains. There is no galvanic separation:
 .
.
The PN8016 does not directly power the ESP8266, there is still a 3.3V LDO regulator in the way:
 .
.
In the picture you can see the LDO AMS1117 3.3 regulator and next to it is the WiFi module with ESP8266 inside.
The WiFi module itself with ESP8266 has its pins signed on both sides of the board:
 .
.
 .
.
[added later] Finally, we take another look at the screw terminal itself from the BW-SS1.
 .
.
 .
.
This is DC29B-7.62 .
Upgrading a custom ESP8266 batch for BW-SS1 (using Tasmota as an example) .
Here, uploading your own batch is even simpler than in other such products.
Here we don't have to worry about providing 3.3V for the ESP, we can plug in comfortably in front of the LDO regulator with our 5V.
Of course, we must further bear in mind that the UART<->USB adapter used for programming must operate at 3.3V voltage levels at RX and TX.
On the other hand, plugging in itself can be a problem - there is no connector, you have to look at the pins.
I plugged in like this myself:
 .
.
Adapter (set to 3.3V mode voltage levels on RX and TX):
 .
.
Entirety:
 .
.
List of pin connections:
- ground to ground
- 5V from USB to 5V on the board (not to 3.3V from ESP, as this will damage it!)
- RX from adapter to TX from ESP
- TX from adapter to RX from ESP
- GPIO0 from the adapter to GND (short-circuiting GPIO0 to GND while ESP is running, i.e. giving it power, activates programming mode)
- (additionally, the USB-UART adapter has the 3.3V logic level mode selected)
Just that.
The programming procedure is as follows:
1. disconnect the power supply completely
2. short-circuit GPIO0 to GND
3. connect the power supply (ESP8266 must boot with GPIO0 shorted to ground)
4. start uploading the batch from the computer (or other command)
5. After uploading, unplug the power supply
6. disconnect GPIO0 from GND
7. connect the power supply (now the ESP8266 will boot normally, not in programming mode)
On the computer side I used esptool.py installed with the ESP8266 support package for Arduino (via Boards Manager). Project repo:
https://github.com/esp8266/Arduino
First, a test of communication with the ESP - command esptool.py chip_id :
 .
.
I then backed up the BlitzWolf software. Command esptool.py read_flash 0x00000000 0x100000 BW-SS1-flash_1M.bin :
 .
.
The first argument of this command is the offset from which we start reading the Flash memory, and the second argument is the size to load. The third is the name of the file to create.
I then uploaded the alternative firmware, Tasmota, as an example. The command esptool.py write_flash 0x0 tasmota.bin :
 .
.
After disconnecting GPIO0 from ground and unplugging and re-plugging the power supply, ESP starts with the new firmware and we can configure Tasmota:
 .
.
I managed to configure the Tasmota correctly, pin setting:
 .
.
But I already described Tasmota in detail in another topic, here:
https://www.elektroda.pl/rtvforum/topic3760371.html
So I refer those interested to it.
After playing around with Tasmota, I restored the batch from Blitzwolf and was again able to control the BW-SS1 via their app (not surprisingly, everything is in that batch, including our WiFi network data):
 .
.
Current consumption of BW-SS1 (from 5V supply) .
Finally, I thought I could still easily measure what current the chip draws from the 5V supply (I powered it from USB).
I took the measurements with the insert from BlitzWolf.
Relay open:
 .
.
Relay shorted:
.
With the relay open it consumes approximately 25mA , i.e. (0.025*5)W = 0.125W . When closed about 100mA , i.e. (0.1*5)W = 0.5W . Of course, this doesn't take into account the losses on the power supply circuit itself (here: PN8016). But it's pretty much in line with what the vendor was quoting (although he was quoting <0.5W, which is a bit of a stretch).
Next part announced .
Another Smart Home product with WiFi (and here with RF433 too!) is already in the queue for teardown and programming trials - the QTouch switch:
 .
.
I'll test it soon, describe it and give it a go on the forum too.
Summary .
Inside, the BW-SS1 differs to some extent from the Sonoff. Its power supply and the connection of the ESP8266 is realised in a different way. In the Sonoff (at least the one I know) there is also more convenient access to the Flash memory, which we may want to replace with a larger one if need be. Here, the Flash memory together with the ESP8266 is on a separate board (a module from Tuya?), which may also be an advantage if we want to replace something, but I don't know if the WiFi module used here can be bought separately - you would have to look for it.
Nevertheless, there are no programming problems here, after soldering the five cables everything goes smoothly.
PS: However, if anyone has a similar Blitzwolf product and wants to upload their own flash to it, they can wait a few weeks, because this month I will give the forum a detailed description of using tuya-convert to upload the batch via WiFi, and it's a much more convenient method and doesn't require soldering.
Cool? Ranking DIY Helpful post? Buy me a coffee.

