logo elektroda
logo elektroda
X
logo elektroda

Socket/plug with WiFi PS-16-M and eWeLink/Coolkit application - test and teardown

p.kaczmarek2 4227 10
ADVERTISEMENT
Treść została przetłumaczona polish » english Zobacz oryginalną wersję tematu
  • Socket/plug with WiFi PS-16-M and eWeLink/Coolkit application - test and teardown .
    Hello my dears .
    I invite you to my test and teardown of the WiFi-controlled PS-16-M 'smart' socket and the dedicated eWeLink/Coolkit app for Android and iOS. The whole thing will be in the form of a detailed description-tutorial showing the configuration of the whole thing and the various functionalities.

    Purchasing a PS-16-M WiFi socket .
    I found the socket on the Banggood website:
    Socket/plug with WiFi PS-16-M and eWeLink/Coolkit application - test and teardown .
    Including shipping, I paid £36.6. I placed the order on 1 September and today (10 September) the package was brought by the courier.
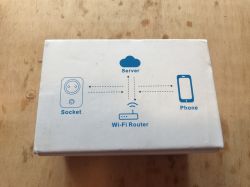
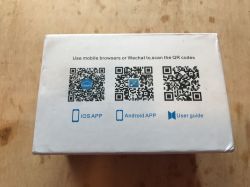
    The socket is received in the original box:
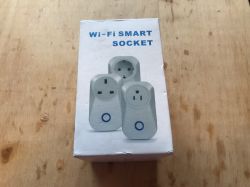
    Socket/plug with WiFi PS-16-M and eWeLink/Coolkit application - test and teardown .
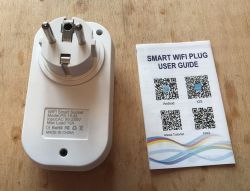
    Socket/plug with WiFi PS-16-M and eWeLink/Coolkit application - test and teardown Socket/plug with WiFi PS-16-M and eWeLink/Coolkit application - test and teardown Socket/plug with WiFi PS-16-M and eWeLink/Coolkit application - test and teardown Socket/plug with WiFi PS-16-M and eWeLink/Coolkit application - test and teardown .
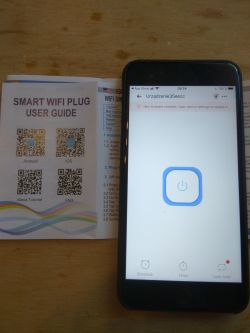
    Also included are instructions and QR codes with links to the Android and iOS apps:
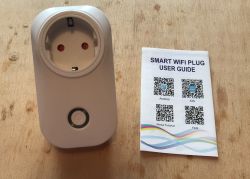
    Socket/plug with WiFi PS-16-M and eWeLink/Coolkit application - test and teardown Socket/plug with WiFi PS-16-M and eWeLink/Coolkit application - test and teardown .
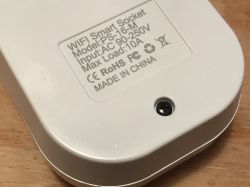
    The listing name for the sale was "EJLink PS1-EU/UK/US 10A 2500W WIFI", but the model name on the unit's case is "PS-16-M".
    The manual is in several languages, I show the English version below:
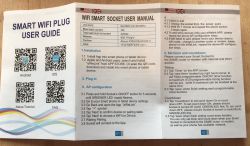
    Socket/plug with WiFi PS-16-M and eWeLink/Coolkit application - test and teardown .

    Installing the coolkit.apk/eWeLink application .
    The application is downloaded from a link encoded as a QR code. In the version I received the link led to:
    
    http://app.coolkit.cn/coolkit.apk
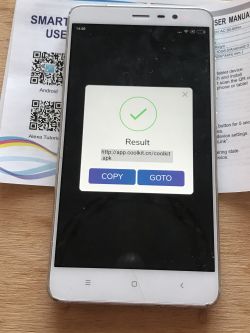
    
    .
    Socket/plug with WiFi PS-16-M and eWeLink/Coolkit application - test and teardown .
    We receive the application as an APK file, meaning we download it from outside Google Play.
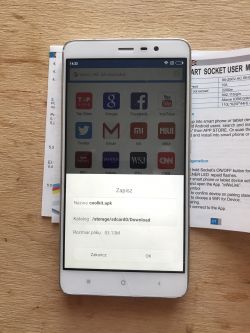
    Socket/plug with WiFi PS-16-M and eWeLink/Coolkit application - test and teardown .
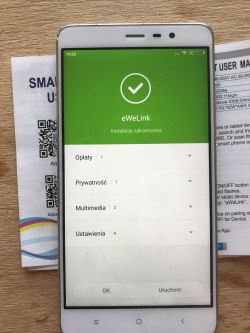
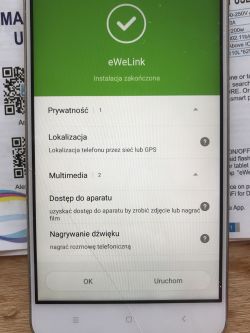
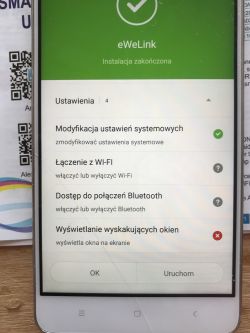
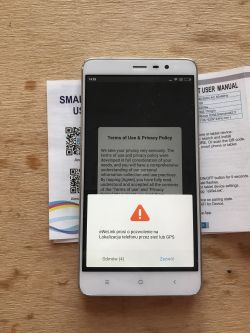
    The app requires quite a few permissions before installation - including Location (GPS) and phone/recording access:
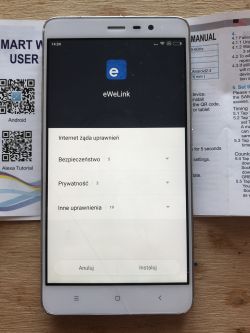
    Socket/plug with WiFi PS-16-M and eWeLink/Coolkit application - test and teardown Socket/plug with WiFi PS-16-M and eWeLink/Coolkit application - test and teardown Socket/plug with WiFi PS-16-M and eWeLink/Coolkit application - test and teardown Socket/plug with WiFi PS-16-M and eWeLink/Coolkit application - test and teardown Socket/plug with WiFi PS-16-M and eWeLink/Coolkit application - test and teardown .
    Socket/plug with WiFi PS-16-M and eWeLink/Coolkit application - test and teardown .
    To run this application we need to create an account - at the beginning we are asked which country we are from (I chose Poland +48), but we don't need to enter a phone number. I installed everything on a phone without a SIM card.
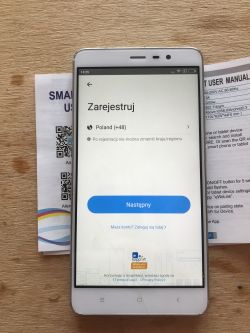
    Socket/plug with WiFi PS-16-M and eWeLink/Coolkit application - test and teardown .
    An email address is required to set up an account:
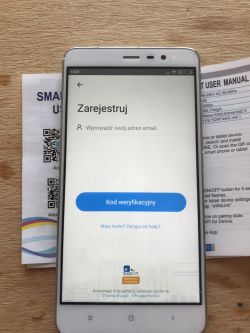
    Socket/plug with WiFi PS-16-M and eWeLink/Coolkit application - test and teardown .
    This needs to be confirmed by receiving an activation code:
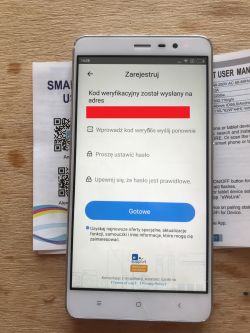
    Socket/plug with WiFi PS-16-M and eWeLink/Coolkit application - test and teardown .
    Socket/plug with WiFi PS-16-M and eWeLink/Coolkit application - test and teardown .
    After this we are successfully logged into the application. No further information needs to be provided:
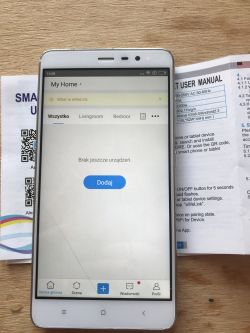
    Socket/plug with WiFi PS-16-M and eWeLink/Coolkit application - test and teardown .

    Pairing the PS-16-M socket with the app via home WiFi .
    A new device is added using the large 'Add' button in the device list:
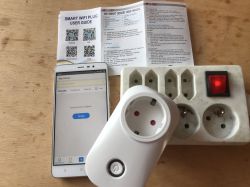
    Socket/plug with WiFi PS-16-M and eWeLink/Coolkit application - test and teardown .
    I used the 'Quick Pairing' mode to connect to the socket:
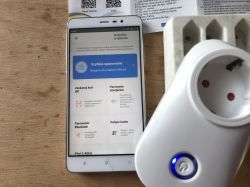
    Socket/plug with WiFi PS-16-M and eWeLink/Coolkit application - test and teardown .
    Pairing is done over a 2.4GHz WiFi network and requires its password (the name is taken automatically from the WiFi to which the phone is connected):
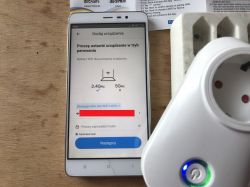
    Socket/plug with WiFi PS-16-M and eWeLink/Coolkit application - test and teardown .
    (These passwords are rather necessary, as the the phone must somehow communicate to the device the password from the WiFi to which it will then connect)
    Once the pairing has started, you need to press the button on the socket longer (until the green backlight starts flashing rapidly):
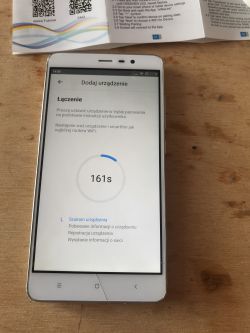
    Socket/plug with WiFi PS-16-M and eWeLink/Coolkit application - test and teardown .
    Socket/plug with WiFi PS-16-M and eWeLink/Coolkit application - test and teardown .
    After a while, the device is successfully added with an automatically assigned name, which we can then change:
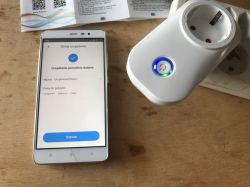
    Socket/plug with WiFi PS-16-M and eWeLink/Coolkit application - test and teardown .
    Here we can also assign the device to groups (rooms). From this point on, the device will be remembered by the application.


    Control options via WiFi .
    We have all the devices available on the application dashboard (they are also grouped by room):
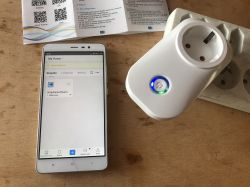
    Socket/plug with WiFi PS-16-M and eWeLink/Coolkit application - test and teardown .
    After selecting a device from the list, we can of course change its status:
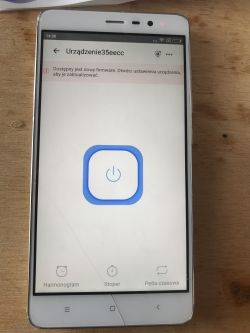
    Socket/plug with WiFi PS-16-M and eWeLink/Coolkit application - test and teardown .
    Unfortunately, this requires an internet connection (not just a router), a big difference from the Blitzwolf app, which copes with a temporary lack of internet.
    Device on (white background on its page in the app, blue LED on):
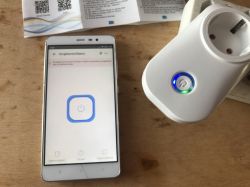
    Socket/plug with WiFi PS-16-M and eWeLink/Coolkit application - test and teardown .
    Device switched off (black background on its page in the app):
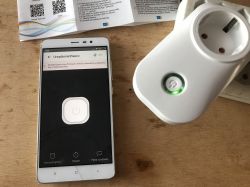
    Socket/plug with WiFi PS-16-M and eWeLink/Coolkit application - test and teardown .
    In the device panel we also have options: Stopwatch, Schedule, Time Loop

    Control options via WiFi - stopwatch .
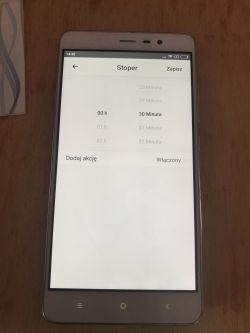
    The stopwatch allows you to set an action that will be performed once in a certain time (a given number of minutes and hours):
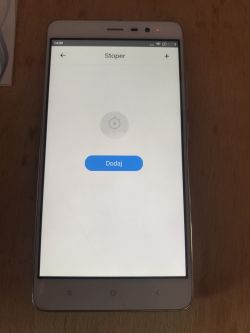
    Socket/plug with WiFi PS-16-M and eWeLink/Coolkit application - test and teardown Socket/plug with WiFi PS-16-M and eWeLink/Coolkit application - test and teardown .
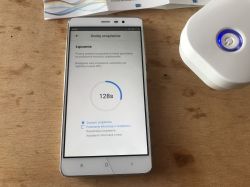
    Once the stopwatch has been created, it still needs to be started. It then starts timing the action:
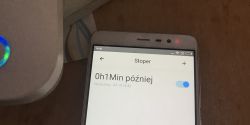
    Socket/plug with WiFi PS-16-M and eWeLink/Coolkit application - test and teardown .

    WiFi control capabilities - schedule .
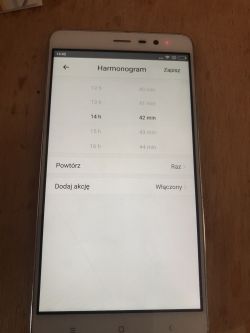
    Scheduling allows you to assign an action (on or off) to a particular time of day:
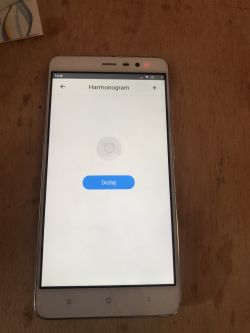
    Socket/plug with WiFi PS-16-M and eWeLink/Coolkit application - test and teardown Socket/plug with WiFi PS-16-M and eWeLink/Coolkit application - test and teardown .
    In the "repeat" list, we can select on which days of the week the action executes (or whether it will execute one at a time):
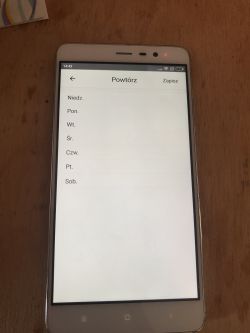
    Socket/plug with WiFi PS-16-M and eWeLink/Coolkit application - test and teardown .
    The created schedule (like the stopwatch before) can be switched on or off. An active schedule correctly turns the device on/off at a given time:
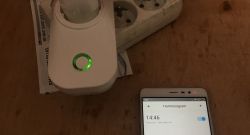
    Socket/plug with WiFi PS-16-M and eWeLink/Coolkit application - test and teardown .


    WiFi control capabilities - time loop .
    A time loop is a kind of form of stopwatch that repeats itself. The loop allows us to turn the device on and off every so often (to the nearest minute):
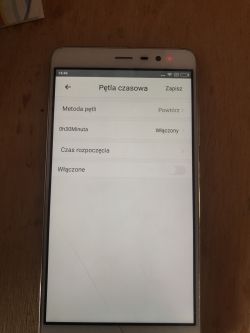
    Socket/plug with WiFi PS-16-M and eWeLink/Coolkit application - test and teardown .
    The 'Loop Method' field allows us to specify when the loop turns the device on and when it turns it off (separately we have the time for which it is on and the time for which it is off):
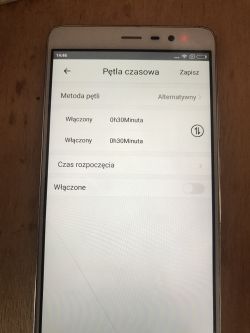
    Socket/plug with WiFi PS-16-M and eWeLink/Coolkit application - test and teardown .
    'Start time' opens a calendar where we can select from when the loop is in effect:
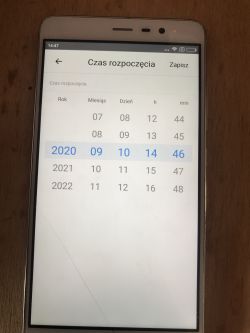
    Socket/plug with WiFi PS-16-M and eWeLink/Coolkit application - test and teardown .
    To test this, I made a simple loop that turns the lamp on and off every minute:
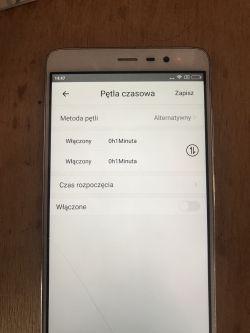
    Socket/plug with WiFi PS-16-M and eWeLink/Coolkit application - test and teardown .
    Everything worked fine - the lamp turned on and off every minute.
    The time loop is also remembered even quite after the device has been unplugged - I unplugged the socket overnight, and when I plugged it in in the morning the lamp was flashing again.
    It is also interesting to note that this functionality works even when the device is disconnected from the internet, yet in the same situation the phone app does not allow you to control it. That is, the socket must somehow remember the time loop itself and perform it without the internet.

    Control options via WiFi - device settings .
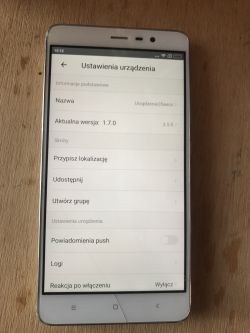
    In the 'device settings' tab, we have the possibility to change the room (group) of the device, to set the reaction after switching on (e.g. in case of a mains power failure), to view the logs and the model, Mac address and firmware name of the socket:
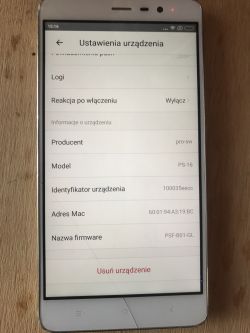
    Socket/plug with WiFi PS-16-M and eWeLink/Coolkit application - test and teardown Socket/plug with WiFi PS-16-M and eWeLink/Coolkit application - test and teardown .


    WiFi control capabilities - logs .
    The eWeLink app offers another interesting feature that I particularly liked - these are the socket status logs, which allow us to see what was happening to our device and whether it has indeed changed its state at a given time as it should:
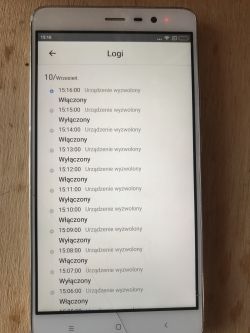
    Socket/plug with WiFi PS-16-M and eWeLink/Coolkit application - test and teardown .

    WiFi control capabilities - scenes/scenarios .
    The most advanced functionality available here is the creation of custom 'scenes', i.e. events that trigger other events. We can "programme" our own home in this way, linking devices that will then switch on or off together.
    This is available here:
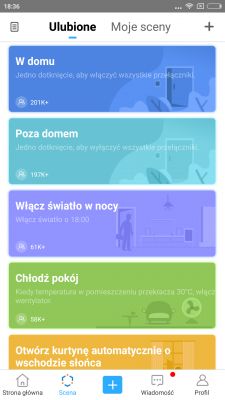
    Socket/plug with WiFi PS-16-M and eWeLink/Coolkit application - test and teardown .
    The app offers a wide range of conditions and triggers that even include, for example, room temperature measurement and time of day (sunrise etc).
    I was not able to test this fully as I only have one eWeLinkIt device, but below I will give screenshots of the process of setting up such a scene:
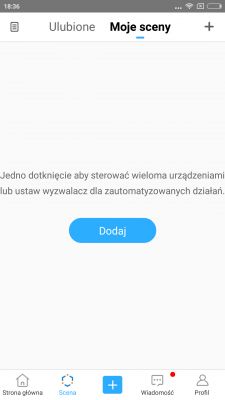
    Socket/plug with WiFi PS-16-M and eWeLink/Coolkit application - test and teardown .
    Everything is based on the "if X then Y" construction:
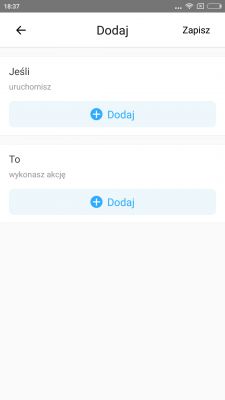
    Socket/plug with WiFi PS-16-M and eWeLink/Coolkit application - test and teardown .
    Trigger selection options:
    Socket/plug with WiFi PS-16-M and eWeLink/Coolkit application - test and teardown
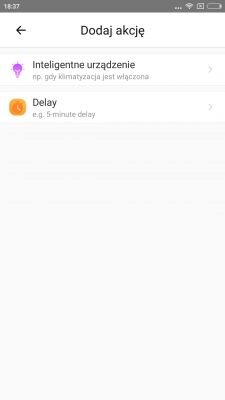
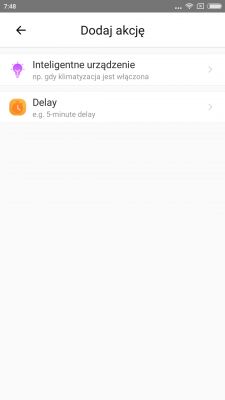
    Action possibilities:
    Socket/plug with WiFi PS-16-M and eWeLink/Coolkit application - test and teardown
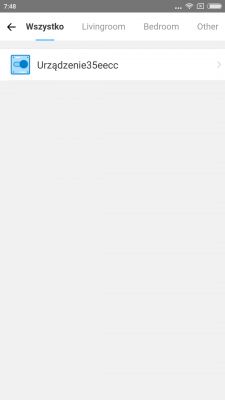
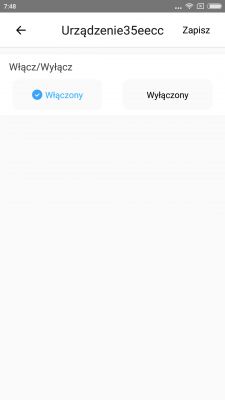
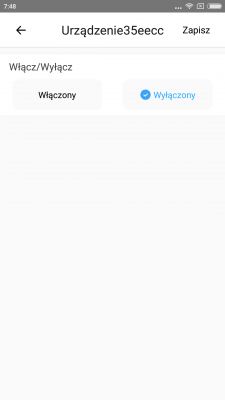
    When creating a trigger (selecting the device whose state change we are waiting for, choosing which state we want):
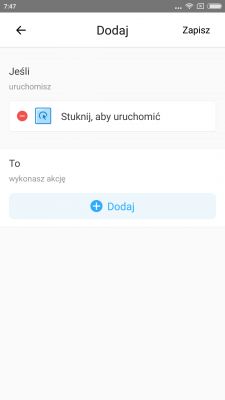
    Socket/plug with WiFi PS-16-M and eWeLink/Coolkit application - test and teardown .
    Socket/plug with WiFi PS-16-M and eWeLink/Coolkit application - test and teardown Socket/plug with WiFi PS-16-M and eWeLink/Coolkit application - test and teardown Socket/plug with WiFi PS-16-M and eWeLink/Coolkit application - test and teardown .
    Here we also see that as we select the trigger settings we can decide whether we expect all conditions to be met or any one of them.
    Setting the effect of the event:
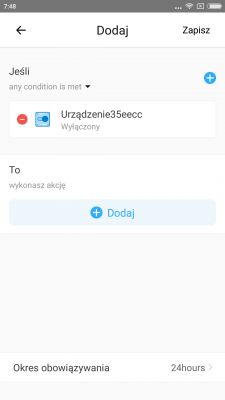
    Socket/plug with WiFi PS-16-M and eWeLink/Coolkit application - test and teardown .
    Socket/plug with WiFi PS-16-M and eWeLink/Coolkit application - test and teardown .
    Unfortunately (as I mentioned earlier), I did not complete testing this function as I do not have a second eWeLink it device.

    The eWeLink/Coolkit app for iOS .
    The Nest control app is also available for Apple devices and this time it can be downloaded directly from their AppStore (the QR code leads there):
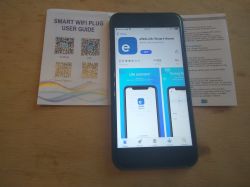
    Socket/plug with WiFi PS-16-M and eWeLink/Coolkit application - test and teardown .
    After logging in (email and password needed) we have a list of our devices:
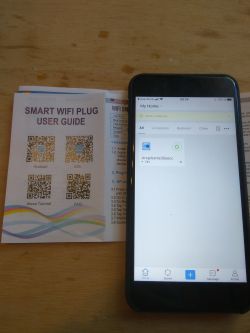
    Socket/plug with WiFi PS-16-M and eWeLink/Coolkit application - test and teardown Socket/plug with WiFi PS-16-M and eWeLink/Coolkit application - test and teardown .
    I didn't notice any differences between the Android app and the one for iOS.

    Power usage measurements .
    I used a power usage meter from china based on the V9261F chip to measure.
    The power usage with the relay off is about 0.2W:
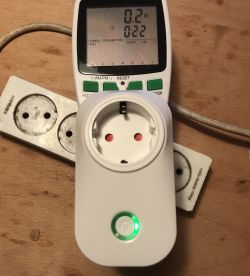
    Socket/plug with WiFi PS-16-M and eWeLink/Coolkit application - test and teardown .
    Power usage with the relay on is approximately 0.7W:
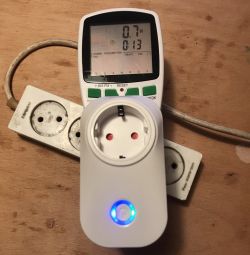
    Socket/plug with WiFi PS-16-M and eWeLink/Coolkit application - test and teardown .
    Some time ago I measured the power consumption of the BW-SHP8 - it was virtually the same as here.

    Interior of the PS-16-M .
    The case is held on by three black screws:
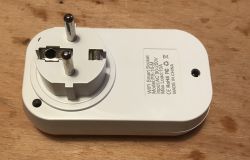
    Socket/plug with WiFi PS-16-M and eWeLink/Coolkit application - test and teardown .
    Socket/plug with WiFi PS-16-M and eWeLink/Coolkit application - test and teardown .
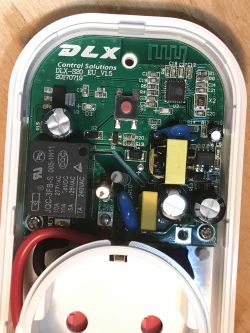
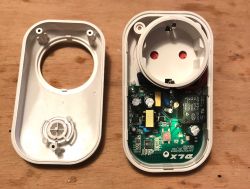
    Once opened, we are shown one larger board on which both the microcontroller, relay and small power supply are located:
    Socket/plug with WiFi PS-16-M and eWeLink/Coolkit application - test and teardown .
    Socket/plug with WiFi PS-16-M and eWeLink/Coolkit application - test and teardown .
    Whole in operation without top cover:
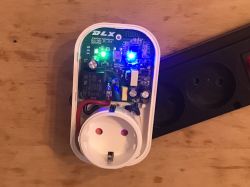
    Socket/plug with WiFi PS-16-M and eWeLink/Coolkit application - test and teardown .
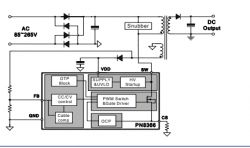
    Under the yellow capacitor you can see the rectifier bridge and a little further on is the pulse power supply circuit in flyback topology realised on a PN8366 and a small transformer.
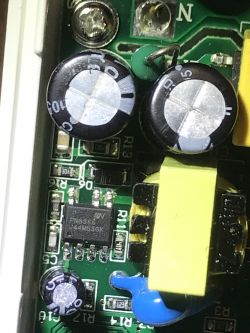
    Socket/plug with WiFi PS-16-M and eWeLink/Coolkit application - test and teardown .
    The PN8366 is a so-called 'Ultra-low standby power quasi-resonant primary-side feedback AC-DC converters' made by Chipown. It has a distinctive pin arrangement (one is missing):
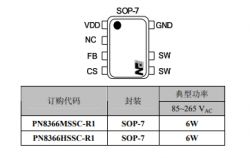
    Socket/plug with WiFi PS-16-M and eWeLink/Coolkit application - test and teardown .
    There is an example diagram of its application in the catalogue note (presumably this is what the power supply section of the board in question looks like):
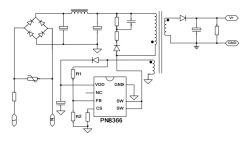
    Socket/plug with WiFi PS-16-M and eWeLink/Coolkit application - test and teardown .
    Socket/plug with WiFi PS-16-M and eWeLink/Coolkit application - test and teardown .
    In this circuit, the transistor from the inverter is already built in and no external one is needed.
    Its catalogue note:
    PN8366-Ch..wn.pdf Download (384.96 kB) .
    A little further down you can see the LDO CJT1117B 3.3 regulator:
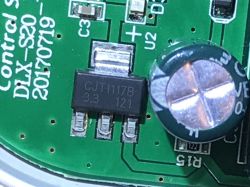
    Socket/plug with WiFi PS-16-M and eWeLink/Coolkit application - test and teardown .
    Catalogue note for this LDO:
    Changjiang...C78777.pdf Download (2.05 MB) .
    It provides a stable 3.3V for the chip's main controller.
    Socket/plug with WiFi PS-16-M and eWeLink/Coolkit application - test and teardown .
    The main controller is the 32-bit ESP8285:
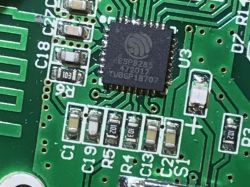
    Socket/plug with WiFi PS-16-M and eWeLink/Coolkit application - test and teardown .
    ESP8285 datasheet note:
    0a-esp8285...eet_en.pdf Download (873.69 kB) .
    Next to the ESP you can see the distinctive 26MHz quartz clock and the antenna from WiFi realised on the PCB:
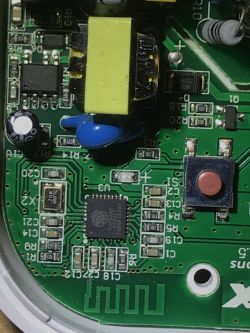
    Socket/plug with WiFi PS-16-M and eWeLink/Coolkit application - test and teardown .
    The ESP8285 is not here as an external module; it is soldered to the main (only) controller board. Its housing is a QFN-32:
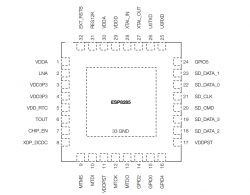
    Socket/plug with WiFi PS-16-M and eWeLink/Coolkit application - test and teardown .
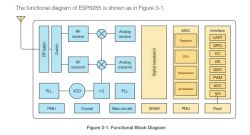
    Internal schematic of the ESP8285:
    Socket/plug with WiFi PS-16-M and eWeLink/Coolkit application - test and teardown .
    There is no other microcontroller on the board - ESP takes care of everything.
    A little further down you can see the transistor, signed Q1 on the board, which is used to control the relay:
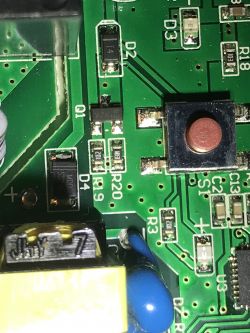
    Socket/plug with WiFi PS-16-M and eWeLink/Coolkit application - test and teardown .
    And the relay itself (JQc-3FB-S 005-1H11):
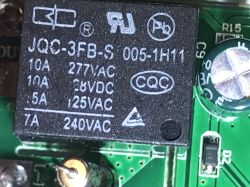
    Socket/plug with WiFi PS-16-M and eWeLink/Coolkit application - test and teardown .
    From the underside of the PCB we have just one small bonus - the RX/TX connector, probably useful for a standalone firwmare upgrade:
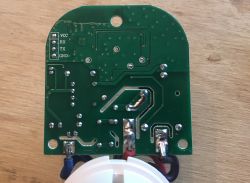
    Socket/plug with WiFi PS-16-M and eWeLink/Coolkit application - test and teardown .
    It's also worth noting that the relay only disconnects the phase wire (assuming you haven't connected the socket in reverse). In the photo below you can see the wire markings, to the board goes N (Neutral) and L_OUT (Live output) and L_IN (Input Live):
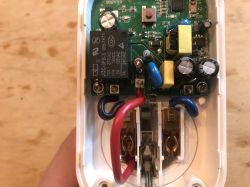
    Socket/plug with WiFi PS-16-M and eWeLink/Coolkit application - test and teardown .
    The earth is not connected to the circuit at all (it is just passed through to the other side).

    Previous part .
    I have previously tested a similar socket from Blitzwolf, the BW-SHP8, if anyone wants to compare features and prices the previous topic is here:
    https://www.elektroda.pl/rtvforum/topic3687040.html#18652154

    Summary .
    The PS-16-M WiFi socket is fully functional and easy to install and use. It costs £36.6 and is much cheaper than its alternatives that offer additional power consumption metering (such as the Blitzwolf BW-SHP8 for which I paid £80 some time ago).
    Power consumption is comparable in both cases (0.2W with the relay off, 0.7W with it on).
    The eWeLink/Coolkit phone app is convenient to use and offers a bit more than the Blitzwolf app - e.g. this 'time loop' function, although its installation makes me have some reservations about user privacy. It is certainly a plus that only an email is required for registration (no phone number needed).
    One drawback of the eWeLink app (and this socket) is that it cannot be controlled directly via LAN (WiFi) when we don't have internet access. In the case of the Blitzwolf, this was possible.
    The eWeLink app is available on Android and on iOS.
    The socket itself is realised based on the ESP8285 chip so it is probably possible to change the firmware, but I will deal with that another time.

    Cool? Ranking DIY
    Helpful post? Buy me a coffee.
    About Author
    p.kaczmarek2
    Moderator Smart Home
    Offline 
    p.kaczmarek2 wrote 11844 posts with rating 9941, helped 566 times. Been with us since 2014 year.
  • ADVERTISEMENT
  • #2 18918656
    McMarycha
    Level 31  
    Isn't this the same housing as the sonoff s20 ?
  • ADVERTISEMENT
  • #3 18921568
    metalMANiu
    Level 21  
    Using two such devices, is it possible to create something like a motor controller? What I mean is whether two separate devices can be configured in the application so that it is not possible to switch them on at the same time.
    Regards Mariusz
  • #4 18921879
    Duch__
    Level 31  
    My power supply circuit unfortunately died after about 2 months of operation. When fed an external 3.3V the socket works fine, but on its own from the built-in power supply it won't start. I need to find the time to see what exactly has died.
  • #5 18921936
    Linoge
    Level 27  
    I recommend the BW SHP6:
    + design - not clunky, not conspicuous
    + 2 red and blue LEDs to use
    + detachable housing
    + external WIFI antenna (not on PCB) = greater range
    + possibility of installing alternative software
    + pushbutton located on top instead of behind the cable going downwards
    - no pin
    - you have to solder to install alternative software
    Price c.a. 55 PLN on ali.
  • #6 18922050
    Citek
    Level 22  
    While in MediaExpert the other day, I noticed similar sockets. Even the price is reasonably ok, as the sockets are in Poland and have a function to measure power consumption.
    For £59 more powerful up to 3450W:
    https://www.mediaexpert.pl/dom-i-ogrod/inteli...sterowanie-bezrzewodowe/gniazdko-gosund-sp111
    and a slightly weaker one for 49zł up to 2300W.
    There is also a Sonoff for 55zł:
    https://www.mediaexpert.pl/dom-i-ogrod/inteli.../sterowanie-bezrzewodowe/gniazdko-sonoff-s26e
    In general the sockets look ok. Unfortunately I can't say anything more about them, because I don't have them physically and I haven't tested them.
  • ADVERTISEMENT
  • #7 18932535
    p.kaczmarek2
    Moderator Smart Home
    metalMANiu wrote:
    Is it possible to create something like a motor controller using two such devices? What I mean is whether two separate devices can be configured in the application so that they cannot be switched on at the same time.


    There is indeed similar functionality there - it's called 'Scenes' and allows you to make your own 'events' based on other 'events'. E.g. you can switch on one device when another is switched off, or when the temperature is below 20 degrees, etc. etc. It's similar to simple programming, you can give several conditions and effects to an action.

    You can make, for example, for each of two devices such an event that turning on one turns off the other. Only I don't know how with the response time to this (and whether it goes through the application servers or only on our LAN).

    I've updated the first post and given screenshots of this to the paragraph. I haven't been able to fully test this functionality because I don't have a second eWeLinkIt device to test their such a "connection", but I may have a second one soon, I'll update the topic later.
    Helpful post? Buy me a coffee.
  • #8 18933505
    metalMANiu
    Level 21  
    Thanks for your reply. I ask because I'm currently using a double Nous L8 "switch" (works under Tuya). The two outputs work independently and the only solution I came up with was just to use simple algorithms created from within the application.
    I created, so a formula along the lines of: "if outputs S1 and S2 are both on, then turn off both outputs". Unfortunately, executing this short algorithm takes long enough that the motor would get 230V on the wires of both directions for a few seconds.
    So I was thinking of trying it with eWeLink, but from what I can see from your screenshots, it wouldn't work any better at all.
    Maybe you have some other ideas?
  • ADVERTISEMENT
  • #9 18935657
    Linoge
    Level 27  
    Node mcu v3 with espeasy or other software and a set of NO NC relays in the appropriate configuration ?
  • #11 18947747
    kowaltom99
    Level 15  
    metalMANiu wrote:
    Thanks for the reply. I ask because I'm currently using a dual Nous L8 "switch" (works under Tuya). The two outputs work independently and the only solution I have come up with is just to use simple algorithms created from within the application.
    I created, so a formula along the lines of: "if outputs S1 and S2 are both on, then turn off both outputs". Unfortunately, executing this short algorithm takes long enough that the motor would get 230V on the wires of both directions for a few seconds.
    So I was thinking of trying it with eWeLink, but from what I can see from your screenshots, it wouldn't work any better at all.
    Maybe you have some other idea?
    .

    No need to combine with a double switch. There are off-the-shelf Tuya modules available for controlling roller shutters operated by Smart Life. On the oblique portal, just search for "curtain wifi"

    Example:
    https://www.loratap.com/tuya-smart-life-wifi-...le-home-amazon-alexa-voice-control-p0014.html

    Surcharge
    https://www.loratap.com/products/sc500w-v2

Topic summary

The discussion centers on the WiFi-controlled PS-16-M smart socket and its integration with the eWeLink/Coolkit application for Android and iOS. The original post details the purchase, unboxing, and initial configuration of the PS-16-M socket, including a teardown and tutorial on its functionalities. Comparisons are made to similar devices such as the Sonoff S20, noting similarities in housing. Users inquire about advanced control scenarios, such as using two devices to prevent simultaneous activation (e.g., motor control), with the eWeLink app supporting "Scenes" that allow conditional automation like turning one device off when another is on. However, concerns about response time and reliance on cloud servers versus local LAN control are raised. Hardware reliability issues are noted, including a failed internal power supply after two months, requiring external 3.3V power for operation. Alternative devices are recommended, such as the BW SHP6, praised for design, external WiFi antenna, and support for alternative firmware, though requiring soldering for flashing. Other smart sockets available in Poland, including Gosund SP111 and Sonoff S26E, are mentioned with power ratings and pricing. Some users express safety concerns about compact smart sockets compared to Sonoff. Suggestions for motor control include using NodeMCU with ESPEasy firmware and NO/NC relays or dedicated Tuya modules for roller shutters controlled via Smart Life app. Overall, the discussion covers practical experiences, device comparisons, automation capabilities, hardware issues, and alternative solutions for smart socket and motor control applications.
Summary generated by the language model.
ADVERTISEMENT