





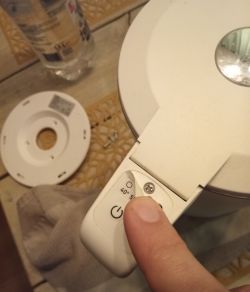
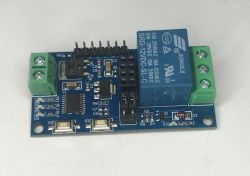
Tuya water pump with WIFI
Source: aliexpress
>WIFI Control Plant Drip Irrigation Watering System Kit Garden Automatic Watering Device Pots Double Timed Water Pump
![[BK7231N - CBU] WD-01ADE Tuya water pump with WiFi: Pin Configuration,Btn](https://obrazki.elektroda.pl/5341773600_1686167391_thumb.jpg "[BK7231N - CBU] WD-01ADE Tuya water pump with WiFi: Pin Configuration,Btn")
The watering system is controlled by Tuya module CBU (CBU-NL) -> BK7231N
(Earlier devices are built with ESP8266)
All needed pin are accessible. You can flash it without dismount the module.
![[BK7231N - CBU] WD-01ADE Tuya water pump with WiFi: Pin Configuration,Btn](https://obrazki.elektroda.pl/2584798400_1686167555_thumb.jpg "[BK7231N - CBU] WD-01ADE Tuya water pump with WiFi: Pin Configuration,Btn")
![[BK7231N - CBU] WD-01ADE Tuya water pump with WiFi: Pin Configuration,Btn](https://obrazki.elektroda.pl/2206825200_1686167560_thumb.jpg "[BK7231N - CBU] WD-01ADE Tuya water pump with WiFi: Pin Configuration,Btn")
Pin definition for the module as cbu.txt
The device works with four batteries or with USB-Cable.
These pins are used:
P16 - REL1 - pump-A
P14 - REL2 - pump-B
P8 - Btn_n 1 - for pump-A
P7 - Btn_n 2 - for pump-B
P20 - WifiLED
I run it with the autoexec.bat attached.
Some inner pictures:
![[BK7231N - CBU] WD-01ADE Tuya water pump with WiFi: Pin Configuration,Btn](https://obrazki.elektroda.pl/7378517600_1686167805_thumb.jpg "[BK7231N - CBU] WD-01ADE Tuya water pump with WiFi: Pin Configuration,Btn")
![[BK7231N - CBU] WD-01ADE Tuya water pump with WiFi: Pin Configuration,Btn](https://obrazki.elektroda.pl/3377625800_1686167808_thumb.jpg "[BK7231N - CBU] WD-01ADE Tuya water pump with WiFi: Pin Configuration,Btn")
![[BK7231N - CBU] WD-01ADE Tuya water pump with WiFi: Pin Configuration,Btn](https://obrazki.elektroda.pl/7879349500_1686167815_thumb.jpg "[BK7231N - CBU] WD-01ADE Tuya water pump with WiFi: Pin Configuration,Btn")
Also the Tuya configuration is added here as zip.
The measured power consumption is:
72mA - quiescent current
280mA - with one running pump
490mA - with two running pumps
It is not a good idea to run it on battery without energy saving rules.
There is one problem with the configuration: I must press the button twice to start and stop the pumps.
The device requires a very good power supply.
To make the function safer, I soldered a backup capacitor between 0 and 3.3V (470uF).
Source: aliexpress
>WIFI Control Plant Drip Irrigation Watering System Kit Garden Automatic Watering Device Pots Double Timed Water Pump
![[BK7231N - CBU] WD-01ADE Tuya water pump with WiFi: Pin Configuration,Btn](https://obrazki.elektroda.pl/5341773600_1686167391.jpg "[BK7231N - CBU] WD-01ADE Tuya water pump with WiFi: Pin Configuration,Btn")
The watering system is controlled by Tuya module CBU (CBU-NL) -> BK7231N
(Earlier devices are built with ESP8266)
All needed pin are accessible. You can flash it without dismount the module.
![[BK7231N - CBU] WD-01ADE Tuya water pump with WiFi: Pin Configuration,Btn](https://obrazki.elektroda.pl/2584798400_1686167555.png "[BK7231N - CBU] WD-01ADE Tuya water pump with WiFi: Pin Configuration,Btn")
![[BK7231N - CBU] WD-01ADE Tuya water pump with WiFi: Pin Configuration,Btn](https://obrazki.elektroda.pl/2206825200_1686167560.png "[BK7231N - CBU] WD-01ADE Tuya water pump with WiFi: Pin Configuration,Btn")
Pin definition for the module as cbu.txt
The device works with four batteries or with USB-Cable.
These pins are used:
P16 - REL1 - pump-A
P14 - REL2 - pump-B
P8 - Btn_n 1 - for pump-A
P7 - Btn_n 2 - for pump-B
P20 - WifiLED
I run it with the autoexec.bat attached.
Some inner pictures:
![[BK7231N - CBU] WD-01ADE Tuya water pump with WiFi: Pin Configuration,Btn](https://obrazki.elektroda.pl/7378517600_1686167805.jpg "[BK7231N - CBU] WD-01ADE Tuya water pump with WiFi: Pin Configuration,Btn")
![[BK7231N - CBU] WD-01ADE Tuya water pump with WiFi: Pin Configuration,Btn](https://obrazki.elektroda.pl/3377625800_1686167808.jpg "[BK7231N - CBU] WD-01ADE Tuya water pump with WiFi: Pin Configuration,Btn")
![[BK7231N - CBU] WD-01ADE Tuya water pump with WiFi: Pin Configuration,Btn](https://obrazki.elektroda.pl/7879349500_1686167815.jpg "[BK7231N - CBU] WD-01ADE Tuya water pump with WiFi: Pin Configuration,Btn")
Also the Tuya configuration is added here as zip.
The measured power consumption is:
72mA - quiescent current
280mA - with one running pump
490mA - with two running pumps
It is not a good idea to run it on battery without energy saving rules.
There is one problem with the configuration: I must press the button twice to start and stop the pumps.
The device requires a very good power supply.
To make the function safer, I soldered a backup capacitor between 0 and 3.3V (470uF).

