logo elektroda
logo elektroda
X
logo elektroda

ESP32 and touchscreen display - tutorial - part 1 - how to program? Basics

p.kaczmarek2 11238 15
ADVERTISEMENT
Treść została przetłumaczona polish » english Zobacz oryginalną wersję tematu
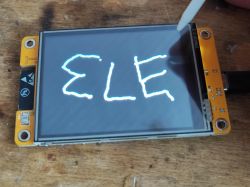
  • ESP32 TFT touch screen displaying texts with a stylus. .
    Here I will present an ESP32-2432S028R board offering, first of all, a large 2.8" TFT colour LCD display based on the ILI9341 (display) and XPT2046 (resistive touch panel, including stylus) controllers, all for just about £50. I'll show here how to operate this display in PlatformIO by example. This section will only cover the basics, but in subsequent topics I will also try to touch on drawing speed (DMA) and LVGL.

    Basic information .
    You can buy the product from here in the country (generally slightly more expensive, faster shipping) or import it from China (may be slightly cheaper). I leave the choice to the reader. Regardless of where you buy, here are the contents of the kit
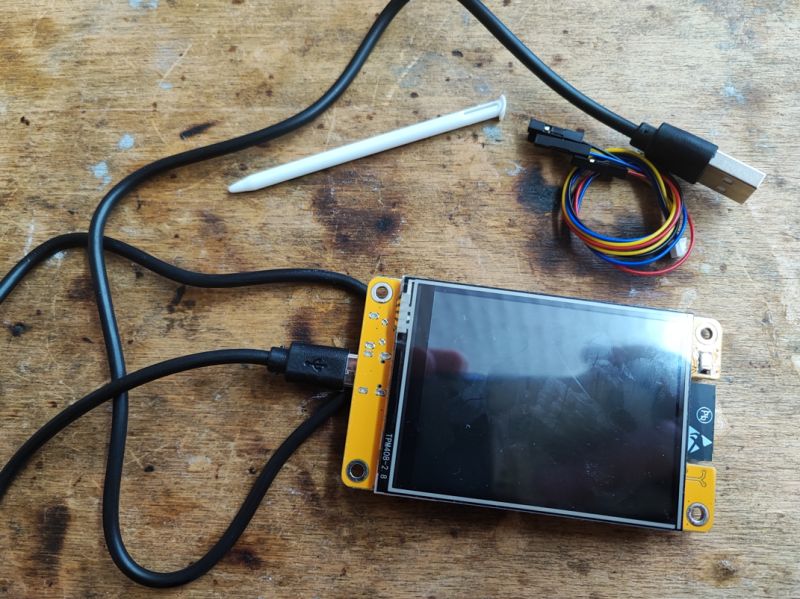
    ESP32-2432S028R board with touchscreen and stylus on a wooden table. .
    We also get a stylus and USB cable and expansion cables in the kit. Specifications from the vendor:
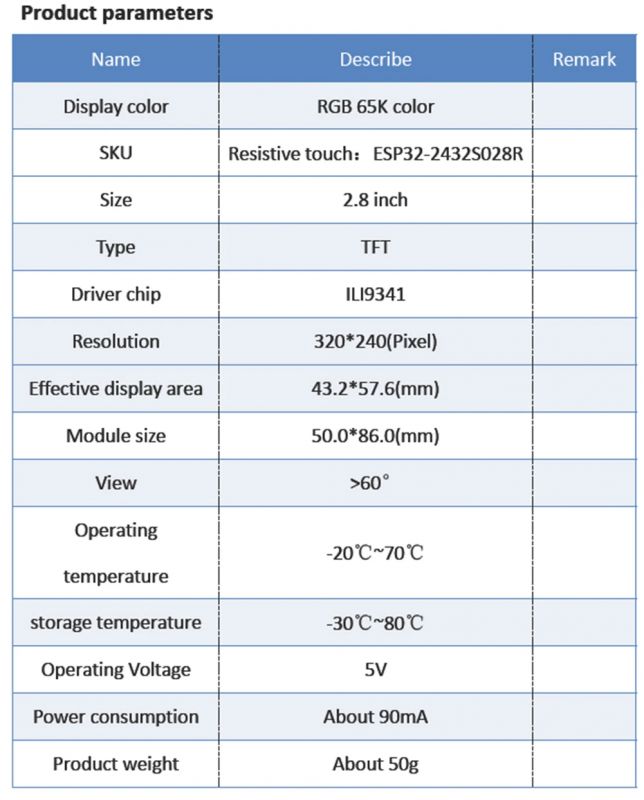
    Technical specifications table for ESP32-2432S028R board .
    Board (my version already had USB type C):
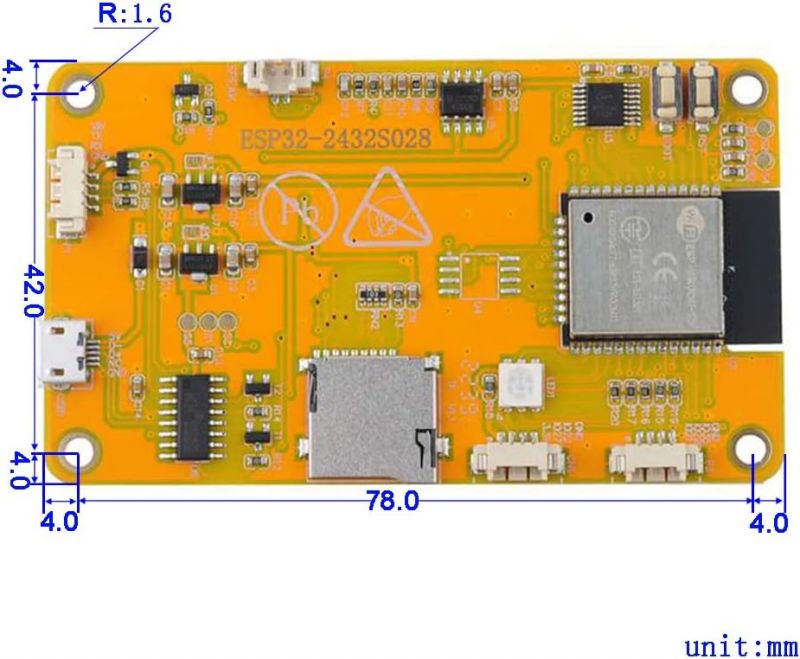
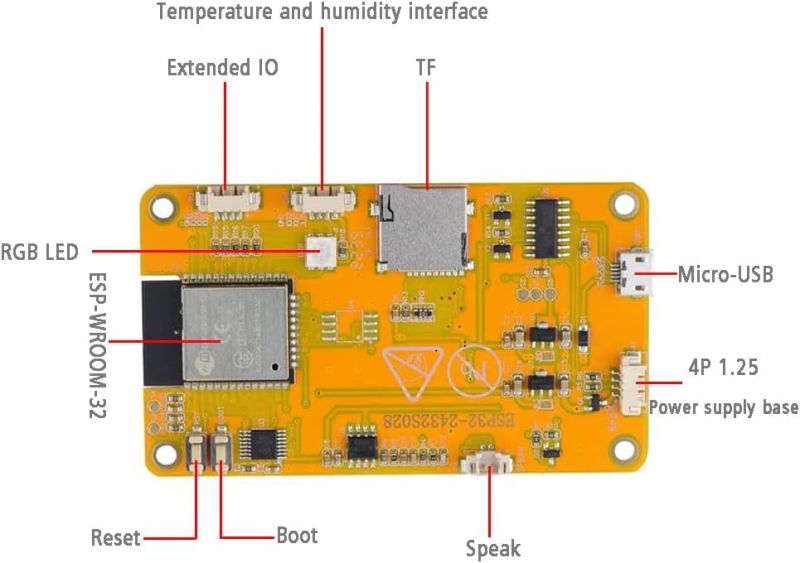
    ESP32-2432S028R board with visible components and ports. .
    ESP32-2432S028R board with labeled components
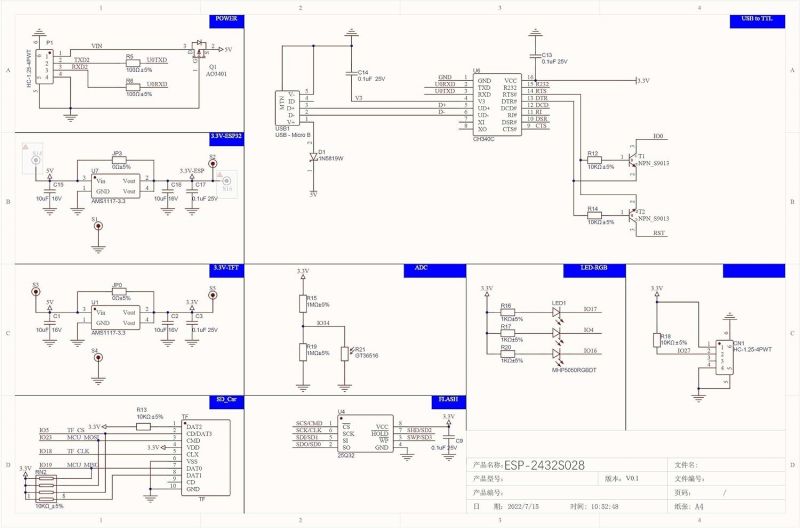
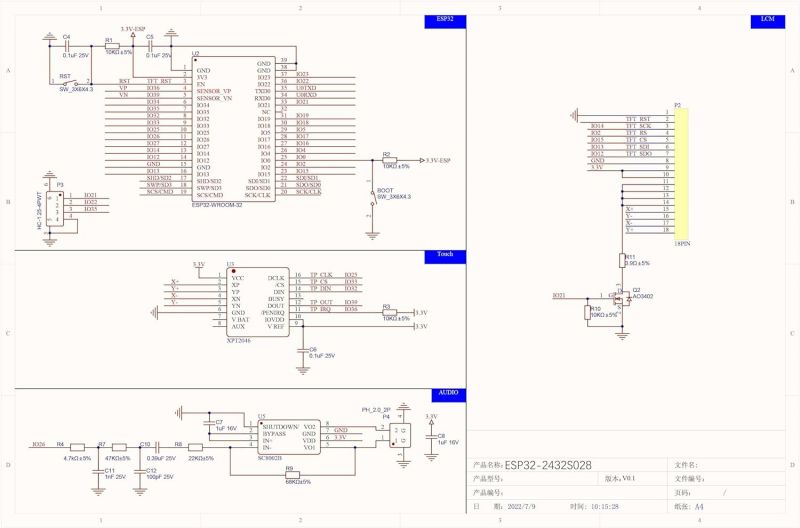
    Scheme:
    Schematic of the ESP32-2432S028R board with TFT display connections .
    Connection diagram of the ESP32-2432S028R board with display and touch panel .


    Factory demo
    The display is received with a demo program uploaded. This program is available for download on my flash dumps repository:
    https://github.com/openshwprojects/FlashDumps/tree/main/IoT/ESP32
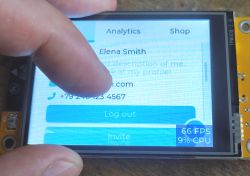
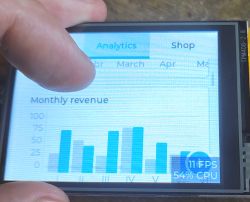
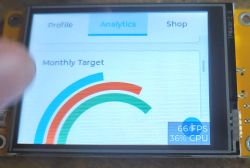
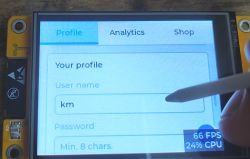
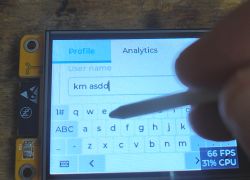
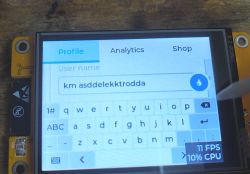
    The program itself is impressive, it shows not only graphics but also interactive elements, of course scrolling works, and you can even type text in the fields (a touch keyboard appears, just like on today's smartphones):
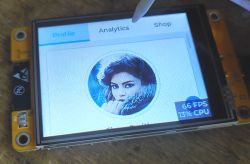
    ESP32-2432S028R board with TFT display and stylus Hand touching the LCD display showing user information segment. ESP32-2432S028R board with a 2.8 TFT LCD displaying a bar chart. Color LCD TFT 2.8 display with a chart. ESP32-2432S028R touchscreen with stylus Person using a stylus to enter text on the ESP32-2432S028R touchscreen. ESP32-2432S028R board with LCD TFT display and onscreen keyboard .
    Videos showing the demo. General interaction with the demo:


    .
    Text entry looks like this:


    .


    Basic display .
    For presentations, I use the free PlatformIO environment which has already scrolled through some topics:
    Clock on ESP12 and MAX7219 display - tutorial - part 1, ArduinoOTA, basics .
    How to program a Wemos D1 (ESP8266) board in the shape of an Arduino? ArduinoOTA in PlatformIO .
    Wemos D1 "Arduino" and DHT11 - a simple weather station with graphs on a web page .
    I'm assuming the reader knows some of the basics of this environment, but I'll still try to show a lot.
    I started by choosing a platform for the project. There wasn't this particular board what I have, so I chose another one on WROOM32:
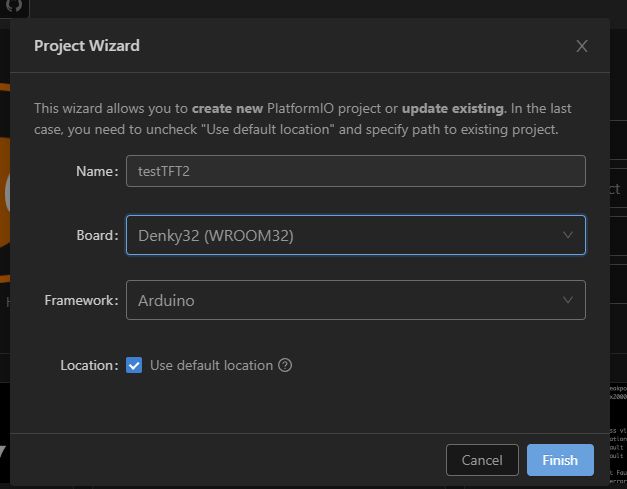
    Screenshot of the PlatformIO project wizard showing settings for the Denky32 (WROOM32) board with the Arduino framework selected. .
    Ok, we have the project ready. What do we want to do now?
    Let's perhaps start with the character display. We search for the TFT_eSPI library
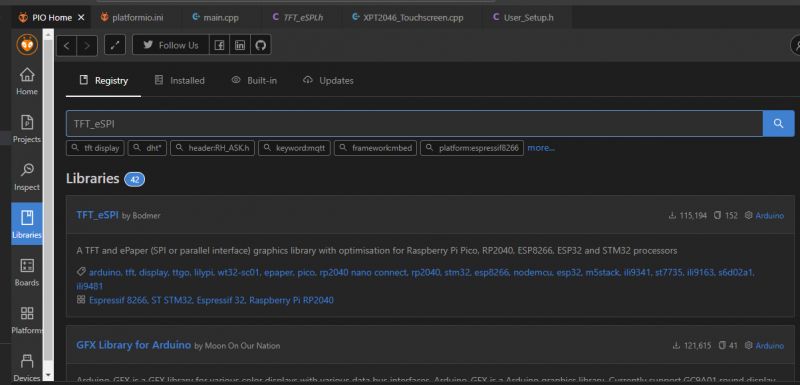
    Screenshot of searching for the TFT_eSPI library in the PlatformIO environment. .
    The TFT_eSPI library by Bodmer operates on platforms such as the ESP8266, ESP32, STM32 and even the RP2040. It supports displays such as GC9A01, ILI9163, ILI9225, ILI9341, ILI9342, etc.
    Of course, it is available with examples:
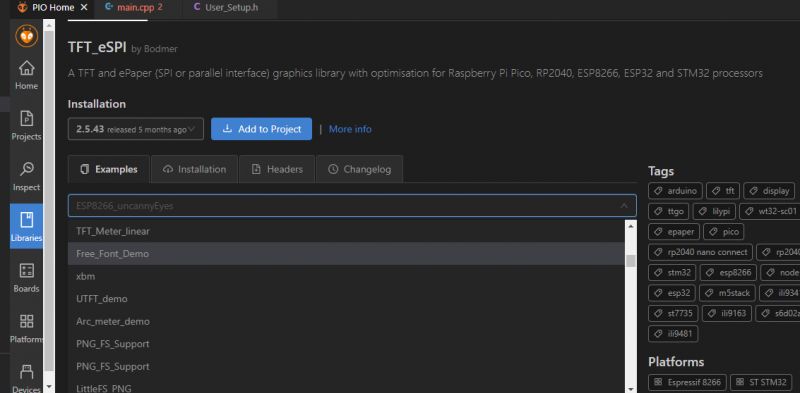
    View of PlatformIO screen with TFT_eSPI library added to a project. .
    However, I have not been able to get it to work immediately - I will save you the trouble.
    One file needs to be modified as the pin/communication definition doesn't match. Fortunately this same module has been run by someone before, Github user RuiSantosdotme provided a ready-made one:
    https://r aw.githubuse rconte nt.co m/RuiSantosdotme/ESP32-TFT-Touchscreen/main/configs/User_Setup.h
    .
    So, we find in PlatformIO (or in our project folder) and replace the indicated file. Now it's time to display something. To do this:
    - we include the SPI and then the TFT_eSPI headers
    - create an object of the TFT_eSPI class
    - in setup we initialise it and perform sample graphics operations
    Here is the code:
    Code: C / C++
    Log in, to see the code
    .
    First we call init to start the display. Then we can set its rotation (rotation), clear the screen with one colour and display text on it.
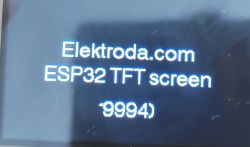
    The result:
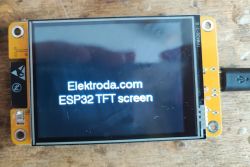
    Colorful 2.8 TFT display with text Elektroda.com ESP32 TFT screen .
    Hm, the colours are reversed, I saw that after the fact, but there is a solution for that too: function invertDisplay .
    The same can be done for example with a countdown. One would just like to add another drawing of text in the loop, but is that enough?
    Code: C / C++
    Log in, to see the code
    .
    However, it's not perfect. I've specifically done a countdown to highlight a problem - our new text appears on top of the old text:
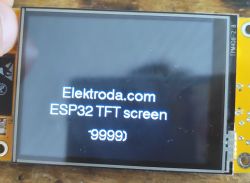
    ESP32 2.8 TFT display showing text Elektroda.com ESP32 TFT screen Close-up of a TFT display with text and number .
    It looks like we have done something wrong. For this to work properly, we should either at least obscure the old pixels every time new text is applied, or fully refresh the entire screen. So far we've done a full refresh, so after this fix the whole display goes into a loop. Here's the result:
    Code: C / C++
    Log in, to see the code
    .
    I took the easier route, which is to clean the whole screen and then redraw everything. Now there are no leftover characters from previous texts on the display. However, this is not an efficient way to do it, because if we displayed more things on the screen, it would force us to redraw everything.... in part two I will show how this problem can be solved.


    . Touchscreen bases
    The display is already there, but that's only half the story. We still need to handle the touchscreen, i.e. the inputs from the user. The touchscreen is able to give us location and pressure.
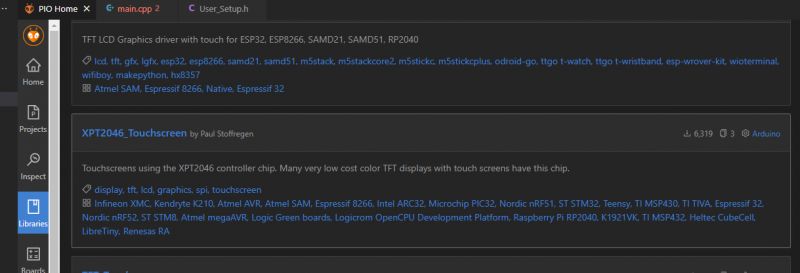
    We are looking for a library that can handle XPT2046. I have chosen XPT2046_Touchscreen.
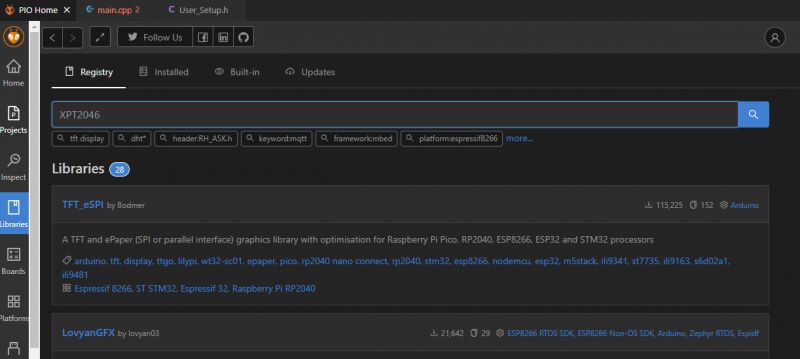
    PlatformIO interface with XPT2046 library search .
    Screenshot of PlatformIO showing the libraries section. .
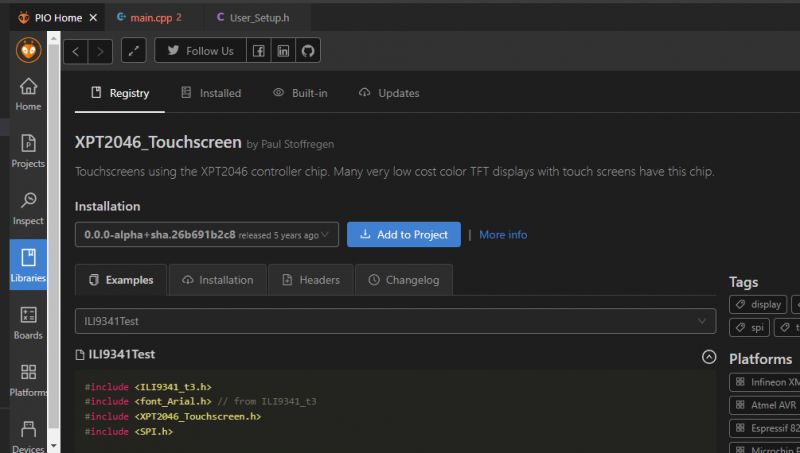
    I have added it to my project:
    Screenshot of the PlatformIO environment featuring the XPT2046_Touchscreen library. .
    By the way, I'll put my platformio.ini here for reference, which is the file that, among other things, specifies the libraries used:
    
    ; PlatformIO Project Configuration File
    ;
    ; Build options: build flags, source filter
    ; Upload options: custom upload port, speed and extra flags
    ; Library options: dependencies, extra library storages
    ; Advanced options: extra scripting
    ;
    ; Please visit documentation for the other options and examples
    ; https://docs.platformio.org/page/projectconf.html
    
    [env:denky32]
    platform = espressif32
    board = denky32
    framework = arduino
    lib_deps = 
    bodmer/TFT_eSPI@^2.5.43
    paulstoffregen/XPT2046_Touchscreen@0.0.0-alpha+sha.26b691b2c8
    
    .
    The XPT2046_Touchscreen class object provides us with access to touch events from the screen. We can check if the screen is touched and the position and strength of the touch. First, however, we need to determine what pins the XPT2046 is on:
    Code: C / C++
    Log in, to see the code
    .
    We save, compile... and surprise - something doesn't work. How is this possible? An example from the web doesn't work?
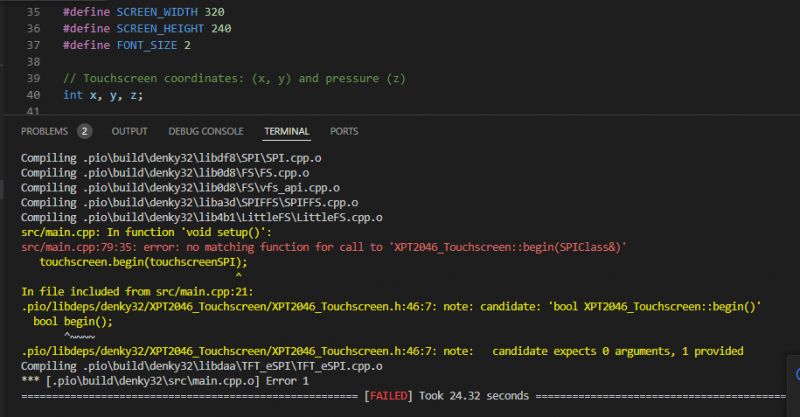
    Screenshot of a compilation error in PlatformIO during the compilation of an ESP32 project. .
    The problem is:
    
    src/main.cpp:79:35: error: no matching function for call to 'XPT2046_Touchscreen::begin(SPIClass&)'
    
    .
    A brief web search shows us the solution:
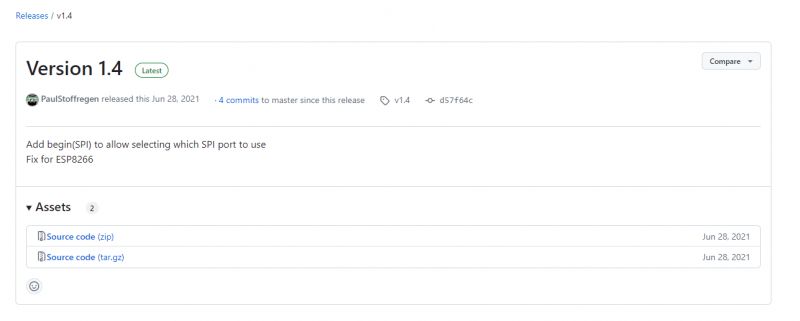
    Screenshot of GitHub page with information about version 1.4 .
    It was not until version 1.4 that the SPI port selection was introduced. We need to update.
    You have to manually download the newer version from Github:
    https://github.com/PaulStoffregen/XPT2046_Touchscreen
    And probably in some form the one on PlatformIO is older.
    By default, someone changed something in the library and the rest was not updated.
    So, I downloaded the newer version from Github and extracted it to where PlatformIO keeps what I downloaded via Visual Code, which is to libdeps:
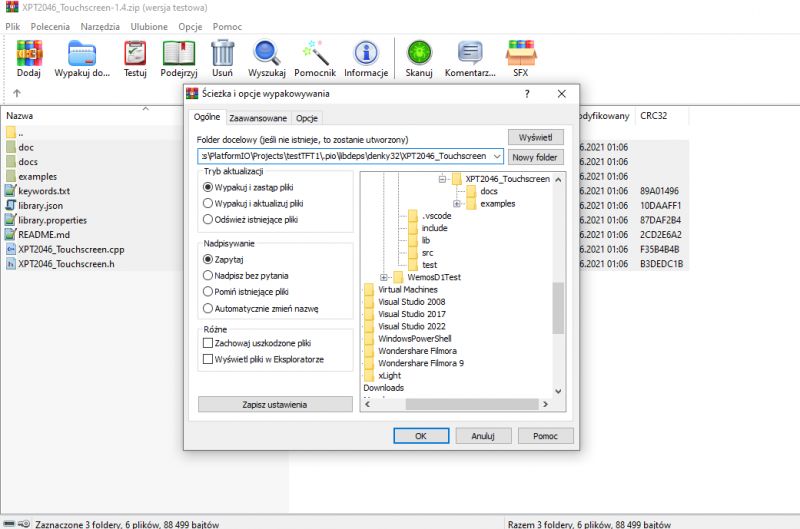
    ZIP file extraction program window displaying folder structure. .
    After that my code should work, but I was impatient and added something else right away....

    Location and pressure
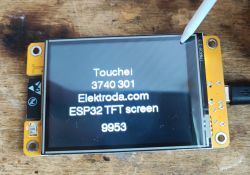
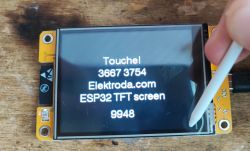
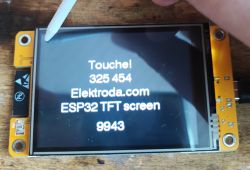
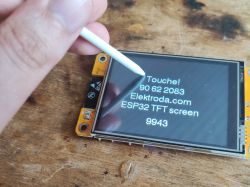
    The previous code just checked for pressure, and here I've added retrieving the pressure point from an object representing the touchscreen. When there is a touch, I display the text and the location of the touch to the screen:
    Code: C / C++
    Log in, to see the code
    .
    Testing, here are the results:
    ESP32-2432S028R board with a 2.8 TFT display and stylus. ESP32-2432S028R with a 2.8 TFT touch display and stylus ESP32-2432S028R board with touchscreen display. .
    Something else seems to have gone wrong. These coordinates are weird. Well, yes, they are in TFT virtual space, not in pixels.... a simple mapping needs to be done:
    Code: C / C++
    Log in, to see the code
    .
    Now the position displayed corresponds to the positions used when drawing on the screen.
    You can also add the pressure force, this is stored in the Z-coordinate of the point already taken:
    Code: C / C++
    Log in, to see the code
    .
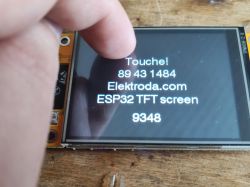
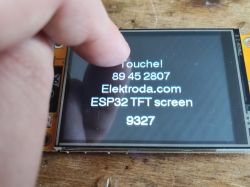
    We test:
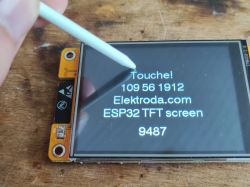
    ESP32-2432S028R board with a TFT touch display and stylus. ESP32 TFT touch screen displaying texts with a stylus. ESP32-2432S028R with 2.8 TFT touchscreen display <spanclass="notranslate">Finger touching a touchscreen display with ESP32 TFT. .
    It seems to work, but either I have poor touch control in my hands or it's not very authoritative.
    It's more correct now, but I think it could be presented a bit nicer....

    Draw! .
    Now that we know the basics of the display and touchscreen we can do something more interesting. I suggest a simple drawing activity. Here the plus is that we don't have to refresh the whole screen, because we just add more pixels to it. Then we just have to draw, say, a circle in the pressure event, where the pressure is detected:
    Code: C / C++
    Log in, to see the code
    .
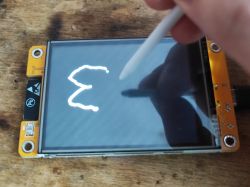
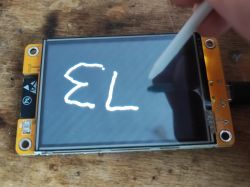
    I also removed the wait from the loop to make everything more responsive. I use fillCircle to have a filled circle. Testing:
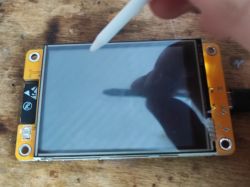
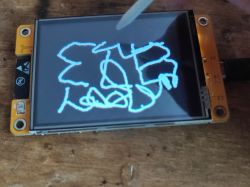
    ESP32-2432S028R board with a 2.8 TFT LCD color display ESP32-2432S028R board with a large 2.8 TFT touch screen being drawn on with a stylus. ESP32-2432S028R touch TFT LCD screen with stylus ESP32-2432S028R board with a touchscreen ESP32 board with LCD TFT display and drawing on screen ESP32 board with LCD TFT display and drawing on screen .
    Very cool fun! You could go further and add a toolbox on the side, colours and have a drawing toy.

    Summary
    The board is very interesting and the price is not bad either. The display, on the other hand, I rate as good, it is not in my opinion "very good" because somehow it did not always respond to my fingers the first time, even though I removed the protective film from it. However, this does not change the fact that I want to present much more on this plate....
    There will be a whole series about it - in this series we will first scratch a bit "on foot", learn how to draw efficiently (do you always have to refresh the whole screen? Or will DMA help us?) make some minigames or demos, and then we will get interested in the LVGL topic - both from the code level and from the interface editor.
    That's it for now - has anyone used this module? What applications do you see for ESP32 + touchscreen display? .

    Cool? Ranking DIY
    Helpful post? Buy me a coffee.
    Do you have a problem with Arduino? Ask question. Visit our forum Arduino.
    About Author
    p.kaczmarek2
    Moderator Smart Home
    Offline 
    p.kaczmarek2 wrote 11833 posts with rating 9931, helped 566 times. Been with us since 2014 year.
  • ADVERTISEMENT
  • #2 21111380
    gulson
    System Administrator
    Thanks for the article! Displays are getting cheaper and cheaper.

    Admittedly I haven't used a touchscreen display with ESP32 yet, but applications such as any watches, alarm clocks, thermometers where something needs to be changed and set come to mind.
    A mini control panel for each room for smart home purposes e.g. controlling the underfloor heating in a room.
    Maybe something for industrial automation (but rather unprofessional), to control simple technological processes.
    Some small music controls for the band.
    Photovoltaic information and summaries with a choice of what to display.
    Display of computer/laptop parameters and control (shortcuts) of basic computer components - something like Stream Deck.

    PS
    There used to be small touchscreen displays in grocery shops, are you happy with the user experience.
  • #3 21111435
    Mateusz_konstruktor
    Level 36  
    p.kaczmarek2 wrote:
    What applications do you see for the ESP32 + touchscreen display?
    .

    p.kaczmarek2 wrote:
    You could go further and add a toolbox on the side, colours and have a drawing toy.

    I would go further in this direction, and it doesn't have to be any toy.
    I'm thinking of a hand-held sketchbook, a modern substitute for card and pencil.
    Adding the option to save a sketch would already be a nice design aid.
  • ADVERTISEMENT
  • #4 21111451
    p.kaczmarek2
    Moderator Smart Home
    Interesting ideas. I've also already been doing a bit of experimenting with the Smart Home theme. In one of the next parts, I will show how a simple display of measurement/parameter results from Tasmota devices (and necessarily also from OpenBeken, as their JSON formats are compatible) can be made on this panel and without using Home Assistant. The project will involve cyclically querying IPs from a list and refreshing the results on the screen (LVGL based project, so there will be a scrollbar no problem). This will provide an on-screen view of e.g. measurements from sockets with electricity measurement or there DHT11 sensors etc.

    This will have the potential for such an amateur imitation of the Sonoff NSPanel:
    https://www.elektroda.pl/rtvforum/topic4005509.html
    Except that it will work without Home Assistant
    Helpful post? Buy me a coffee.
  • #5 21111554
    krzbor
    Level 27  
    It's a very interesting device, but would benefit from a 3.5" or larger screen. To include:
    - power pins or pads on the back of the board inside,
    - a photoresistor connected to the ADC.
    - A wall mount case (white and black) - power supply on the back and mounting holes for a standard can. A miniature 230V/5V inverter must then be inserted into such a box,
    - a free-standing enclosure with a USB C connector at the bottom rear.
    Only such a kit really makes sense - you can create your own DIY, but it is also suitable for (low) volume production of home automation.
  • #6 21111719
    gemiel
    Level 25  
    krzbor wrote:
    This is a very interesting device, but would benefit from a 3.5" or larger screen.


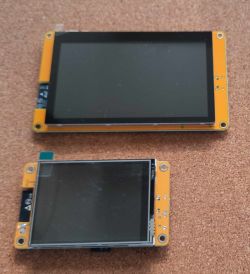
    Modules are also manufactured with larger displays. I bought a 2.8" and when it turned out to be a bit too small I bought a 4.3".
    The Chinese have so much of this that they sell :D .

    Two display modules of different sizes, 2.8 and 4.3, placed on a cork surface. Two electronic modules with yellow circuit boards, a larger one on top and a smaller one at the bottom.
  • #7 21111721
    p.kaczmarek2
    Moderator Smart Home
    @gemiel do you also get the impression that this display sometimes doesn't respond very well to touch?

    Added after 18 [seconds]:

    I should add that I'm even talking about the program preloaded here, this LVGL demo
    Helpful post? Buy me a coffee.
  • #8 21111918
    gemiel
    Level 25  
    I didn't try to draw. I only tapped the icons with the stylus and scrolled the page. For me it works reasonably well, a bit clumsy, i.e. like old smartphones.
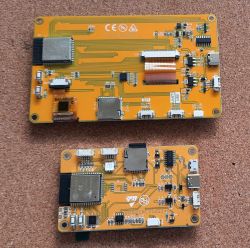
    This larger panel has capacitive touch. With this screen size, it's easier to operate your fingers and the quality of operation is much better. The 4.3" LCD panels come with resistive and capacitive touch. So there is a choice.
    The 2.8" screen, on the other hand, is small enough that I only use it with a stylus.... and glasses :D .
    I was still reminded of the topic of improving the sound quality of the module output.
    I made the modifications based on this video:
    https://www.youtube.com/watch?v=6JCLHIXXVus
  • #9 21116048
    error105
    Level 14  
    I used to play with it myself, but it ended up in the cupboard and will probably never be used.... Why. It's a crime these days to use shoddy TN matrices that have no advantage - even the price is gigantic.
    For 50zl you can probably get a whole Android phone with an IPS display already.

    There are similar displays on Ali, but on the aforementioned IPS and it's a completely different user experience and quality.
  • ADVERTISEMENT
  • #10 21118854
    Andrzej.Kr
    Level 11  
    >>21111347 Applications? As usual, a whole host of them. E.g. I'm piecing together a dummy load AC for the stereo, but straight away with basic measurements, a system that measures channel differences etc. A combination like this would be perfect. As health permits. Next thing quick. Maybe not original but a stereo amplifier with parametric tone control. Let's say in three ranges. Again, instead of knobs or buttons you can select a waveform and draw it. That's the theory. And if you draw the waveform, you can see the spectrum and instead of using tilt indicators, you can display it in vintage colours. As used to be the case with Pioneer equipment from the 1980s, for example, or as is now the case with the Macintosh. Not to mention the possibility of changing the display to suit your tastes. I won't mention a whole lot of measuring equipment.
  • #11 21144366
    tomzor
    Level 14  
    Any success in making a working example with this display and the LVGL library and working correctly ?, especially with touch ?
  • #12 21144379
    p.kaczmarek2
    Moderator Smart Home
    Yes. It was possible to do a project on LVGL and this will be shown and discussed extensively, both in Squareline studio and from the code level.


    .
    Unfortunately, this will only be a few parts in, I will only be uploading part 3 soon, still without LVGL.

    And where the question comes from, are you trying to run and there's a difficulty? I'd be happy to help
    Helpful post? Buy me a coffee.
  • ADVERTISEMENT
  • #13 21144460
    tomzor
    Level 14  
    Well I'm currently sitting on a very similar LCD (2.8") and touch, and I'm figuring out how to make this touch work (and the LVGL library).
    But maybe I'll wait when you do the next parts of the interesting tutorial.

    What is certain is that I have something wrong with the touch itself, specifically the interpretation (events etc) from the touch. Because the touch itself works OK. But something the LVGL library itself is not reading the event.
  • #14 21144481
    p.kaczmarek2
    Moderator Smart Home
    You might try firing up this:
    https://github.com/rzeldent/esp32-smartdisplay-demo
    Here you have a demonstration of how they hook up the touch:
    https://github.com/rzeldent/esp32-smartdispla...1150c6838ab4269/src/esp32_smartdisplay.c#L171
    Code: C / C++
    Log in, to see the code
    Helpful post? Buy me a coffee.
  • #16 21186232
    p.kaczmarek2
    Moderator Smart Home
    @tomzor topic about LVGL and Squareline studio:
    ESP32 and touch display - part 5 - LVGL in SquareLine Studio .
    Helpful post? Buy me a coffee.

Topic summary

The discussion revolves around the ESP32-2432S028R board, featuring a 2.8" TFT LCD display with ILI9341 and XPT2046 controllers, priced around £50. Users share various applications for the touchscreen display, including smart home control panels, industrial automation, and music controls. Some participants express interest in larger displays and additional features like power pins and photoresistors. The conversation also touches on the performance of the touch interface, with some users reporting issues with responsiveness. The LVGL library is mentioned as a tool for programming the display, with users seeking assistance in integrating touch functionality. A project demonstrating the use of LVGL is anticipated in future discussions.
Summary generated by the language model.
ADVERTISEMENT