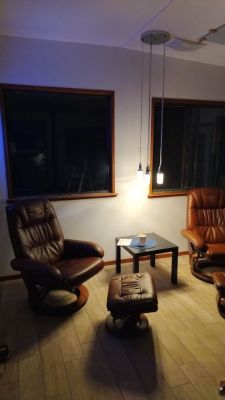
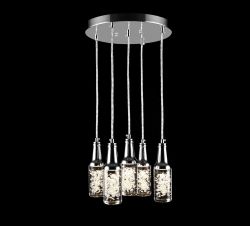
Today, we are going to decloud a nice pendant light in the shape of beer bottles Link
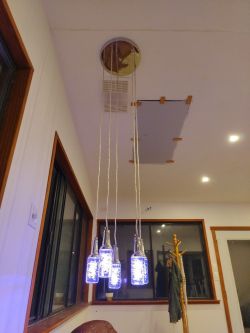 .
.
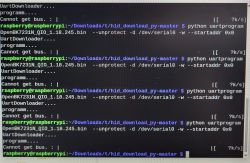
According to the manual, it is made by Carro. Obviously, I didn't want to install their stinky app, so here we go. Inside the lamp, we see a 24V PS and an LED controller. The LED driver is powered by a CB3S IC, therefore, you'd need the BK7231N FW (I know it says it is for WB3S, but nonetheless) . Since we will be doing the upgrade OTA, you need the UG FW, I used OpenBK7231N_UG_1.15.597.bin
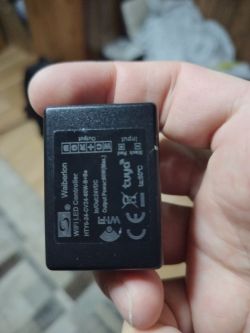
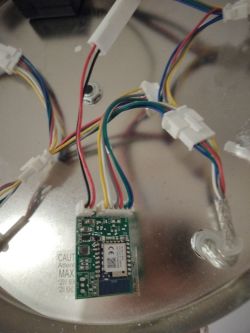
As before, I used the Tuya Cloud Cutter (CC henceforth). However, unlike the previous LED lamp, CC knew neither the lamp nor the controller (HTY5-24-CV24-60W) manufacturers.
After some experiments with CC, this setup worked for me:
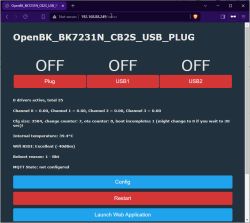
Before CC can start declouding the controller, you need to put it into the AP mode. About 5 ON-OFF cycles with a one-second interval will do the trick. The manual says three cycles - it's a lie. After the CC is done, you should see a wifi network with SSID OpenBK7231T_XXXXX. Follow the setup instructions from OpenBeken: connect to Wi-Fi, open 192.168.4.1, enter your SSID and password, and enter your MQTT server details.
Now comes the fun part, matching the pins. After some experiments, it turned out that PWM0 is cold white, PWM1 is not connected, PWM2 is warm white, PWM3 is green, PWM4 is red, and PWM5 is blue. You need to set your channels to PWM0 - 3, PWM2 - 4, PWM3 - 1, PWM4 - 0, PWM5 - 2, and check Flags 4, 10, and 12. Once this is all set, you can provision it with Home Assistant, and it will correctly set the colors. This was relatively easy and required minimal teardown, even though no documentation seems to be available for the LED controller.
AI: Just to clarify, are you looking for help with a specific issue you encountered during the declouding and flashing process, or are you just sharing your experience?
Sharing my experience
AI: If you did run into any problems or unexpected behavior (like errors, connectivity issues, or pin mapping oddities), could you describe what happened?
Not really, just a bunch of trial and error
 .
.
According to the manual, it is made by Carro. Obviously, I didn't want to install their stinky app, so here we go. Inside the lamp, we see a 24V PS and an LED controller. The LED driver is powered by a CB3S IC, therefore, you'd need the BK7231N FW (I know it says it is for WB3S, but nonetheless) . Since we will be doing the upgrade OTA, you need the UG FW, I used OpenBK7231N_UG_1.15.597.bin


As before, I used the Tuya Cloud Cutter (CC henceforth). However, unlike the previous LED lamp, CC knew neither the lamp nor the controller (HTY5-24-CV24-60W) manufacturers.
After some experiments with CC, this setup worked for me:
[?] How do you want to choose the device?: By firmware version and name
   By manufacturer/device name
 > By firmware version and name
   From device-profiles (i.e. custom profile)

[?] Select the firmware version and name: 1.3.21 - BK7231N / oem_bk7231n_light_ty
   1.3.1 - BK7231N / oem_bk7231n_light_ty
  ...
   1.3.20 - BK7231N / oem_bk7231n_light_ty
 > 1.3.21 - BK7231N / oem_bk7231n_light_ty
   1.3.22 - BK7231N / oem_bk7231n_light_ty
...
   1.6.0 - BK7231T / oem_bk7231s_curtain_switch

[?] Select the brand of your device: Tuya Generic
   Immax
 ...
   Treatlife
 > Tuya Generic
   UltraPro

[?] Select the article number of your device: SWWFD1C412 RGBCT Downlight
   1947Z5R W509Z1 RGBCT Bulb
 > SWWFD1C412 RGBCT Downlight

Selected Device Slug: tuya-generic-swwfd1c412-rgbct-downlight
Selected Profile: oem-bk7231n-light-ty-1.3.21-sdk-2.3.3-40.00
Selected Firmware: /work/custom-firmware/OpenBK7231N_UG_1.15.597.bin
Before CC can start declouding the controller, you need to put it into the AP mode. About 5 ON-OFF cycles with a one-second interval will do the trick. The manual says three cycles - it's a lie. After the CC is done, you should see a wifi network with SSID OpenBK7231T_XXXXX. Follow the setup instructions from OpenBeken: connect to Wi-Fi, open 192.168.4.1, enter your SSID and password, and enter your MQTT server details.
Now comes the fun part, matching the pins. After some experiments, it turned out that PWM0 is cold white, PWM1 is not connected, PWM2 is warm white, PWM3 is green, PWM4 is red, and PWM5 is blue. You need to set your channels to PWM0 - 3, PWM2 - 4, PWM3 - 1, PWM4 - 0, PWM5 - 2, and check Flags 4, 10, and 12. Once this is all set, you can provision it with Home Assistant, and it will correctly set the colors. This was relatively easy and required minimal teardown, even though no documentation seems to be available for the LED controller.
AI: Just to clarify, are you looking for help with a specific issue you encountered during the declouding and flashing process, or are you just sharing your experience?
Sharing my experience
AI: If you did run into any problems or unexpected behavior (like errors, connectivity issues, or pin mapping oddities), could you describe what happened?
Not really, just a bunch of trial and error


