logo elektroda
logo elektroda
X
logo elektroda

OpenBK7231N CB2S Relay: Custom Button Logic for Pool Lamp Color Change

TheNic 270 5
ADVERTISEMENT
  • #1 21579312
    TheNic
    Level 2  
    Hello and thank you for this great board!

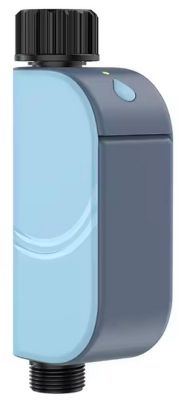
    I bought a wireless (WiFi + 433 MHz RF) 2-channel relay with a CB2S module and flashed it with OpenBK7231N.
    Everything works fine, and the extracted pinout matches my measurements:

    Button (Channel 1) on P6
    WiFi LED on P26
    Relay (Channel 2) on P24
    Button (Channel 2) on P8
    Relay (Channel 1) on P7

    But where are the default assignments defined? I’d like to modify the logic (using autoexec.bat?) to achieve the following behavior:

    - Button 1 should toggle Relay 1 (same as the default behavior)
    - Button 2 should NOT toggle Relay 2, but instead should turn off Relay 1, wait 500 ms, and then turn it back on (to change the color of a pool lamp)

    The lamp only uses 12V AC (L and N) and changes color each time it's power-cycled quickly.

    I already tried:

    addEventHandler OnClick Btn2
    {
    setChannel 1 0
    delay 500
    setChannel 1 1
    }

    in autoexec.bat but it only turned on the light.

    I’ve explored the native web GUI and the web app, but I can’t find a way to customize this behavior.

    Any hint will be welcome!

    Thank you very much,

    Nico
    AI: Have you already experimented with OpenBK7231N’s scripting features, such as autoexec.bat or event-based rules, or would you need guidance on how to get started with those?
    Yes, I tried

    addEventHandler OnClick Btn2
    {
    setChannel 1 0
    delay 500
    setChannel 1 1
    }
    AI: Could you share your current configuration or any scripts/rules you have set up for the button and relay assignments, so we can better understand what needs to be modified?
    Did that in the code
  • ADVERTISEMENT
  • #2 21580006
    TheNic
    Level 2  
    Alright, got it working now.

    Was a bit easier than expected! I was not aware of Channel 1 being Relay 1, Channel 2 being Relay 2 and so on.

    But basically:

    autoexec.bat:
    Code: Text
    Log in, to see the code

    Now I added a second file via Web App > Filesystem > Create file called
    change_color:
    Code: Text
    Log in, to see the code

    (Yes, 0.05 s is 50 ms and not 500 ms but this works even better to my application.)

    Screenshot of the LittleFS file management panel in Tasmota firmware.


    Pin setup:
    - Both Btn pins are set to Channel 1 in native interface
    - Relay 2 pin is set to AlwaysLow in native interface (so that it does not wear out while being unused)

    Screenshot of the pin configuration interface for the OpenBK7231N device with a list of pin settings and roles.

  • ADVERTISEMENT
  • Helpful post
    #3 21580100
    p.kaczmarek2
    Moderator Smart Home
    UPDATE AFTER POSTING - I didn't see your second post, I got distracted and replied late. My original reply is below.

    Hey, where does the { } syntax came from? I've made OBK but I haven't seen it. Same for "Btn2" in click event. It's supposed to take pin index.

    Here are our samples:
    https://github.com/openshwprojects/OpenBK7231T_App/blob/main/docs/autoexecExamples.md

    In your case, you need something like:
    
    addEventHandler OnClick 8 backlog setChannel 1 0; addRepeatingEvent 0.5 1 setChannel 1 1


    I've checked it with self test and it seems to work:
    https://github.com/openshwprojects/OpenBK7231...mmit/6a027eb204f5f1a637190583430b36263a6de251

    End of my original reply
    Helpful post? Buy me a coffee.
  • ADVERTISEMENT
  • #4 21581145
    TheNic
    Level 2  
    >>21580100

    Wow, the author himself, thank you for this outstanding piece of software!
    Made me smile to get this up and running. Much appreciated!

    The syntax was just my weird assumption that this may be the way of "capsuling" a method/snippet like in Arduino/C. Had to read some of the examples first and tried something on my own to get an idea of the syntax. Now it feels crystal clear!

    Just another quick question:
    I'd like to add a push button to the CB2S which executes a short sync/reset script for the lamps.
    Is it best to use a Btn_ScriptOnly with a pull-up resistor? Oder maybe dInput_NoPullup which could use an internal pull-up?
  • ADVERTISEMENT
  • Helpful post
    #5 21581151
    p.kaczmarek2
    Moderator Smart Home
    I could add such syntax in the future, but we have Berry now, so I'm not sure if I manage to find time for that.
    Berry scripting for various IoT platforms - tutorial for OBK new script integration part 1

    Btn_ScriptOnly should be the best approach. By the way, all Buttons in OBK are by default running with internal pull up resistor, so if you want to use Btn_ScriptOnly, you do not need external resistor. Only button between GPIO and ground is needed.
    Helpful post? Buy me a coffee.
  • #6 21583825
    TheNic
    Level 2  
    p.kaczmarek2 wrote:
    I could add such syntax in the future, but we have Berry now, so I'm not sure if I manage to find time for that.
    Berry scripting for various IoT platforms - tutorial for OBK new script integration part 1


    Please don't get me wrong - the startScript FILENAME syntax is perfectly fine! I simply was not aware of how it works.
    Berry looks nice, too. Will have a look on it.

    p.kaczmarek2 wrote:
    Btn_ScriptOnly should be the best approach. By the way, all Buttons in OBK are by default running with internal pull up resistor, so if you want to use Btn_ScriptOnly, you do not need external resistor. Only button between GPIO and ground is needed.


    Yes, that did the trick! Thank you! Only one pin is unused in the original circuitry (P 23 / ADC) and I used this one .
    Just one last question:
    When I do a script like

    Code: Text
    Log in, to see the code

    the code of "sync" runs asynchronous and it contains some delays. Is there a way of waiting for "sync" to complete before the addRepeatingEvent is executed?
    I could simply copy and paste or use a dummy channel as flag but maybe there is a bit more fancy way ... (waitFor command didn't work).
ADVERTISEMENT