logo elektroda
logo elektroda
X
logo elektroda

OpenBeken on CB3S - GPIO configuration for roller shutter controller without TuyaMCU

PSlowik 378 28
ADVERTISEMENT
Treść została przetłumaczona polish » english Zobacz oryginalną wersję tematu
  • #1 21618794
    PSlowik
    Level 12  
    I have a request for the roller shutter controllers I want to use openbeken because on the org tuya in HA I could not do stop-pause

    I have uploaded the software to the device (CB3S) but have no idea how to set the configuration.

    I have already come to the conclusion that the device does not have tuyaMCU


    OpenBeken configuration screen showing GPIO settings for CB3S device.
    Screenshot of the OpenBeken interface displaying a list of GPIO numbers and their assigned functions. .

    I have a backup and in openbeken I made a gpio download

    Please help
  • ADVERTISEMENT
  • #2 21618797
    p.kaczmarek2
    Moderator Smart Home
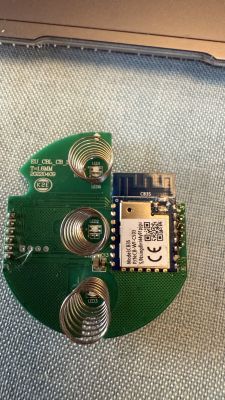
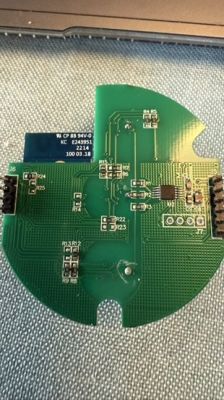
    I would, however, bet that it is TuyaMCU. Show these CB3S from the top. Are there no tracks next to RX1/TX1?
    Helpful post? Buy me a coffee.
  • #3 21618802
    PSlowik
    Level 12  
    Screenshot showing JSON result of a device data reading from the Tuya platform. .

    from tuya platform I read

    {
    "result": {
    "properties": [
    {
    "code": "control",
    "custom_name": "",
    "dp_id": 1,
    "time": 1753639537675,
    "type": "enum",
    "value": "continue"
    },
    {
    "code": "switch_backlight",
    "custom_name": "",
    "dp_id": 7,
    "time": 1753639537642,
    "type": "bool",
    "value": false
    },
    {
    "code": "tr_timecon",
    "custom_name": "",
    "dp_id": 10,
    "time": 1753639537675,
    "type": "value",
    "value": 20
    },
    {
    "code": "switch_stop",
    "custom_name": "",
    "dp_id": 101,
    "time": 1753638662892,
    "type": "bool",
    "value": true
    }
    ]
    },
    "success": true,
    "t": 1753643038653,
    "tid": "7347b8946b1c11f0bc424a7a32184703"
  • #4 21618824
    p.kaczmarek2
    Moderator Smart Home
    Ok so now you can start with the simplest autoexec.bat, what stage are you at with this? Are the heartbeats being picked up?

    TuyaMCU flashing, installation and configuration guide - configure dpID for Home Assistant .
    Helpful post? Buy me a coffee.
  • #5 21618827
    PSlowik
    Level 12  
    autoexec created so far I only have NTP time synchronisation :D .
    what are they receiving? :) .

    in the logs only this


    Info:GEN:sta:rssi=-40,ssid=SLOWIK__NET,bssid=74:4d:28:35:df:99,channel=1,cipher_type:CCMP
    Info:MAIN:Time 271, idle 188009/s, free 74088, MQTT 0(17), bWifi 1, secondsWithNoPing -1, socks 2/38 
    Info:MAIN:Time 272, idle 187357/s, free 74088, MQTT 0(17), bWifi 1, secondsWithNoPing -1, socks 2/38 
    Info:MAIN:Time 273, idle 197708/s, free 65456, MQTT 0(17), bWifi 1, secondsWithNoPing -1, socks 3/38 
    Info:MAIN:Time 274, idle 186689/s, free 74088, MQTT 0(17), bWifi 1, secondsWithNoPing -1, socks 2/38 
    Info:MAIN:Time 275, idle 191472/s, free 74088, MQTT 0(17), bWifi 1, secondsWithNoPing -1, socks 2/38 
    Info:MAIN:Time 276, idle 187902/s, free 74088, MQTT 0(17), bWifi 1, secondsWithNoPing -1, socks 2/38 
    Info:MAIN:Time 277, idle 188376/s, free 74088, MQTT 0(17), bWifi 1, secondsWithNoPing -1, socks 2/38 
    Info:MAIN:Time 278, idle 191407/s, free 74088, MQTT 0(17), bWifi 1, secondsWithNoPing -1, socks 2/38 
    Info:MAIN:Time 279, idle 181846/s, free 74088, MQTT 0(17), bWifi 1, secondsWithNoPing -1, socks 2/38 
    Info:MAIN:Time 280, idle 184827/s, free 74088, MQTT 0(17), bWifi 1, secondsWithNoPing -1, socks 2/38 
    Info:GEN:dhcp=0 ip=192.168.50.118 gate=192.168.50.1 mask=255.255.255.0 mac=cc:8c:bf:2a:d6:2e
    Info:GEN:sta: 1, softap: 0, b/g/n
    Info:GEN:sta:rssi=-40,ssid=SLOWIK__NET,bssid=74:4d:28:35:df:99,channel=1,cipher_type:CCMP
    Info:MAIN:Time 281, idle 189010/s, free 74088, MQTT 0(17), bWifi 1, secondsWithNoPing -1, socks 2/38 
    Info:MAIN:Time 282, idle 191437/s, free 74088, MQTT 0(17), bWifi 1, secondsWithNoPing -1, socks 2/38 
    Info:MAIN:Time 283, idle 191076/s, free 74088, MQTT 0(17), bWifi 1, secondsWithNoPing -1, socks 2/38 
    Info:MAIN:Time 284, idle 188042/s, free 74088, MQTT 0(17), bWifi 1, secondsWithNoPing -1, socks 2/38 
    Info:MQTT:mqtt_host empty, not starting mqtt
    Info:MAIN:Time 285, idle 188153/s, free 74088, MQTT 0(18), bWifi 1, secondsWithNoPing -1, socks 2/38 
    Info:MAIN:Time 286, idle 189867/s, free 74088, MQTT 0(18), bWifi 1, secondsWithNoPing -1, socks 2/38 
    Info:MAIN:Time 287, idle 190630/s, free 74088, MQTT 0(18), bWifi 1, secondsWithNoPing -1, socks 2/38 
    Info:MAIN:Time 288, idle 192019/s, free 74088, MQTT 0(18), bWifi 1, secondsWithNoPing -1, socks 2/38 
    Info:MAIN:Time 289, idle 190044/s, free 74088, MQTT 0(18), bWifi 1, secondsWithNoPing -1, socks 2/38 
    Info:MAIN:Time 290, idle 188062/s, free 74088, MQTT 0(18), bWifi 1, secondsWithNoPing -1, socks 2/38 
    Info:GEN:dhcp=0 ip=192.168.50.118 gate=192.168.50.1 mask=255.255.255.0 mac=cc:8c:bf:2a:d6:2e


    still the same
  • #6 21618831
    p.kaczmarek2
    Moderator Smart Home
    It will help you a lot to check the topic of what I have linked, such as this passage:
    Web console screenshot showing log messages related to TuyaMCU and heartbeat valid status. .
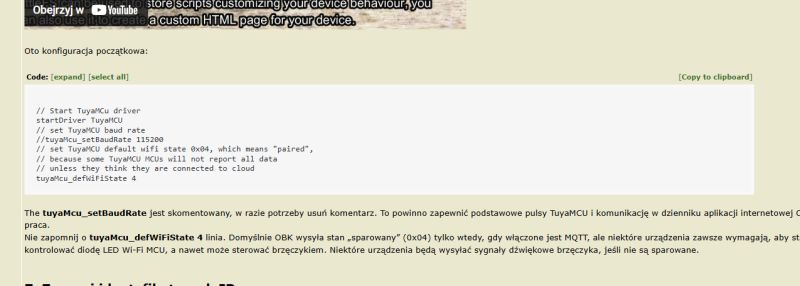
    In the web app console turn on the logging level of everything and there will be more info, including from TuyaMCU every now and then info whether "heartbeat valid" - 1 or 0.
    So you upload autoexec starting TuyaMCU, reboot the device, look to see if heartbeat valid, if not you try a second baud.
    You can instead of heartbeat valid then after start try the command:
    Screenshot of a web app console showing detailed TuyaMCU logs, including heartbeat valid messages. .
    Well, but as I said:
    ------> TuyaMCU flashing, installation and configuration guide - configure dpID for Home Assistant .
    Helpful post? Buy me a coffee.
  • #7 21618846
    PSlowik
    Level 12  
    Debug:CMD:loglevel set 6
    Info:CMD:[WebApp Cmd 'loglevel 6' Result] OK
    ExtraDebug:TuyaMCU:TuyaMCU heartbeat_valid = 0, product_information_valid=0, self_processing_mode = 1, wifi_state_valid = 0, wifi_state_timer=0
    Info:MAIN:Time 165, idle 190831/s, free 71616, MQTT 0(9), bWifi 1, secondsWithNoPing -1, socks 2/38 
    ExtraDebug:TuyaMCU:TuyaMCU heartbeat_valid = 0, product_information_valid=0, self_processing_mode = 1, wifi_state_valid = 0, wifi_state_timer=0
    Info:MAIN:Time 166, idle 184689/s, free 71616, MQTT 0(9), bWifi 1, secondsWithNoPing -1, socks 2/38 
    ExtraDebug:TuyaMCU:TuyaMCU heartbeat_valid = 0, product_information_valid=0, self_processing_mode = 1, wifi_state_valid = 0, wifi_state_timer=0
    Info:MAIN:Time 167, idle 194207/s, free 71616, MQTT 0(9), bWifi 1, secondsWithNoPing -1, socks 2/38 
    ExtraDebug:TuyaMCU:TuyaMCU heartbeat_valid = 0, product_information_valid=0, self_processing_mode = 1, wifi_state_valid = 0, wifi_state_timer=0
    Info:MAIN:Time 168, idle 197143/s, free 71616, MQTT 0(9), bWifi 1, secondsWithNoPing -1, socks 2/38 
    ExtraDebug:TuyaMCU:TuyaMCU heartbeat_valid = 0, product_information_valid=0, self_processing_mode = 1, wifi_state_valid = 0, wifi_state_timer=0
    Info:MAIN:Time 169, idle 192383/s, free 71616, MQTT 0(9), bWifi 1, secondsWithNoPing -1, socks 2/38 
    Info:MQTT:mqtt_host empty, not starting mqtt
    ExtraDebug:TuyaMCU:TuyaMCU heartbeat_valid = 0, product_information_valid=0, self_processing_mode = 1, wifi_state_valid = 0, wifi_state_timer=0
    Info:MAIN:Time 170, idle 187298/s, free 71616, MQTT 0(10), bWifi 1, secondsWithNoPing -1, socks 2/38 
    Info:GEN:dhcp=0 ip=192.168.50.118 gate=192.168.50.1 mask=255.255.255.0 mac=cc:8c:bf:2a:d6:2e
    Info:GEN:sta: 1, softap: 0, b/g/n
    Info:GEN:sta:rssi=-40,ssid=SLOWIK__NET,bssid=74:4d:28:35:df:99,channel=1,cipher_type:CCMP
    ExtraDebug:TuyaMCU:TuyaMCU heartbeat_valid = 0, product_information_valid=0, self_processing_mode = 1, wifi_state_valid = 0, wifi_state_timer=0
    Info:MAIN:Time 171, idle 181870/s, free 71616, MQTT 0(10), bWifi 1, secondsWithNoPing -1, socks 2/38 
    ExtraDebug:TuyaMCU:TuyaMCU heartbeat_valid = 0, product_information_valid=0, self_processing_mode = 1, wifi_state_valid = 0, wifi_state_timer=0
    Info:MAIN:Time 172, idle 180801/s, free 71616, MQTT 0(10), bWifi 1, secondsWithNoPing -1, socks 2/38 
    ExtraDebug:TuyaMCU:TuyaMCU heartbeat_valid = 0, product_information_valid=0, self_processing_mode = 1, wifi_state_valid = 0, wifi_state_timer=0
    Info:MAIN:Time 173, idle 191603/s, free 71616, MQTT 0(10), bWifi 1, secondsWithNoPing -1, socks 2/38 
    ExtraDebug:TuyaMCU:TuyaMCU heartbeat_valid = 0, product_information_valid=0, self_processing_mode = 1, wifi_state_valid = 0, wifi_state_timer=0
    Info:MAIN:Time 174, idle 183545/s, free 71616, MQTT 0(10), bWifi 1, secondsWithNoPing -1, socks 2/38 
    ExtraDebug:TuyaMCU:TuyaMCU heartbeat_valid = 0, product_information_valid=0, self_processing_mode = 1, wifi_state_valid = 0, wifi_state_timer=0
    Info:MAIN:Time 175, idle 188058/s, free 71616, MQTT 0(10), bWifi 1, secondsWithNoPing -1, socks 2/38 
    ExtraDebug:TuyaMCU:TuyaMCU heartbeat_valid = 0, product_information_valid=0, self_processing_mode = 1, wifi_state_valid = 0, wifi_state_timer=0
    Info:MAIN:Time 176, idle 187547/s, free 71616, MQTT 0(10), bWifi 1, secondsWithNoPing -1, socks 2/38 
    ExtraDebug:TuyaMCU:TuyaMCU heartbeat_valid = 0, product_information_valid=0, self_processing_mode = 1, wifi_state_valid = 0, wifi_state_timer=0
    Info:MAIN:Time 177, idle 181489/s, free 71616, MQTT 0(10), bWifi 1, secondsWithNoPing -1, socks 2/38 
    ExtraDebug:TuyaMCU:TuyaMCU heartbeat_valid = 0, product_information_valid=0, self_processing_mode = 1, wifi_state_valid = 0, wifi_state_timer=0
    Info:MAIN:Time 178, idle 188010/s, free 71616, MQTT 0(10), bWifi 1, secondsWithNoPing -1, socks 2/38 
    ExtraDebug:TuyaMCU:TuyaMCU heartbeat_valid = 0, product_information_valid=0, self_processing_mode = 1, wifi_state_valid = 0, wifi_state_timer=0
    Info:MAIN:Time 179, idle 189110/s, free 71616, MQTT 0(10), bWifi 1, secondsWithNoPing -1, socks 2/38 
    ExtraDebug:TuyaMCU:TuyaMCU heartbeat_valid = 0, product_information_valid=0, self_processing_mode = 1, wifi_state_valid = 0, wifi_state_timer=0
    Info:MAIN:Time 180, idle 182672/s, free 71616, MQTT 0(10), bWifi 1, secondsWithNoPing -1, socks 2/38 
    Info:GEN:dhcp=0 ip=192.168.50.118 gate=192.168.50.1 mask=255.255.255.0 mac=cc:8c:bf:2a:d6:2e
    .
  • ADVERTISEMENT
  • #8 21618868
    p.kaczmarek2
    Moderator Smart Home
    Hearbeat_valid equal to 0 and no response to tuyaMcu_sendQueryState ?


    In that case, try the second baud. Uncomment the line setting 115200, reboot and check again.
    Helpful post? Buy me a coffee.
  • #9 21618871
    PSlowik
    Level 12  
    >>21618868 I've done it all still the same....
  • #10 21618873
    p.kaczmarek2
    Moderator Smart Home
    And with RX1/TX1 you didn't accidentally damage the pads? Do you have a multimeter? Can you check with a multimeter if RX1/TX1 goes to this little MCU?
    Helpful post? Buy me a coffee.
  • #11 21618879
    PSlowik
    Level 12  
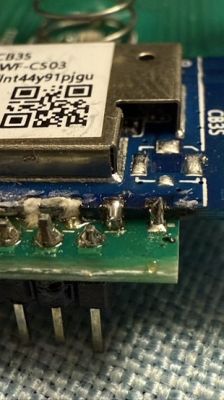
    >>21618873 i definitely did not damage the soldered under the microscope and i soldered under the cb3s.
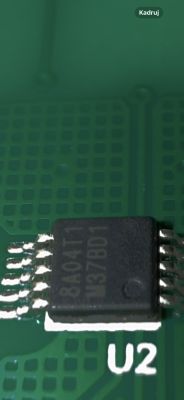
    this small circuit with legs is


    Photo shows a small IC with pins, soldered on a circuit board next to a larger module labeled CB3S.


    Small IC with pins soldered under a microscope, connected to a CB3S module. .
  • ADVERTISEMENT
  • #14 21618899
    p.kaczmarek2
    Moderator Smart Home
    There is information there that it is not TuyaMCU after all.

    In that case, try GPIODoctor to search for pin roles.
    GPIODoctor in OpenBeken - a convenient way to find out GPIO roles in an IoT device .
    Helpful post? Buy me a coffee.
  • #15 21618900
    PSlowik
    Level 12  
    p.kaczmarek2 wrote:
    There is information that it is not TuyaMCU after all.

    In that case, try GPIODoctor to search for pin roles.
    GPIODoctor in OpenBeken - a convenient way to find out GPIO roles in an IoT device
    .

    i understand that what i have read from tuya platform is not useful? because there were given dpid :/ i ask because i do not fully understand how it works
  • ADVERTISEMENT
  • #16 21618901
    p.kaczmarek2
    Moderator Smart Home
    The dpIDs are useful for TuyaMCU but it looks like it's not TuyaMCU after all. This post what @divadiow posted , there it mentions GPIO and pins however. Additionally, from your tests it seems that the tuyaMCU driver does not receive heartbeats. So it's probably not TuyaMCU after all....

    GPIODoctor is used for a quick pin check and is used for devices that are not TuyaMCU
    Helpful post? Buy me a coffee.
  • #17 21618909
    PSlowik
    Level 12  
    >>21618901 I have found so far
    P6 (PWM0) - rel - chn 57 - opening
    P9 (PWM3) - rel - chn 54 - closing

    not found
    Stop
    time how long the relay should be switched on
    selection of backlighting
  • #18 21618914
    p.kaczmarek2
    Moderator Smart Home
    Are these P6 and P9 relays or buttons? Because you have written in such a way that I don't understand.

    GPIO Doctor only looks for basic pins such as relays for switching, LEDs or there buttons (inputs). You can ignore the channel, it is not important, what matters is which pin is what.

    You will not find the delay time there, because it results from the algorithm, which unfortunately will have to be prepared somehow on the OBK...

    I will write figuratively - GPIODoctor is simply an overlay on pins, imagine that in pins you set the relay mode on each pin in turn and check if it works. This is exactly what you do in GPIoDoctor.
    Helpful post? Buy me a coffee.
  • #19 21618916
    PSlowik
    Level 12  
    p.kaczmarek2 wrote:
    Is that P6 and P9 are relays or buttons? Because you wrote in such a way that I don't understand.

    GPIO Doctor only looks for basic pins such as relays for switching, LEDs or there buttons (inputs). You can ignore the channel, it is not important, what matters is which pin is what.

    You will not find the delay time there, because it results from the algorithm, which unfortunately will have to be prepared somehow on the OBK...

    I will write figuratively - GPIODoctor is simply an overlay on pins, imagine that in pins you set the relay mode on each pin in turn and check if it works. This is what you do in GPIoDoctor.


    P6 relay - opening
    P9 relay - closing


    unfortunately i can't find anything else :/ it works so unstable that shock... I set Btn, press High and then it stutters and reboots :/ or it changes itself to Rel :/


    A little progress I found the LEDs
    P14 LED red on opening touch key
    P23 LED red on the closing touch button
    P26 LED green always flashed before connecting to wifi or during pairing - I set it to WiFiLED_n and it works like this.
    P7 Btn closing
    P8 LED red from touch button STOP
    P24 Btn opening
  • #20 21618964
    divadiow
    Level 34  
    PSlowik wrote:
    I understand that what I read from the tuya platform is not useful ? because there were given dpid :/ I ask because I do not fully understand the operation of this
    .
    The dpIDs do not imply the existence of TuyaMCU. Every device communicates with Tuya using dpid IDs, TuyaMCU devices simply use an external chip to do this.
  • #21 21618969
    PSlowik
    Level 12  
    I currently have this configuration

    "pins": {
    "6": "Rel;1",
    "7": "Btn;2",
    "8": "LED;0",
    "9": "Rel;2",
    "14": "LED;1",
    "23": "LED;2",
    "24": "Btn;1",
    "26": "WifiLED_n;0"

    And the opening and closing touch works, then the red LED is switched on.
    The LED indicating the connection to the WiFi is working.

    Not working:
    Touch button from Pause stop I couldn't find it or it worked differently?
    The On/Off key light is not working, it is on all the time :/

    The problem now is:
    When I press open or close the relay switches on and works without time limit....
    it is possible to open and close at the same time and the org used to be that when opening and closing is working, the opening relay switches off and the LED goes out.
    The pause function is a repeat key press.
  • #22 21618979
    divadiow
    Level 34  
    I see that you have previously provided a Tuya configuration file, but did you manage to make a full backup of the factory firmware before flashing the OBK? The GPIO assignment is often printed in the boot log.
  • #24 21618983
    p.kaczmarek2
    Moderator Smart Home
    Remember that at this stage we are just looking for GPIO roles - where is the relay, where is the diode, etc. There is no device logic at this point. Rather, you will need to do this logic yourself in OBK. I wouldn't expect it to work like a roller shutter controller right off the bat right now.
    Helpful post? Buy me a coffee.
  • #25 21618984
    PSlowik
    Level 12  
    >>21618983 of course I know I have every hope in you
  • #26 21618996
    divadiow
    Level 34  
    Thank you. I don't think I saw anything helpful, but this time

    Code: Text
    Log in, to see the code
  • #27 21619158
    PSlowik
    Level 12  
    divadiow wrote:
    Thank you. I don't think I saw anything helpful, but this time

    Code: Text
    Log in, to see the code
    .


    Was there something helpful or not?

    Added after 3 [hours] 57 [minutes]:

    p.kaczmarek2 wrote:
    Remember that at this stage we are just looking for GPIO roles - where is the relay, where is the diode, etc. There is no device logic at this point. Rather, you will need to do this logic yourself in OBK. I wouldn't expect this to work as a roller shutter controller right off the bat now.


    and can you help me with this logic? I don't understand it... i would be enormously grateful

    P11 LED switch on switches on the key light

    Unfortunately, the stop key has not been understood and I have checked everything.


    I found this json on github

    {
    "manufacturer": "MOES",
    "name": "WS-Y-EUTC-WH-MS Curtain Switch v1.1.0",
    "key": "key59dudtpsurhn5",
    "ap_ssid": "smartLife",
    "github_issues": [
    654
    ],
    "image_urls": [
    "moes-ws-y-eutc-wh-ms-curtain-switch-v1.1.0.jpg".
    ],
    "profiles": [
    "oem-bk7231n-curtain-rj-1.1.0-sdk-2.3.1-40.00"
    ],
    "schemas": {
    "000003yz2e": [
    {
    "type": "obj",
    "mode": "rw",
    "property": {
    "range": [
    "open",
    "continue",
    "close"
    ],
    "type": "enum"
    },
    "id": 1
    },
    {
    "type": "obj",
    "mode": "rw",
    "property": {
    "type": "bool"
    },
    "id": 7
    },
    {
    "type": "obj",
    "mode": "rw",
    "property": {
    "min": 10,
    "max": 120,
    "scale": 0,
    "step": 1,
    "type": "value"
    },
    "id": 10
    },
    {
    "type": "obj",
    "mode": "rw",
    "property": {
    "type": "bool"
    },
    "id": 101
    }
    ]
    },
    "device_configuration": {
    "backlit_io_lv": 1,
    "backlit_io_pin": 11,
    "backlit_select": 1,
    "bt1_lv": 0,
    "bt1_pin": 24,
    "bt2_lv": 0,
    "bt2_pin": 10,
    "bt3_lv": 0,
    "bt3_pin": 7,
    "bt_type": 0,
    "ch_num": 1,
    "crc": 79,
    "dely_t1": 200,
    "dev_ctrl1": 1,
    "dry_drvt1": 120,
    "dry_ty1": "false",
    "elec_mty1": 12,
    "en_dry1": "true",
    "jv": "1.2.0",
    "led1_lv": 1,
    "led1_pin": 14,
    "led2_lv": 1,
    "led2_pin": 8,
    "led3_lv": 1,
    "led3_pin": 23,
    "led_netn": 1,
    "led_nets": 0,
    "light_mode": 14,
    "module": "CB3S",
    "net_trig": 4,
    "netled1_lv": 1,
    "netled1_pin": 26,
    "percent_ctrl1": 2,
    "remind_t": 200,
    "reset_bt_pin": 23,
    "reset_t": 8,
    "reverse_ctrl1": 8,
    "rl1_lv": 1,
    "rl1_pin": 6,
    "rl3_lv": 1,
    "rl3_pin": 9,
    "stop_bt_en": "true",
    "trav_t_set": 15,
    "travel_calibra1": 3,
    "travel_t1": 10
    }
    }

    the buttons are set up but the logic is still missing
  • #28 21620297
    p.kaczmarek2
    Moderator Smart Home
    So this leaves you with the software.... now you are basically left to search the forum, as users have already published scripts for the roller shutter controller autoexec.bat.

    Here there is a small problem, because I have no way to help with this directly, because I simply don't have such roller shutters - I don't have any electric roller shutters at home, so necessarily I have no way to test this.

    Alternatively, you could still try to do it differently - you would describe to me from the technical side how it would work, and I would make a controller for it for OBK in C language, testing it only in the simulator.... only so slightly worse without a real device to work with.
    Helpful post? Buy me a coffee.
  • #29 21620335
    PSlowik
    Level 12  
    >>21620297 .
    ok great would

    the operation is quite simple:
    after switching on the mains it checks what time it is and if it is between 5 and 7 o'clock it switches on the key light
    on pressing open it switches on the relay and the LED on this key
    the same happens when closing
    if the Open relay is on and the Close key is pressed, the Open relay and LED are automatically switched off and the Close relay and LED are switched on.
    operation of the relays for a set period of time
    during operation the relay switches off after pressing stop

    I think that's roughly it?

Topic summary

The discussion focuses on configuring the CB3S roller shutter controller using OpenBeken firmware without relying on TuyaMCU. The user uploaded OpenBeken to the CB3S device but struggles with GPIO configuration and implementing stop-pause functionality, which was limited in the original Tuya integration in Home Assistant. Initial assumptions about the presence of TuyaMCU were challenged by the absence of heartbeat signals and no response from TuyaMCU commands, suggesting the device likely lacks an external TuyaMCU chip. The user identified GPIO pins controlling relays for opening (P6) and closing (P9), buttons for open (P24), close (P7), and stop (P8), as well as LEDs indicating status (P14, P23, P26). The dpID values from the Tuya platform are relevant for Tuya communication but do not confirm TuyaMCU hardware presence. GPIODoctor was recommended to map GPIO roles since device logic must be implemented manually in OpenBeken. The user’s current configuration allows basic open/close relay control and LED indication but lacks timed relay deactivation and stop functionality. The desired operation includes mutual exclusion of open/close relays, timed relay activation, and a stop function triggered by a button press. The discussion also highlights the need for custom logic development in OpenBeken, as no ready-made scripts for this roller shutter controller are available, and testing is limited without physical access to the device.
Summary generated by the language model.
ADVERTISEMENT