Here I will show you how you can script the behaviour of TuyaMCU BK7231N relay flashed with OpenBeken firmware. In this topic I will cover a creation of scripts, mapping TuyaMCU variables to OpenBeken channels, displaying them, creation of custom HTTP buttons and setup of a custom OBK script timer.
This topic will not cover the automatic temperature/heating control itself, because I am planning to show it in the separate part.
Requirements
This topic assumes that you already have device flashed with OpenBeken:
https://github.com/openshwprojects/OpenBK7231T_App
You can find more about flashing such devices on our Youtube channel:
https://www.youtube.com/@elektrodacom
Or on our Elektroda teardowns list:
https://openbekeniot.github.io/webapp/devicesList.html
Futhermore, I already assume that you know the dpIDs used by your device. You can use our TuyaMCUAnalyzer for that:
https://github.com/openshwprojects/TuyaMCUAnalyzer
See related topic:
https://www.elektroda.com/rtvforum/topic3970199.html#20528459
Used device
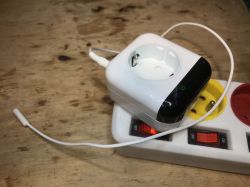
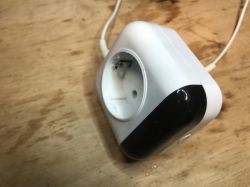
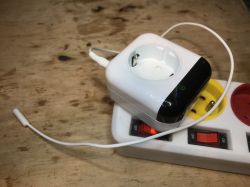
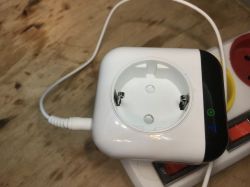
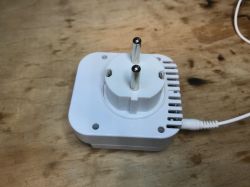
For this topic I used a TuyaMCU BK7231N thermostat (relay+external temperature probe) device, but in this case I will focus mostly on the relay control:
Basic TuyaMCU setup
The setup of TuyaMCU itself is not the main point of this topic, as we have already covered it in the other threads, for example:
https://www.elektroda.com/rtvforum/topic3898502.html
but I will still write a few words about it here.
TuyaMCU is using (already mentioned) dpIDs, which are the identifactors of the variables. Those variables also have their types, like integer, enum, or a boolean. In order to use TuyaMCU, you need to guess the meanings of the dpIDs.
I am usually doing the UART capture of TuyaMCU communication between the MCU and the WiFI module with Tuya firmware. I am just changing the things in Tuya App and observing what kind of data is sent.
For this device, we basically need two dpIDs:
- relay control (boolean, 1 or 0), which can be send from MCU to WiFI module when user presses a button on case, or which can be send from WiFi module to the MCU when you want to toggle relay from the app
- the temperature measurement, which is always send from MCU to WiFI module
So, let's setup this in OBK. Create autoexec.bat in LittleFS:
// start TuyaMCU driver
startDriver TuyaMCU
// set TuyaMCU baud rate
tuyaMcu_setBaudRate 115200
// set TuyaMCU default wifi state 0x04, which means "paired",
// because some TuyaMCU MCUs will not report all data
// unless they think they are connected to cloud
tuyaMcu_defWiFiState 4
// set channel 1 to display toggle
setChannelType 1 Toggle
// Map given dpID to channel 1, dpID type bool
// linkTuyaMCUOutputToChannel [dpId][varType][channelID]
linkTuyaMCUOutputToChannel 1 bool 1
// channel 2 will be temperature
setChannelType 2 temperature
// Map given dpID to channel 2, dpID type value
linkTuyaMCUOutputToChannel 24 val 2
Save and reboot, you will get the following controls:

But that's just the beginning...
For convencience, we can also start NTP (time from web) and SSDP (make device discoverable on local network) drivers:
startDriver NTP
startDriver SSDP
One important thing to note - this TuyaMCU has more dpIDs which are not covered in this topic. It is possible to use those dpIDs to setup a thermostat behaviour on the MCU itself (without OpenBK scripting), but I will cover it another time.
Extending the script
Let's say that we want to have ability to enable the relay for a given amount of time. After that time passes, the relay goes back to the previous (open) state.
We can do that entirely in script. We basically need to:
- choose arbitrary obk channel as a time variable
- create a timer (we'll do that in a loop) that will turn off relay after given time
- create http buttons for predefined time spans
- create a field where user can enter a time of his choice
- display the remaining time on http page
- do some miscellaneous stuff like resetting timer when user forces the relay to be off
Here is the full code - see comments for details.
// setup cosmetics for channel 10, channel labels can have HTML codes
setChannelLabel 10  "<b><span style='color:orange'\>Time left</span></b>"
// set channel 10 to display formatted time
setChannelType 10 TimerSeconds

// create command aliases for enable + setup delay (in channel 10) sequences
alias enable_30min backlog POWER ON; setChannel 10 30*60
alias enable_30sec backlog POWER ON; setChannel 10 30

// set channel 11 label, channel 11 will allow to enter hours value of new timespan
setChannelLabel 11  "<b><span style='color:orange'\>Custom time setting [hours]</span></b>"
setChannelType 11 TextField

// start driver handling extra buttons on http page
startDriver httpButtons
// button 0 - set enable to 1
setButtonEnabled 0 1
// set button 0 label
setButtonLabel 0 "Enable for 30 minutes"
// set button 0 command (see alias created above)
setButtonCommand 0 "enable_30min"
// set button 0 color (CSS color code)
setButtonColor 0 "green"

// when anything sets relay to off, also clear timer
addChangeHandler Channel1 == 0 setChannel 10 0
// if user manually sets channel 1 with no timer, then set default time - you can change 1234 to any value in seconds
addChangeHandler Channel1 == 1  if $CH10==0 then "setChannel 10 1234"

// just like for button 0, also setup button 1
setButtonEnabled 1 1
setButtonLabel 1"Enable for 60 minutes"
setButtonCommand 1 "enable_60min"
setButtonColor 1 "green"

// just like for button 0, also setup button 2
startDriver httpButtons
setButtonEnabled 2 1
setButtonLabel 2 "Enable for 30 sec"
setButtonCommand 2 "enable_30sec"
setButtonColor 2 "green"


// every 10 seconds, request update from TuyaMCU
addRepeatingEvent 10 -1 tuyaMcu_sendQueryState

// now this part runs in a loop
again:
// wait one secnd
delay_s 1
// if channel sued for timer has reached 0, time off
if $CH10<=0 then POWER OFF

// subtract one from time, clamp at 0 and 99999
addChannel 10 -1 0 999999

// continue the loop forever
goto again
Here is how it looks on OBK page:
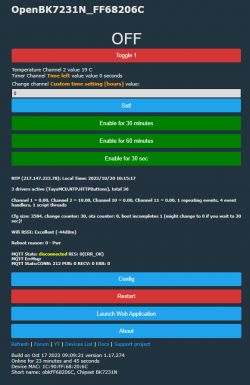
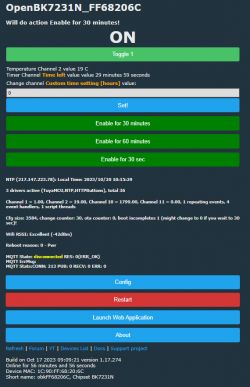
Each button is fully functional. The timer is automatically refreshed and formatted. The custom delay also works, it can be set either via OBK page or via Home Assistant. The countdown timer can be also accessed in Home Assistant if you write custom yaml to listen to countdown variable channel.
Linking device with HA
The basic functionality of this device can be added to HA via Home Assistant Discovery in OBK:
https://www.youtube.com/watch?v=pkcspey25V4&ab_channel=Elektrodacom
The custom functions can be exposed via custom yaml. See our MQTT commands/channel access docs:
https://github.com/openshwprojects/OpenBK7231T_App/blob/main/docs/mqttTopics.md
Linking device with HTTP
You can also report data directly to HTTP server via GET or POST. Everything was covered in the linked topic:
https://www.elektroda.com/rtvforum/topic4007790.html
Linking the behaviour of the relay to the temperature
I am planning to release a separate guide on this topic, but basically, in OpenBeken you can either:
- check the temperature in the loop and act according to that, possibly with a delay
- use change handler to detect when a temperature changes over a certain threshold and then change the relay state:
addChangeHandler Channel0 < 50 echo value is low
I am also planning to make a C driver for a thermostat, but that's a plan for the future.
Linking the behaviour of the relay to the current time
It is also possible to relate relay behaviour to the current time we've got from NTP. There are two ways to do that:
- use addClockEvent:

This can be used to run any script at given time of given day of week.
- use $hour or $minute variable and check its value with if conditional expression
See more:
https://github.com/openshwprojects/OpenBK7231T_App/blob/main/docs/commands.md
https://github.com/openshwprojects/OpenBK7231T_App/blob/main/docs/README.md
https://github.com/openshwprojects/OpenBK7231T_App/blob/main/docs/constants.md
You can also see more autoexec.bat examples at:
https://github.com/openshwprojects/OpenBK7231T_App/blob/main/docs/autoexecExamples.md
Summary
So now you have learned how to configure a TuyaMCU relay in OpenBeken. The same logic can apply to a normal relay, where you just need to set the channel of relay pin to the same channel you have in the script. Everything else will work the same.
Keep in mind that the same could be done in Home Assistant, but with OBK scripting, no Home Assistant is needed. This might give you an advantage when, for example, you don't want to setup HA for a single automation.
That's all for now, thank you for reading. In the next part I will show how to setup a thermostat. Stay tuned.
Cool? Ranking DIY Helpful post? Buy me a coffee.


