logo elektroda
logo elektroda
X
logo elektroda

[RTL8710CF] How to Reflash Firmware on Kasa KP400 WiFi Exterior Smart Plug (US)

Jerther 366 5
ADVERTISEMENT
  • #1 21687589
    Jerther
    Level 4  
    Hi!!

    Here's another guide for a Kasa device!

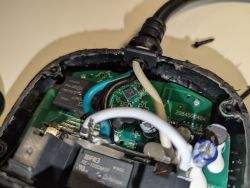
    You will need to crack the device open with some cutting tools and say goodbye to its IP64 rating... Be Careful; I knocked off a small cap and I had to replace it. 2.2 µF 400 V is not exactly common.

    The process is the same as in Kasa's other devices, for example: https://www.elektroda.com/rtvforum/topic4098414.html

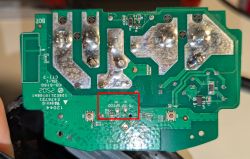
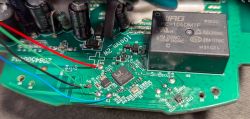
    The pads are clearly labeled on the PCB.

    The screws need a small torx bit. Not sure of the size. I think it is T8.
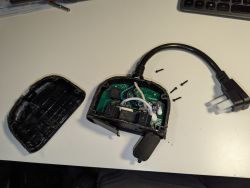

    Disassembled electronic device with power cord and visible circuit board

    Interior of dismantled electronic device with visible PCB and wires

    Close-up of PCB with thick copper traces and a highlighted SMD chip section.

    Close-up of a circuit board with relay, capacitors, and colored wires.

    and here's a basic template I came up with:

    
    {
      "vendor": "Kasa",
      "bDetailed": "0",
      "name": "Kasa KP400 WiFi Exterior Smart Plug (US)",
      "model": "KP400",
      "chip": "RTL87X0C",
      "board": "TODO",
      "flags": "1024",
      "keywords": [
        "TODO",
        "TODO",
        "TODO"
      ],
      "pins": {
        "2": "LED_n;2",
        "3": "WifiLED;0",
        "7": "Rel;2",
        "8": "Rel;1",
        "9": "WifiLED;0",
        "10": "LED_n;1",
        "11": "Btn;2",
        "12": "Btn;1"
      },
      "command": "setButtonTimes 50 1 5",
      "image": "https://obrazki.elektroda.pl/2201733400_1757640007.jpg",
      "wiki": "https://www.elektroda.com/rtvforum/viewtopic.php?p=21687589"
    }
    
  • ADVERTISEMENT
  • #2 21687649
    divadiow
    Level 36  
    nice.

    here is boot log from backup you sent (with obvious differences it not being real device) plus a device joining the TP-Link AP it broadcasts
    Code: Text
    Log in, to see the code
  • ADVERTISEMENT
  • #3 21688039
    Jerther
    Level 4  
    I suspect there's a power meter in there but there's no mention of it in the device documentation (although there's not much in there anyway)...

    I'm not sure how to verify that. I'll have a look at the other chips on the board.
  • ADVERTISEMENT
  • ADVERTISEMENT
  • #5 21688968
    Jerther
    Level 4  
    BP2525: step-down constant voltage driver chip. It's located just under the power supply section so I guess it makes sense.
    SP5: this should actually be a SSM6J505NU, which is a Silicon P-Channel MOS (MOSFET). I believe it drives the WiFi antenna.

    Welp, no power meter related stuff that I can tell. Bummer ;)
  • #6 21695111
    Jerther
    Level 4  
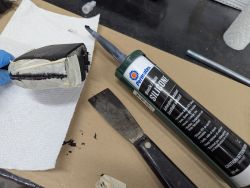
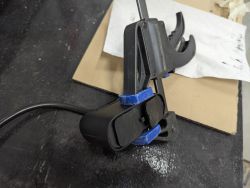
    Some pictures of how I did the reassembly. In an attempt to recover SOME of the waterproof quality, I sealed the case back with some Permatex Black Silicone adhesive sealant I had left from another project.

    I used masking tape because that silicone stuff is really messy. I removed the tape while the sealant was still wet, and I used a clamp to make sure the front was tight.

    Permatex black silicone and hand tools next to taped object being sealed

    Camera secured to table with a woodworking clamp
ADVERTISEMENT