Hello my dear readers. I was gone for a while, because there was a lot of work and some holidays on the way, and some spring sickness spread me.
Anyway, I'm here again

.
Today I will review a very simple function generator from our slant-eyed friends. The generator is based on the popular XR2206 chip.

For the amount of about seventeen Polish zlotys, we can buy mini generators on Aliexpress, offering us sinusoidal, triangular and rectangular waveforms in the range from 1Hz to 1MHz. With friends you have to pay for it around PLN 17, in Poland up to PLN 90 plus shipping.
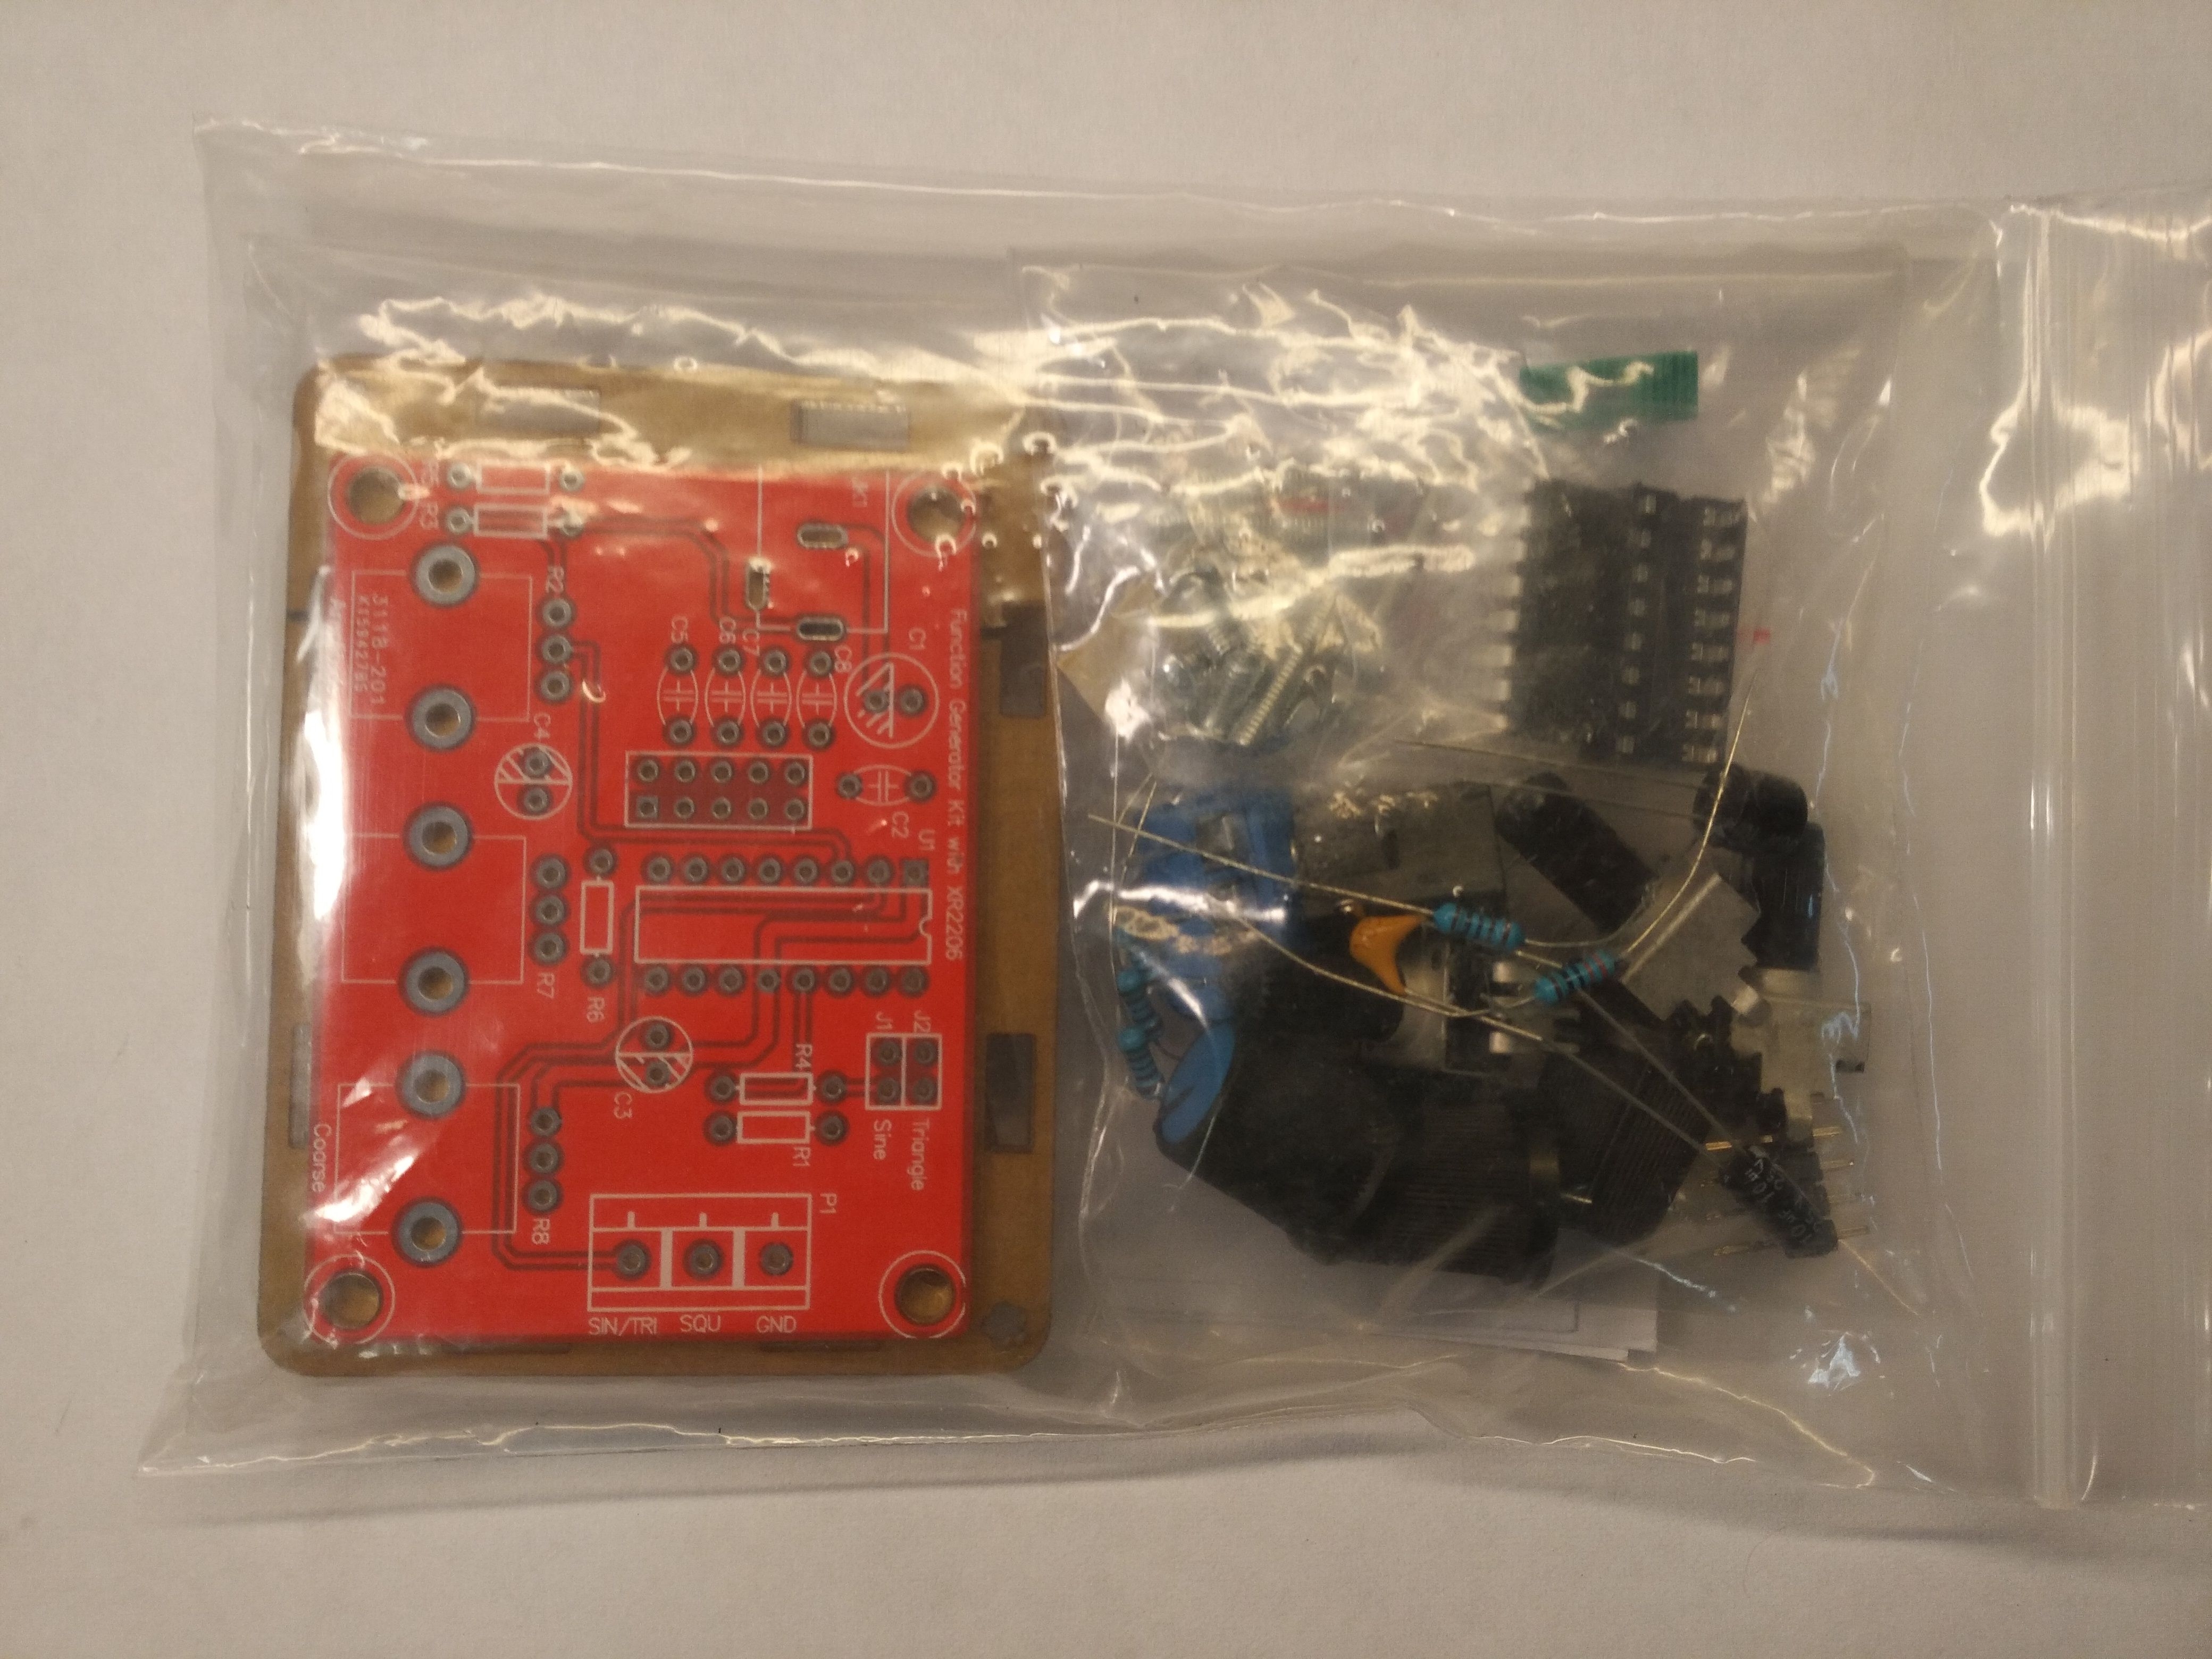
Let's start with the presentation of the contents of the shipment.
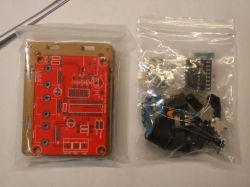

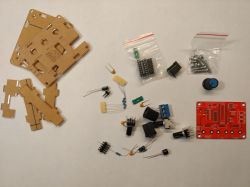
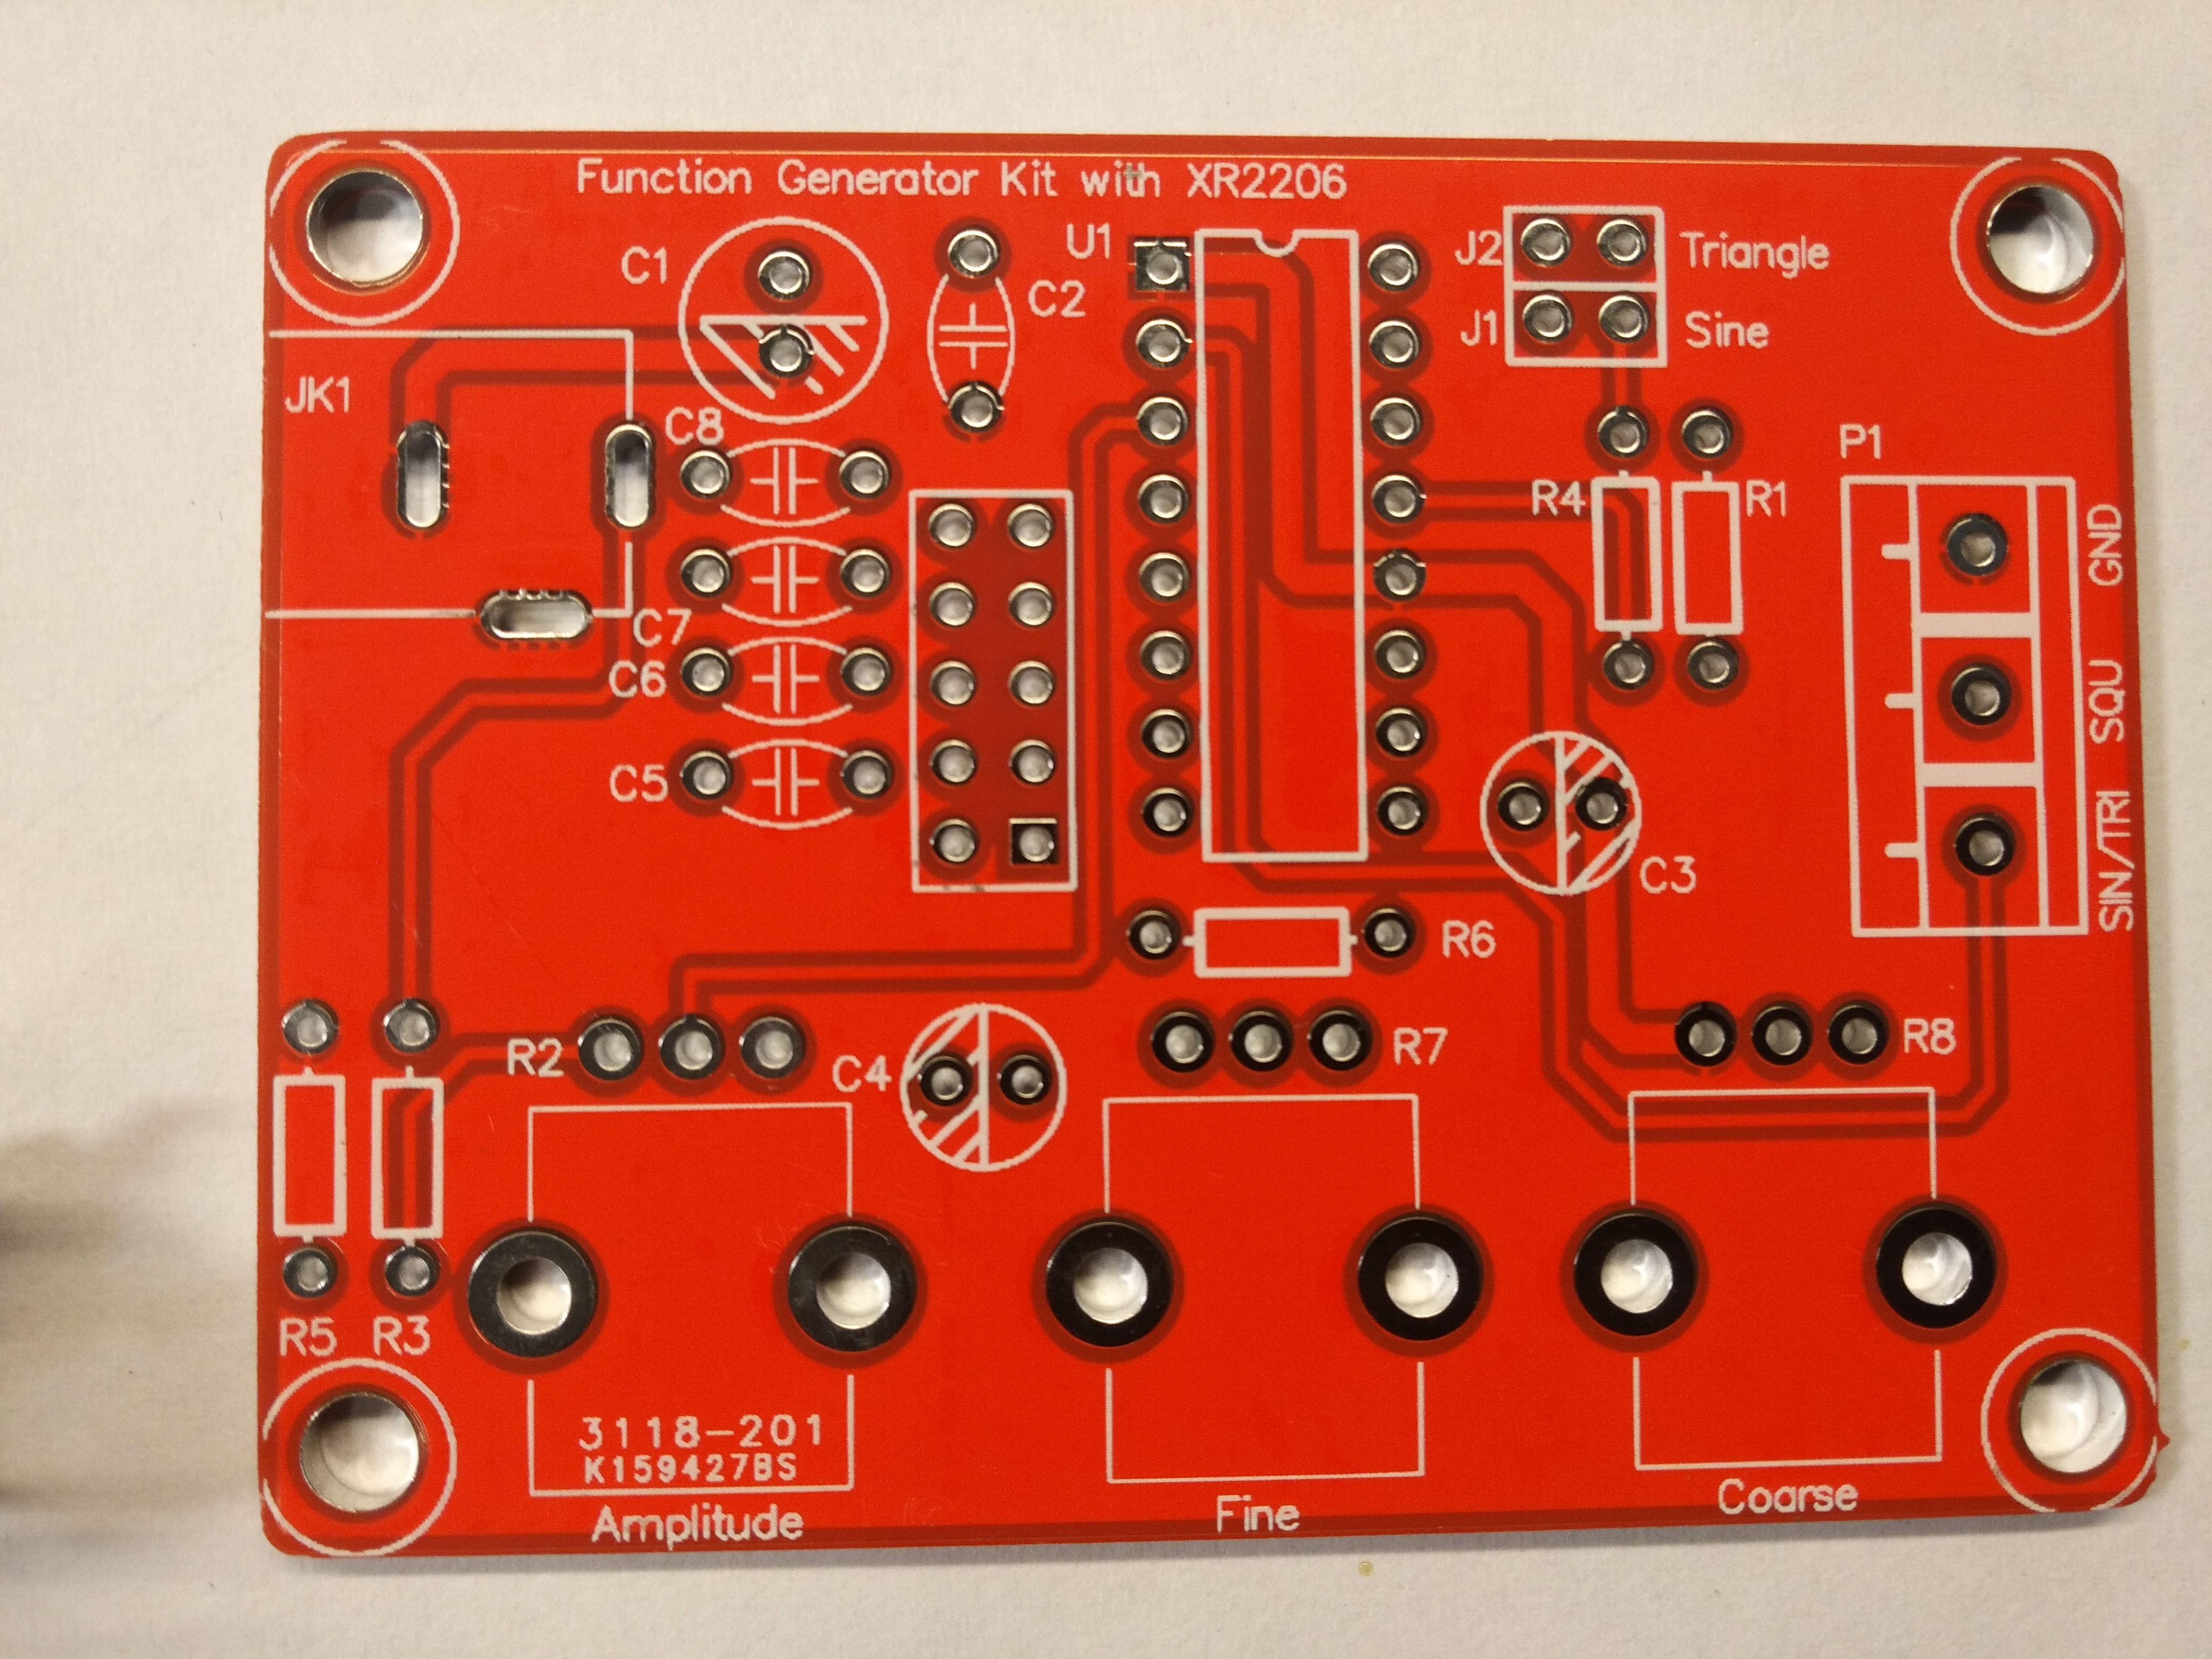
As you can see in the pictures, we get a kit for our own assembly, i.e. the so-called KIT.
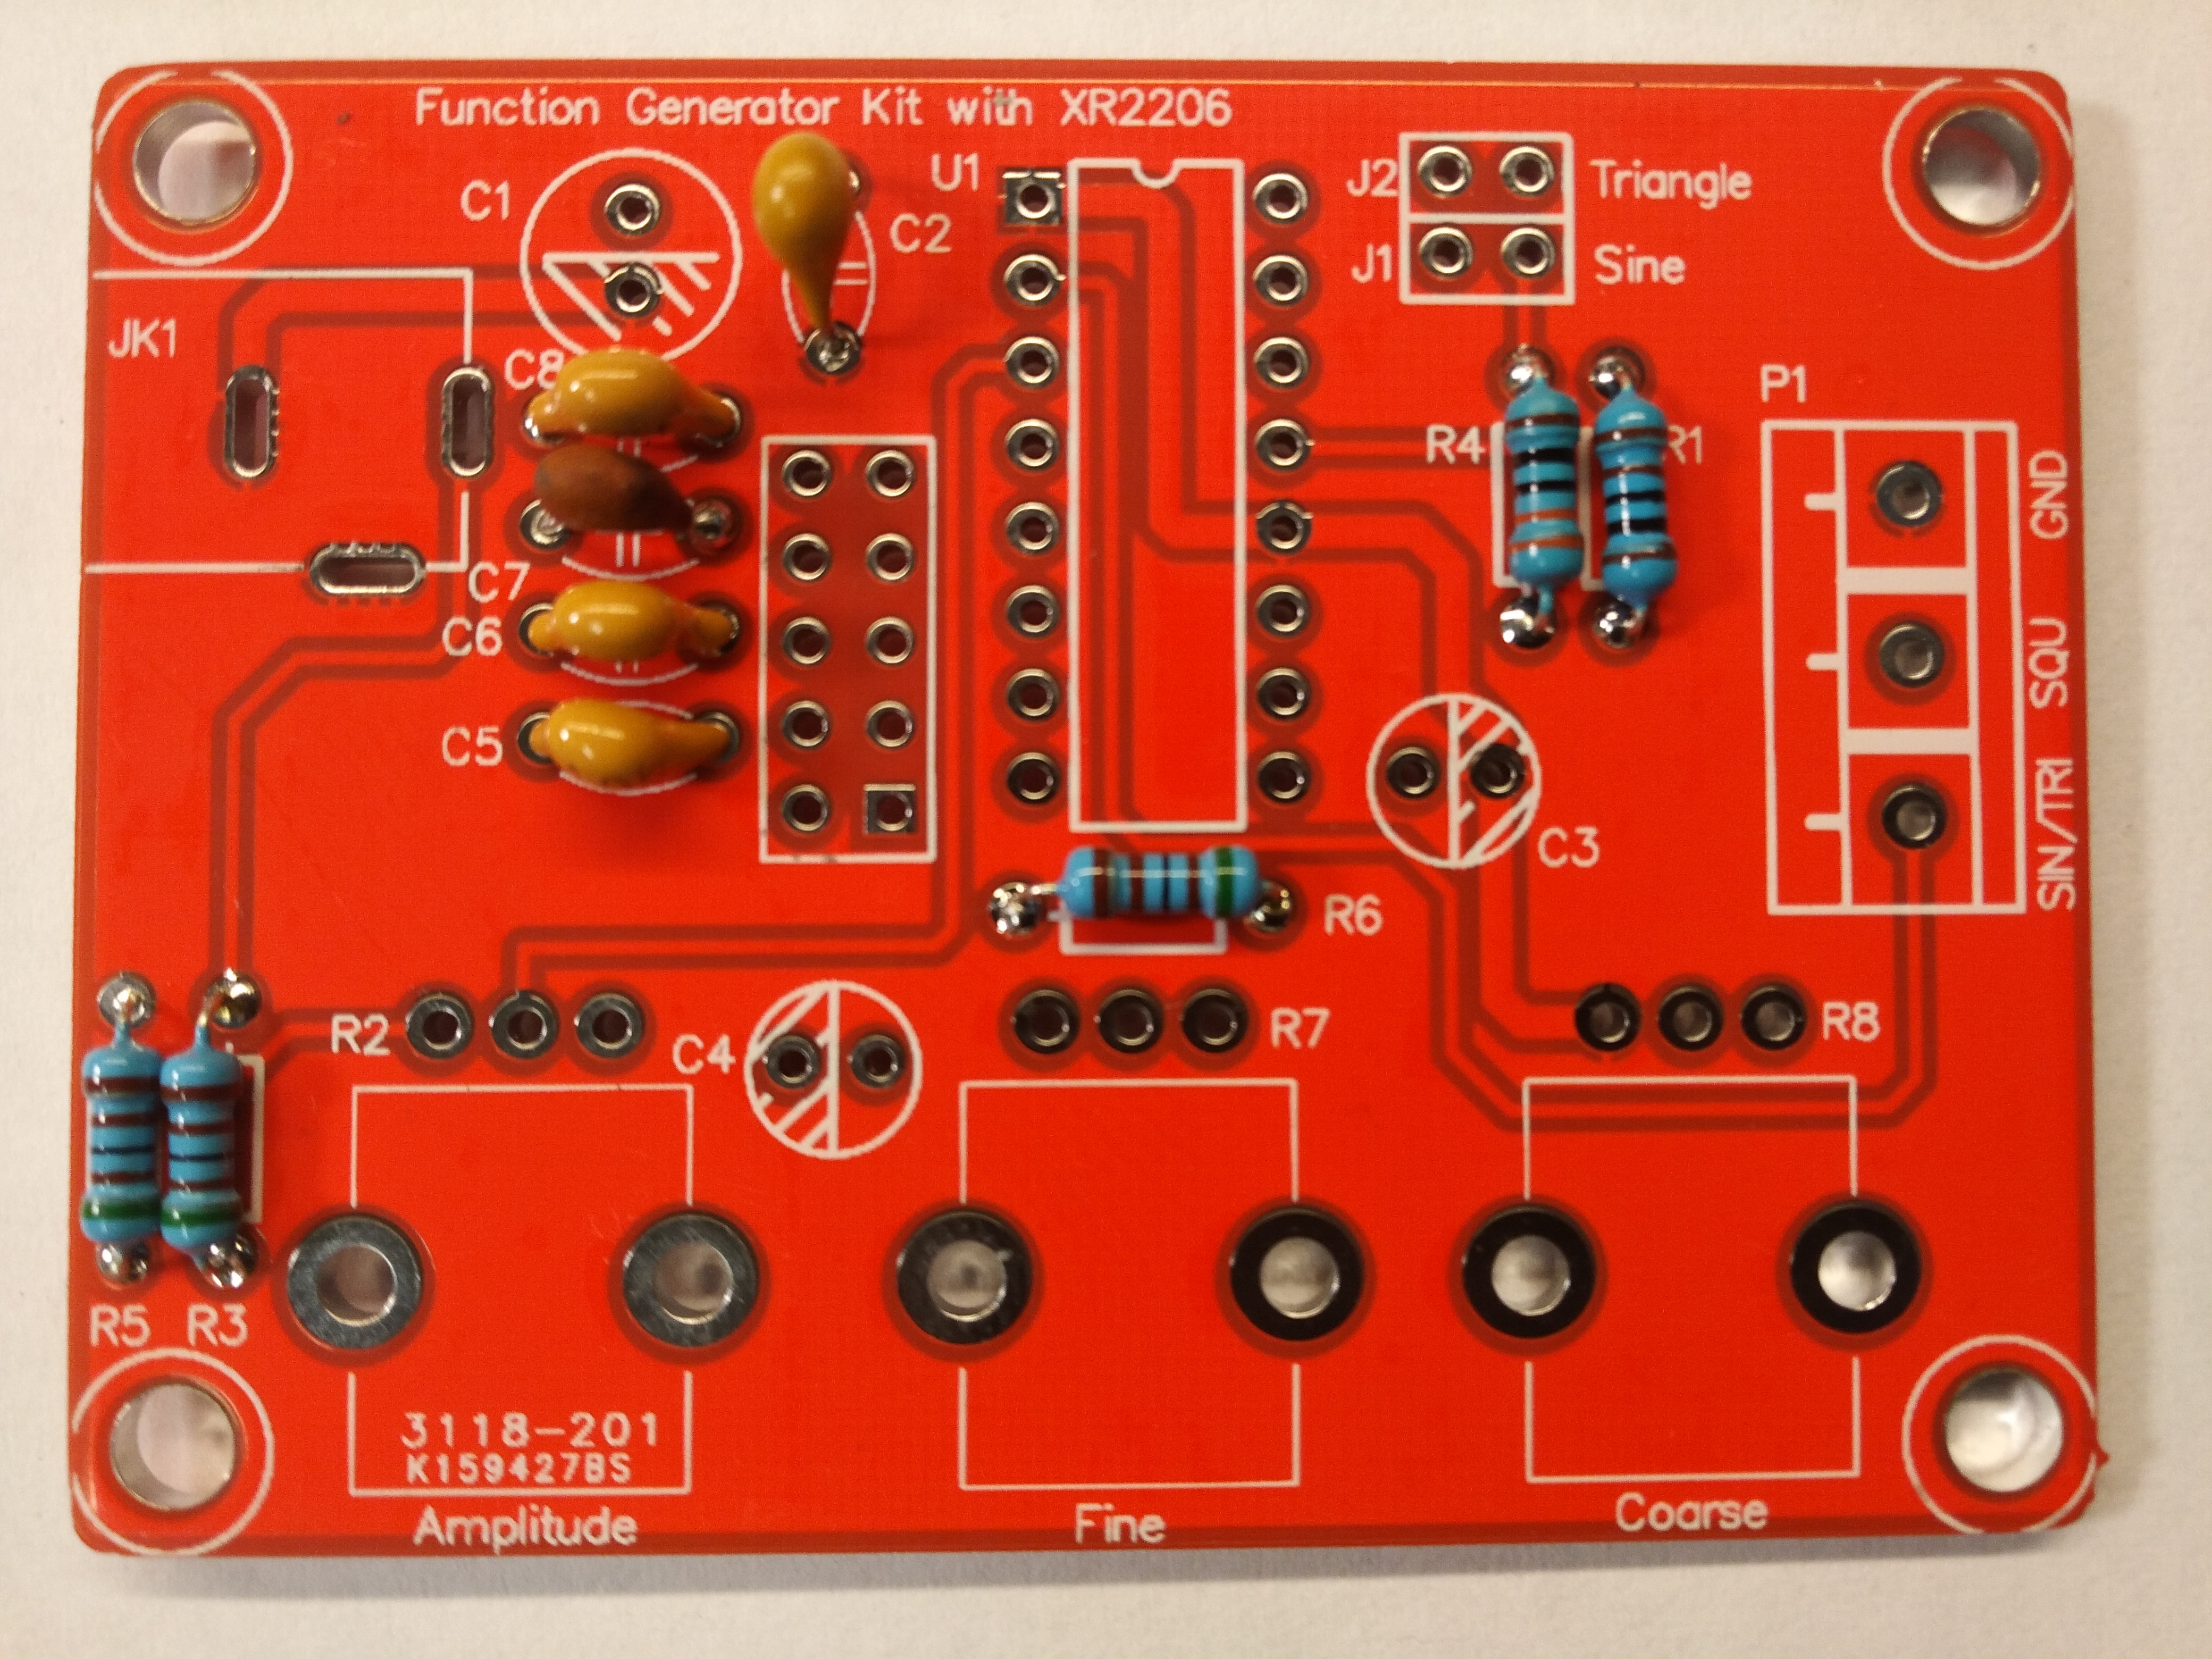
As usual in such cases, we start with soldering the "lowest" elements.
What wnikliwsi of you will notice that one condenser is several dozen years older than the rest. Well, the Chinese made a mistake and gave 104 instead of 220, so I had to pick some "from the drawer".

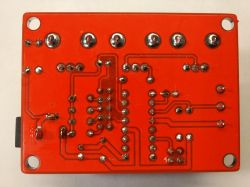
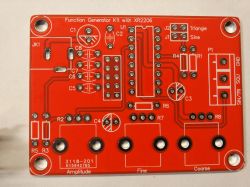
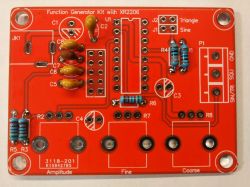
After assembling the tile, it looks like this.
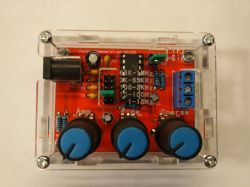
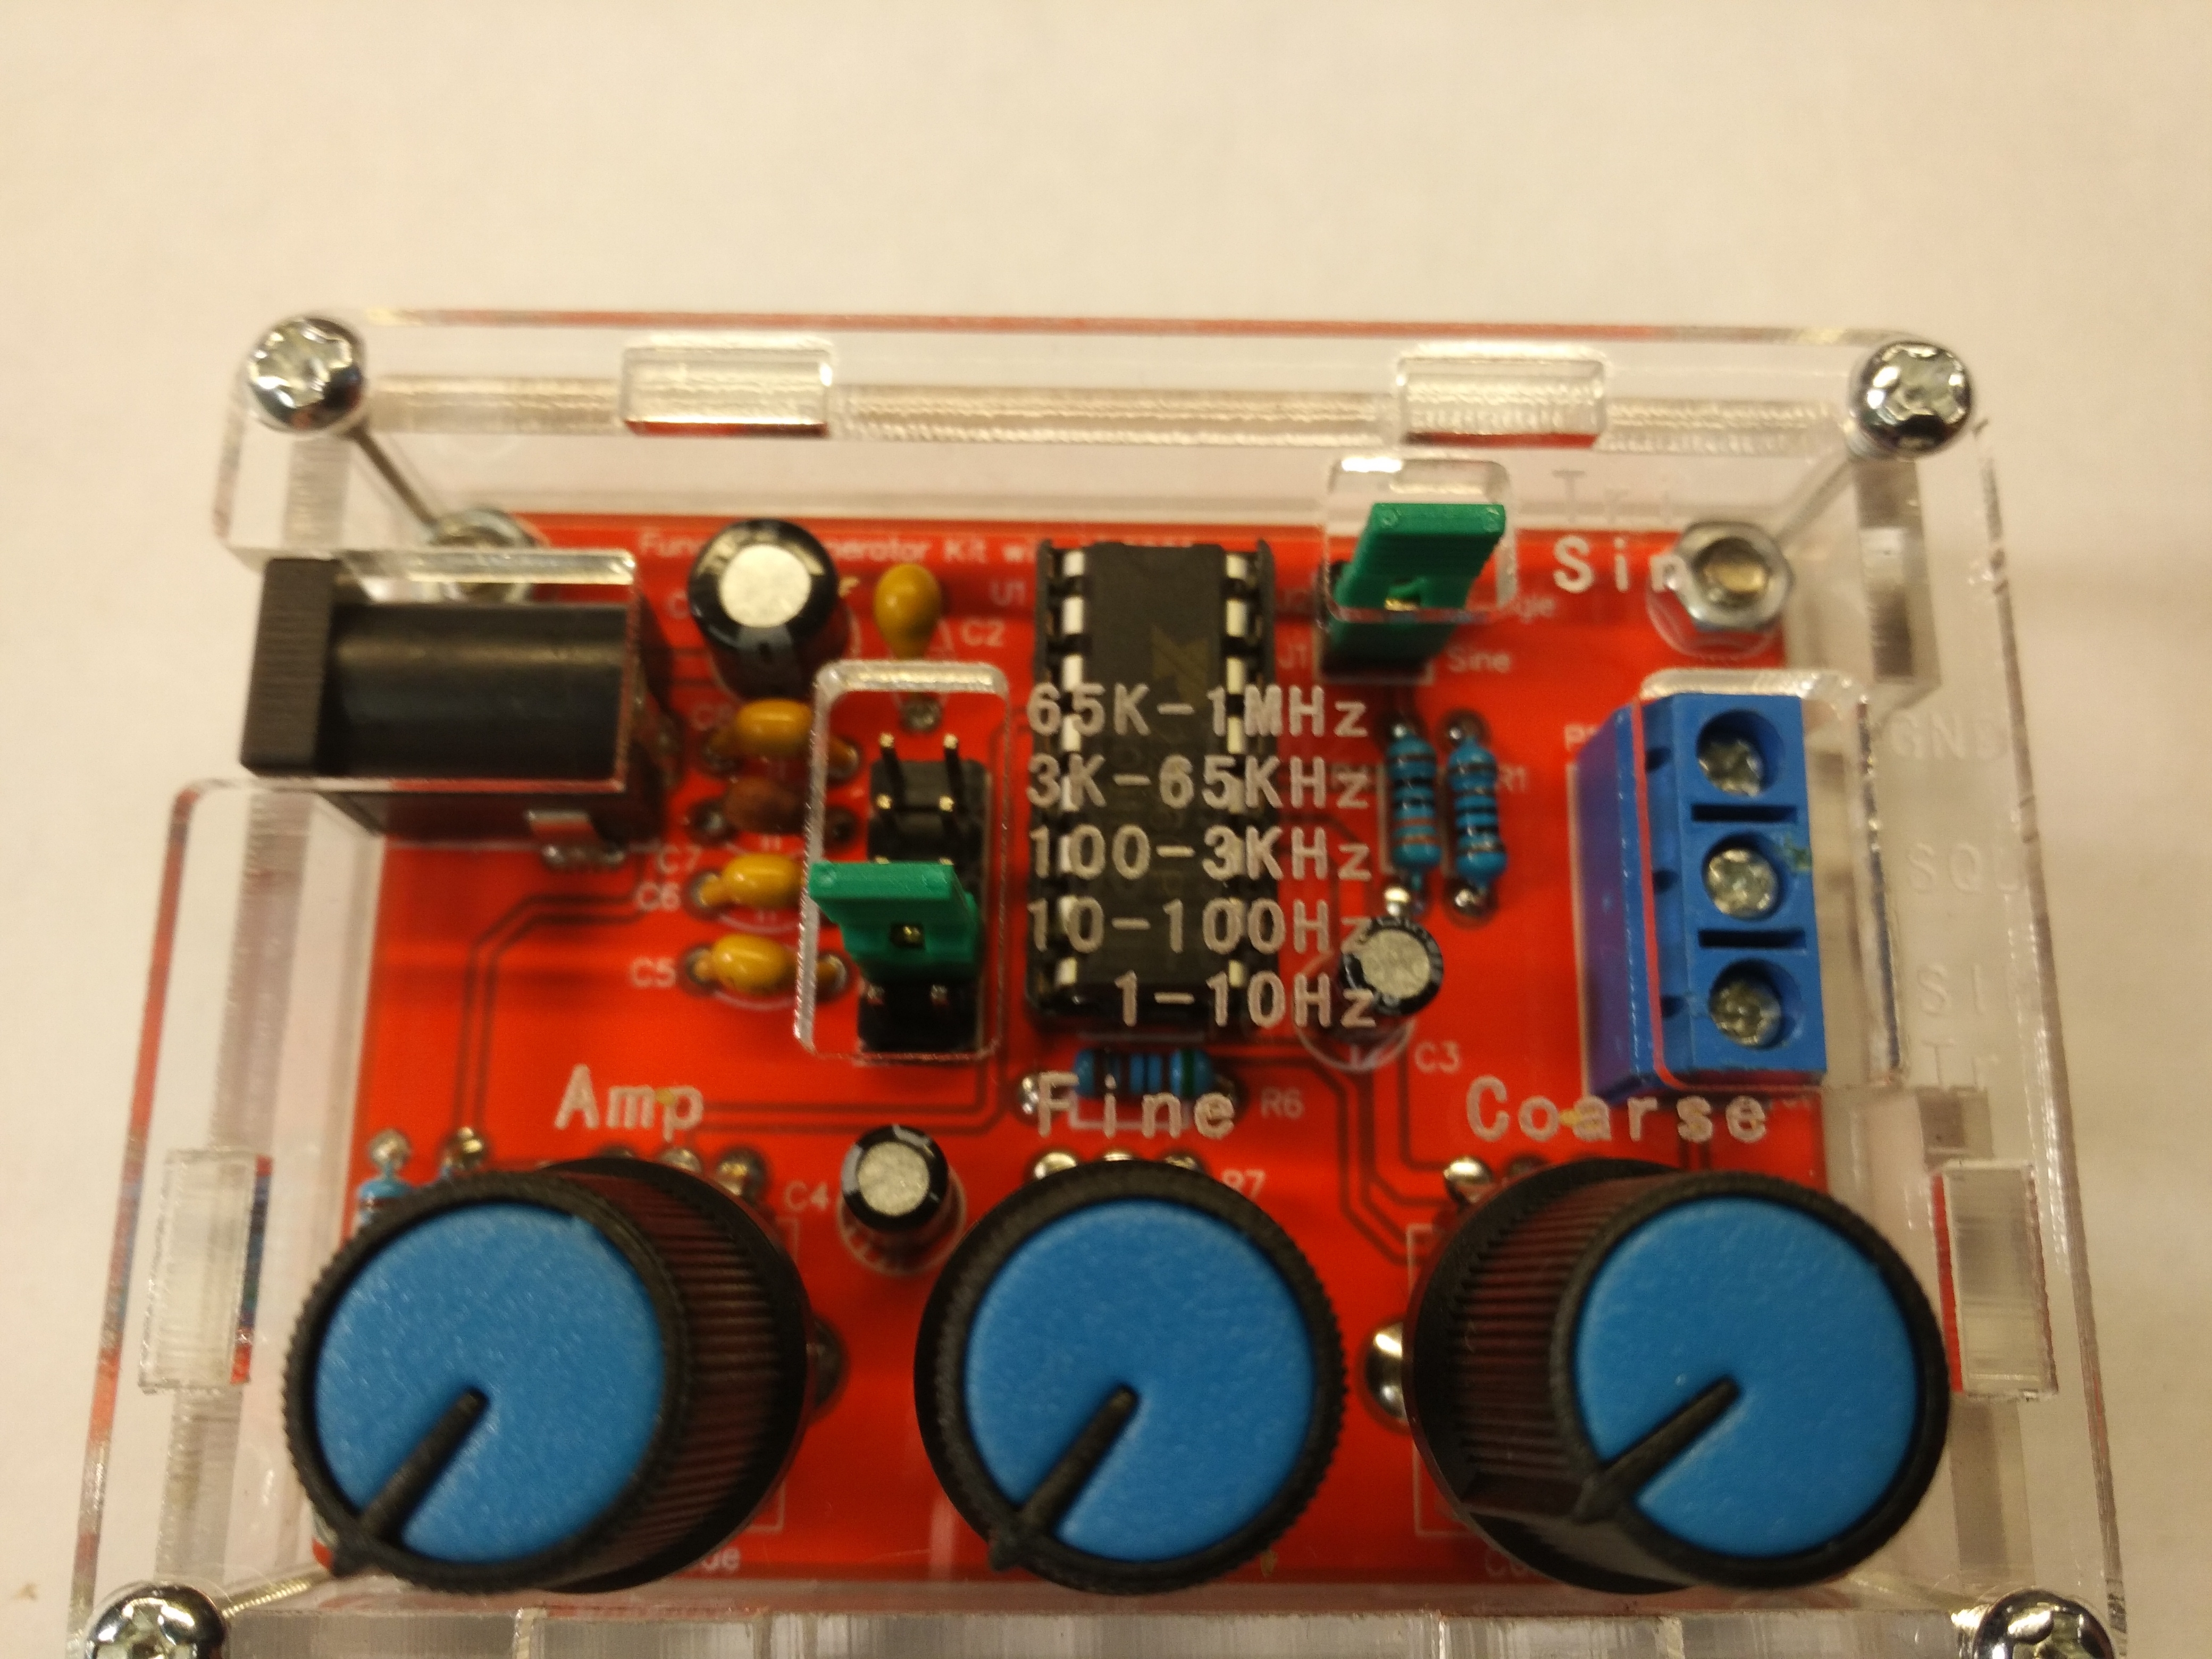
Time for housing. The manufacturer was so kind that when laser cutting the forms, he also decided to engrave descriptions on the front of the panel. It is definitely a plus.
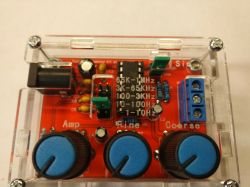
Unfortunately, when assembling the housing, it turned out that the Chinese did not think everything properly. The screws that are included in the kit and are to screw the PCB to the housing, would be perfect in length if we wanted to screw the "bare" PCB. Unfortunately, after soldering the elements, the thickness of the board increases by the thickness of the solder and the cut ends of the leads and it will not be possible to put it together. So you have to keep in mind that we have to get longer M3 screws and some distances between the plate and the bottom part of the housing. I used rubber pads made of a piece of tubing.
Now it's time to mention the technical side of this device.
1. The device is powered by a DC Jack connector. The plug dimensions are 5.5mm x 2.5mm. Standard plus in the center, minus on the housing.
2. The system tolerates the supply voltage in the range of 9VDC - 12VDC.
3. The generator has the following waveforms:
- Sinusoidal (jumper selectable) on the "lower" pin of the ARK connector.
- Triangular (as above, selected with a jumper) on the "lower" pin of the ARK connector.
- Rectangular (permanently given, regardless of the jumper settings), on the middle pin of the ARK connector.
4. We have five compartments (set with a jumper):
- 1 - 10Hz.
- 10 - 100Hz.
- 100Hz - 3kHz.
- 3kHz - 65kHz.
- 65kH - 1MHz.
For all waveform types (at least theoretically).
5. We also have three potentiometers:
- AMP - regulates the signal amplitude in the following ranges:
- for a sine wave: 0-3V / with a supply voltage of 9VDC
- for a triangle wave: 0-3V / at 9VDC supply voltage
- for square wave: 8V - no adjustment possible / with 9VDC supply voltage.
Unfortunately, the regulation works "in the opposite direction". So turned all the way to the right, it is the smallest signal level. Believe me, it can really make life difficult. Already when taking photos for the article, it took its toll.
- Fine - for fine tuning the frequency of the waveform.
- Coarse - for coarse adjustment of waveform frequency.
Fortunately, the latter two regulate in the normal direction.
6. There is also the mentioned three-pin ARK connector with GND, Square and Sinus / Triangle.
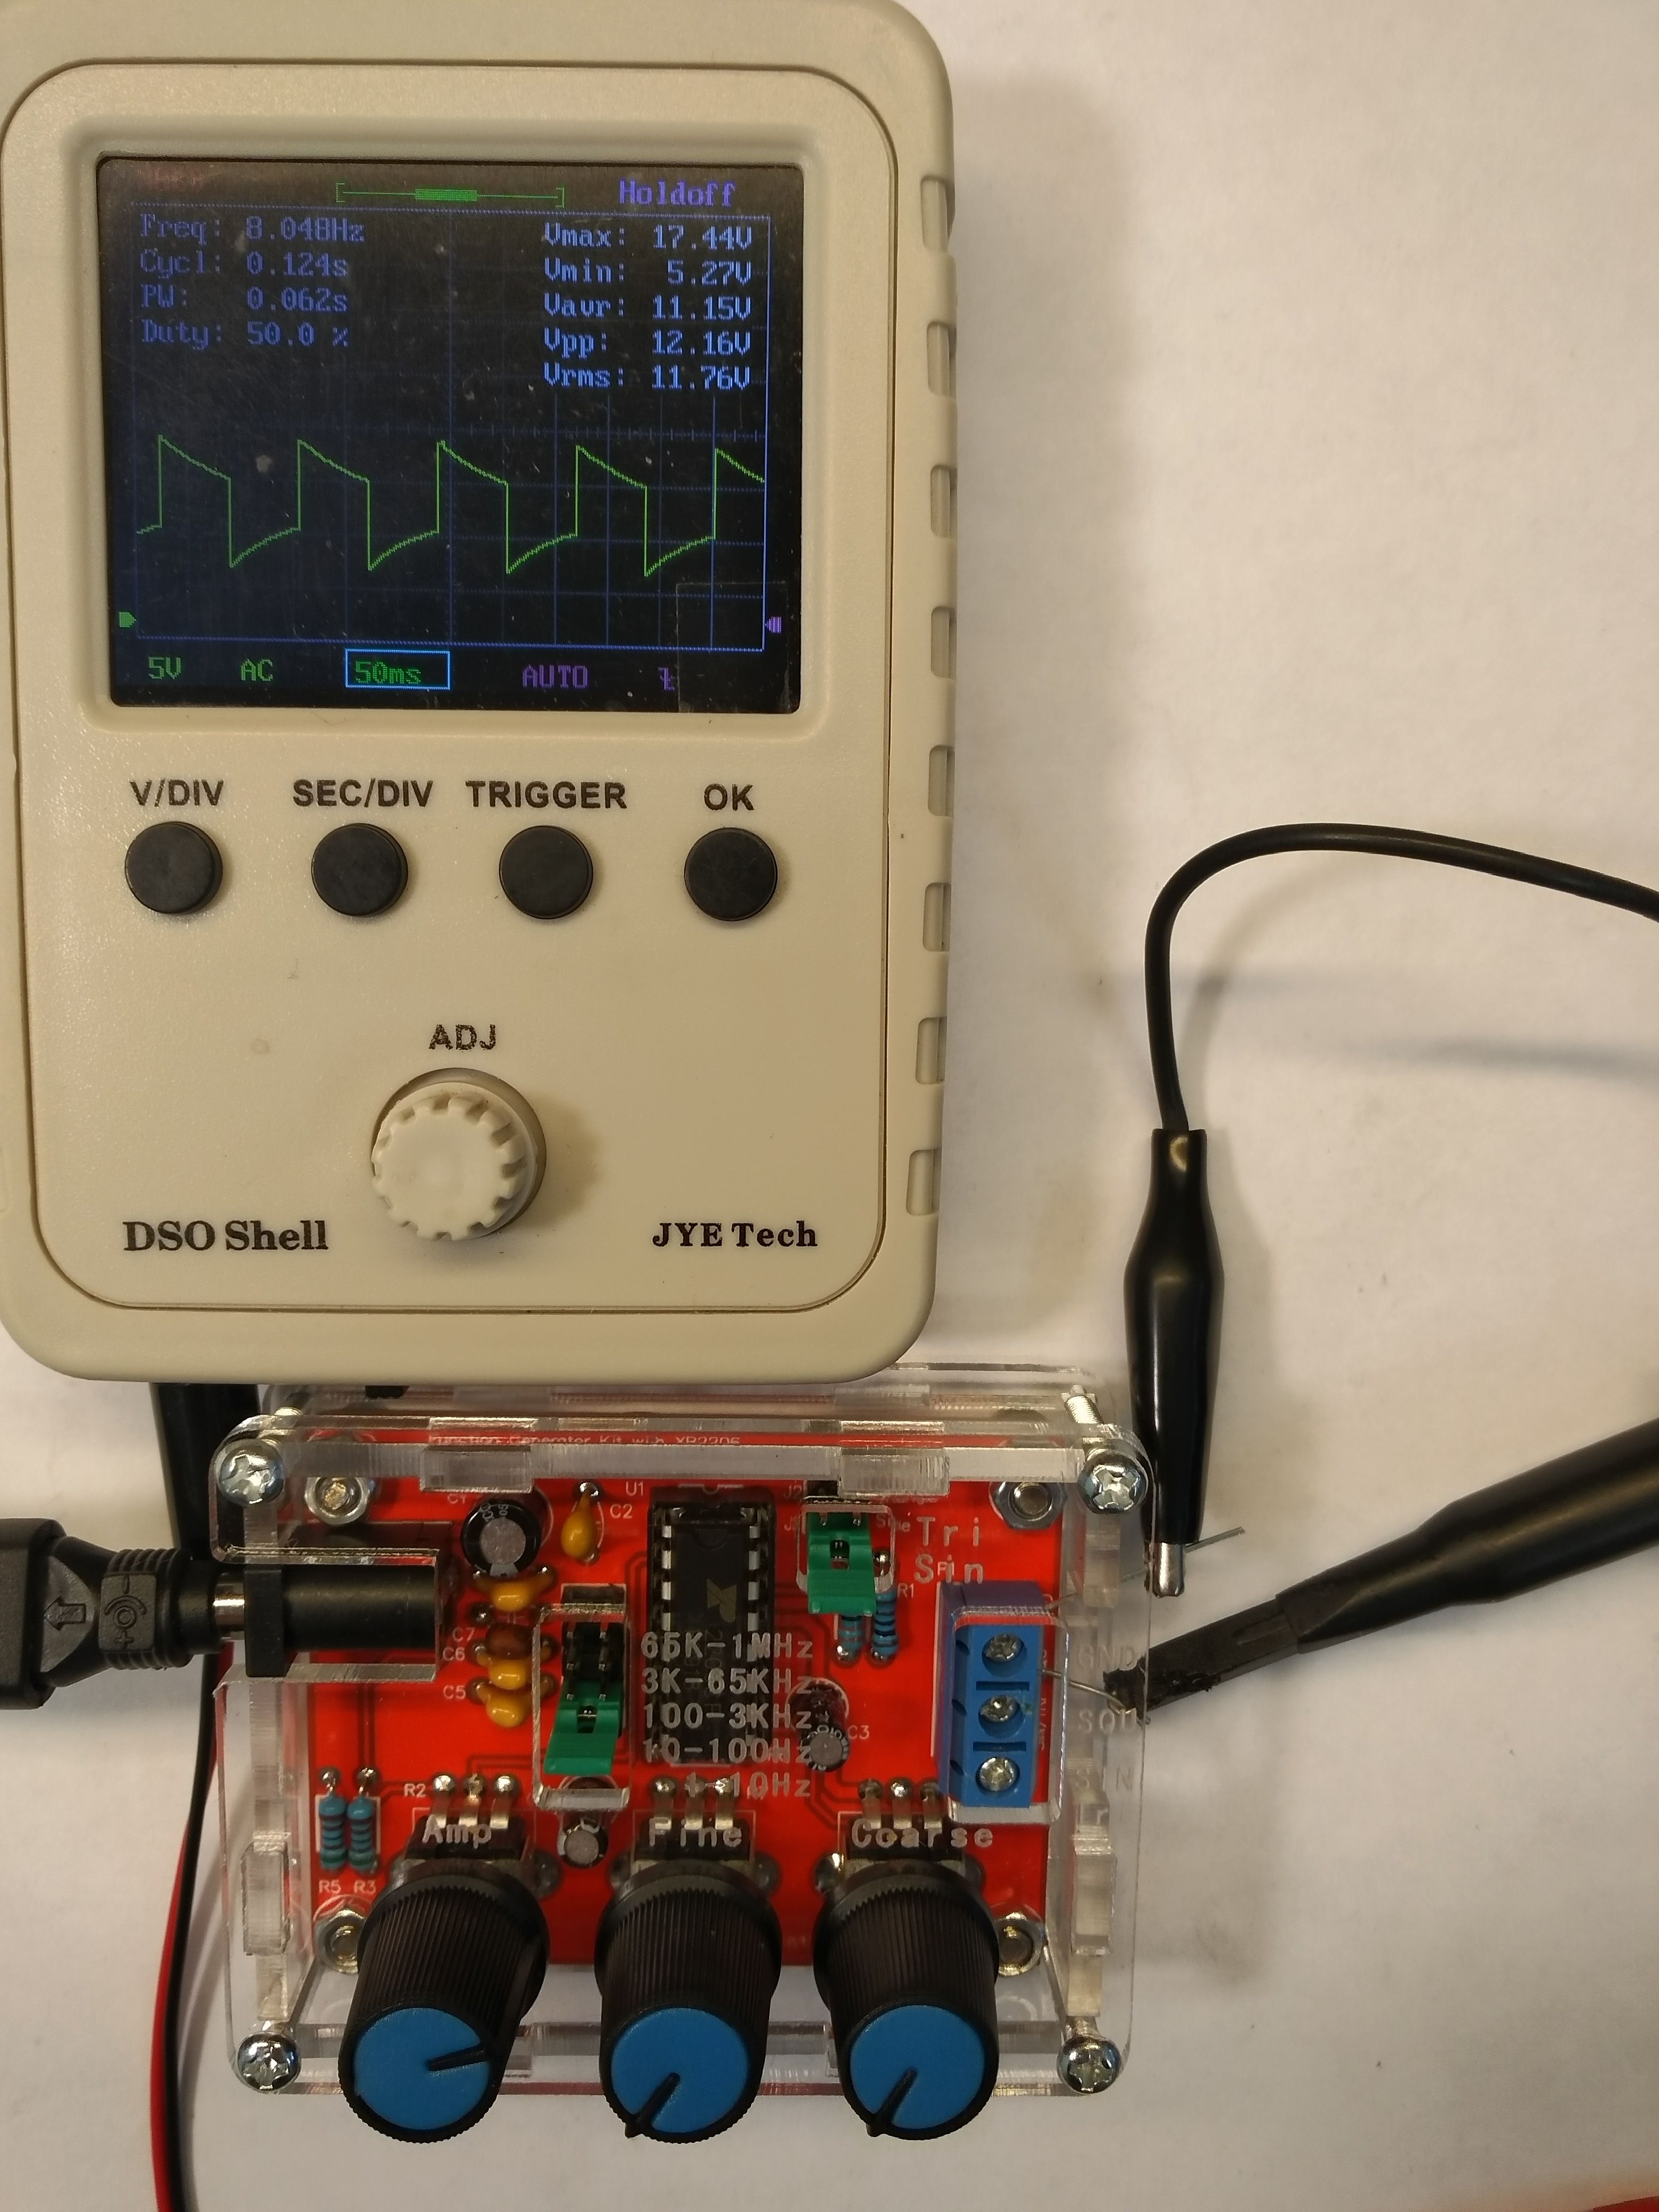
I noticed that the ranges set with the jumper do not exactly match the reality. For example, the maximum frequency in the range up to 10Hz is 20Hz, and in the range up to 100Hz it is 200Hz.
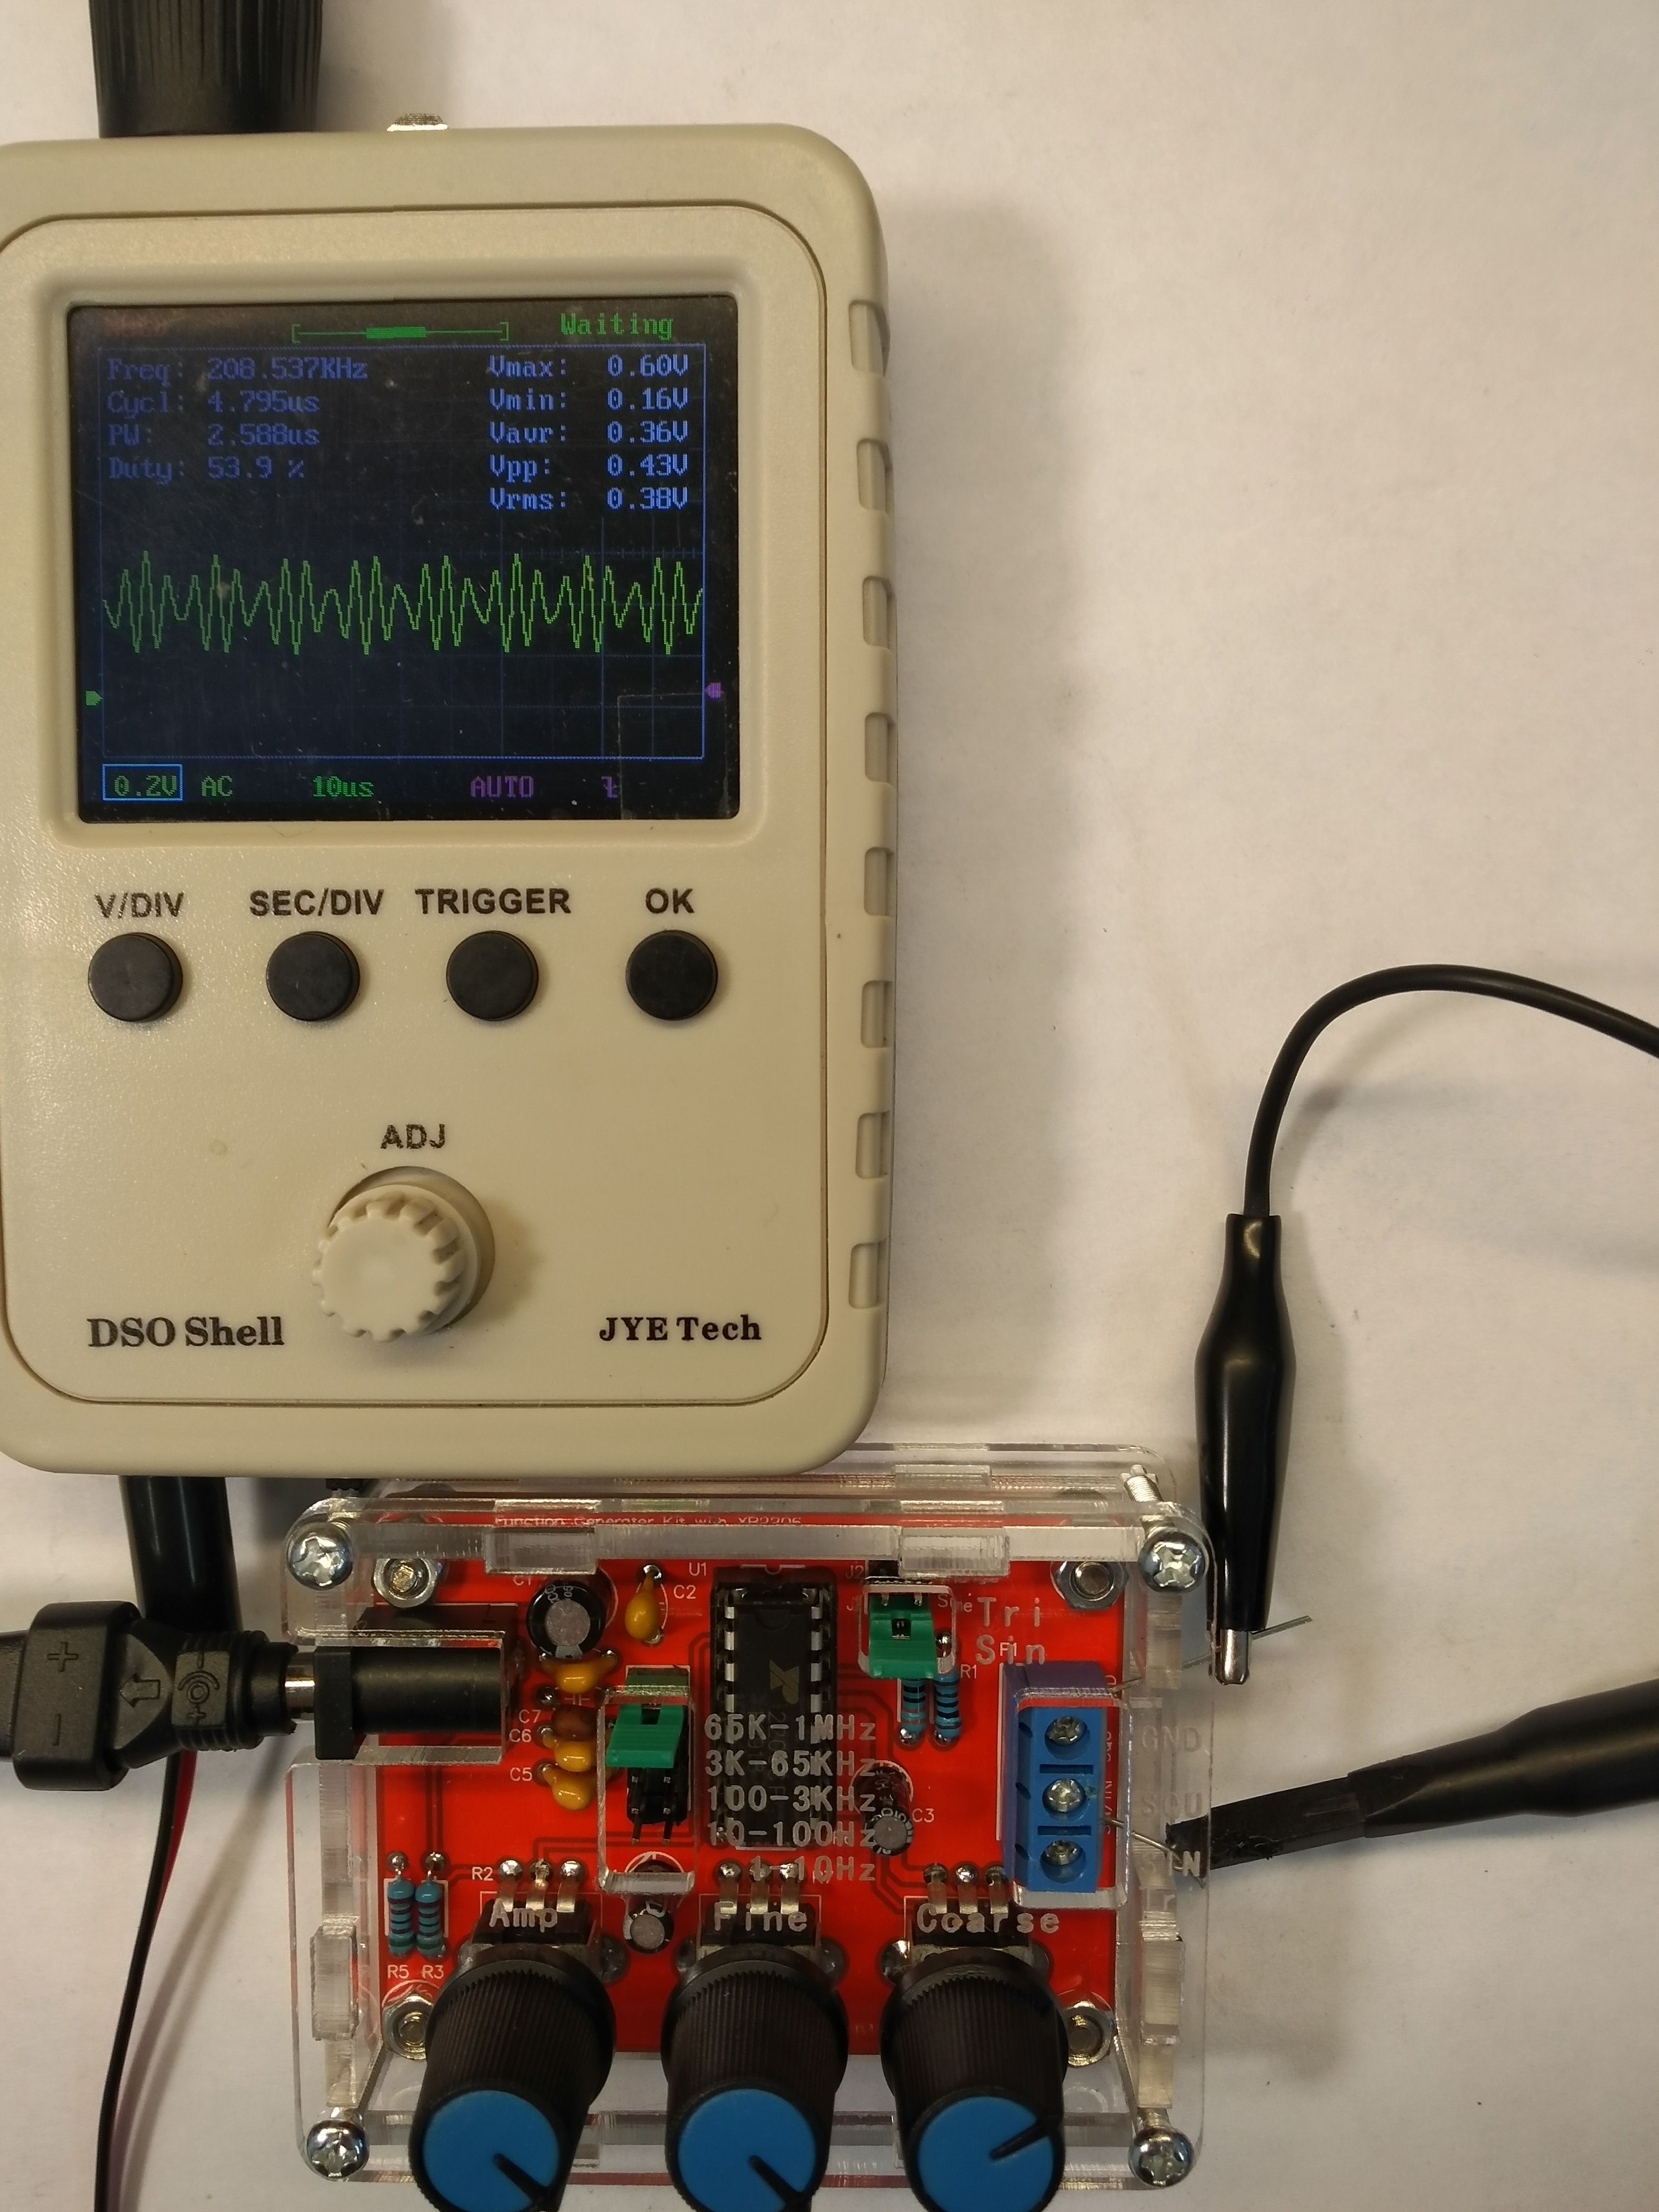
However, I noticed that if in a given range, we exceed the frequency set with the jumper, the waveform can change drastically. Although it does not have to be, it depends on the frequency. The photos will probably tell the most.
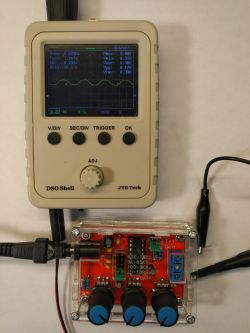
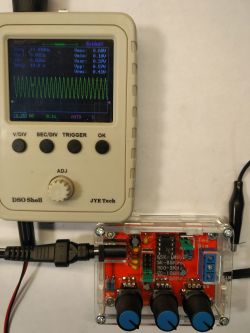
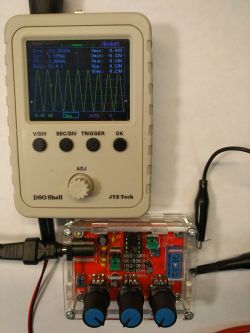
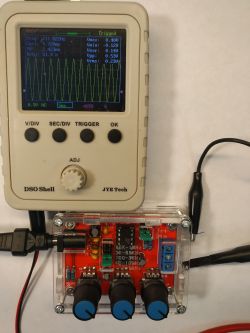
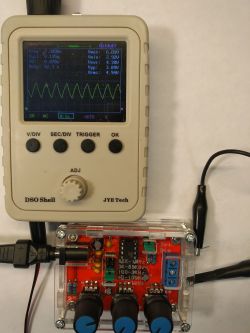
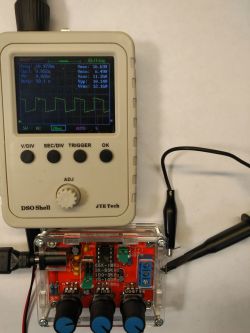
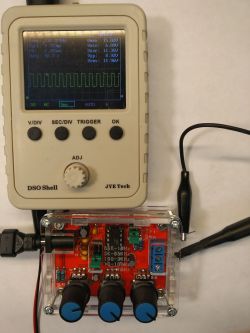
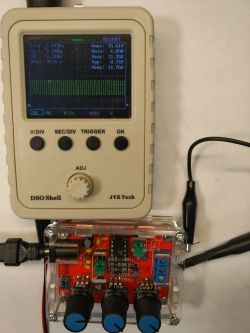
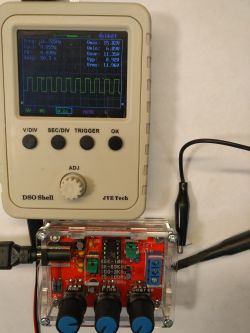
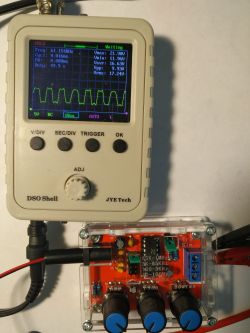
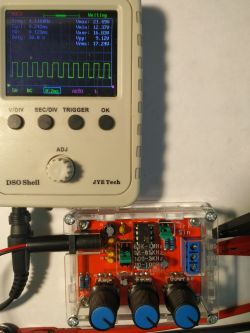
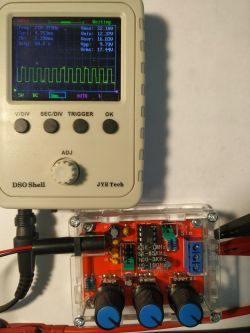
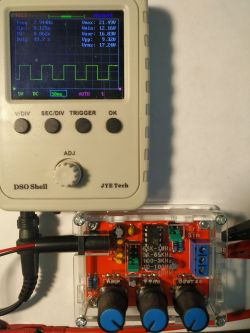
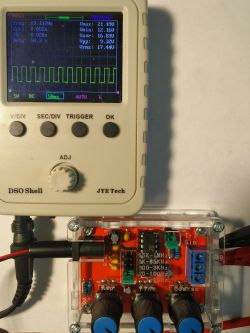
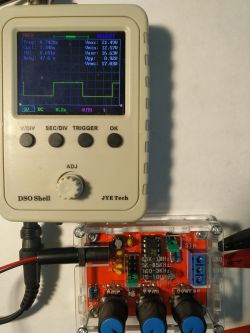
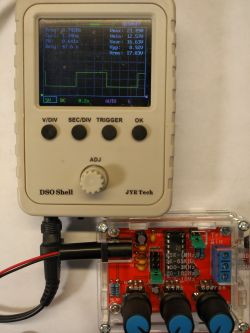
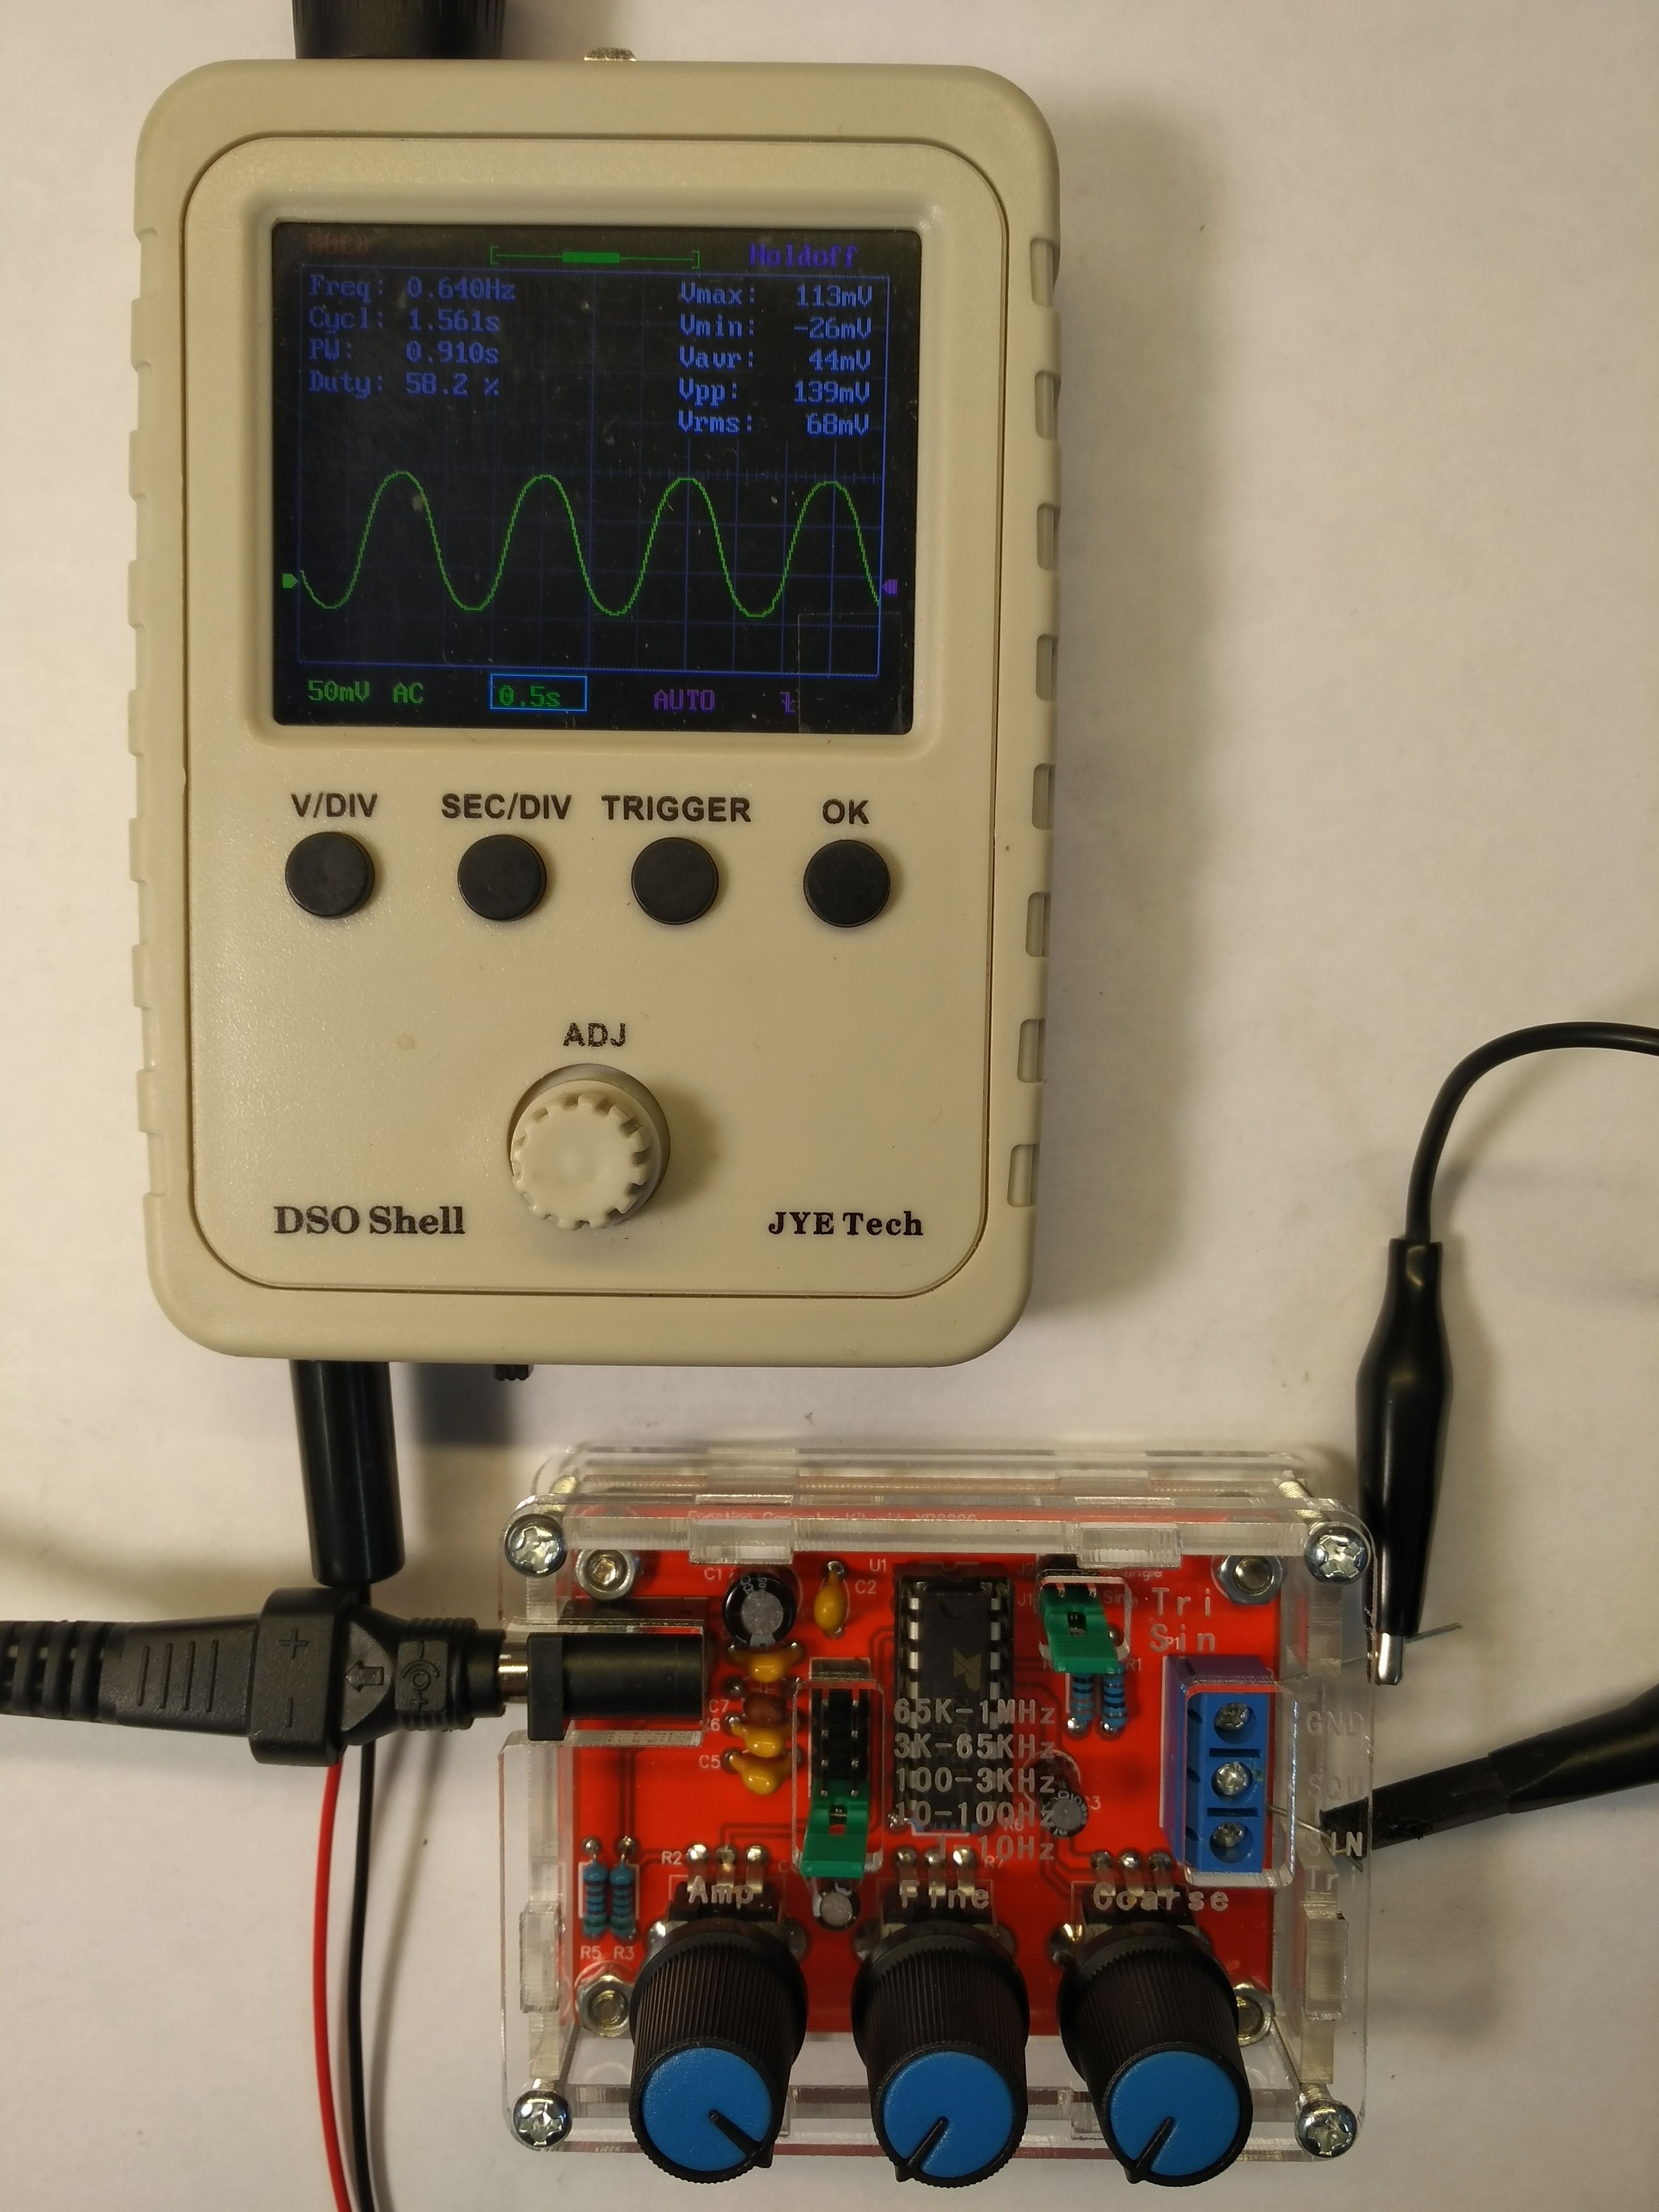
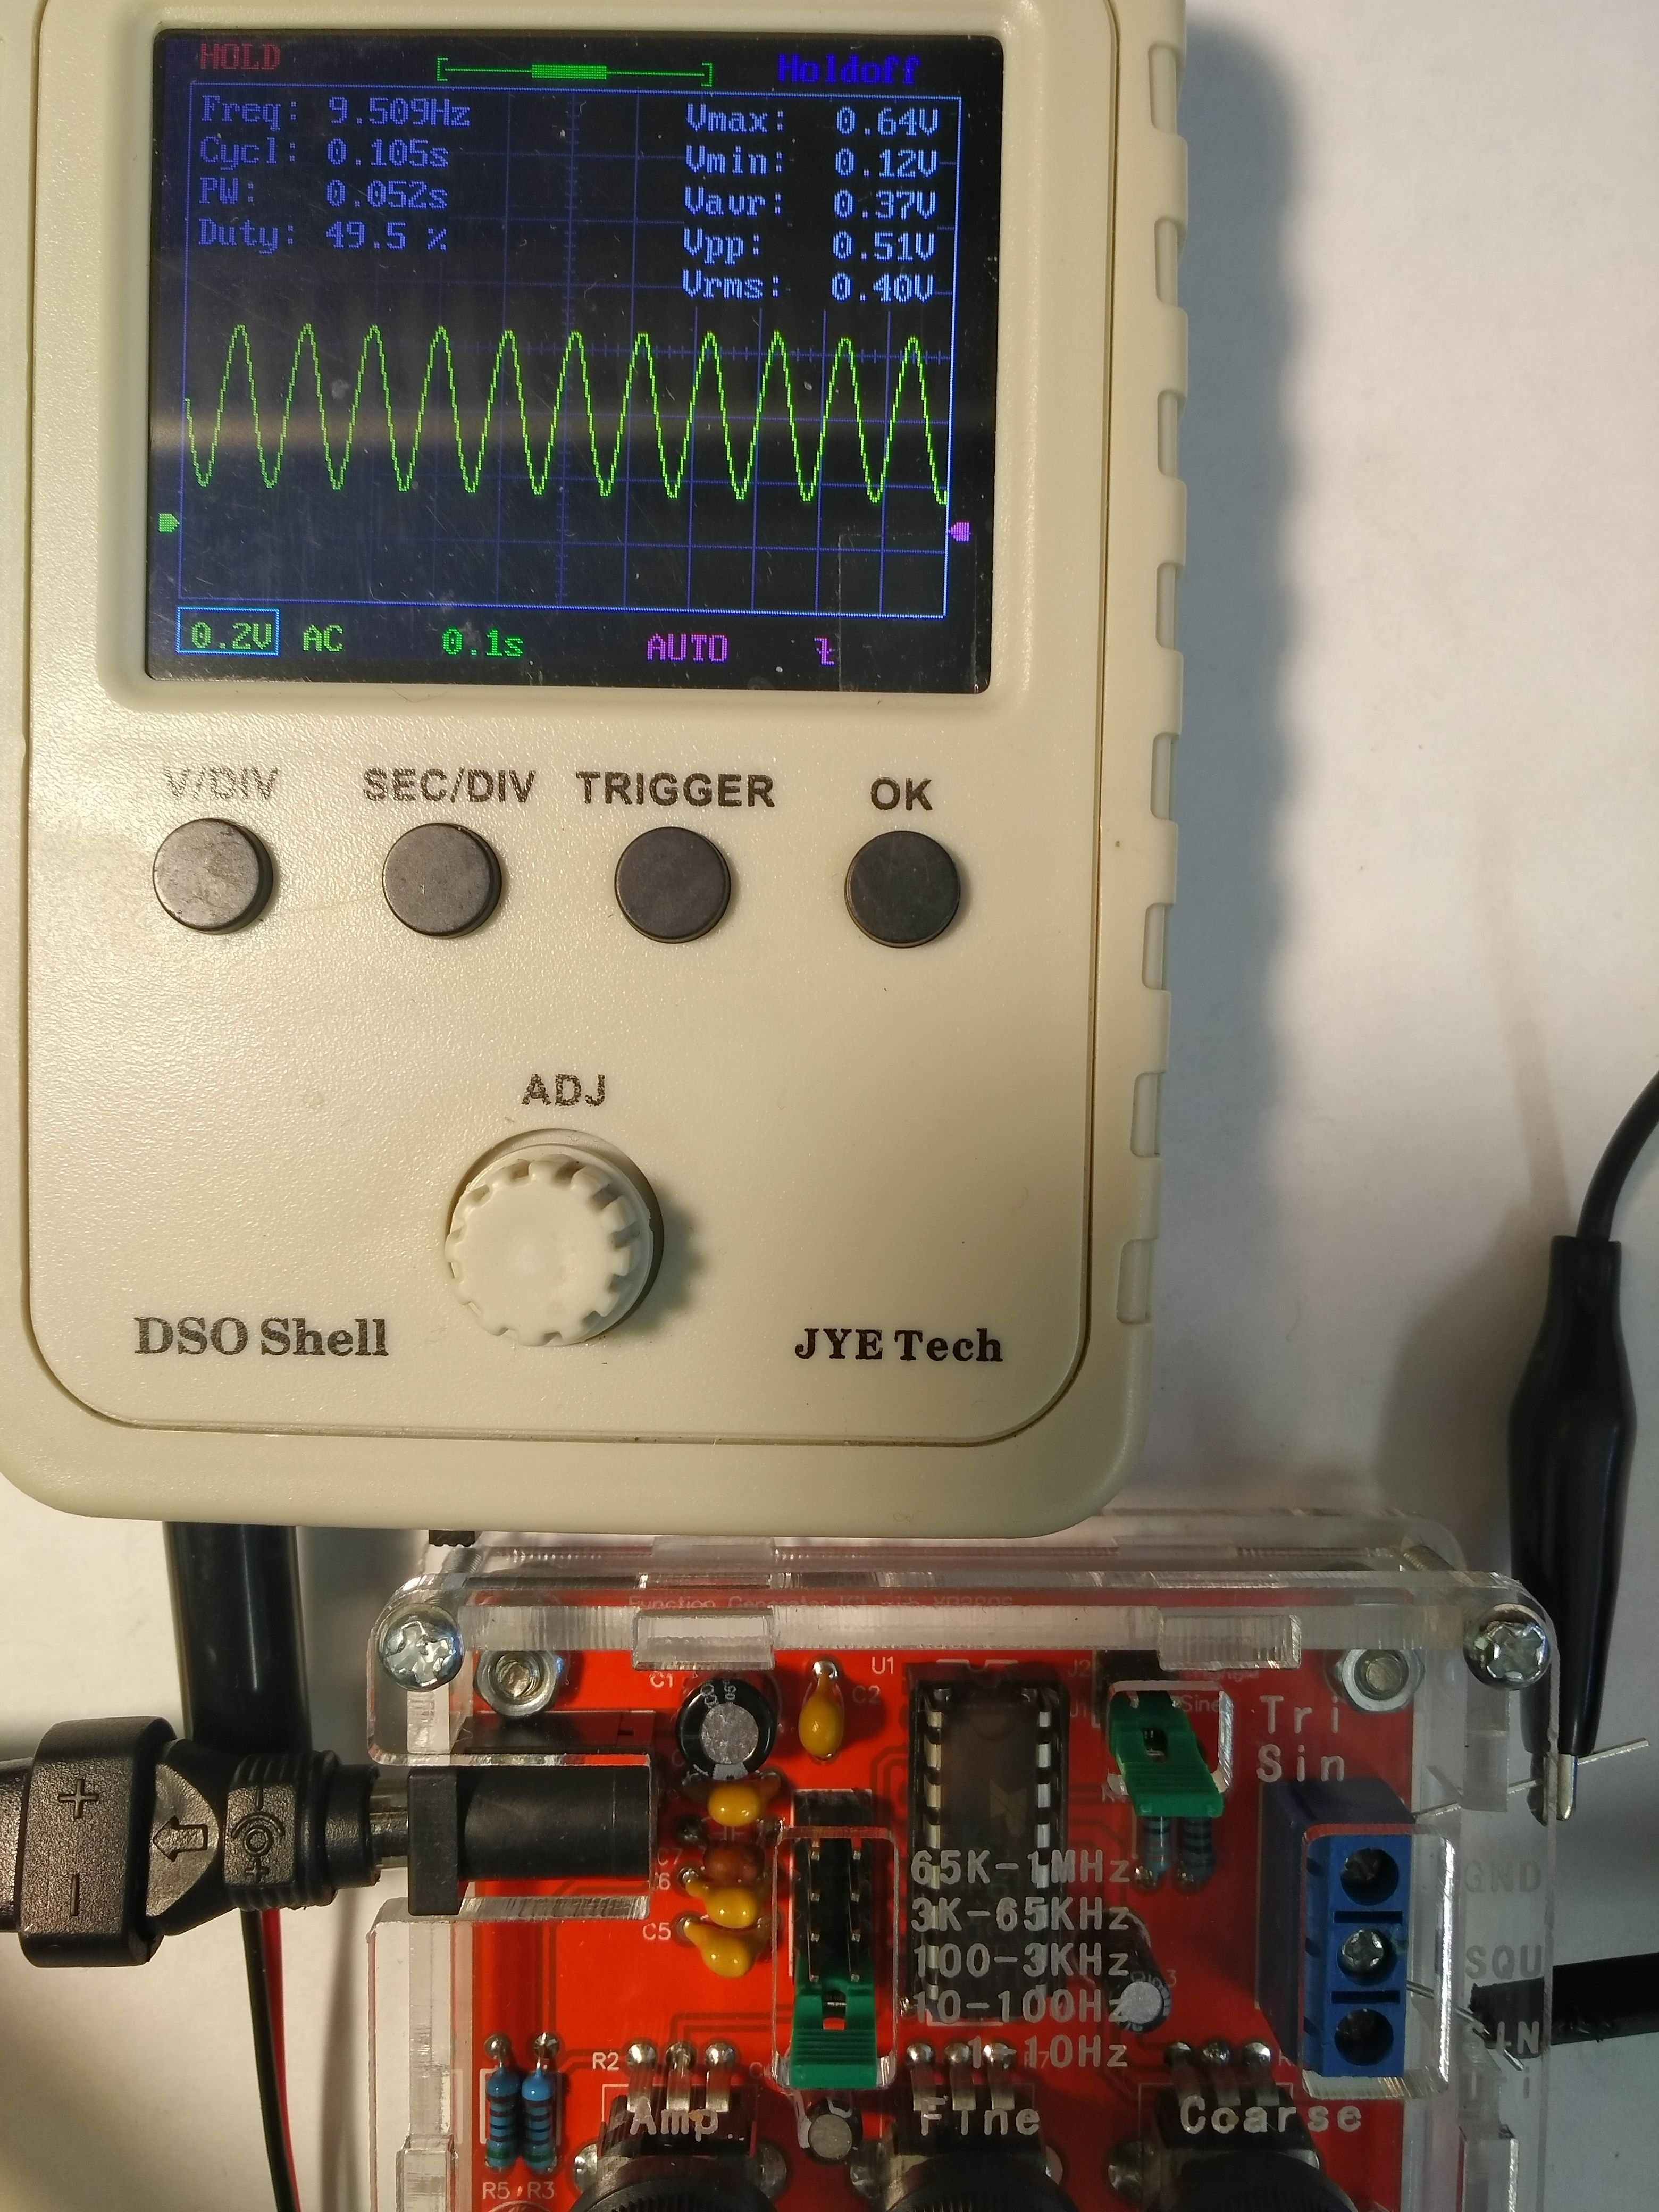
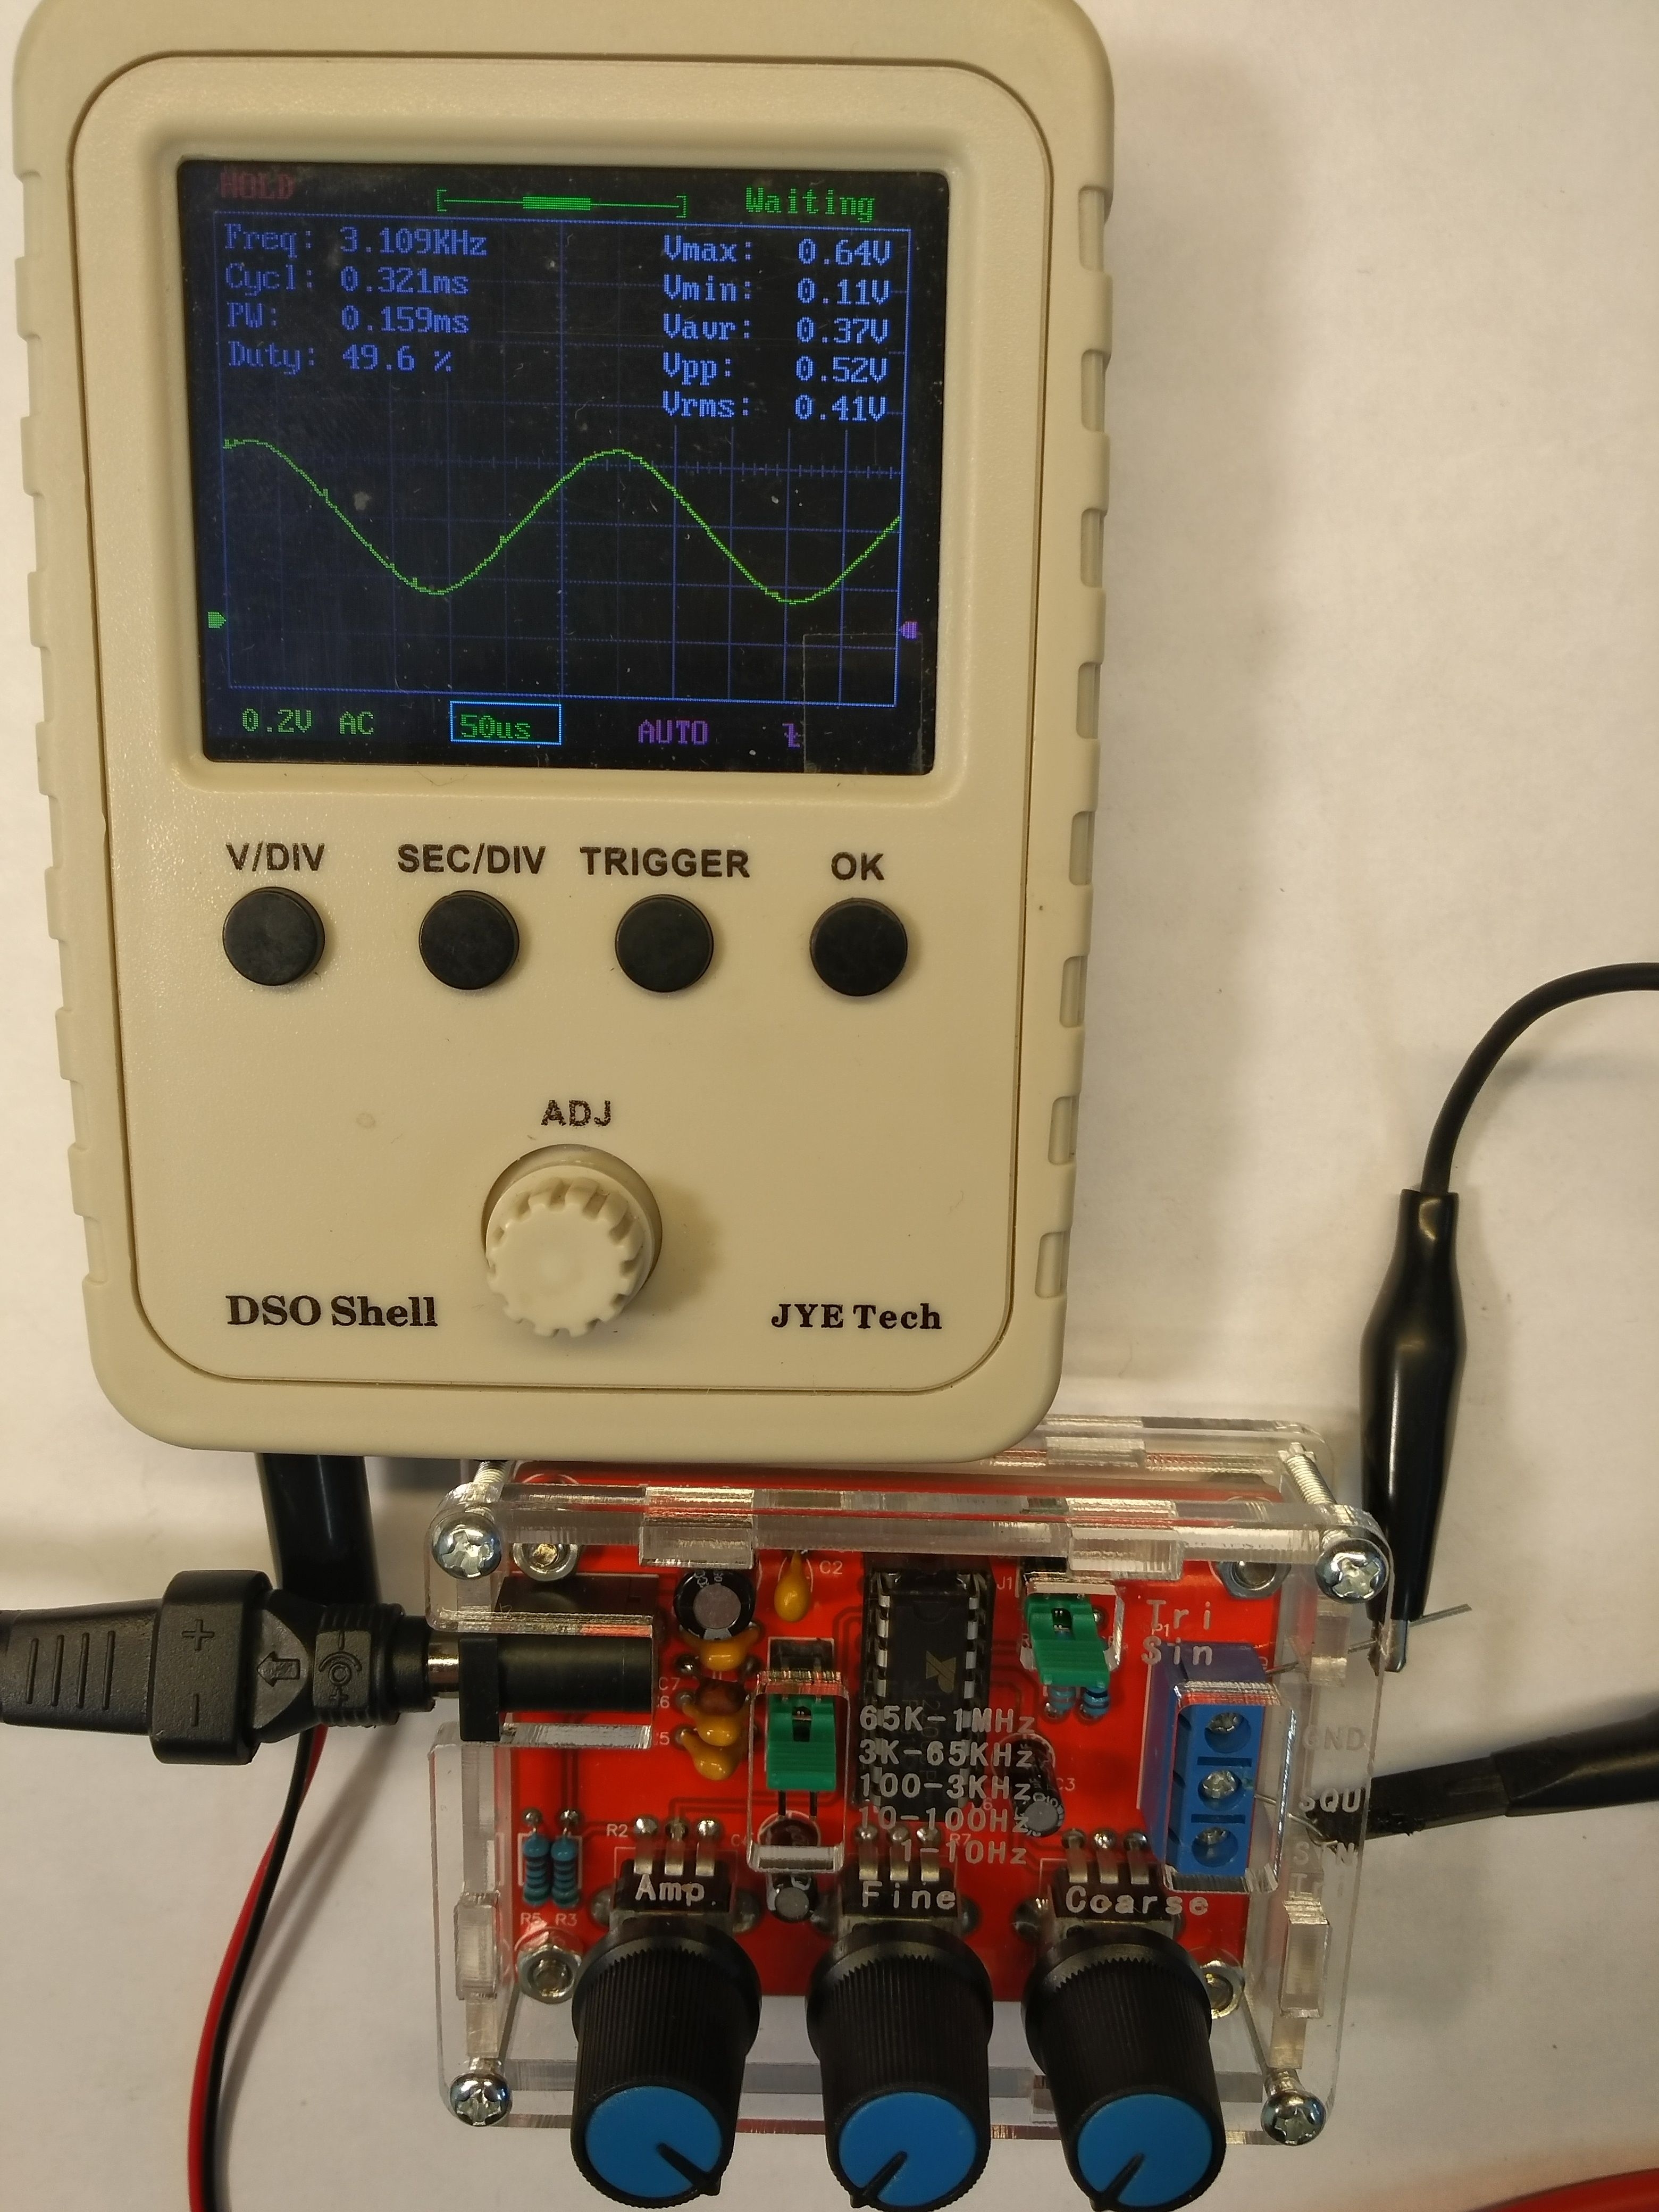
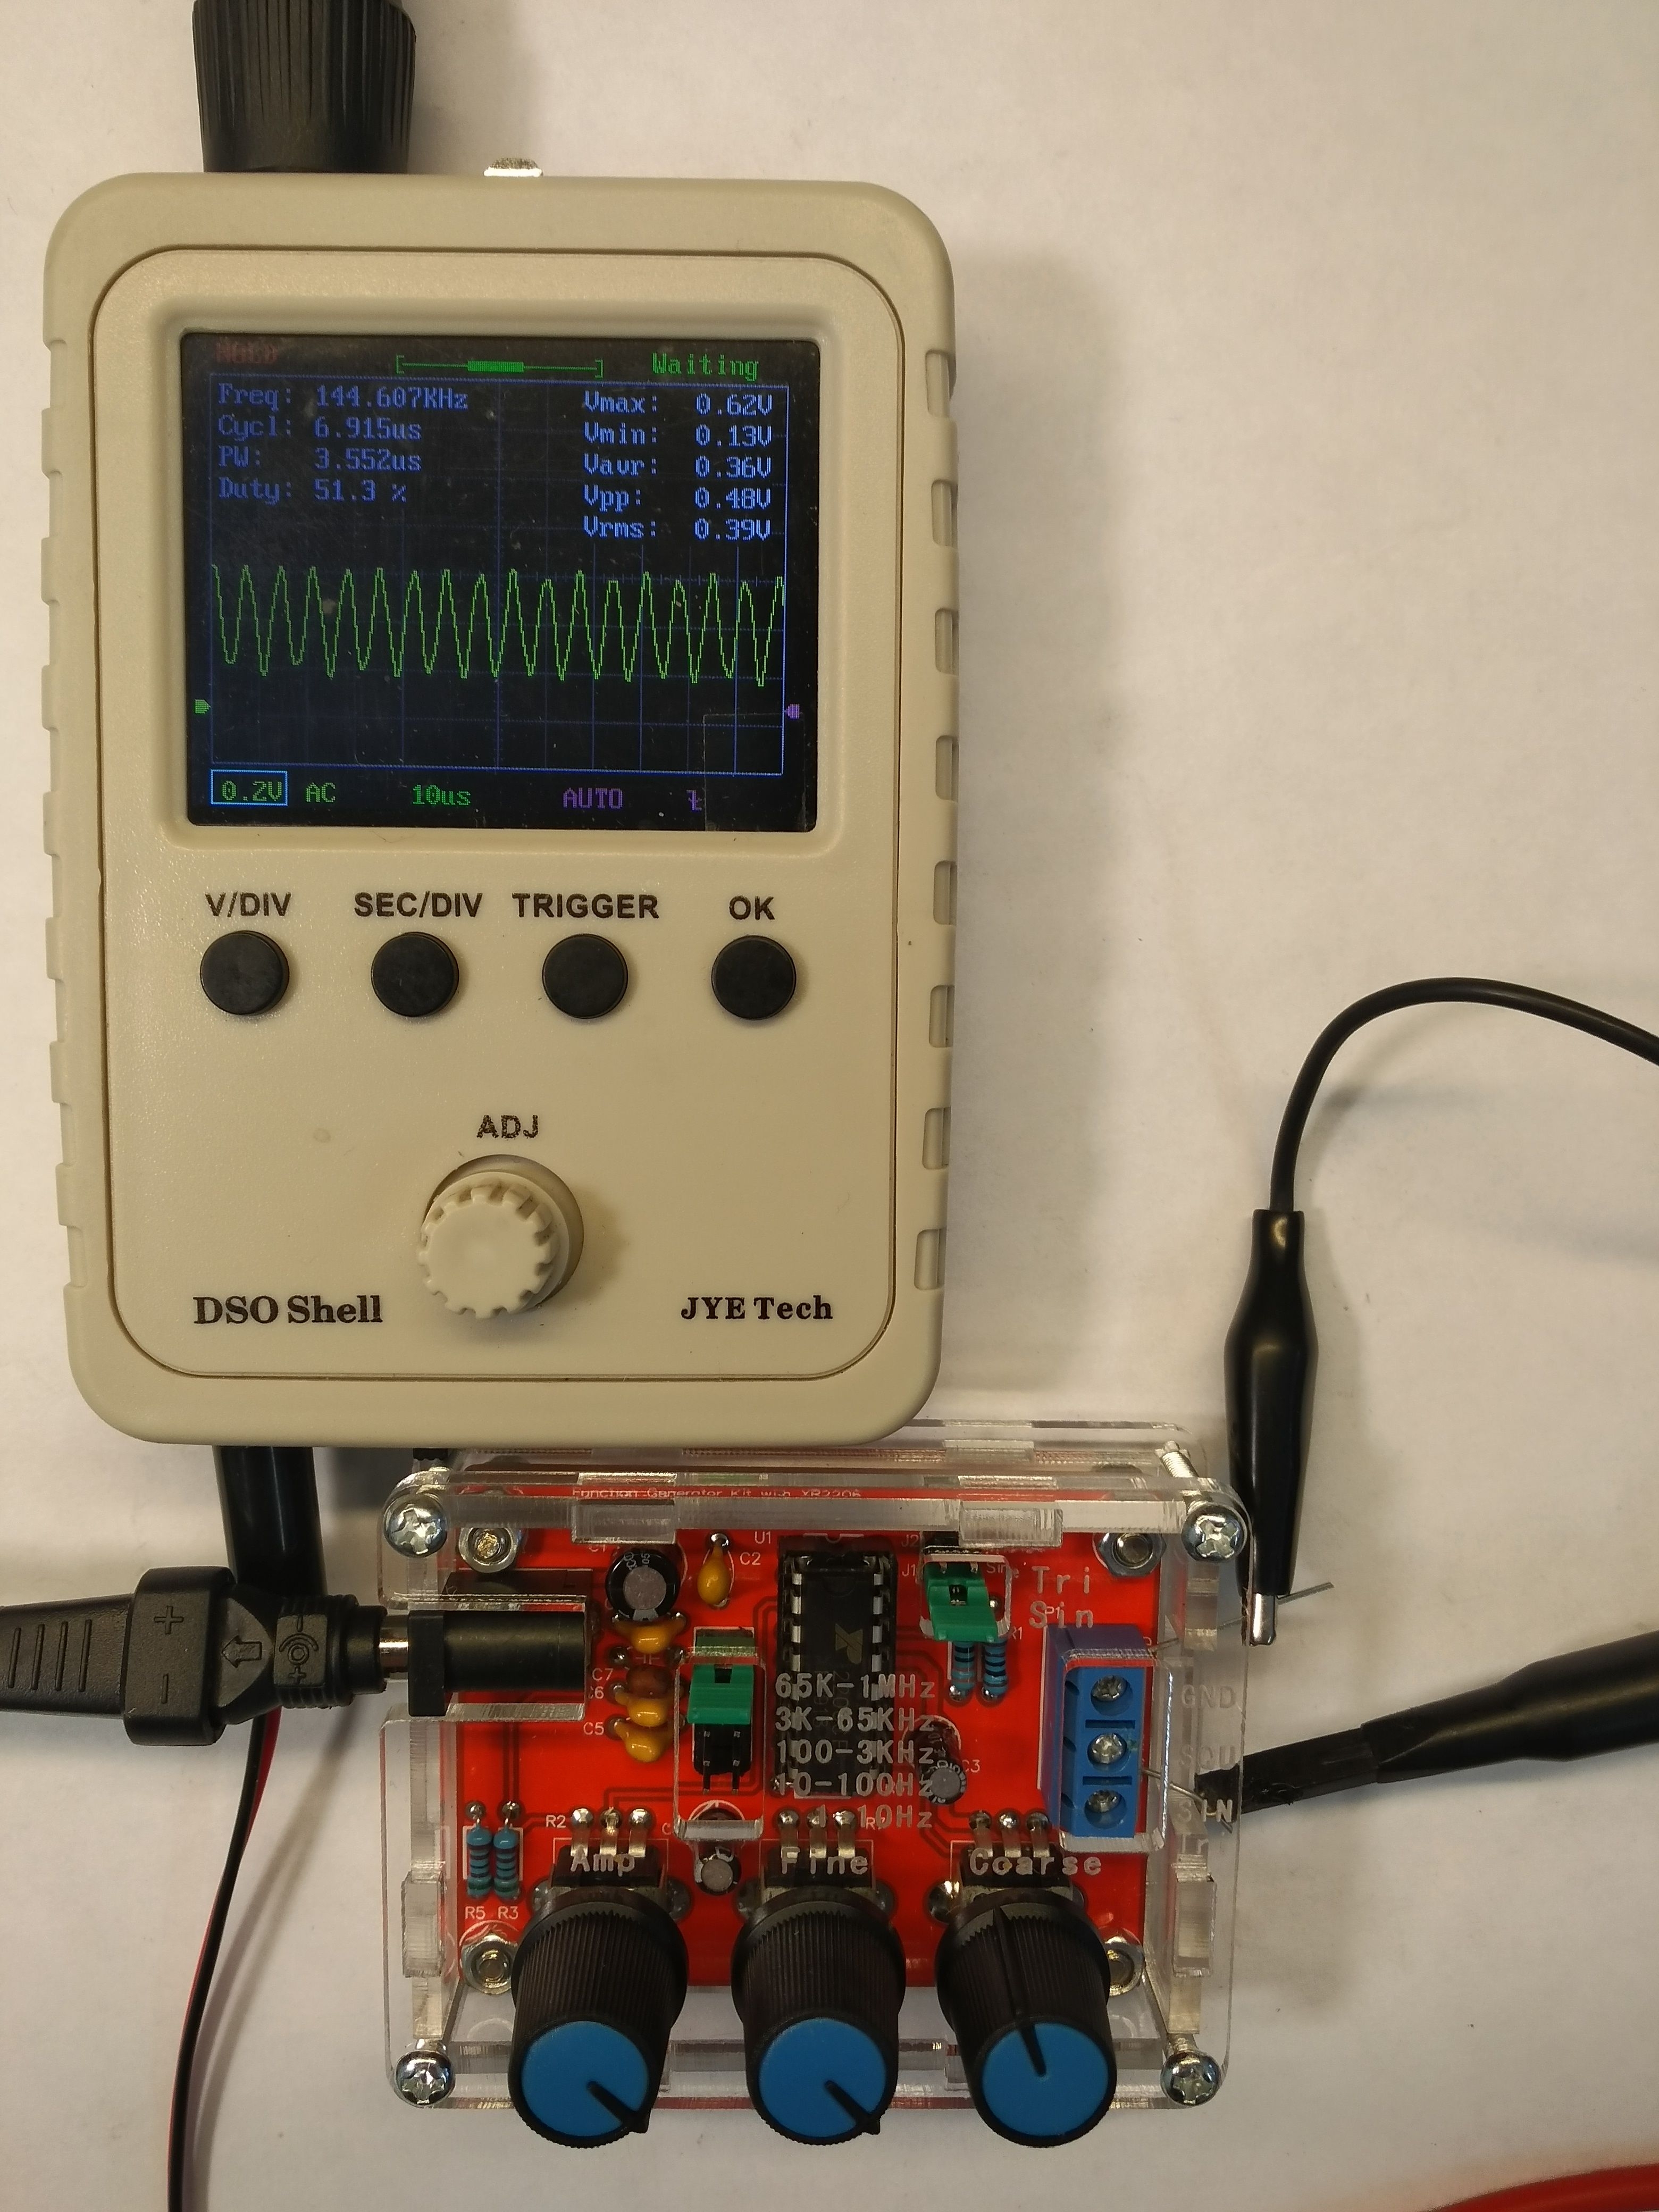
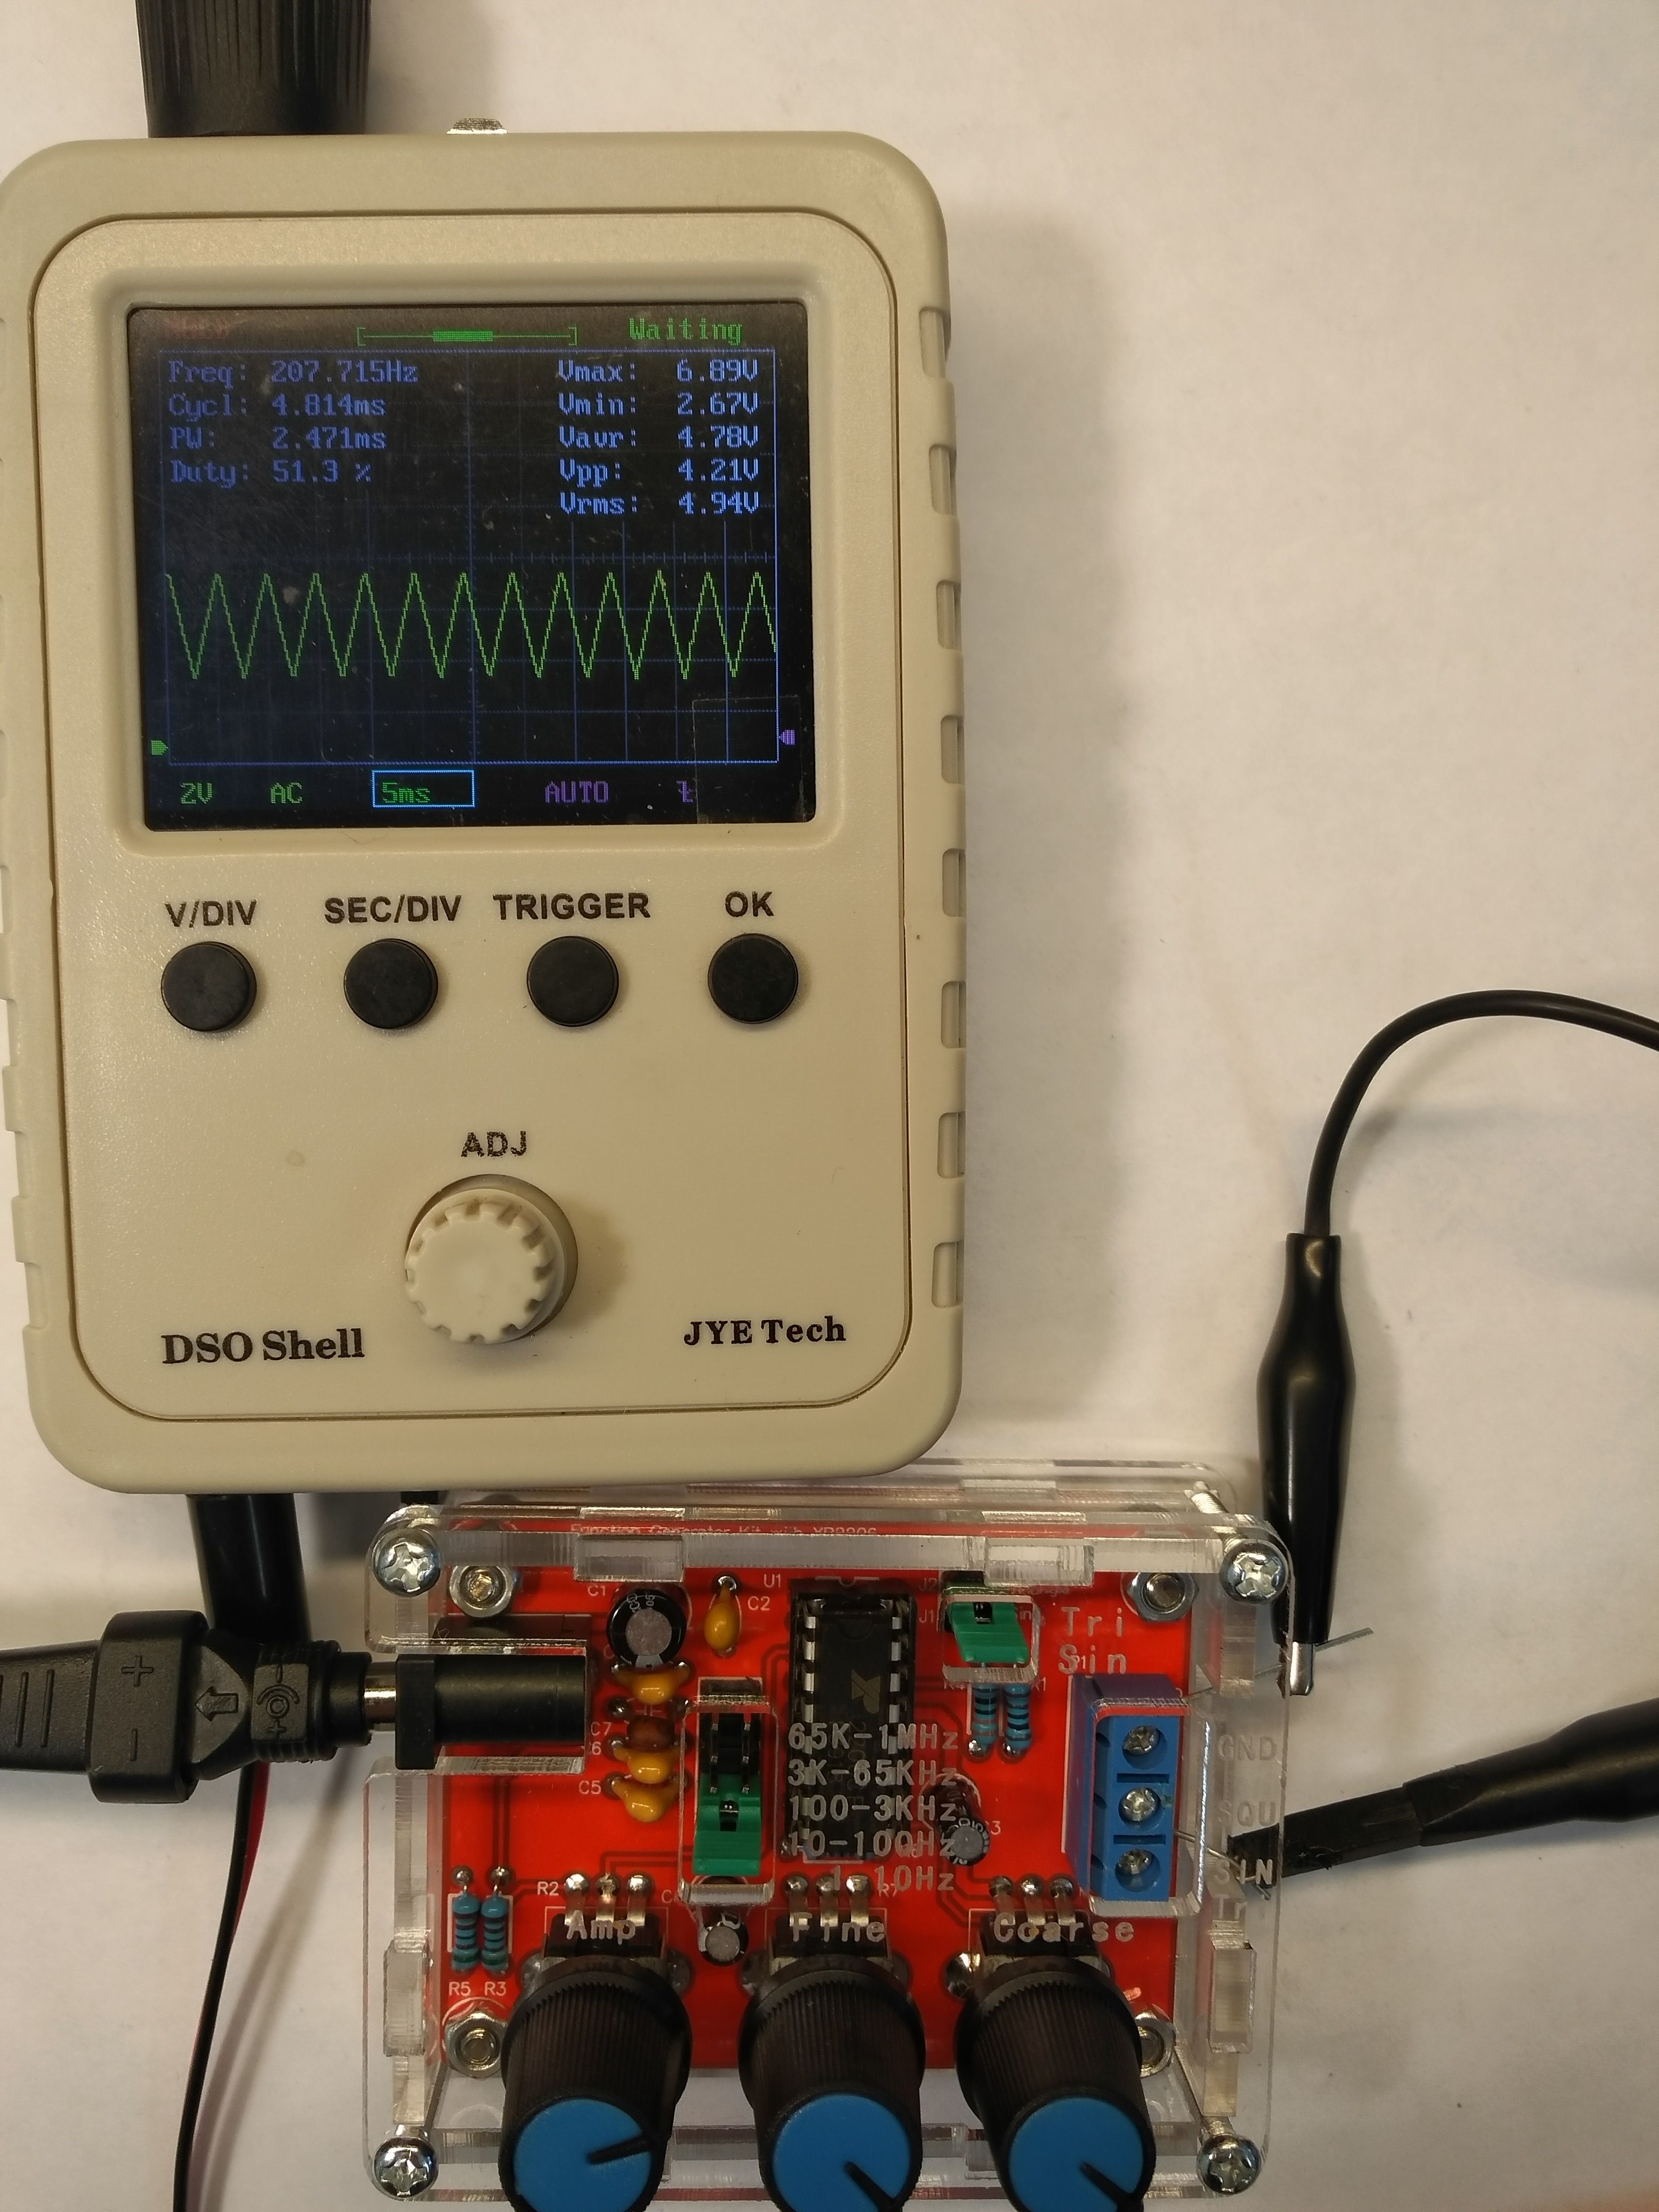
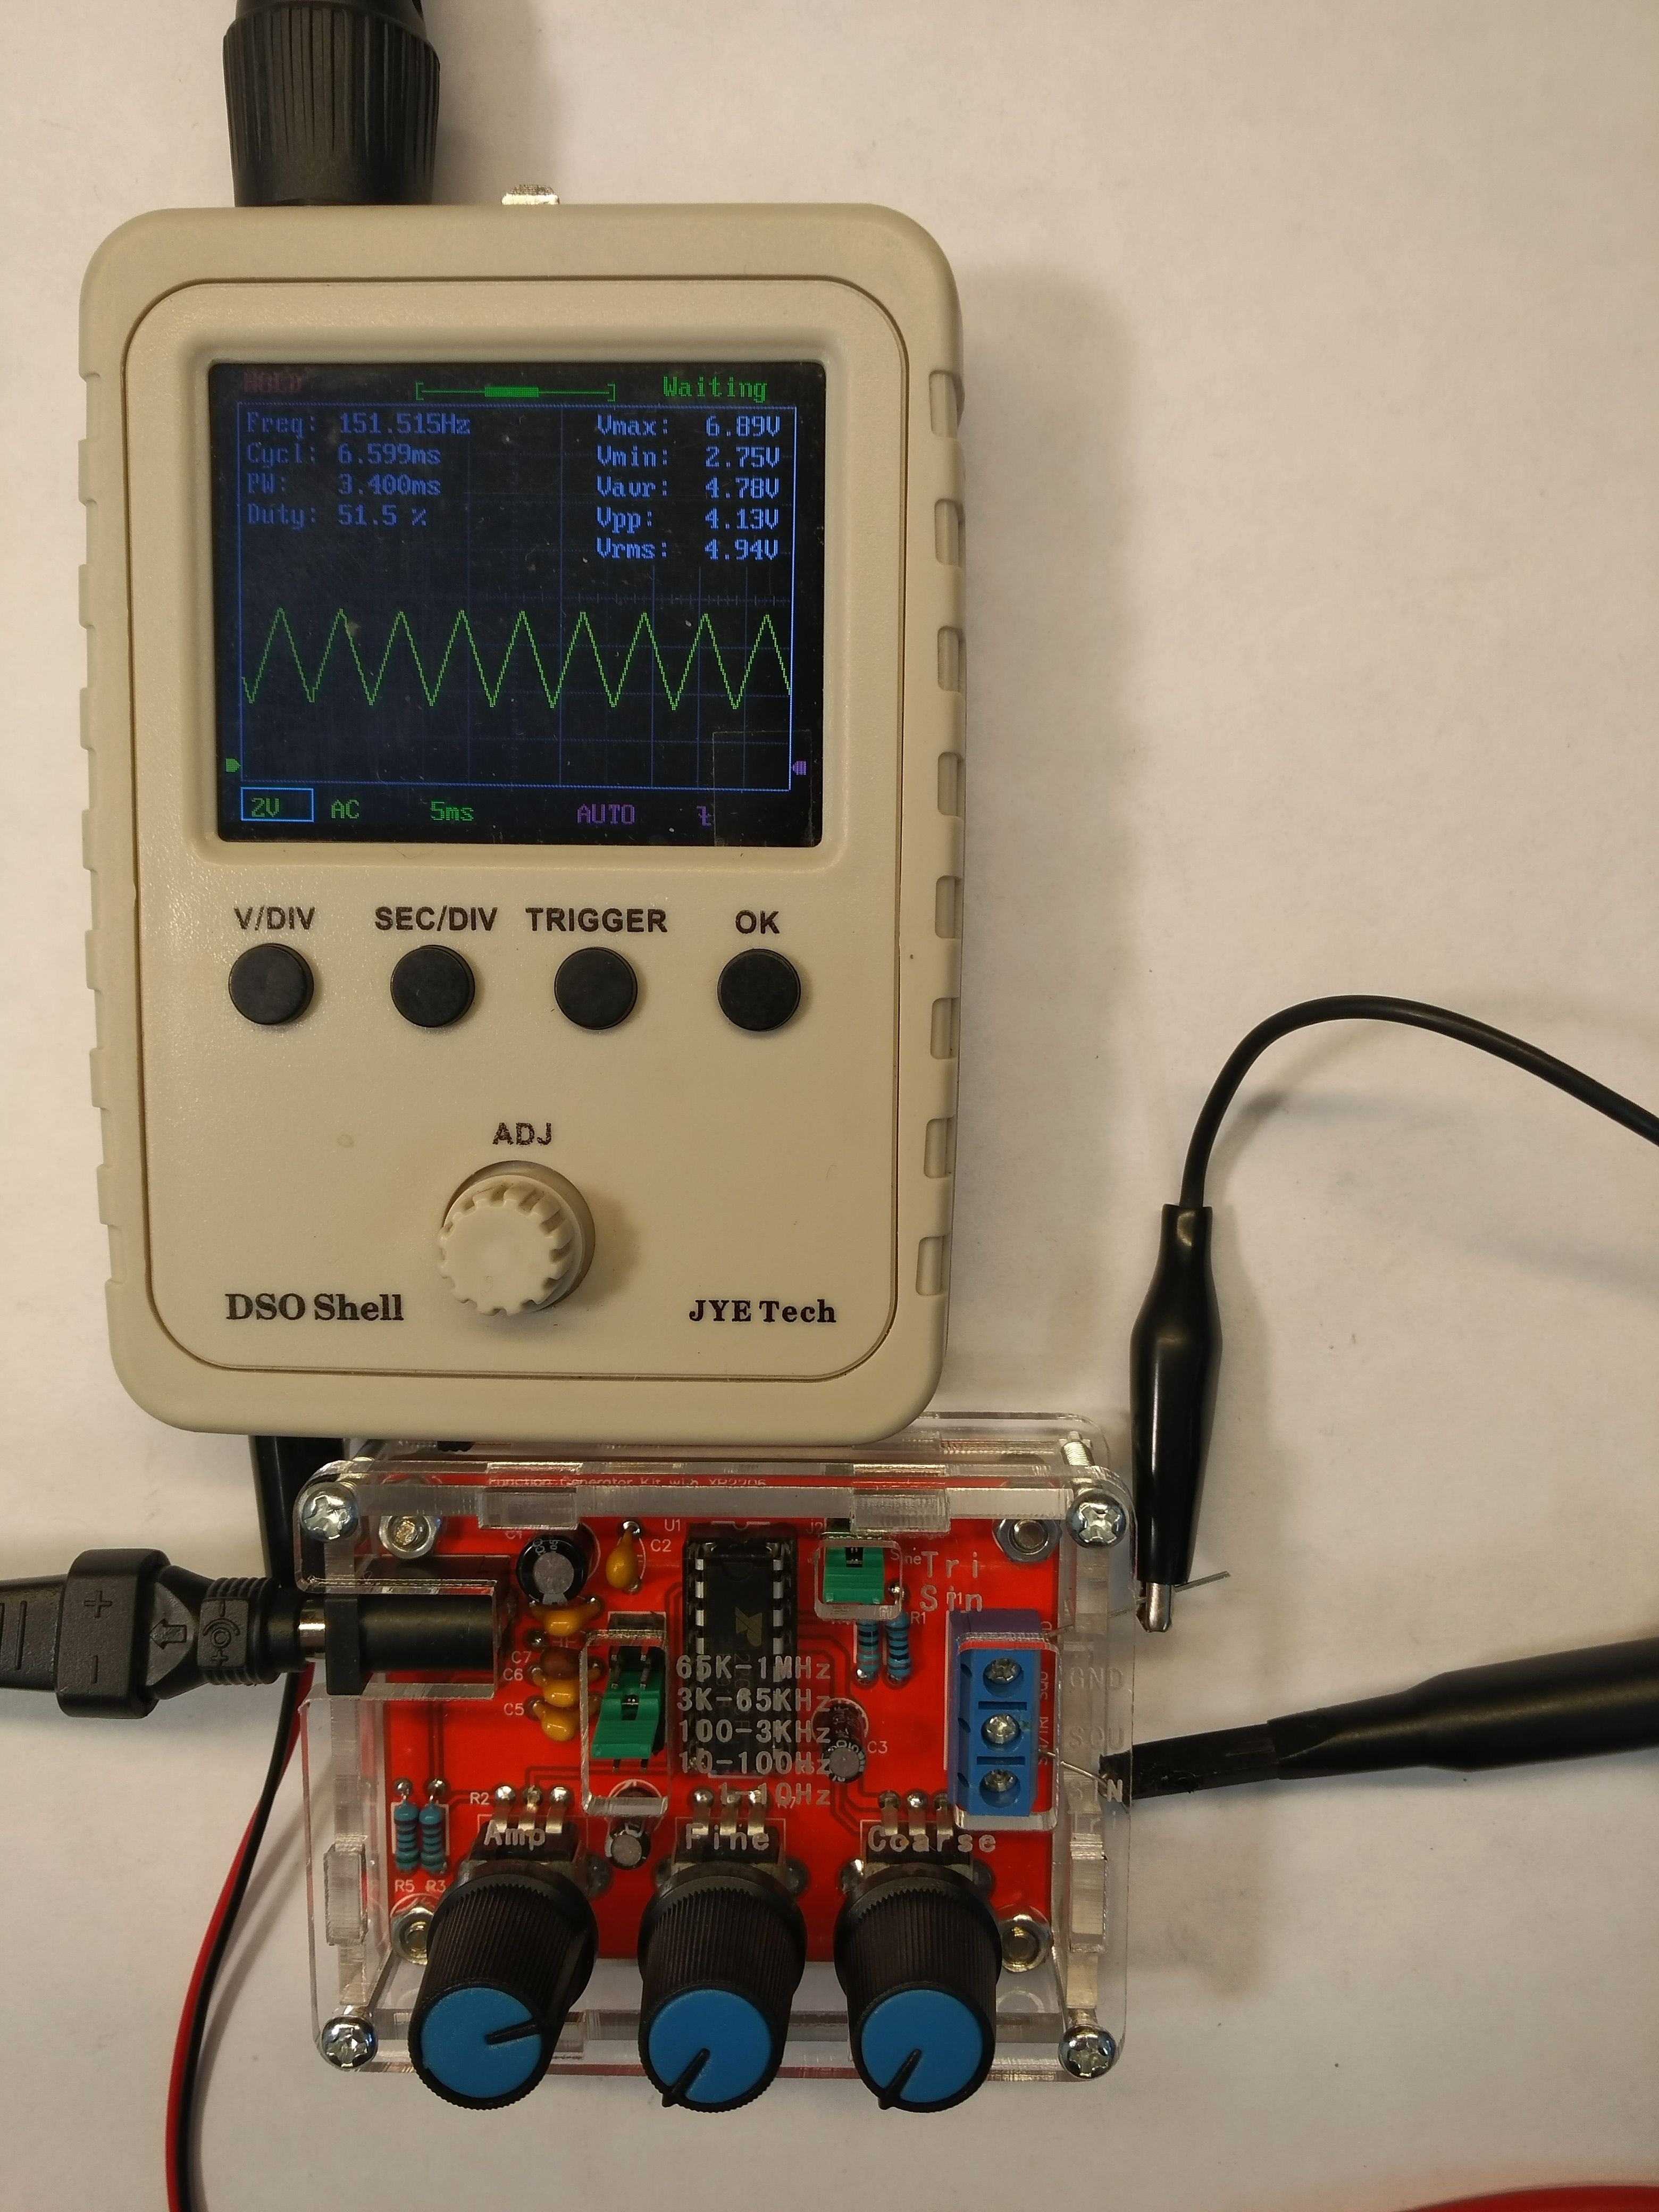
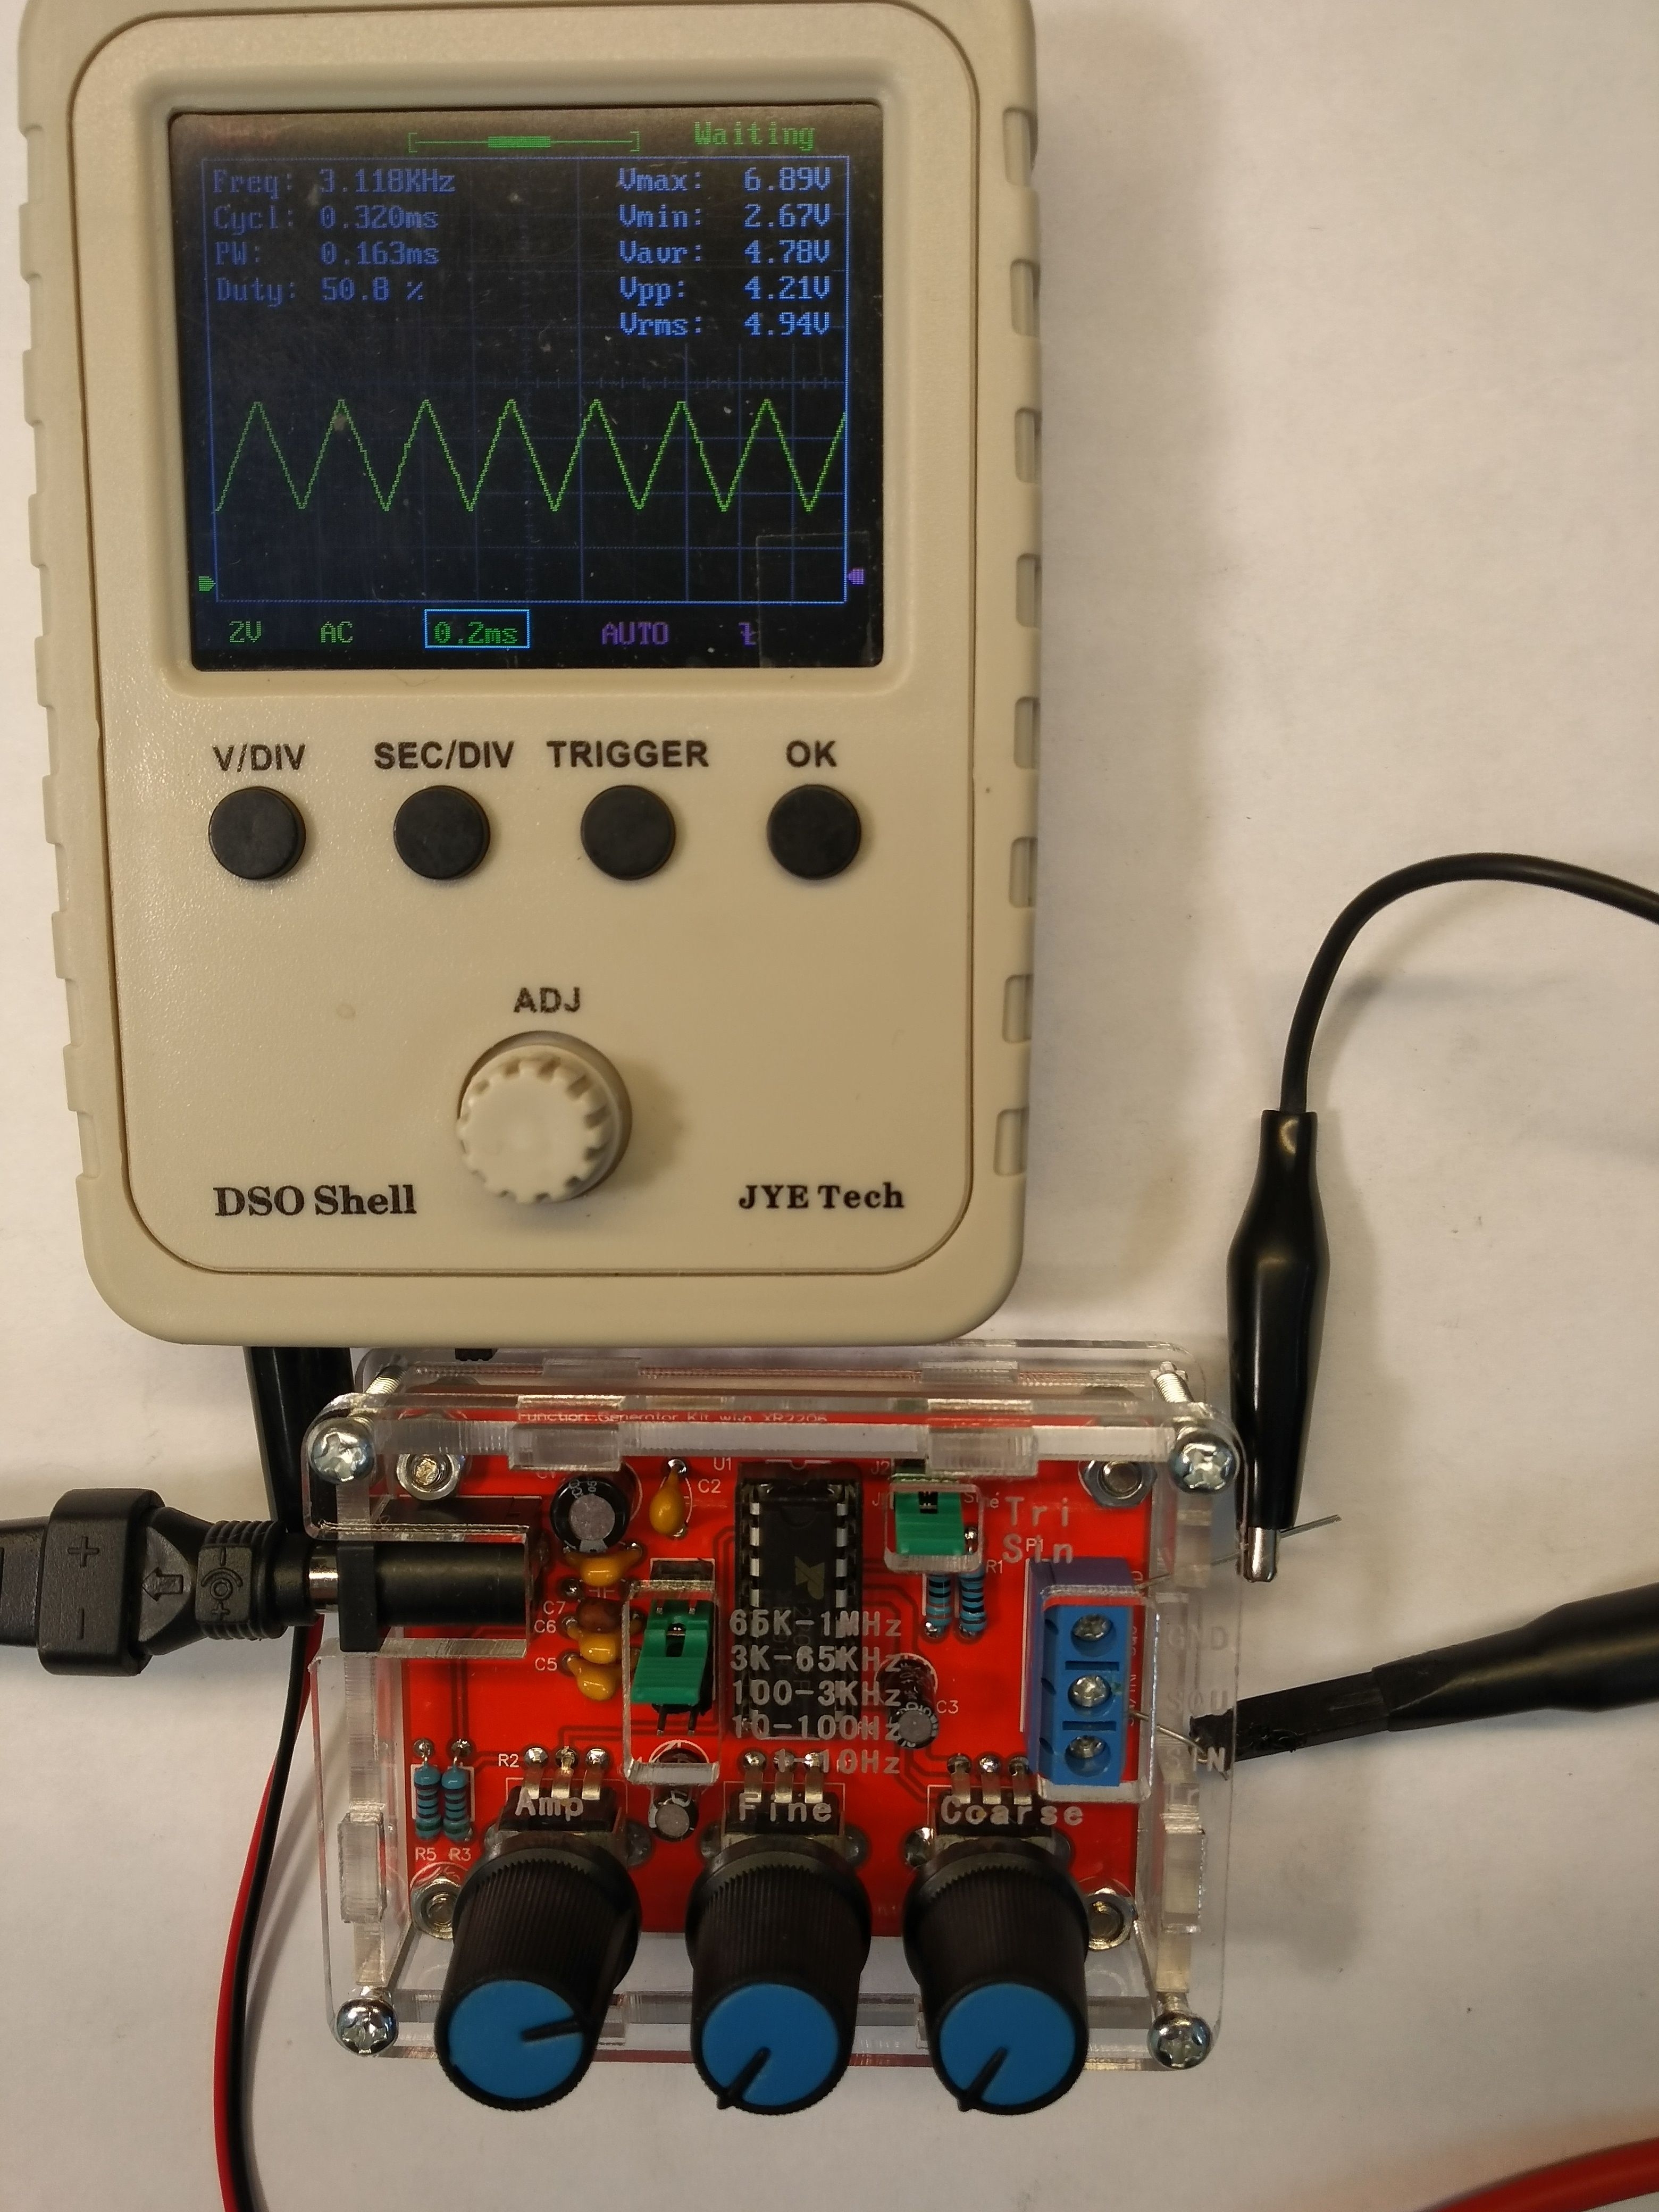
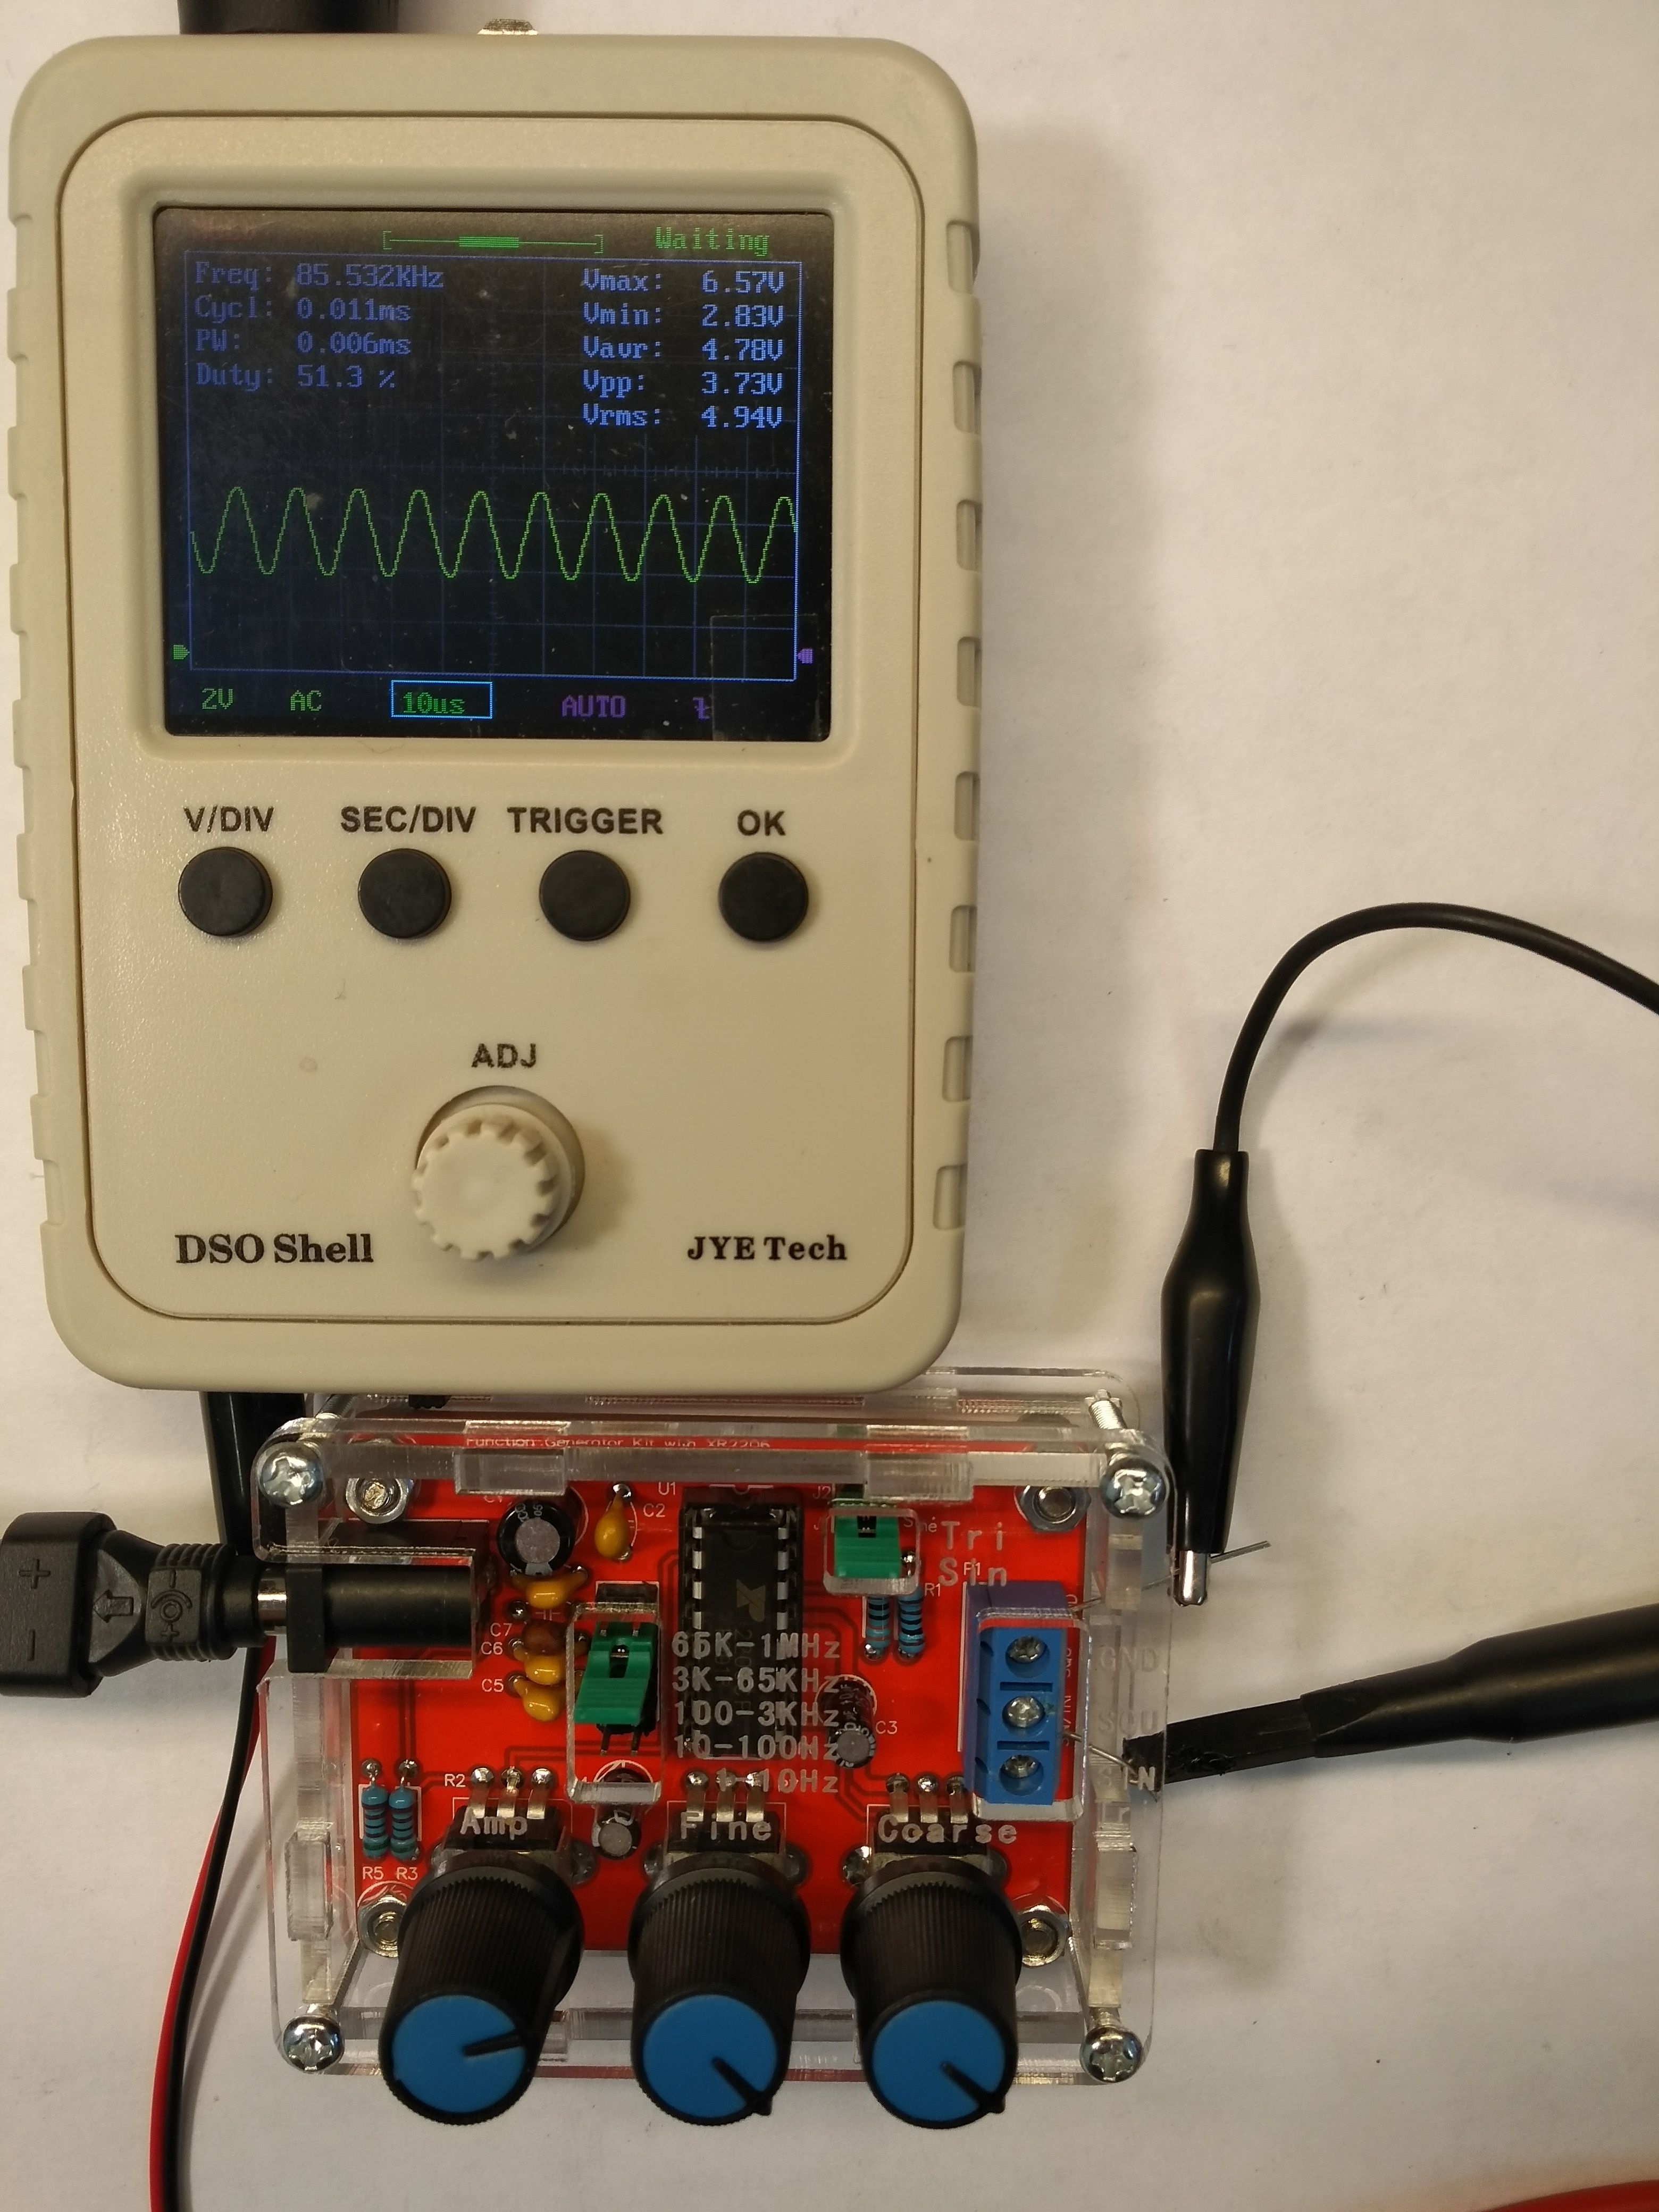
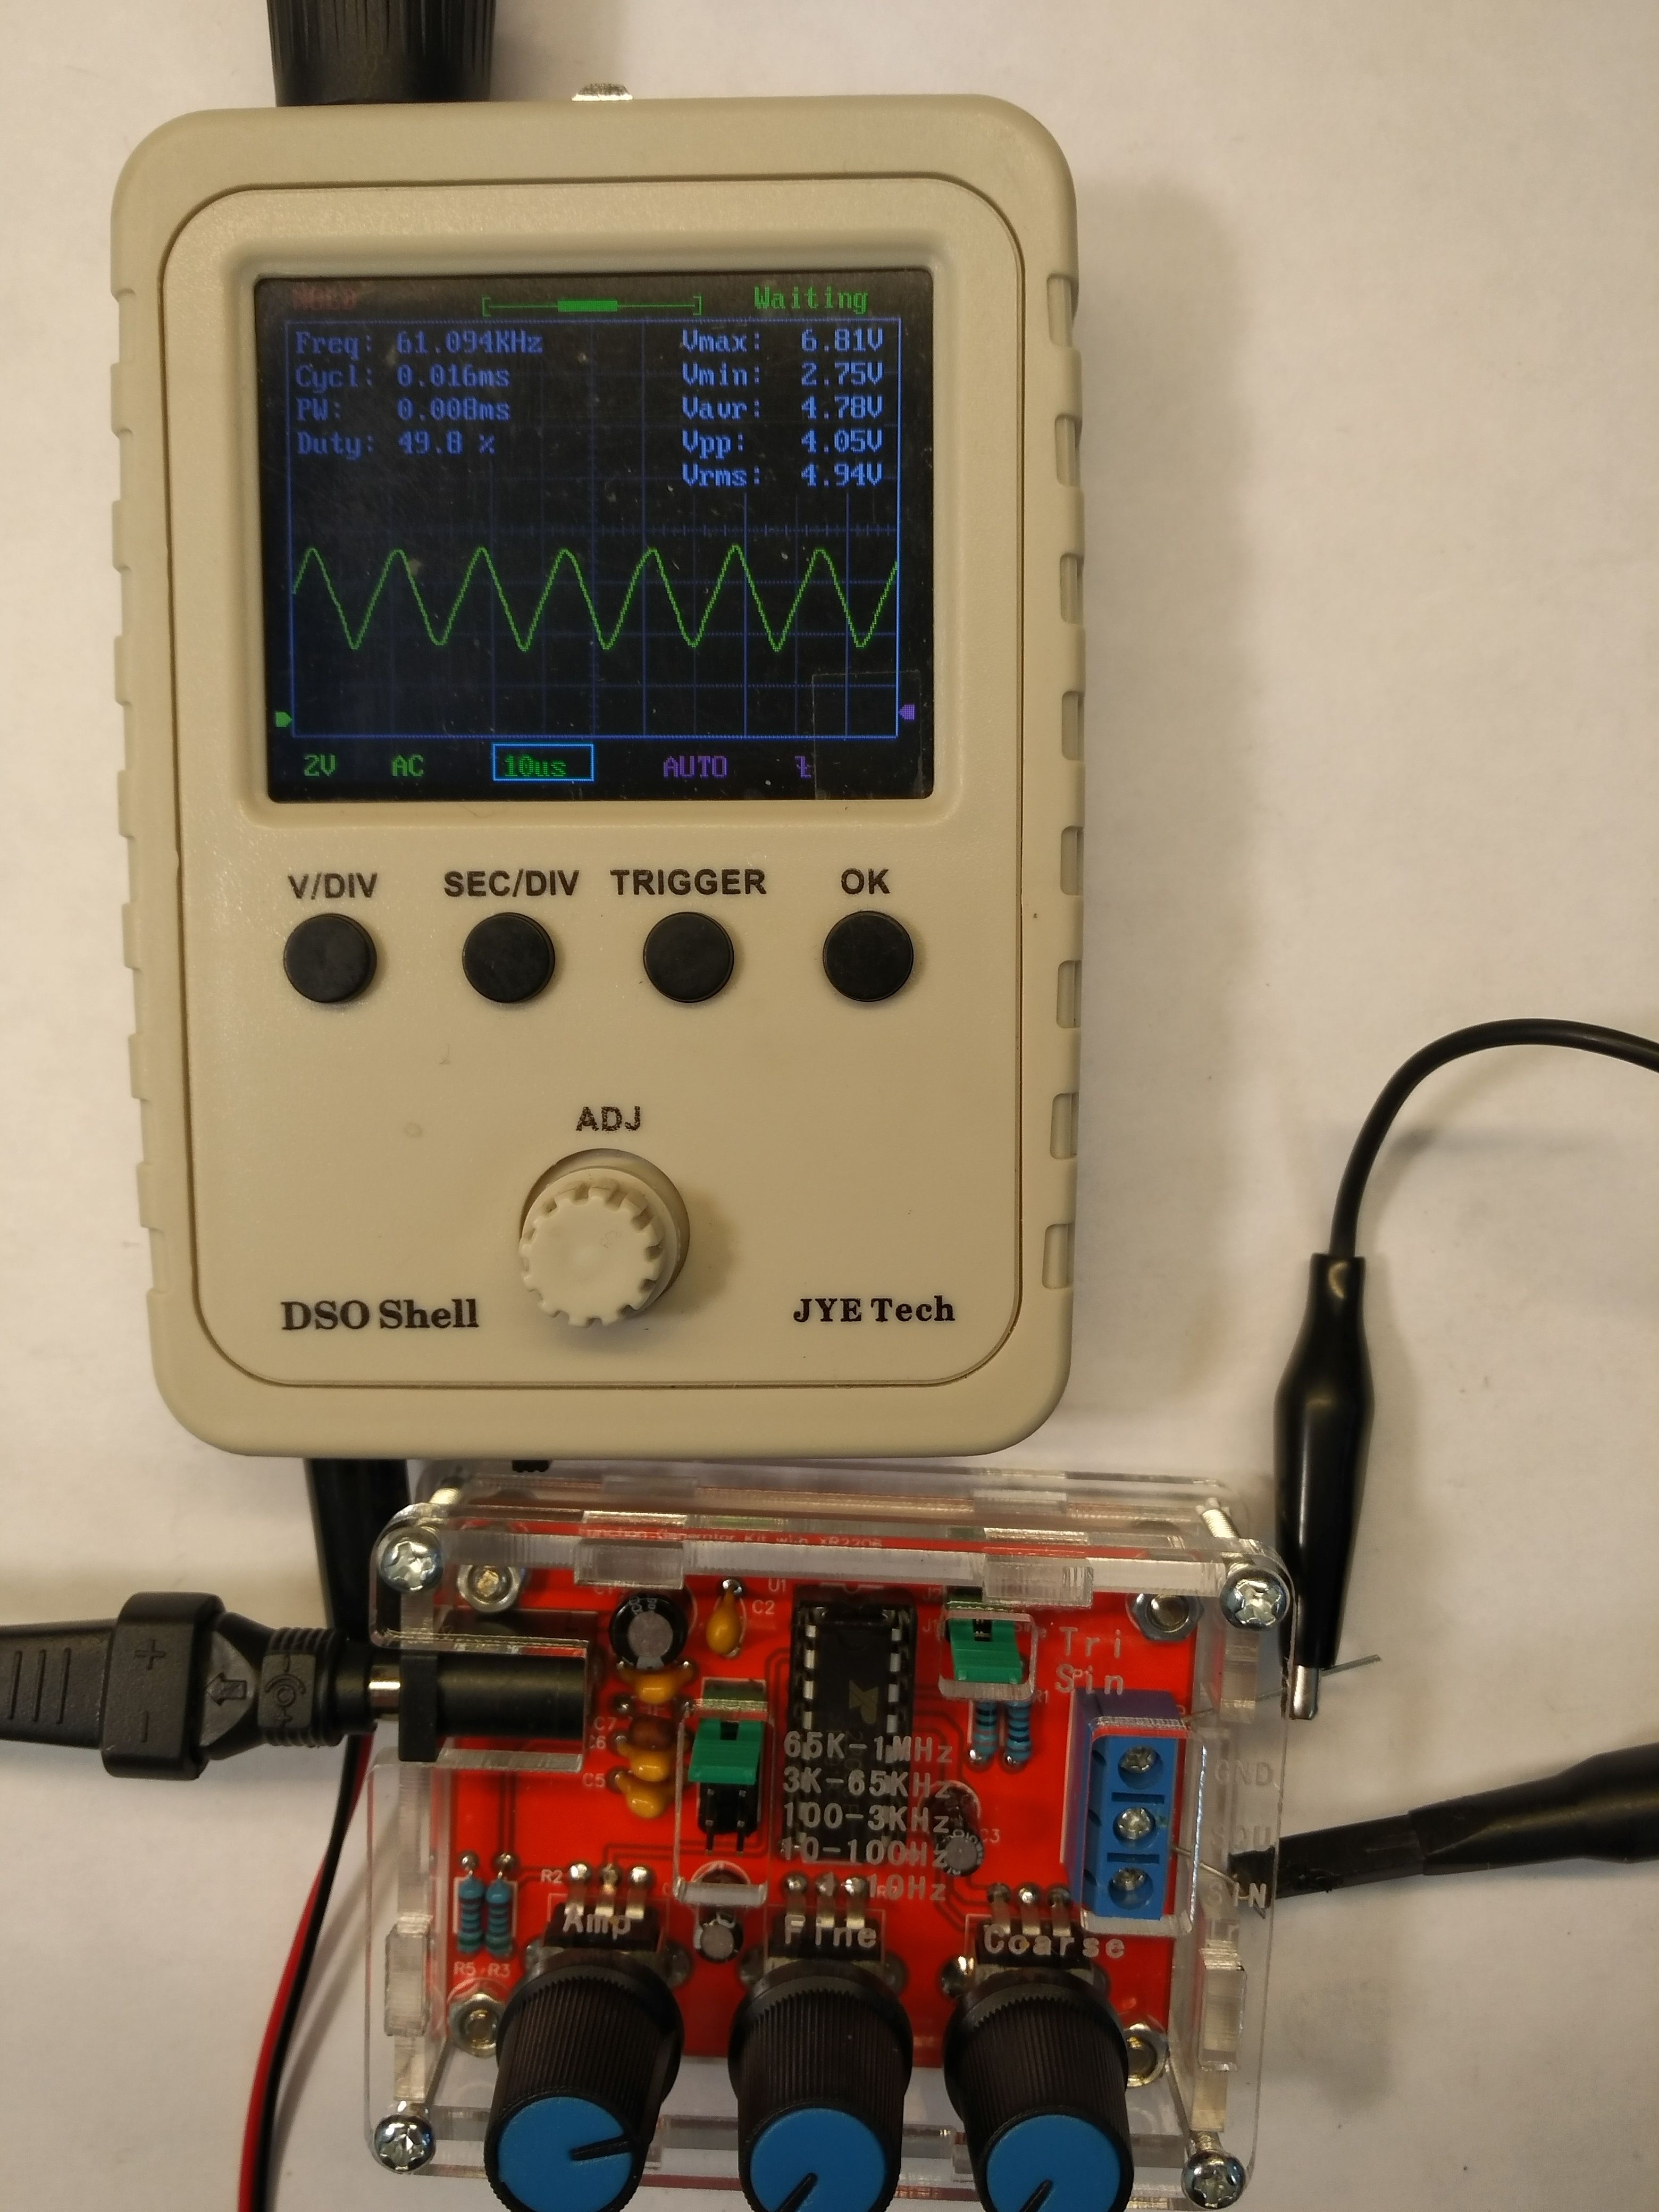
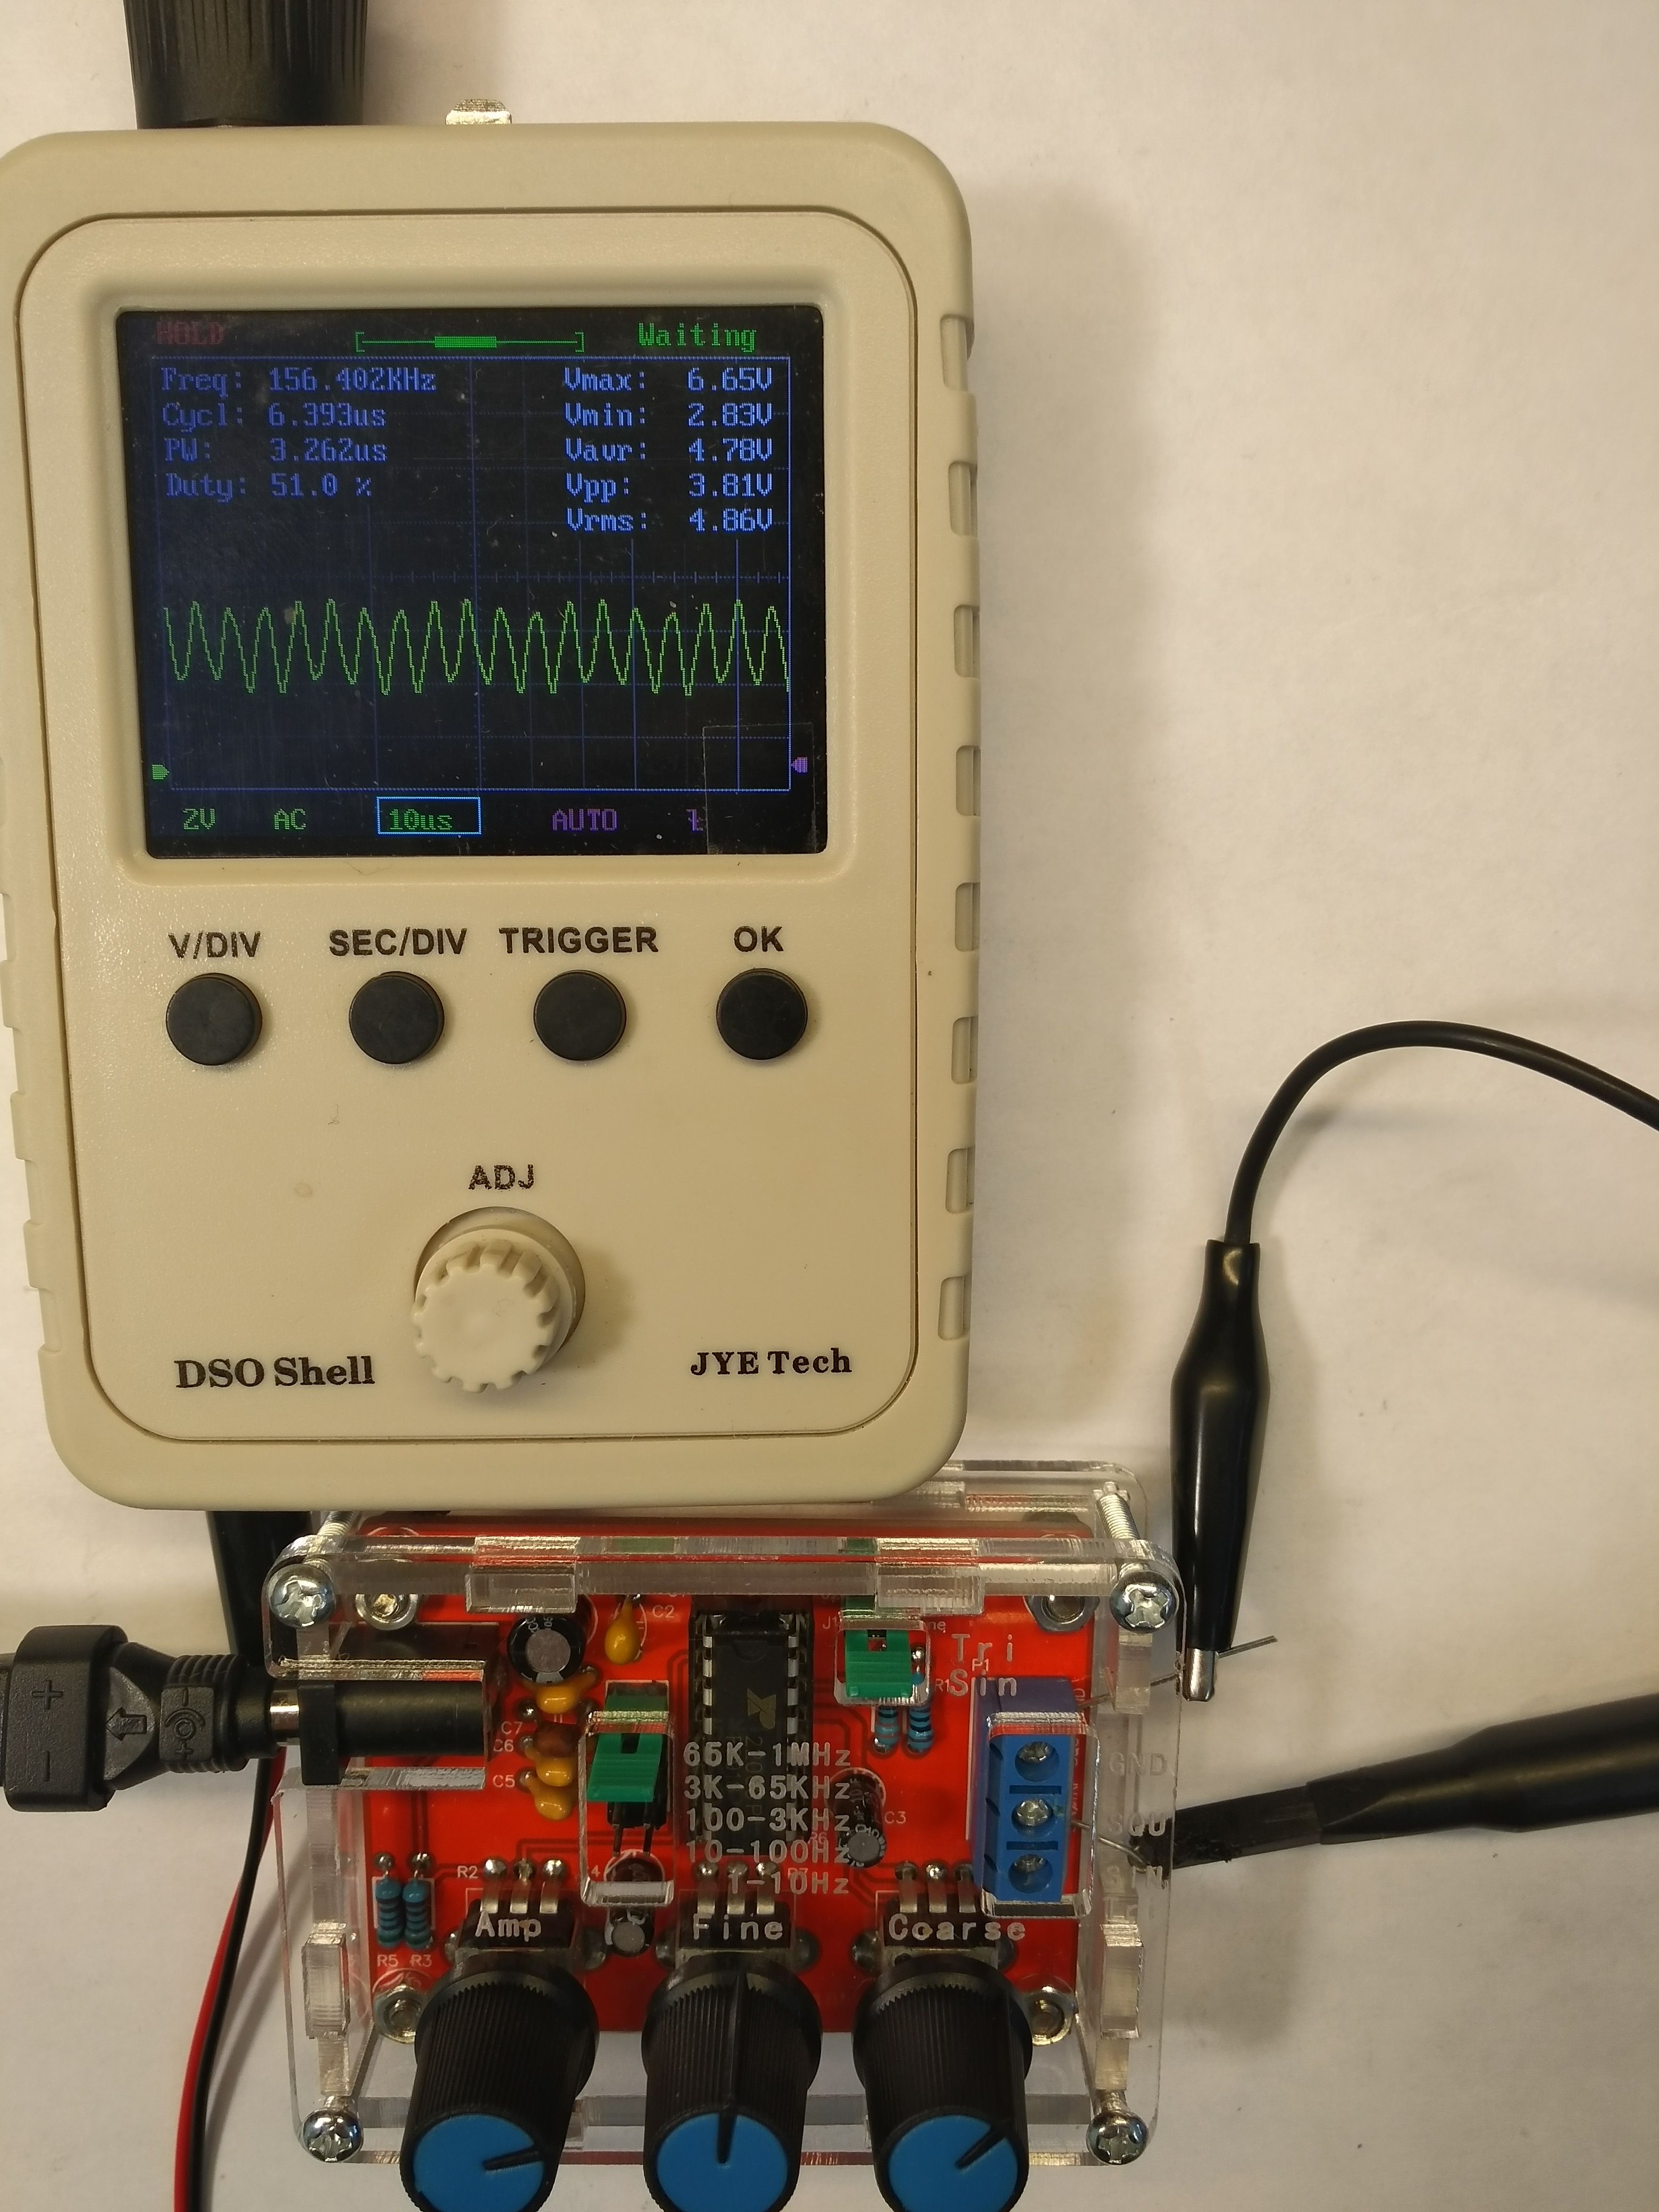
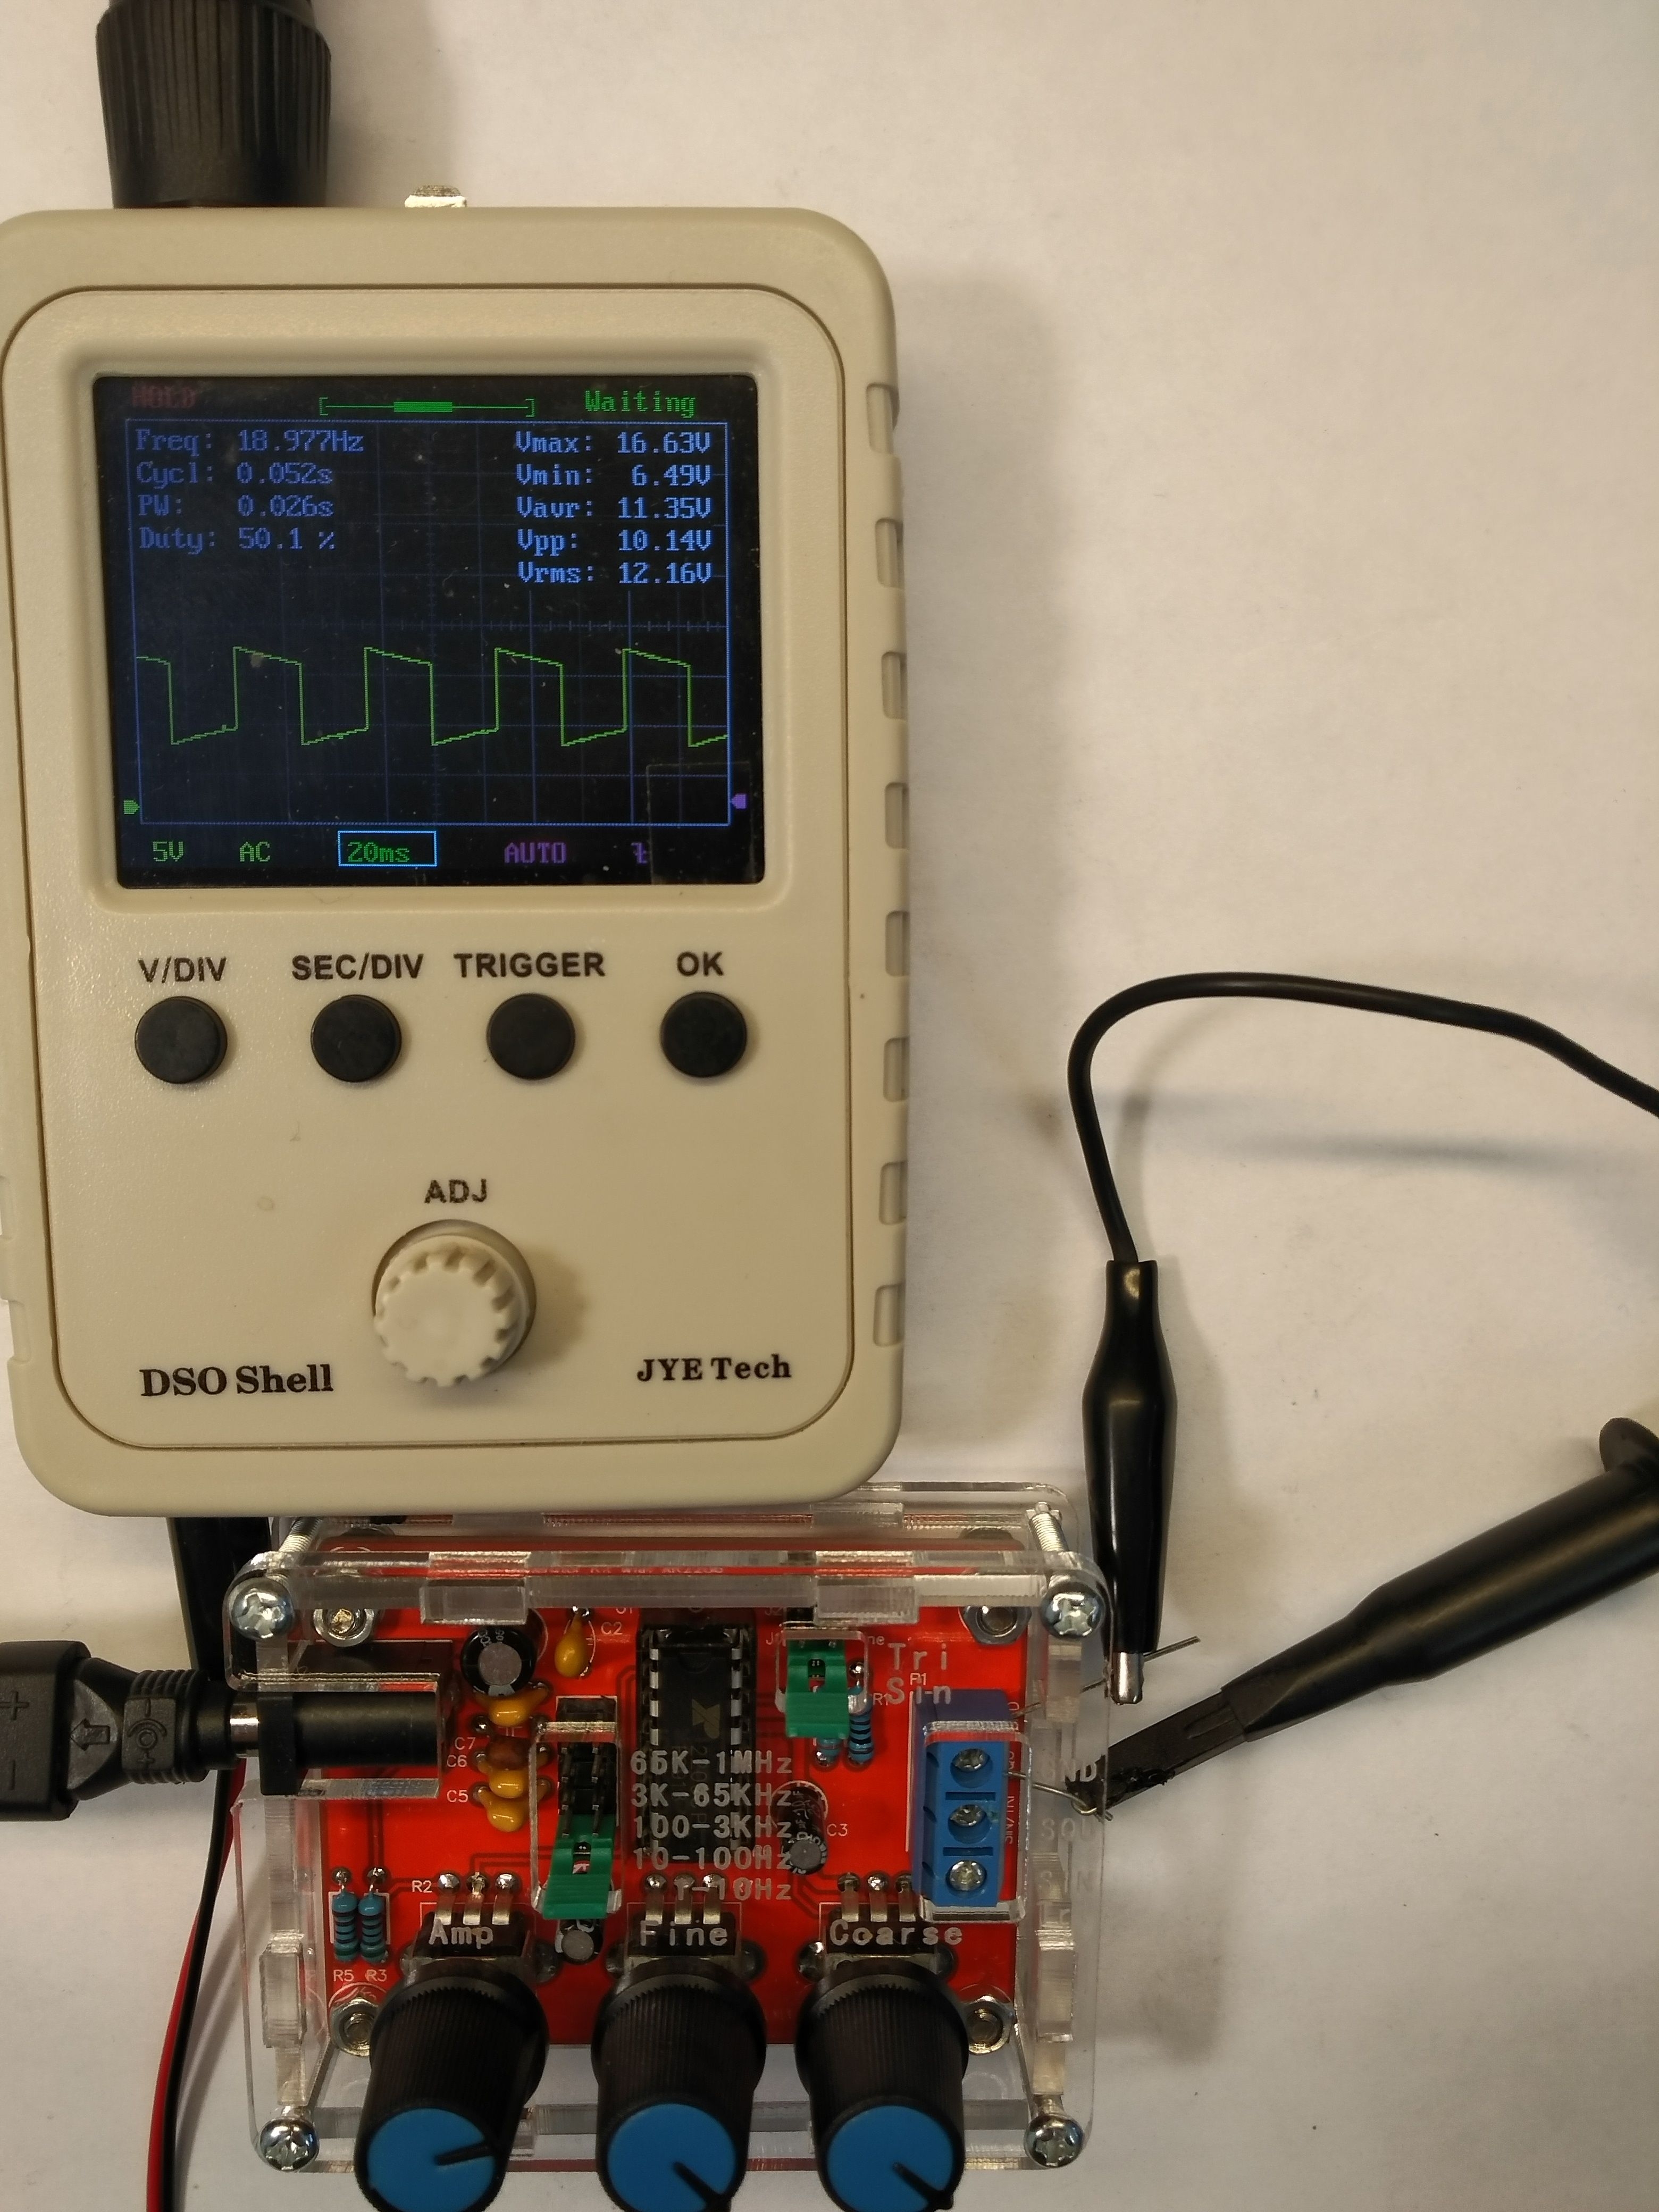
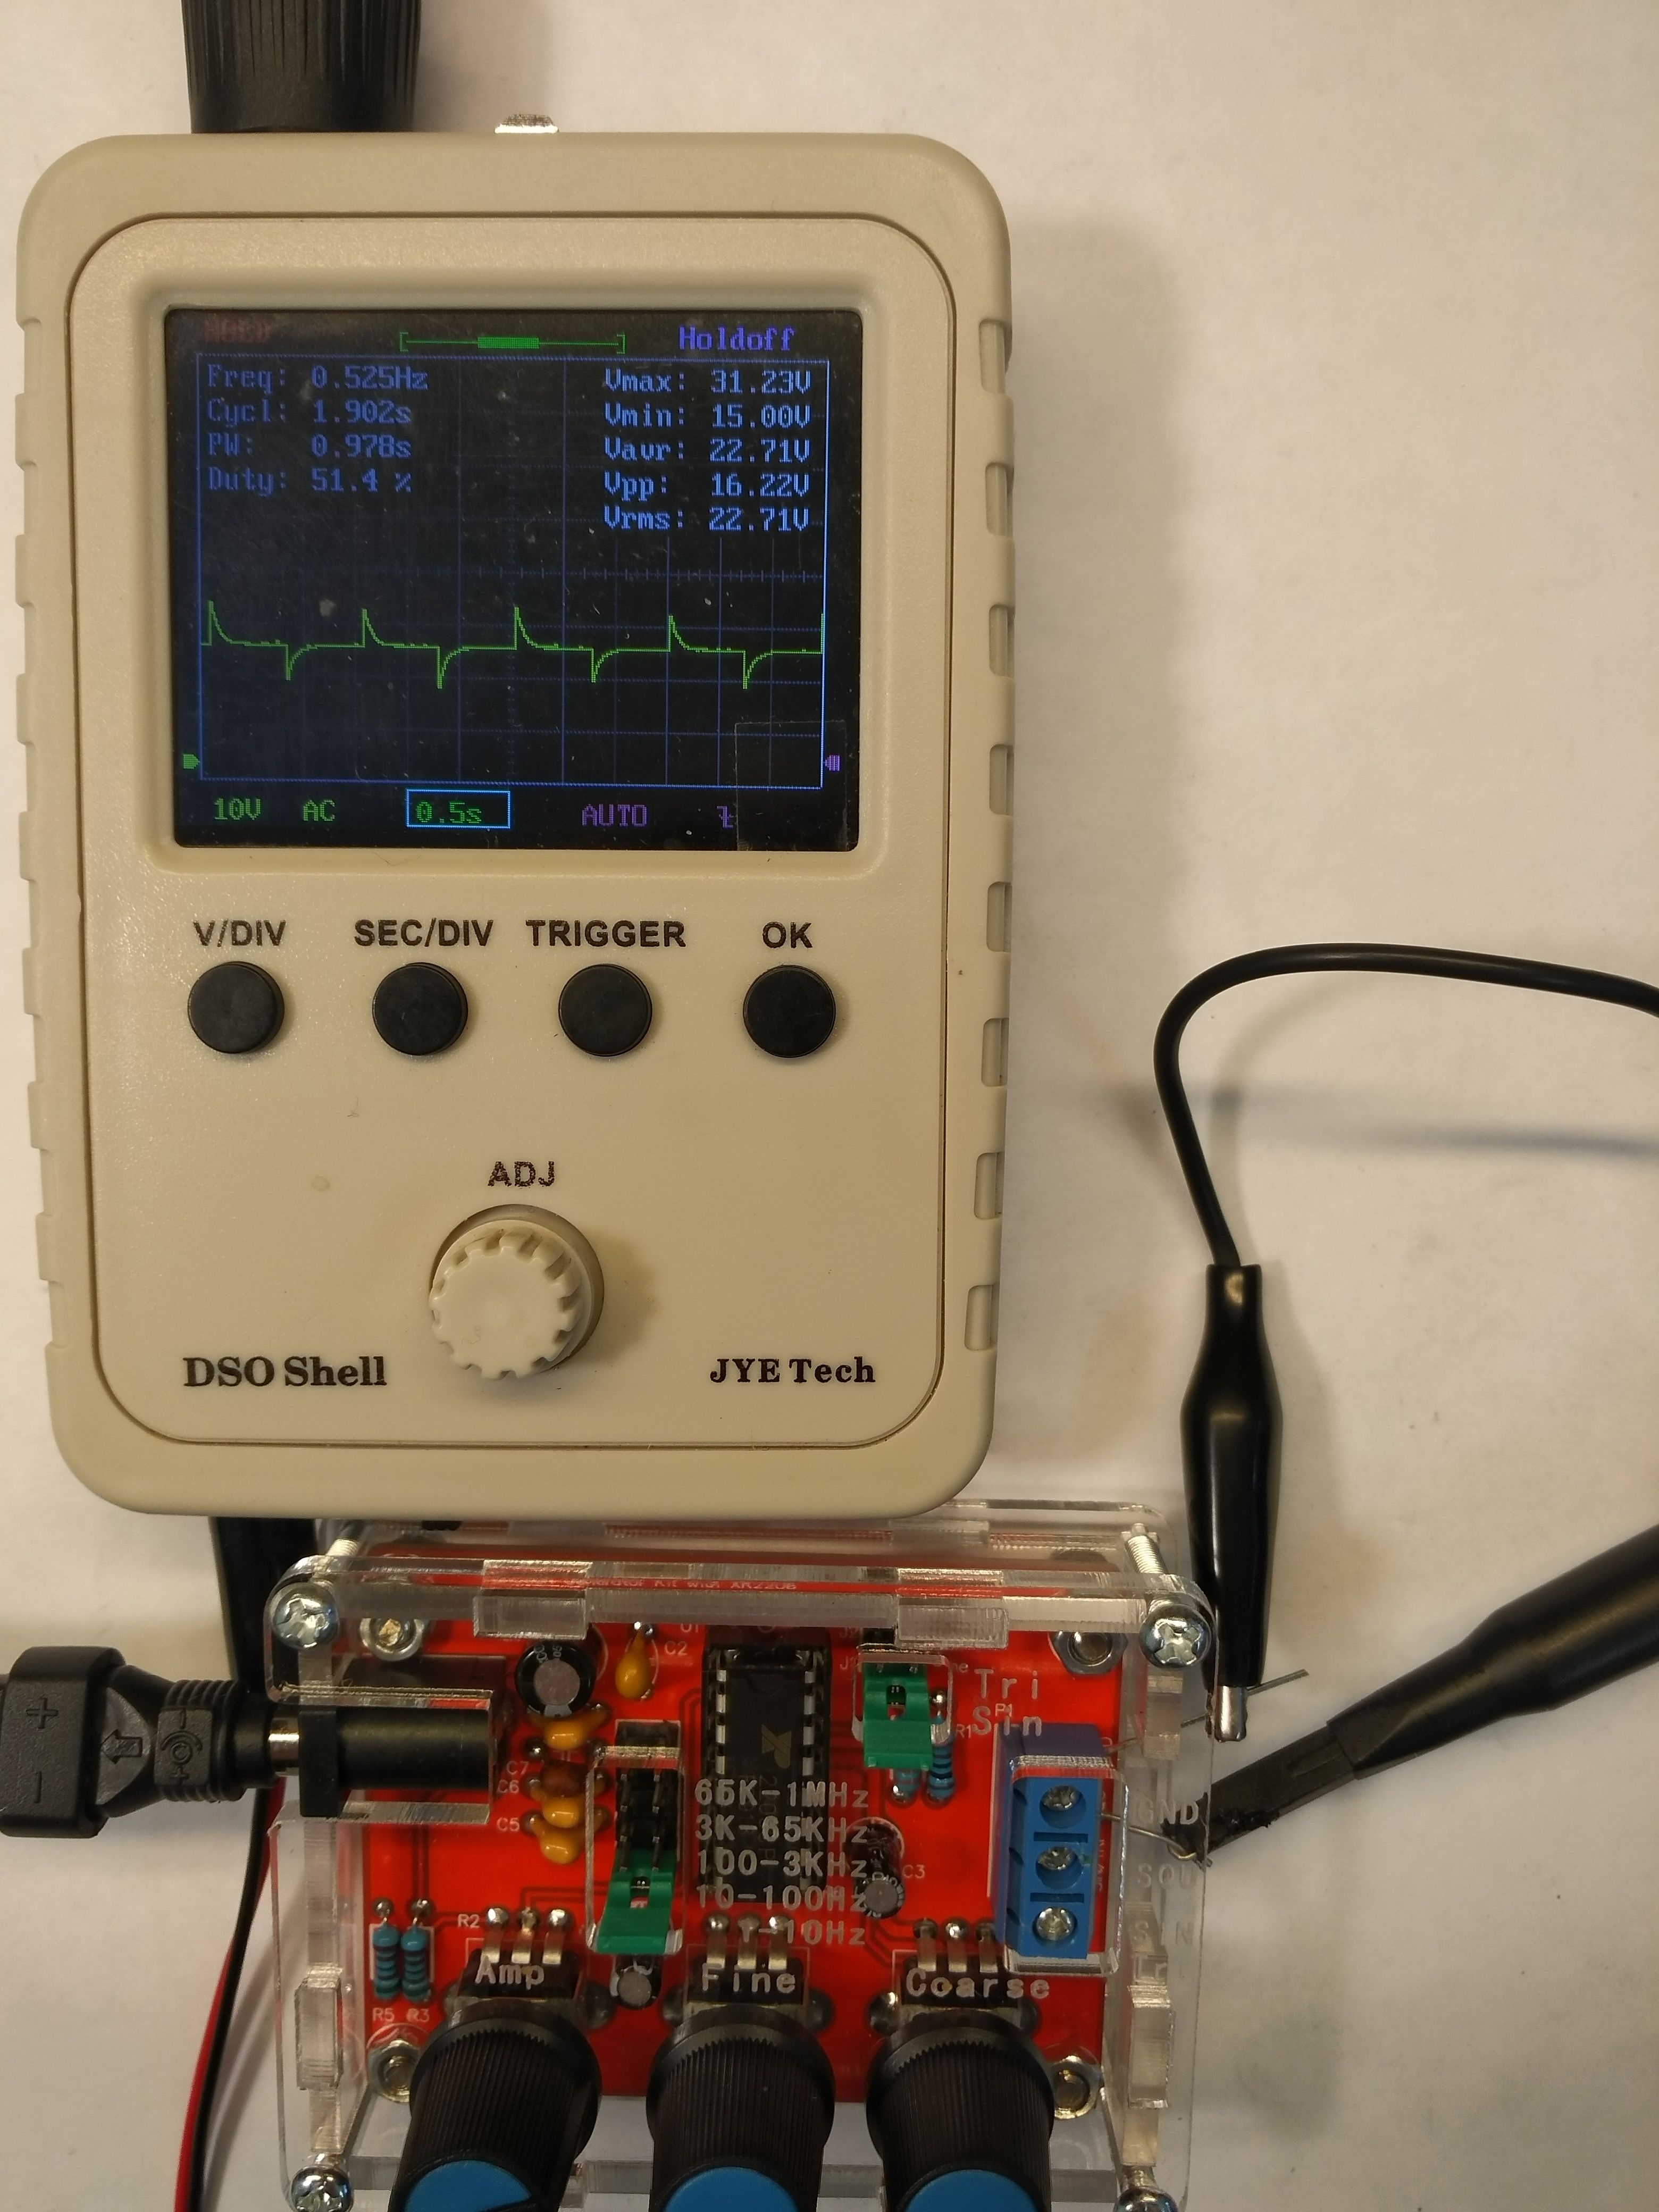
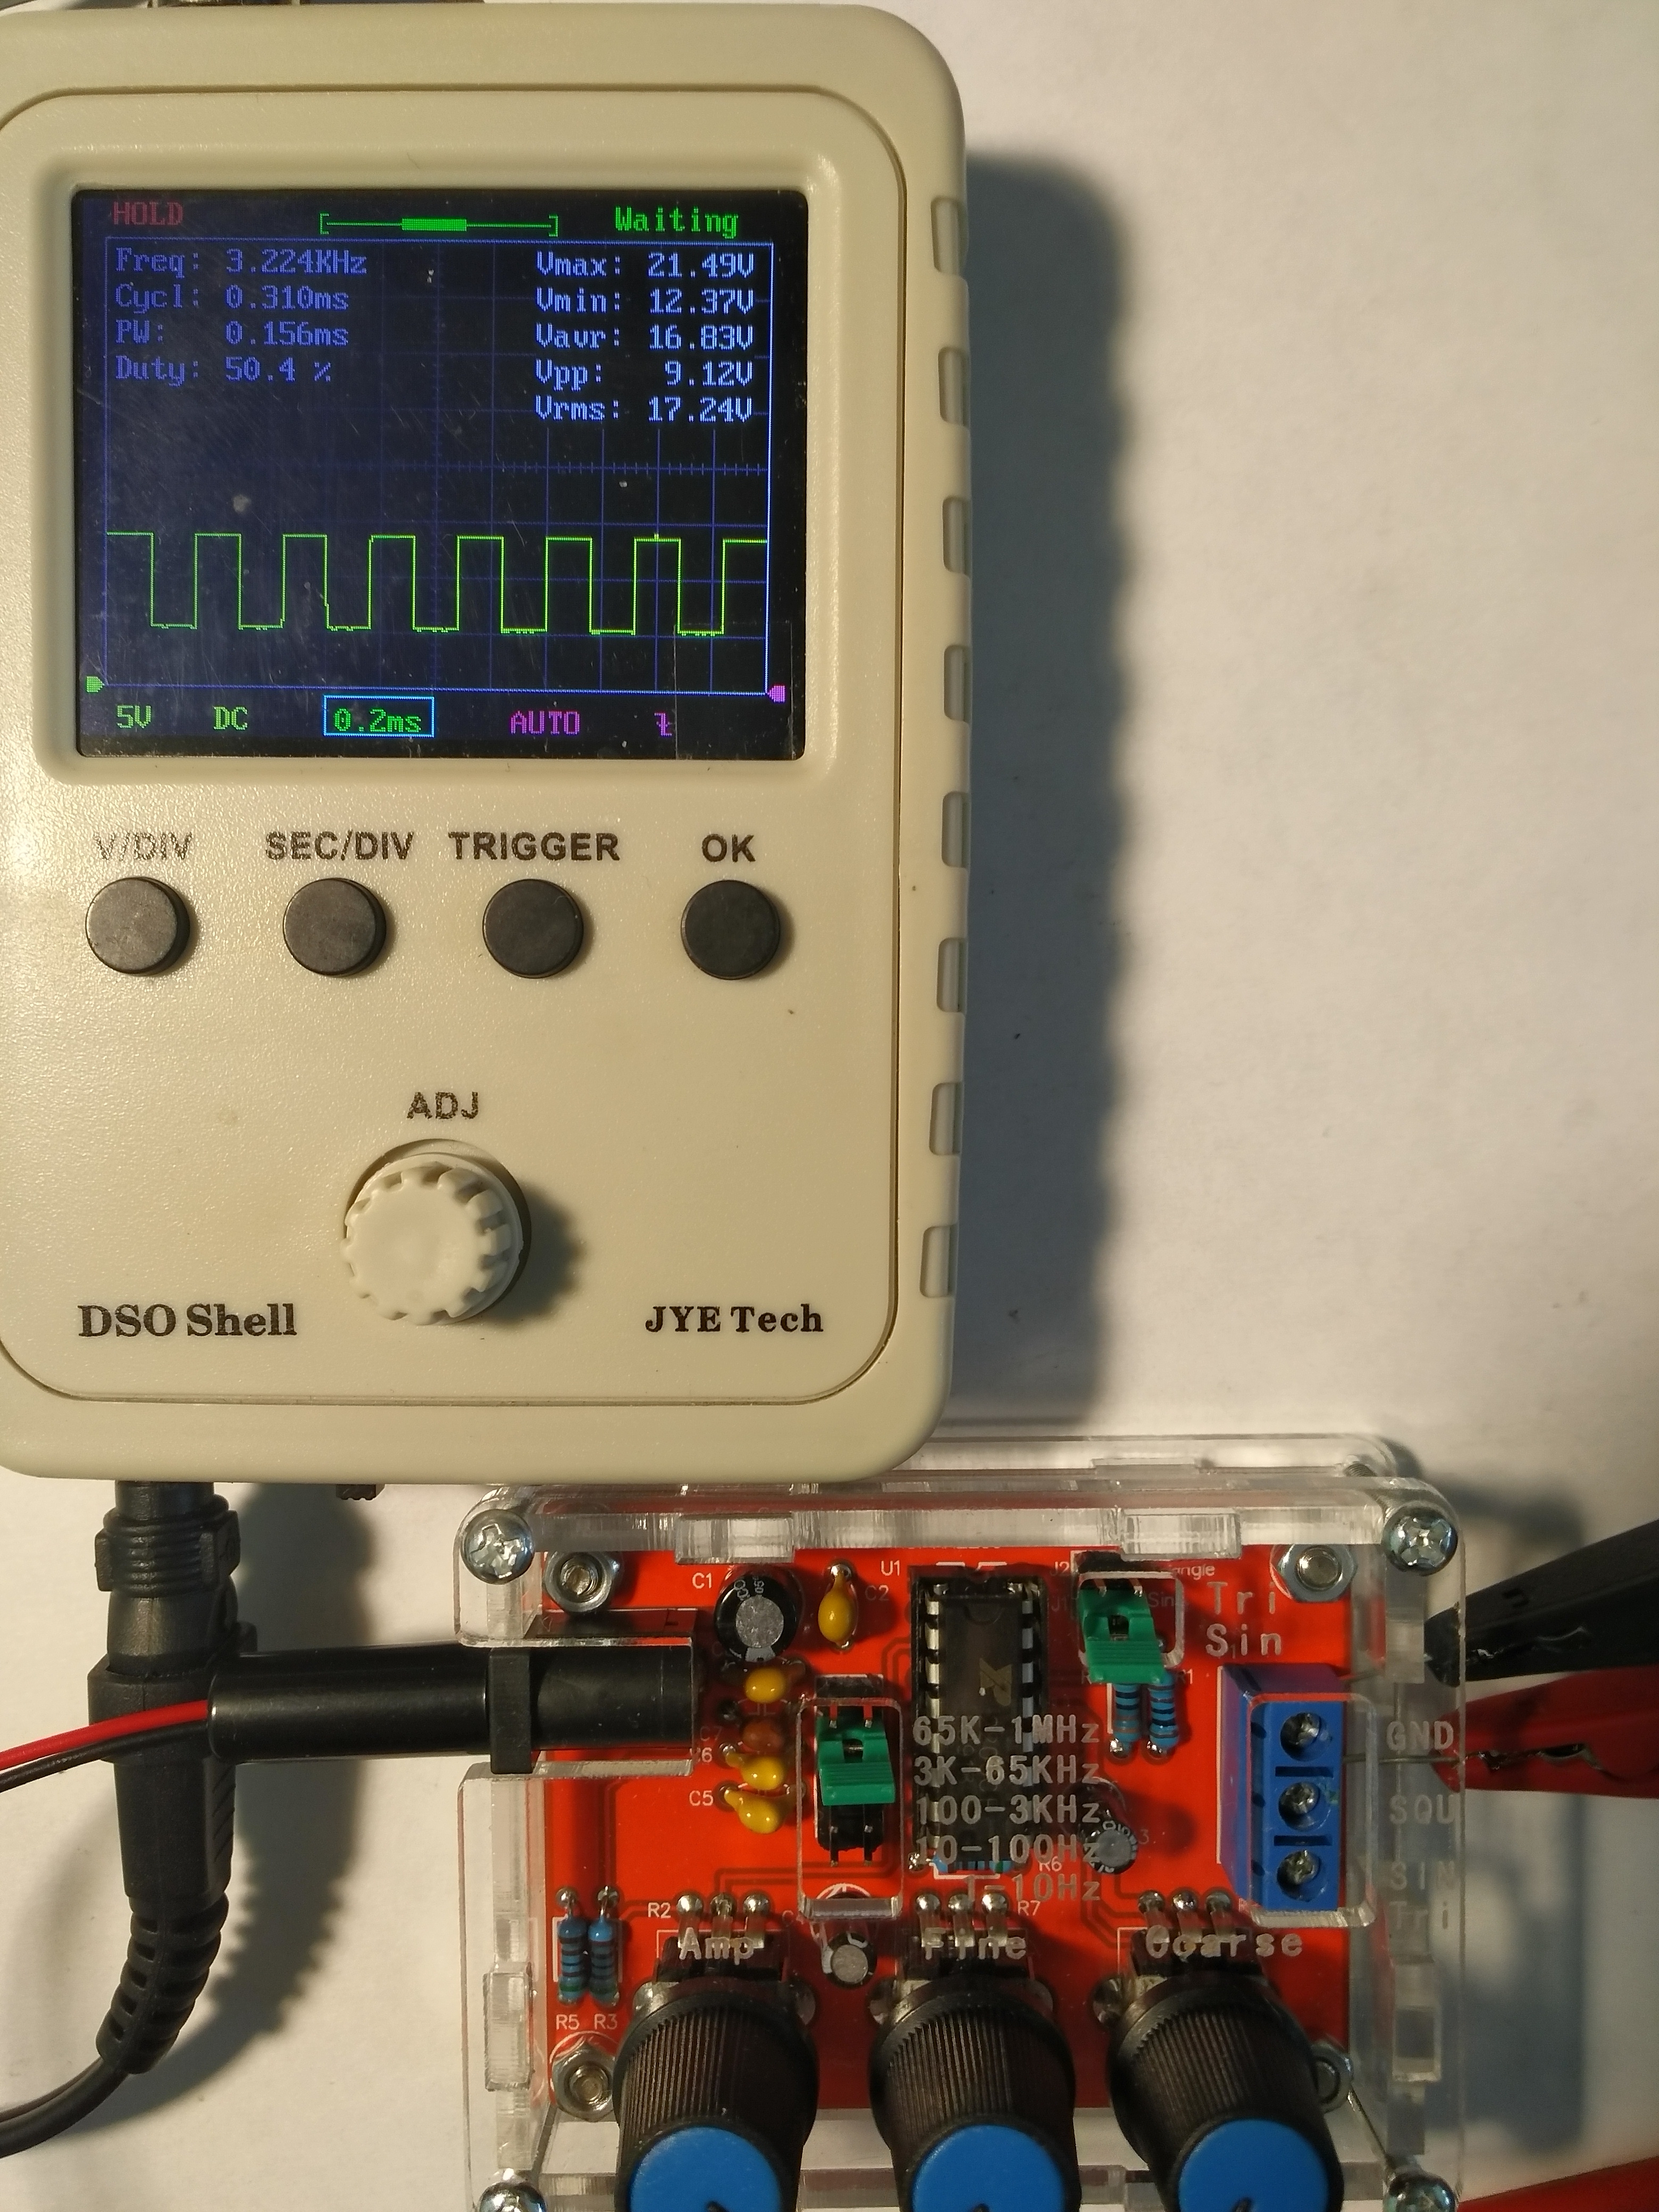
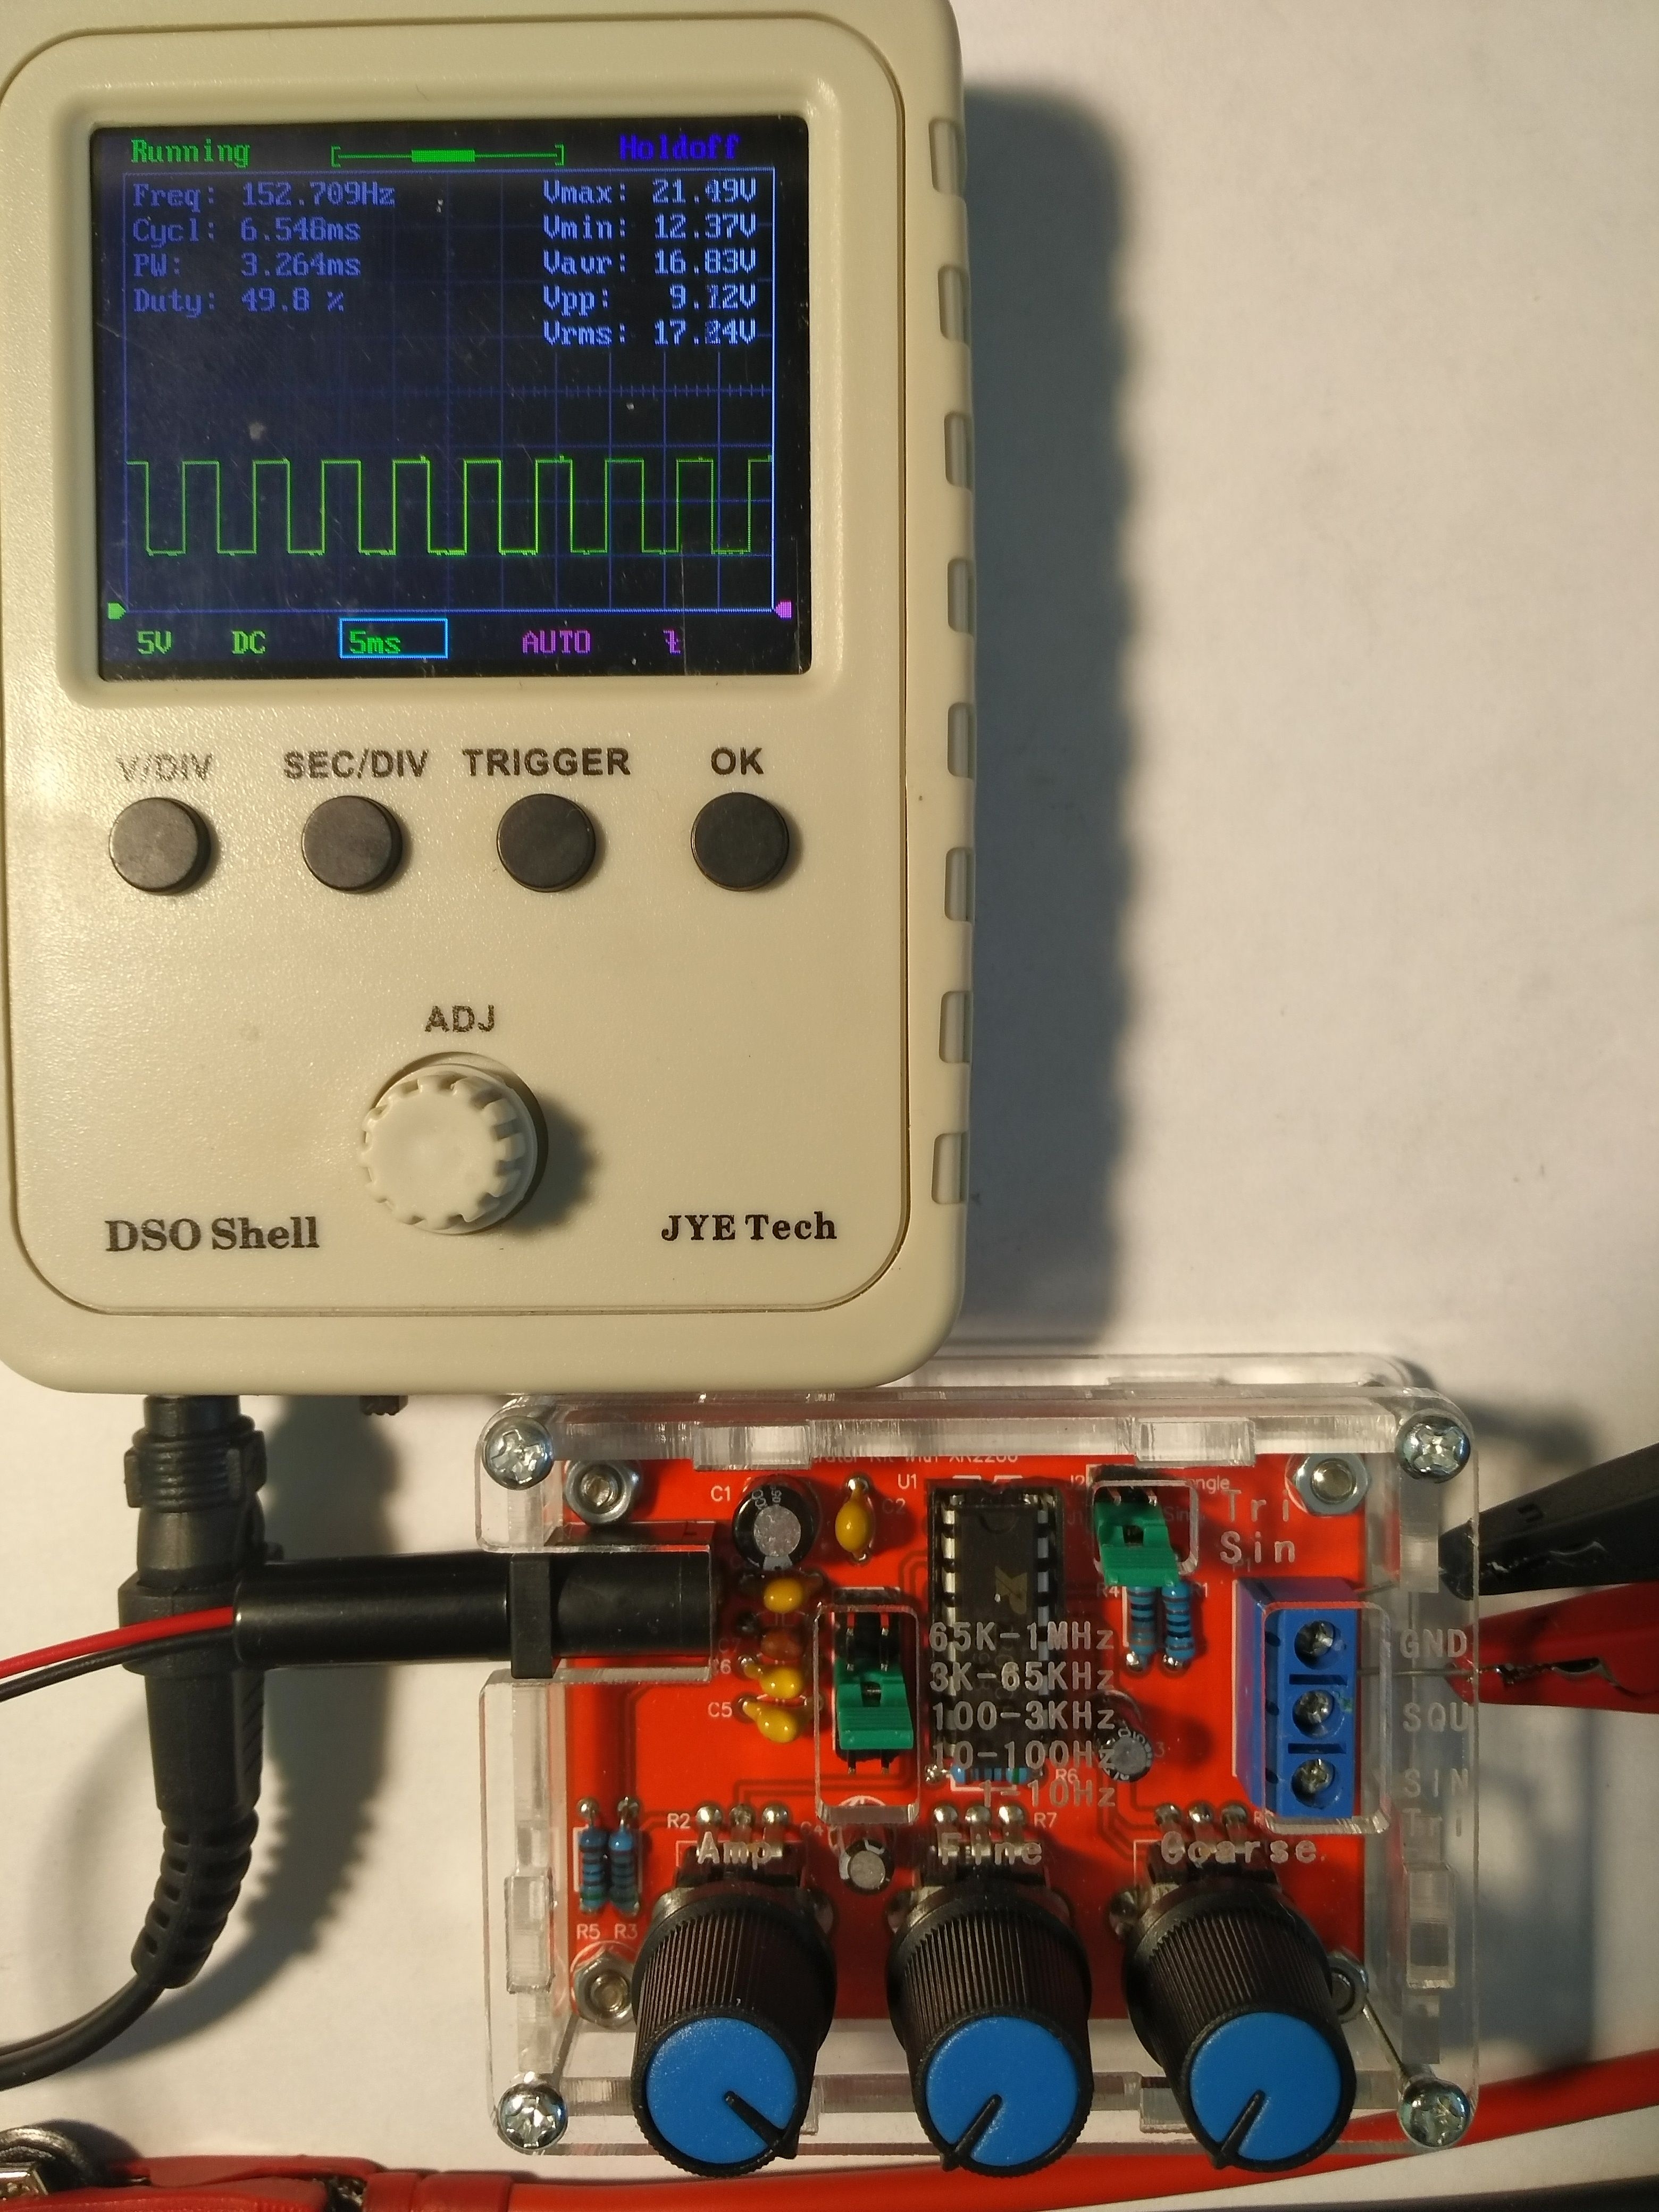
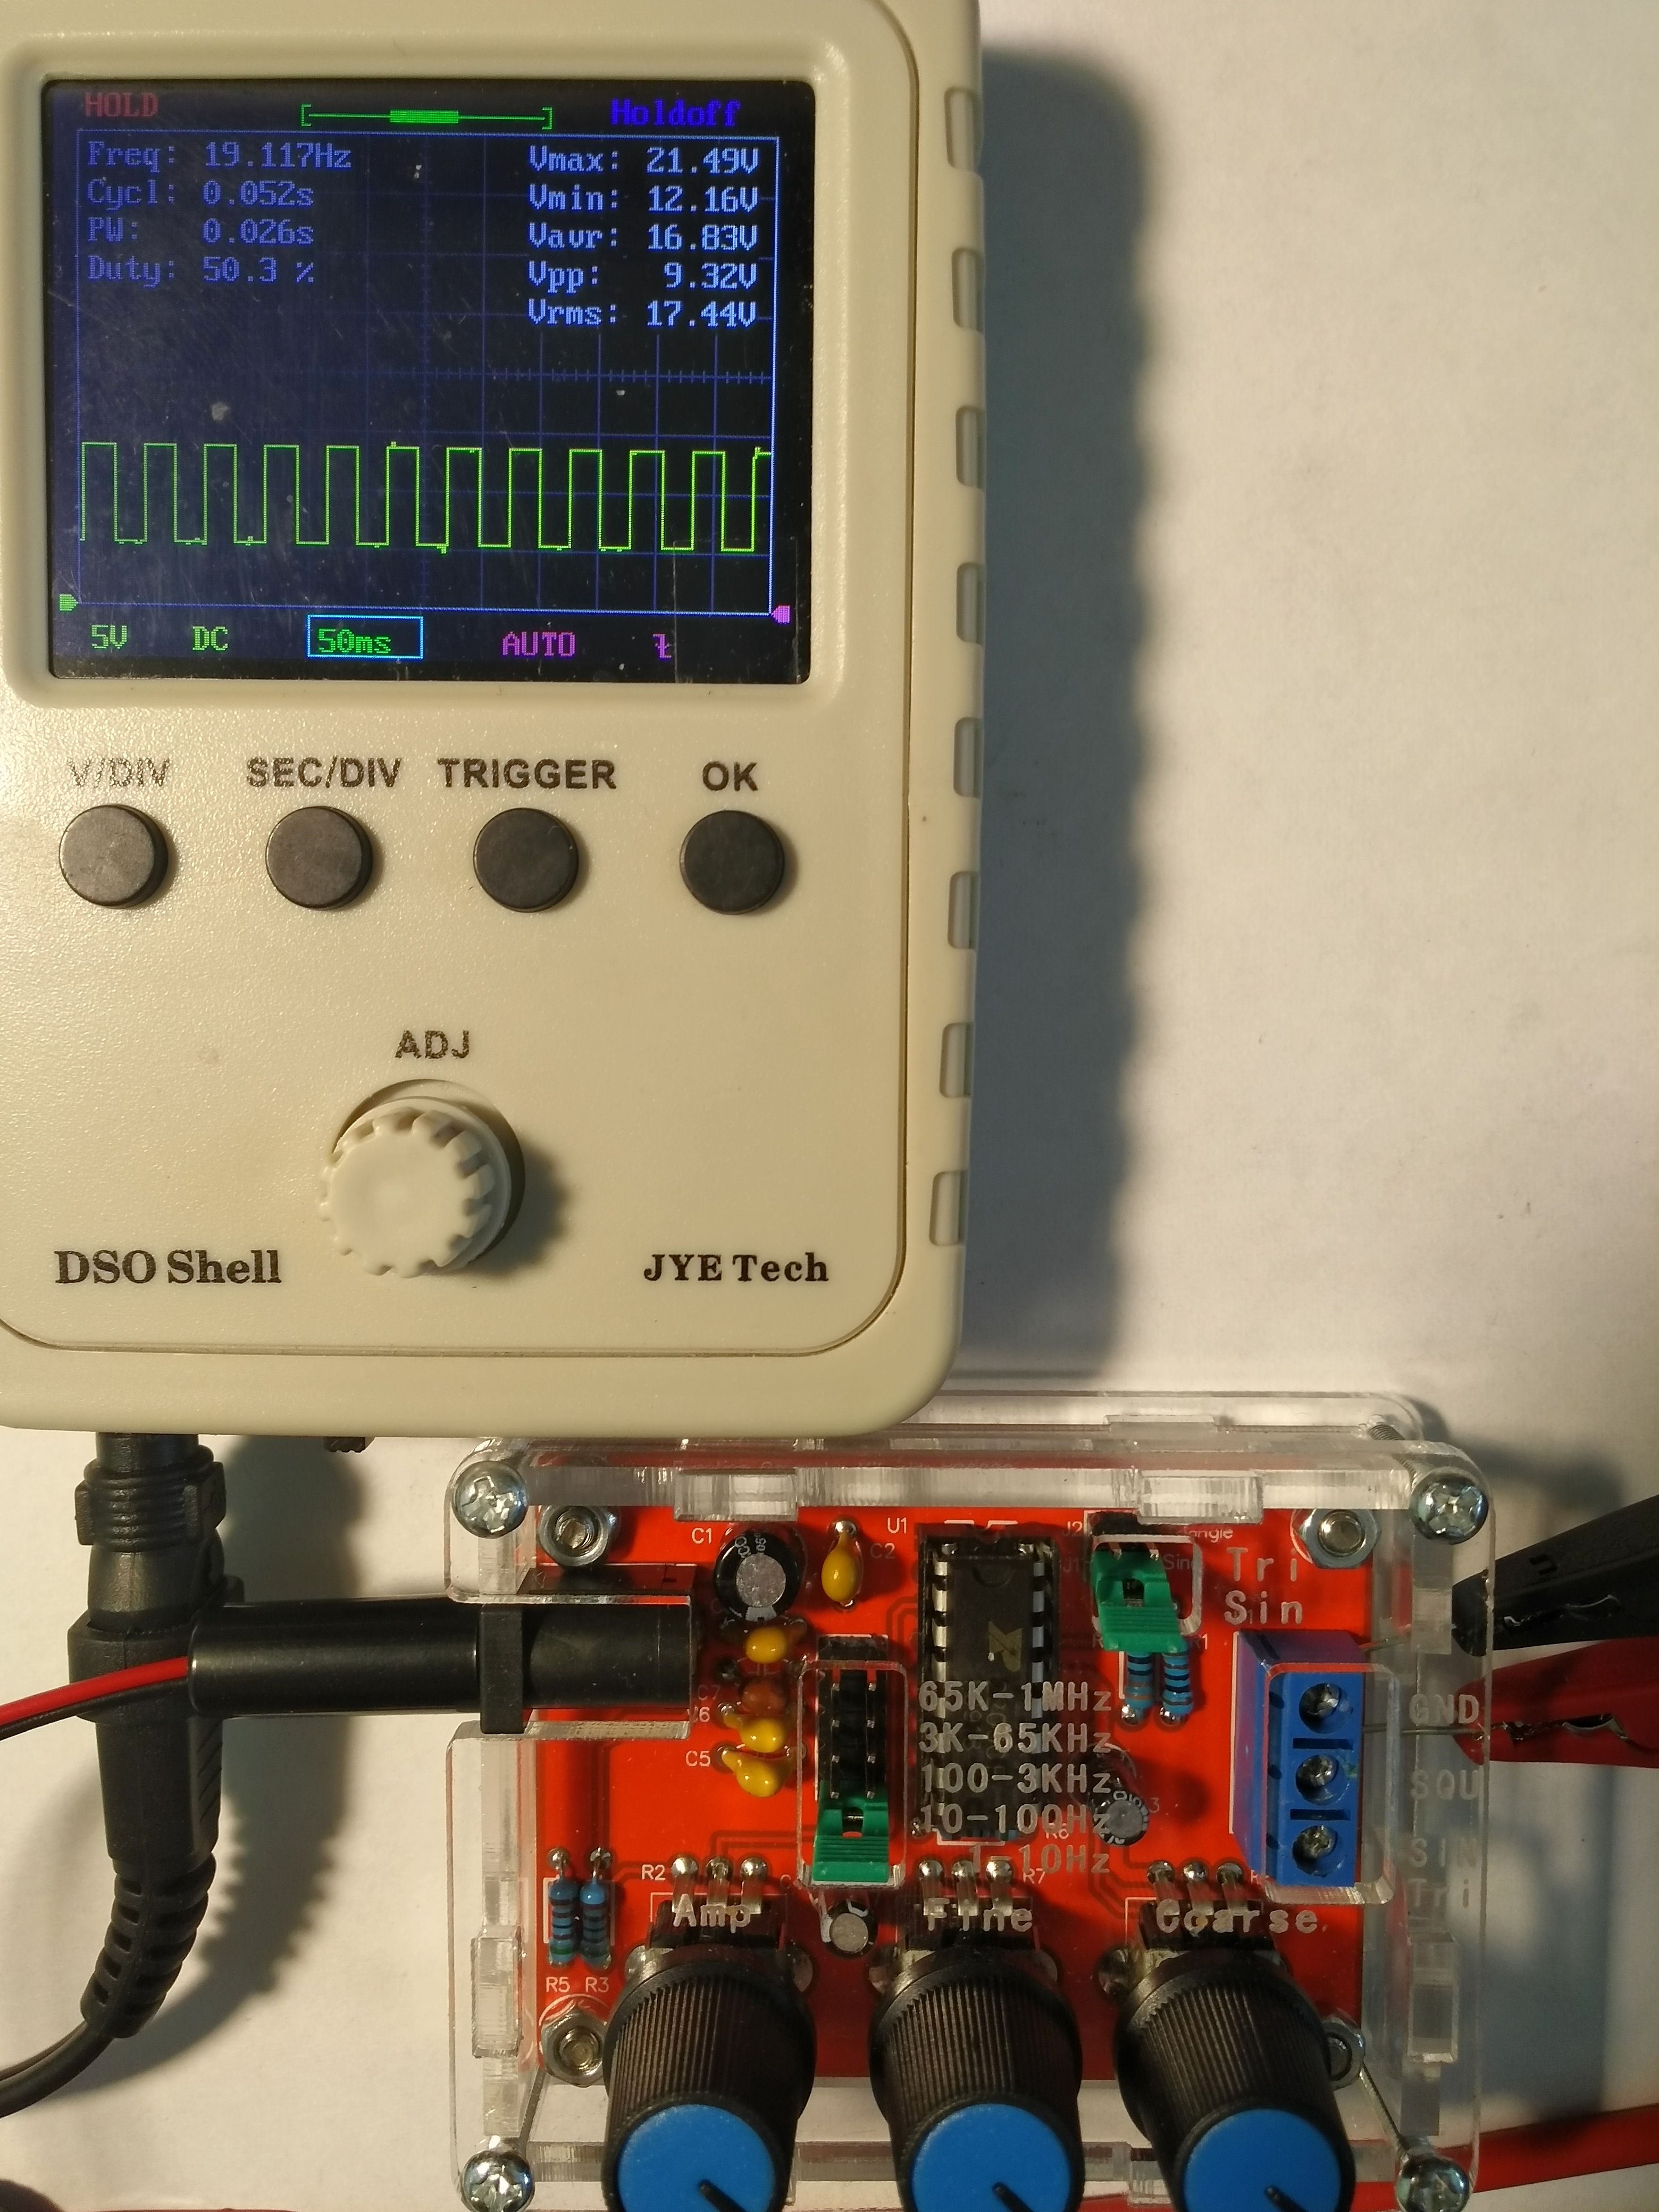
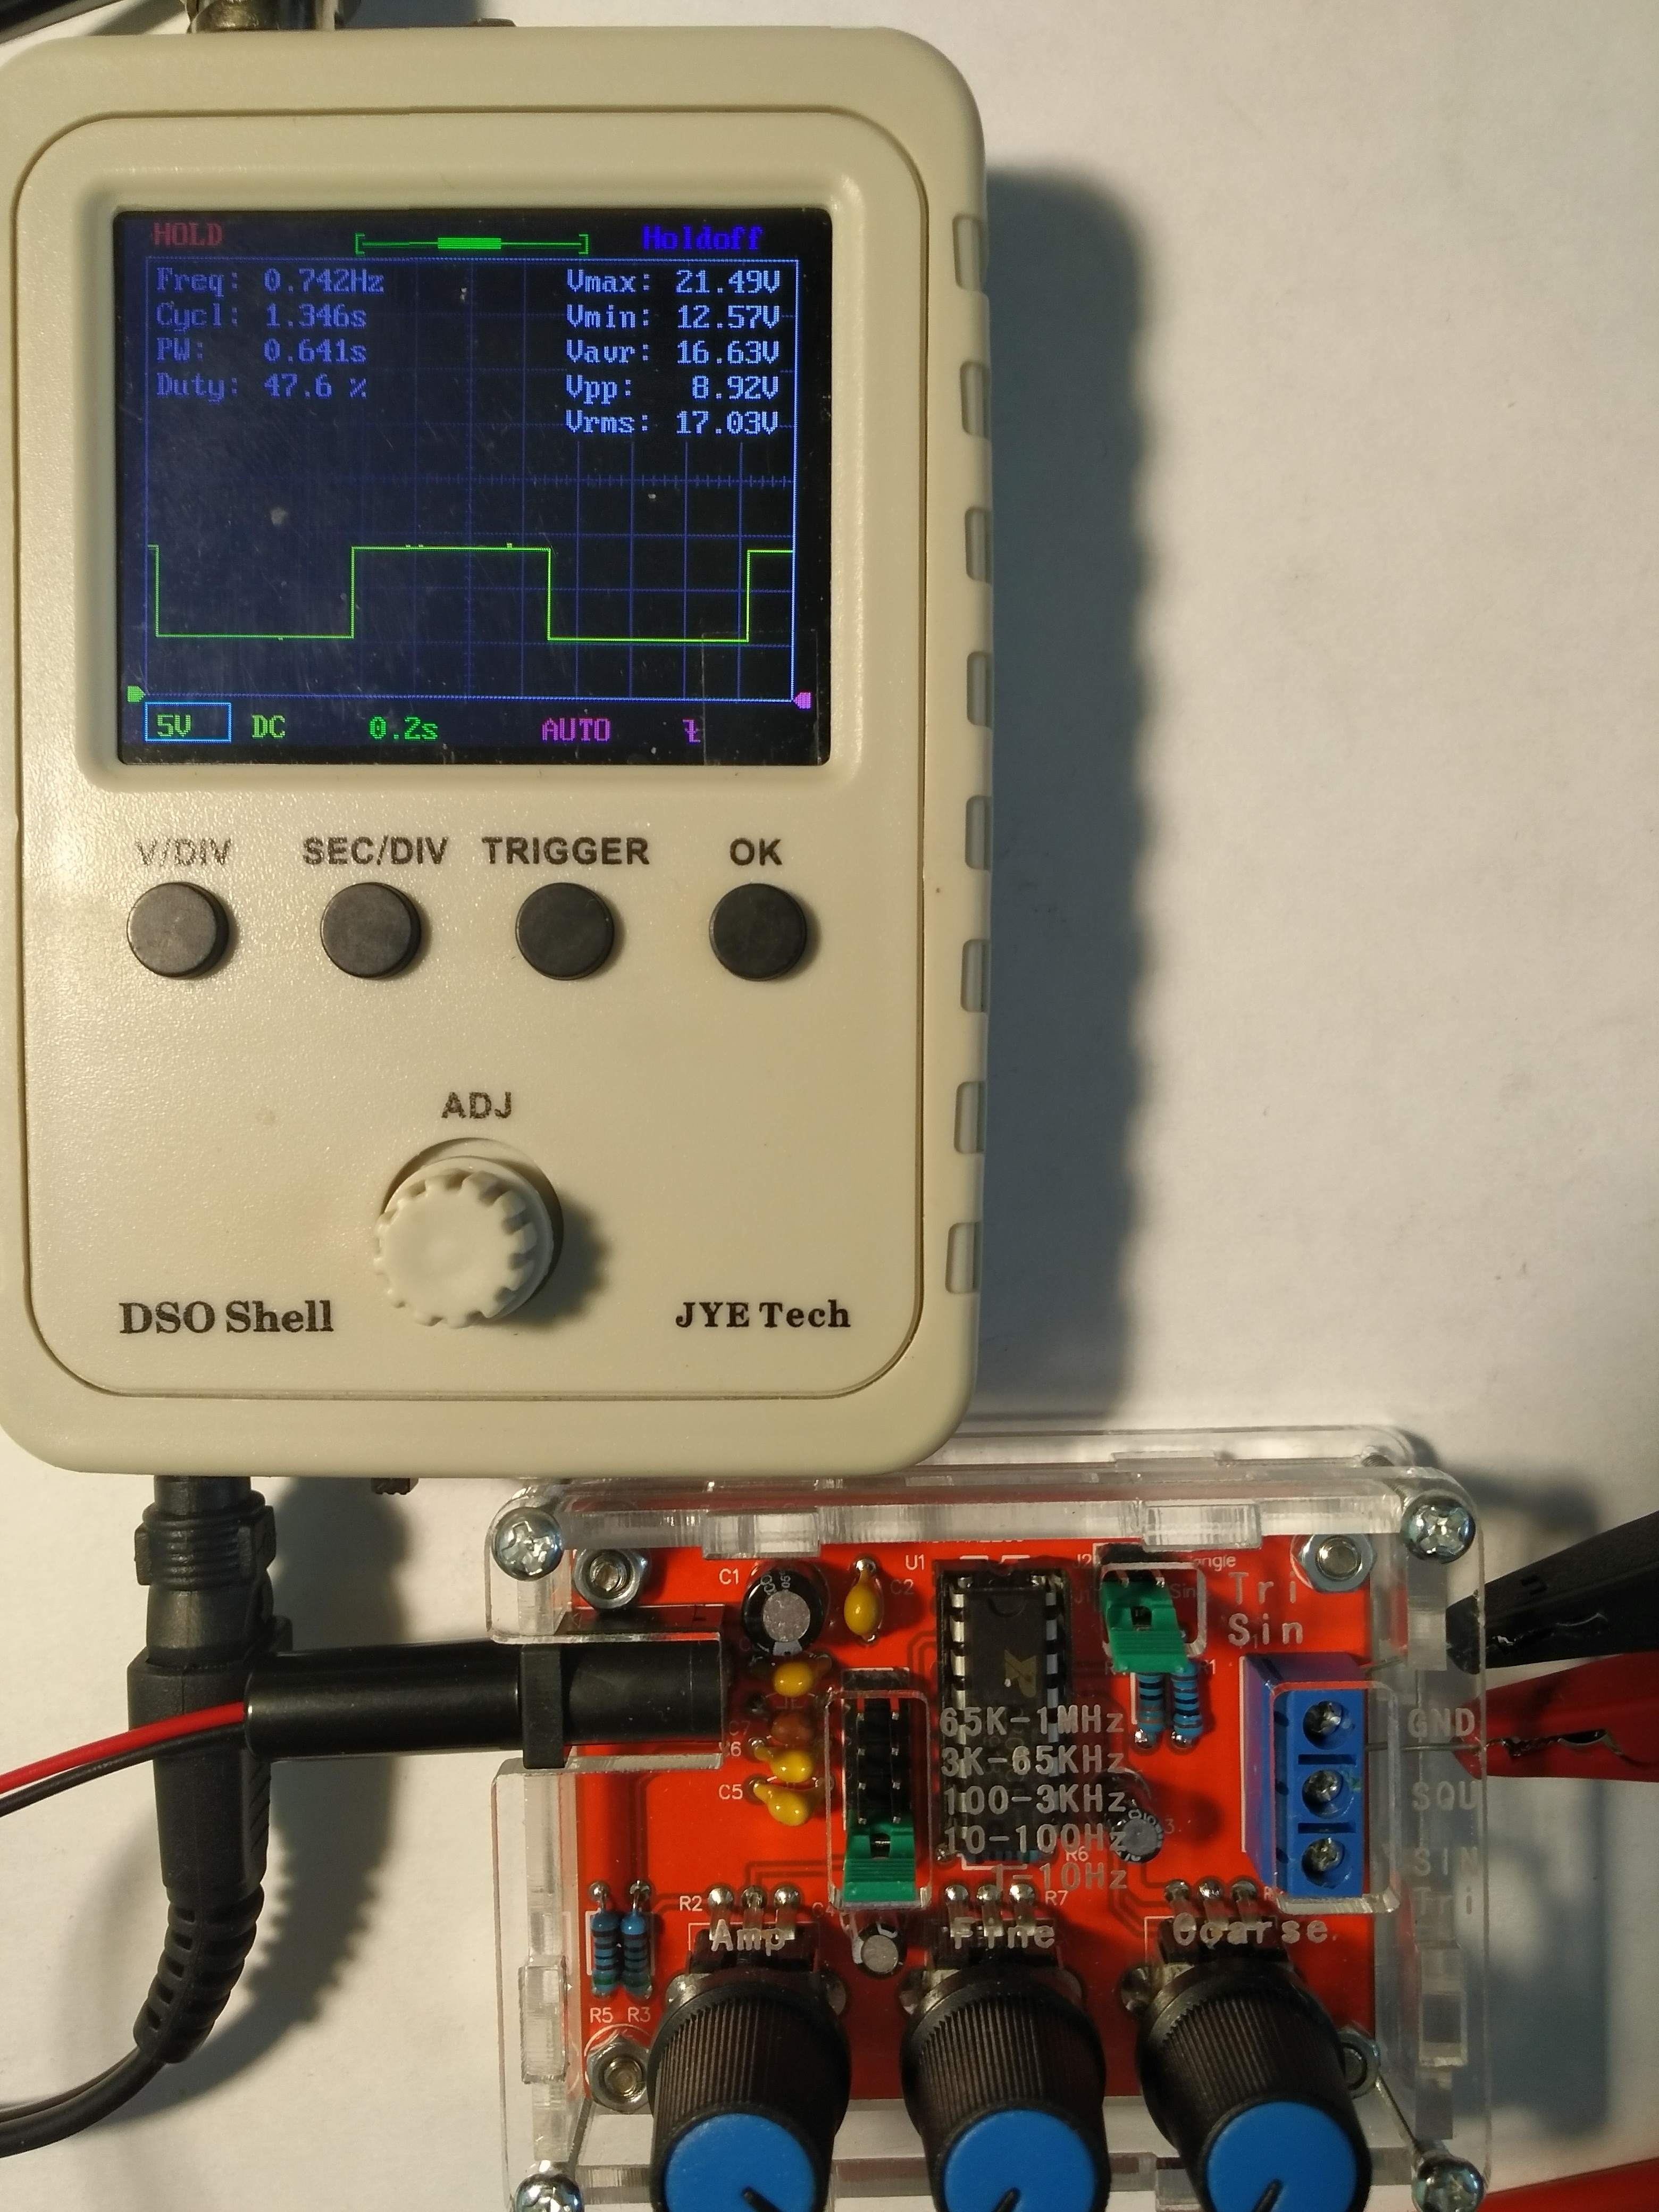
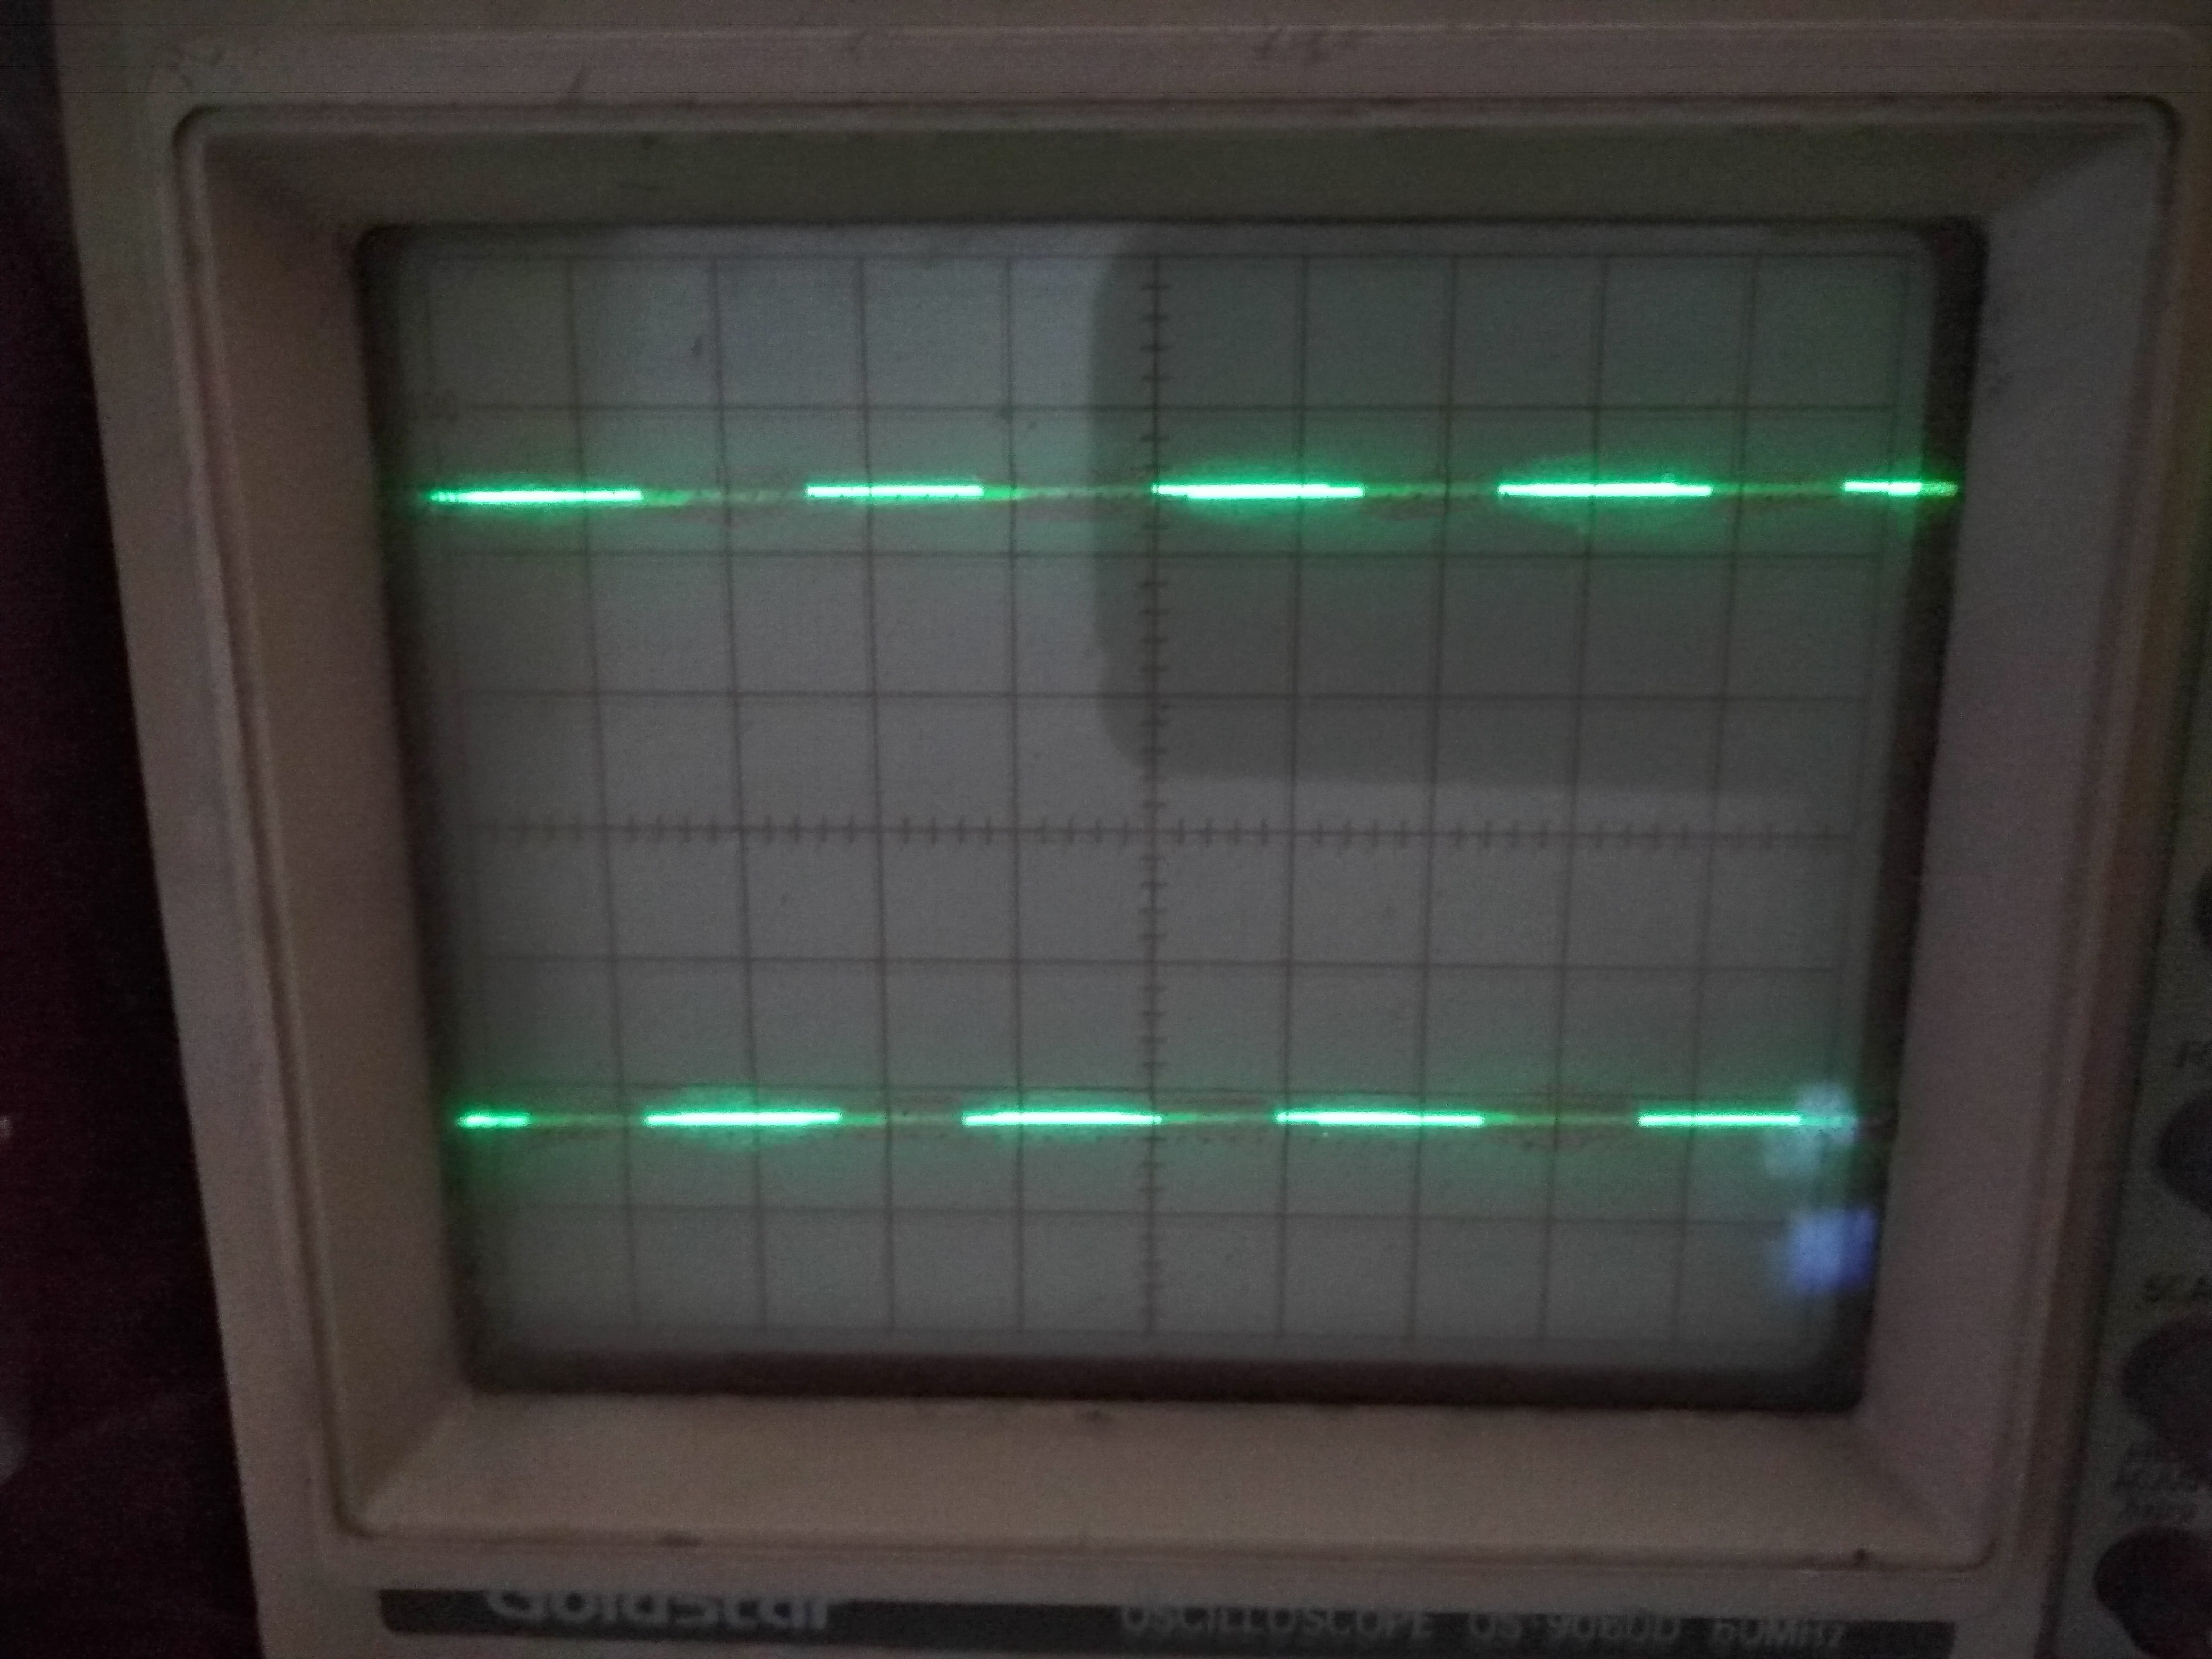
And finally, what you like the most, i.e. some pictures from the course of the tests.
I decided to show the waveforms for each type and frequency on the basis of:
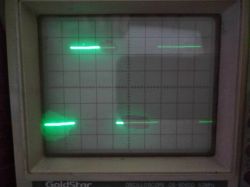
- first range - minimum twist of the potentiometers, and then the maximum opening of the potentiometers. I am talking about the Fine and Coarse potentiometers, because I turned the Amplitude one only slightly when needed. The same for the other ranges, except the last one, because the oscilloscope did not work anymore.

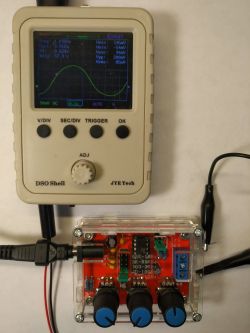


Sorry for confusing the order of photos but it's not my fault but electrode server error. However, I don't think it will be a big problem for you. After all, everything is clearly visible, only a little out of sequence.
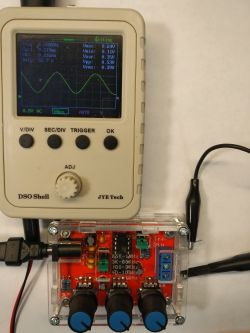
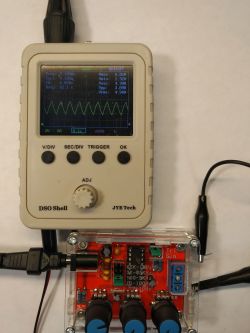
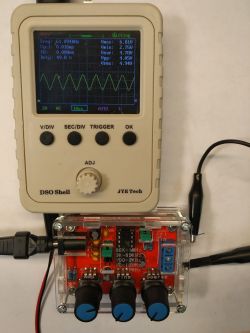
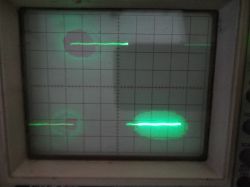
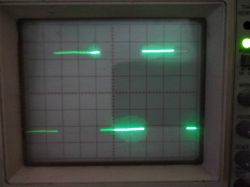
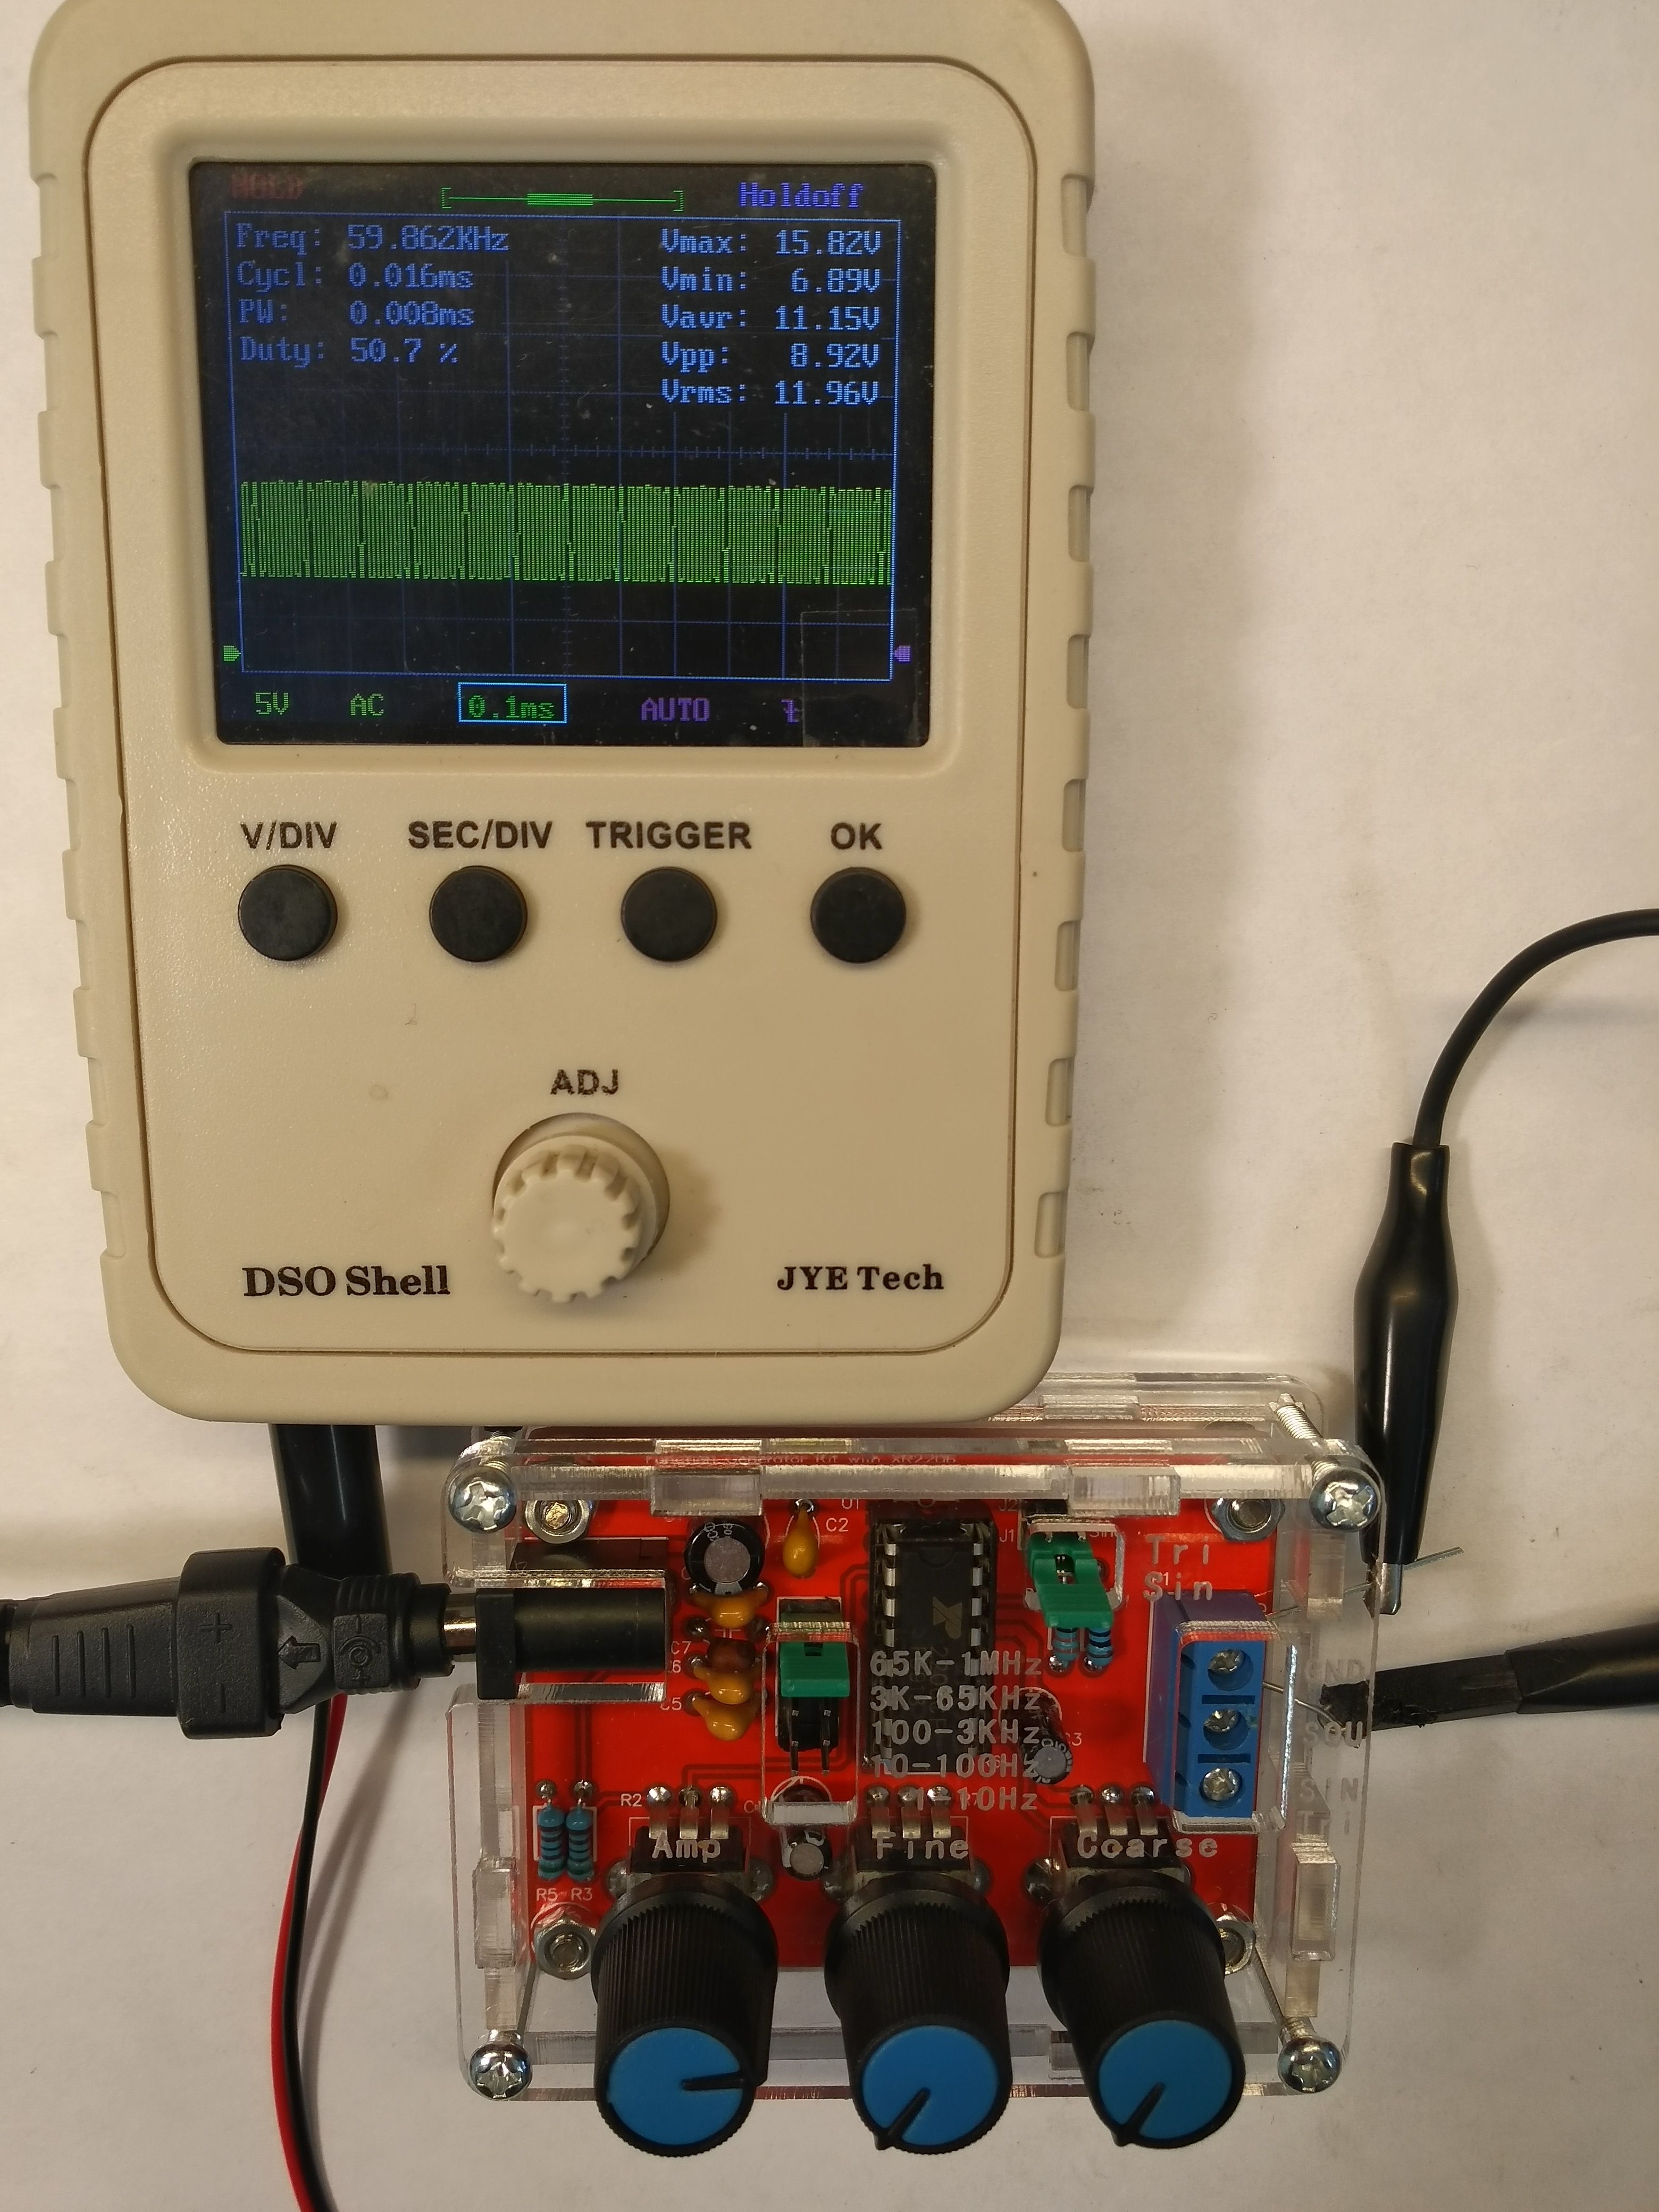
The above photos show the behavior of the course, from fractions of Hertz to two hundred kilos of Hertz. However, the pocket oscilloscope that I used for the review has the feature that above the mentioned frequency it starts to get lost.
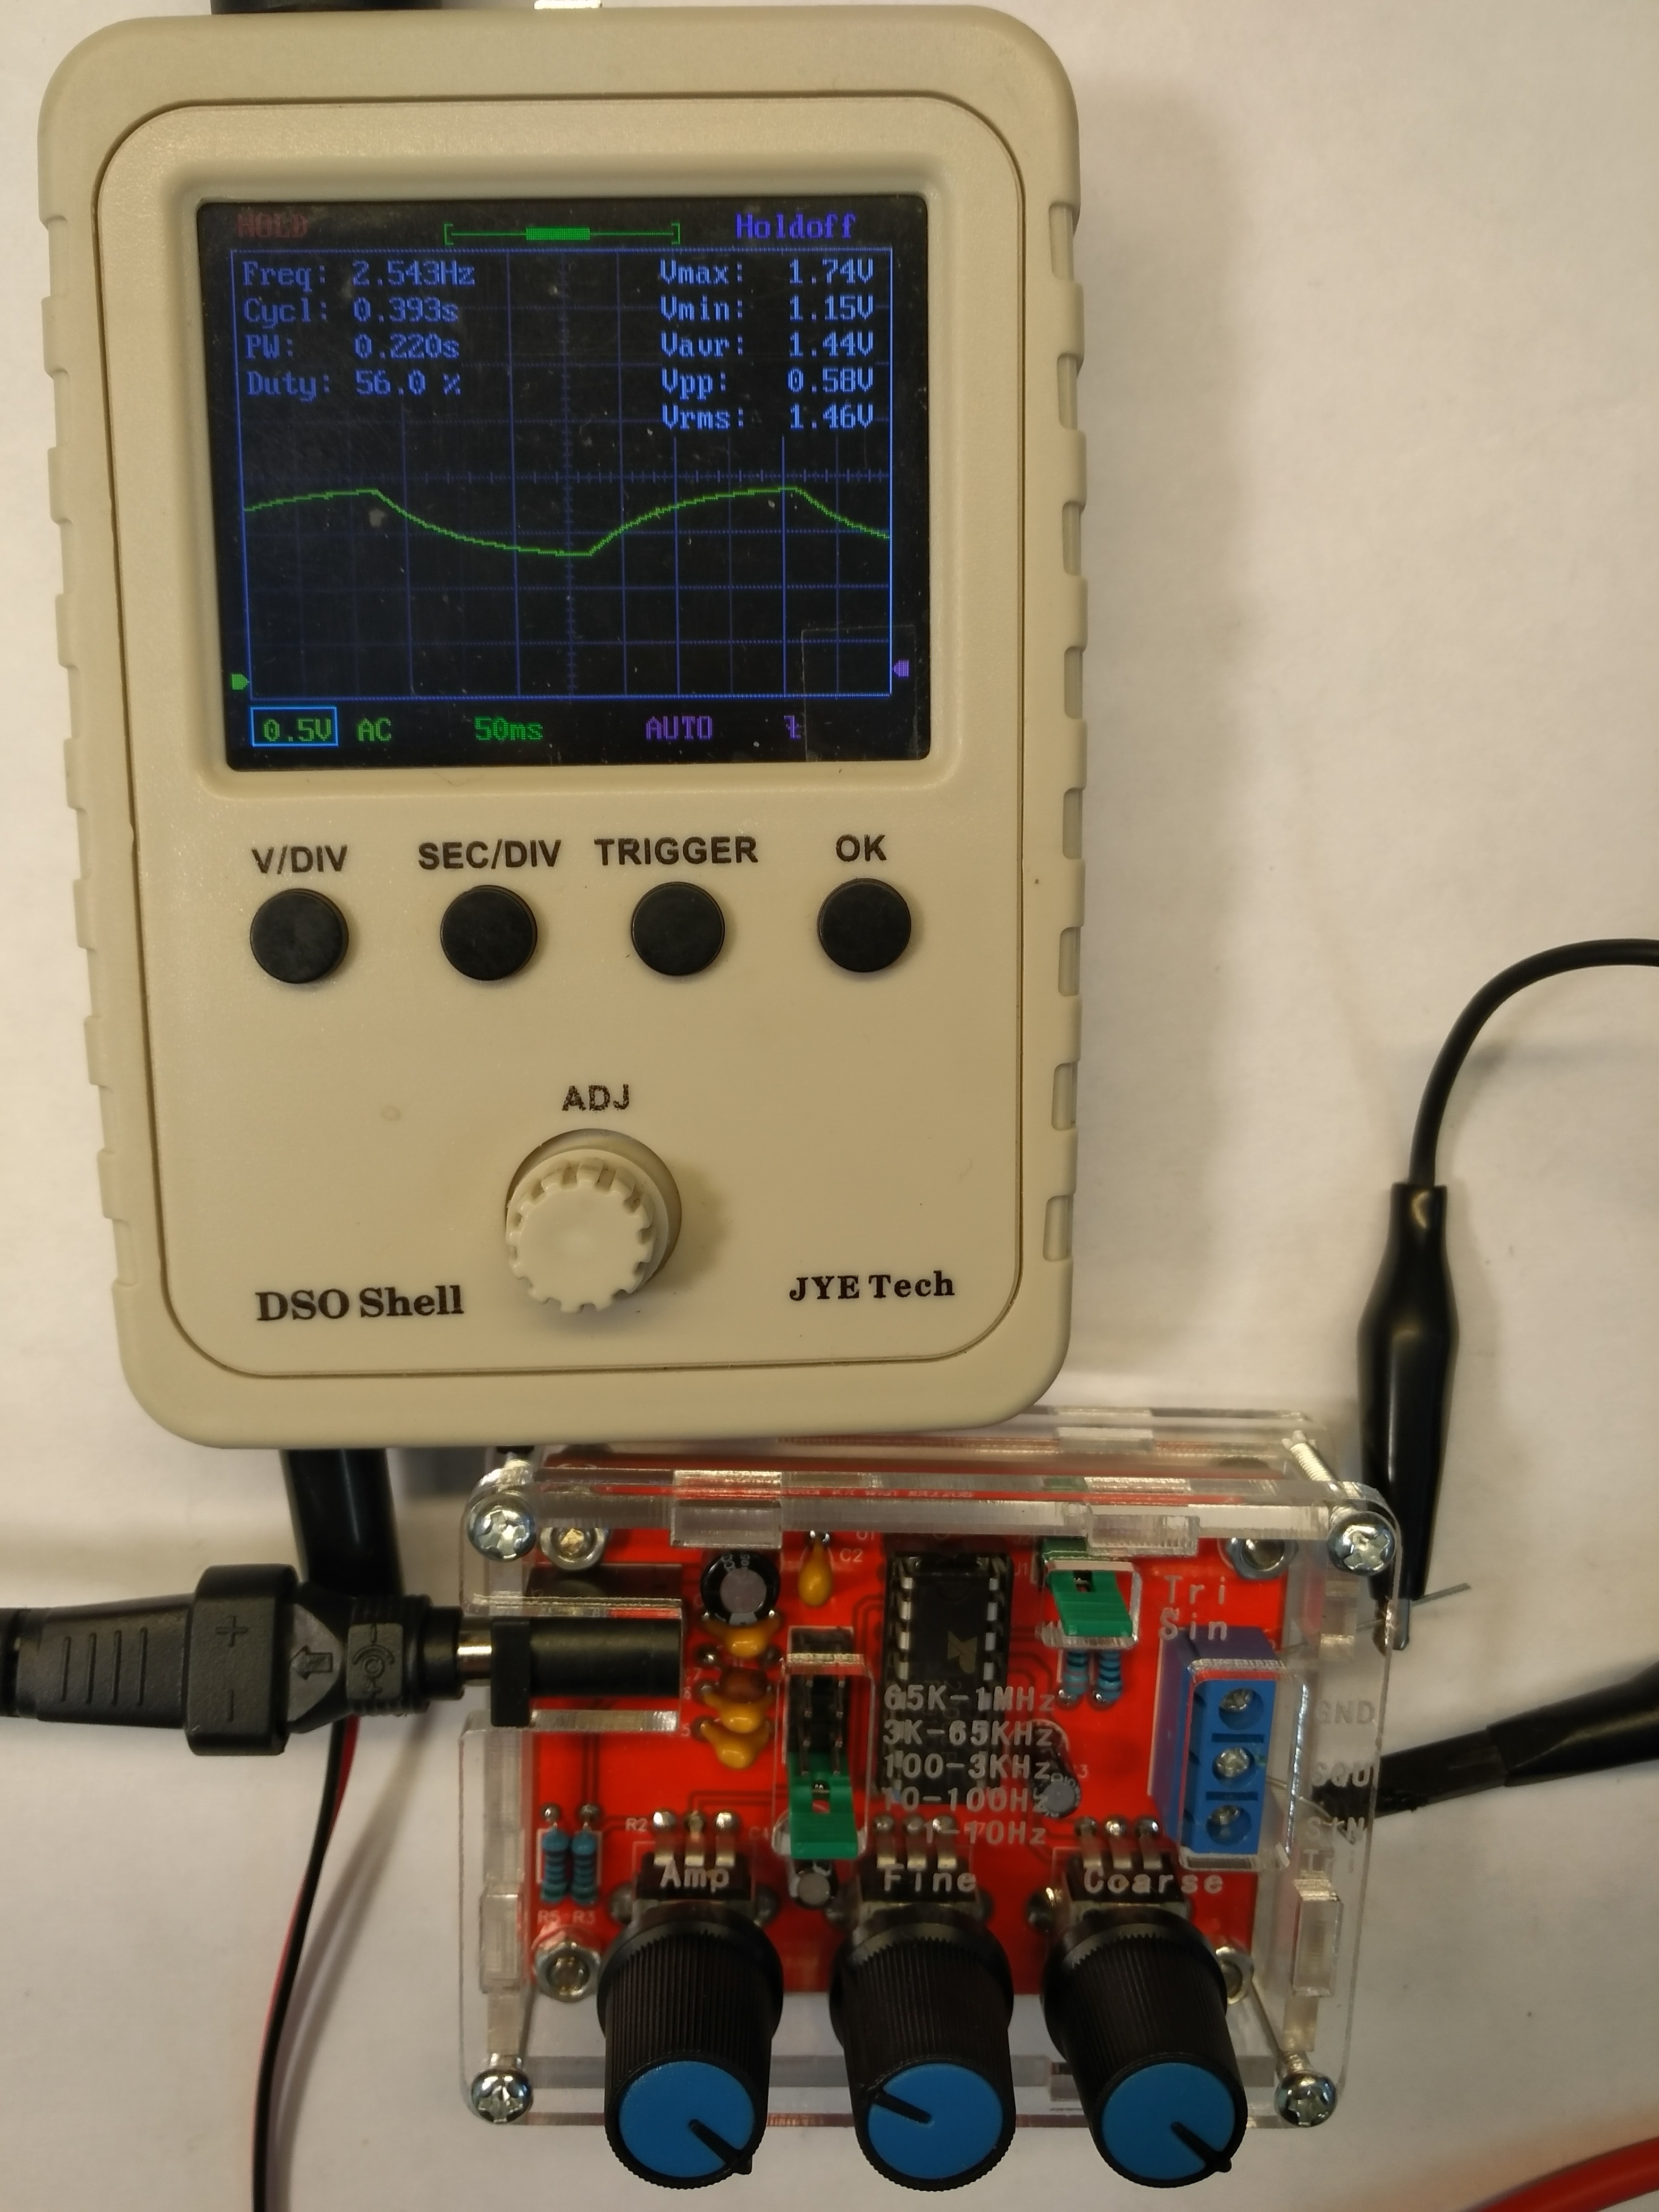
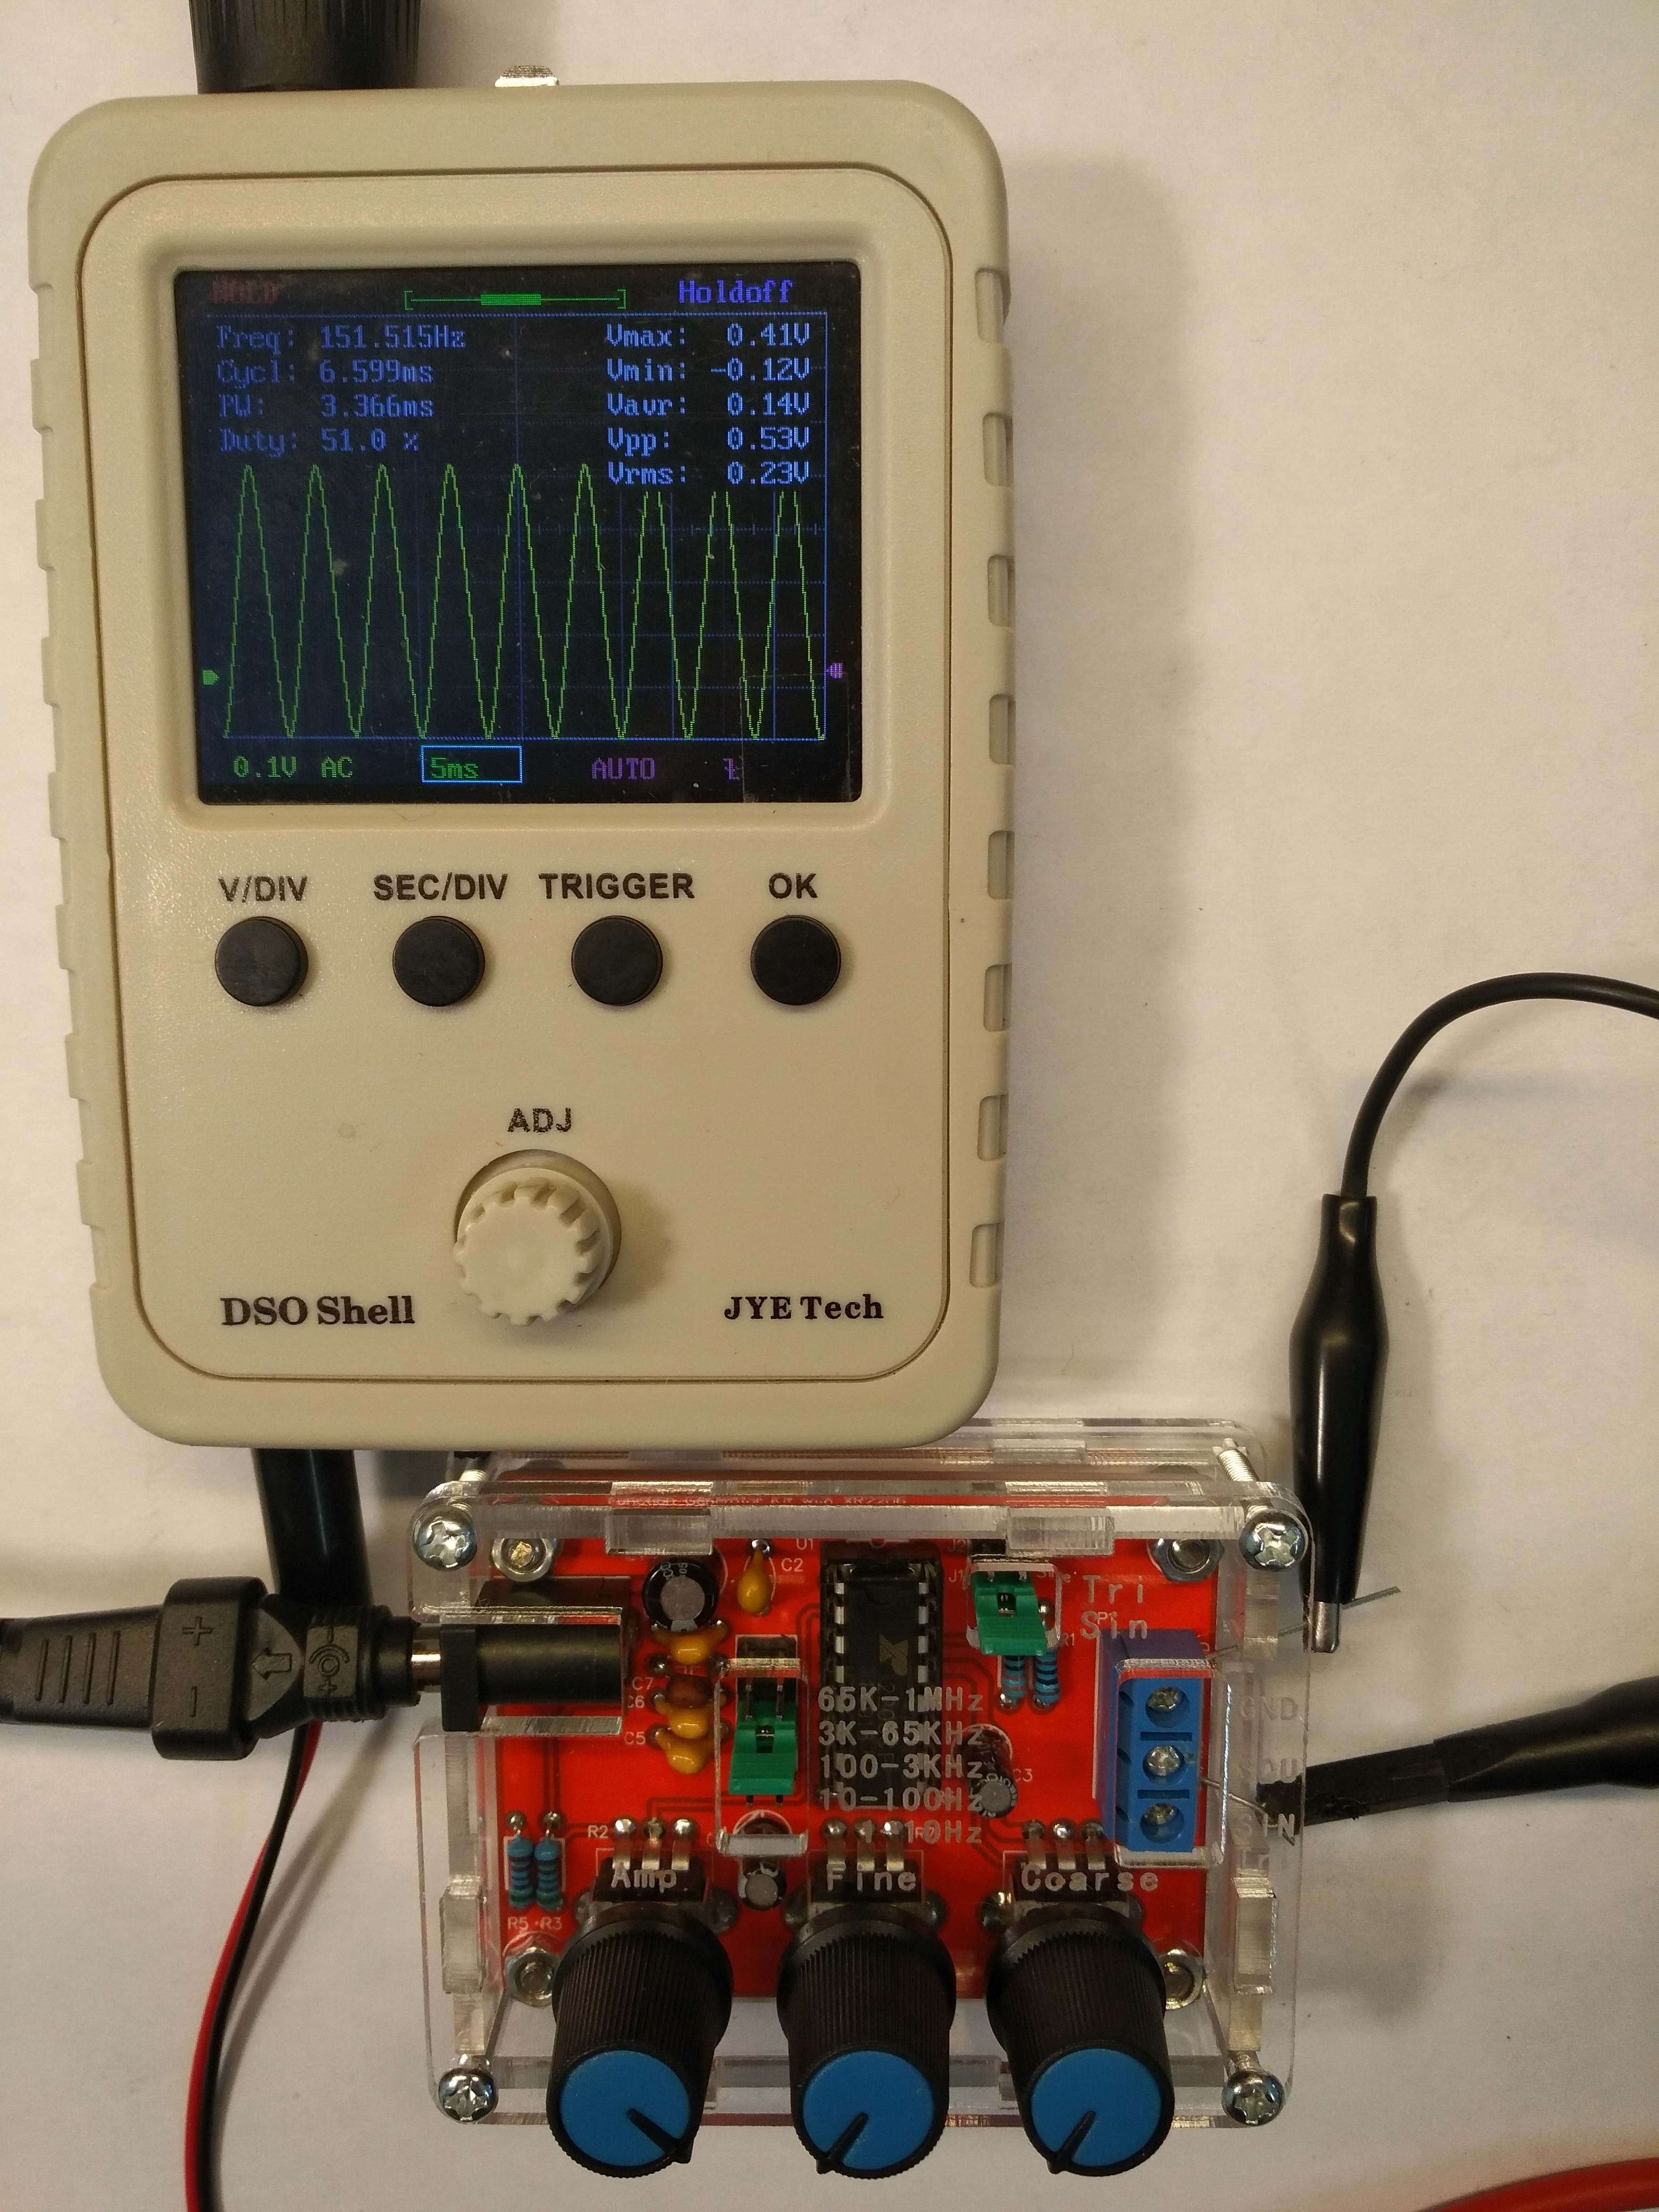
In the pictures we can also observe that the "quality" of the waveform is strongly dependent on its frequency. And this is just SINUS. In a moment I will present you a triangle and a rectangle where it is much worse.
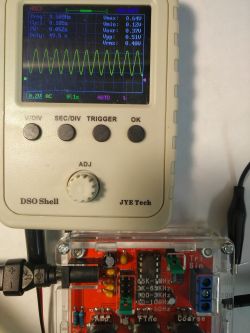
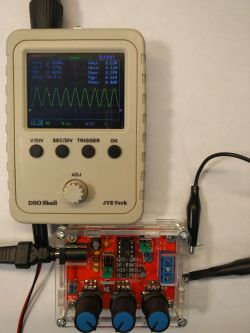
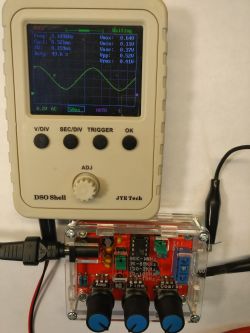
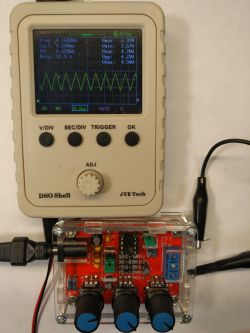
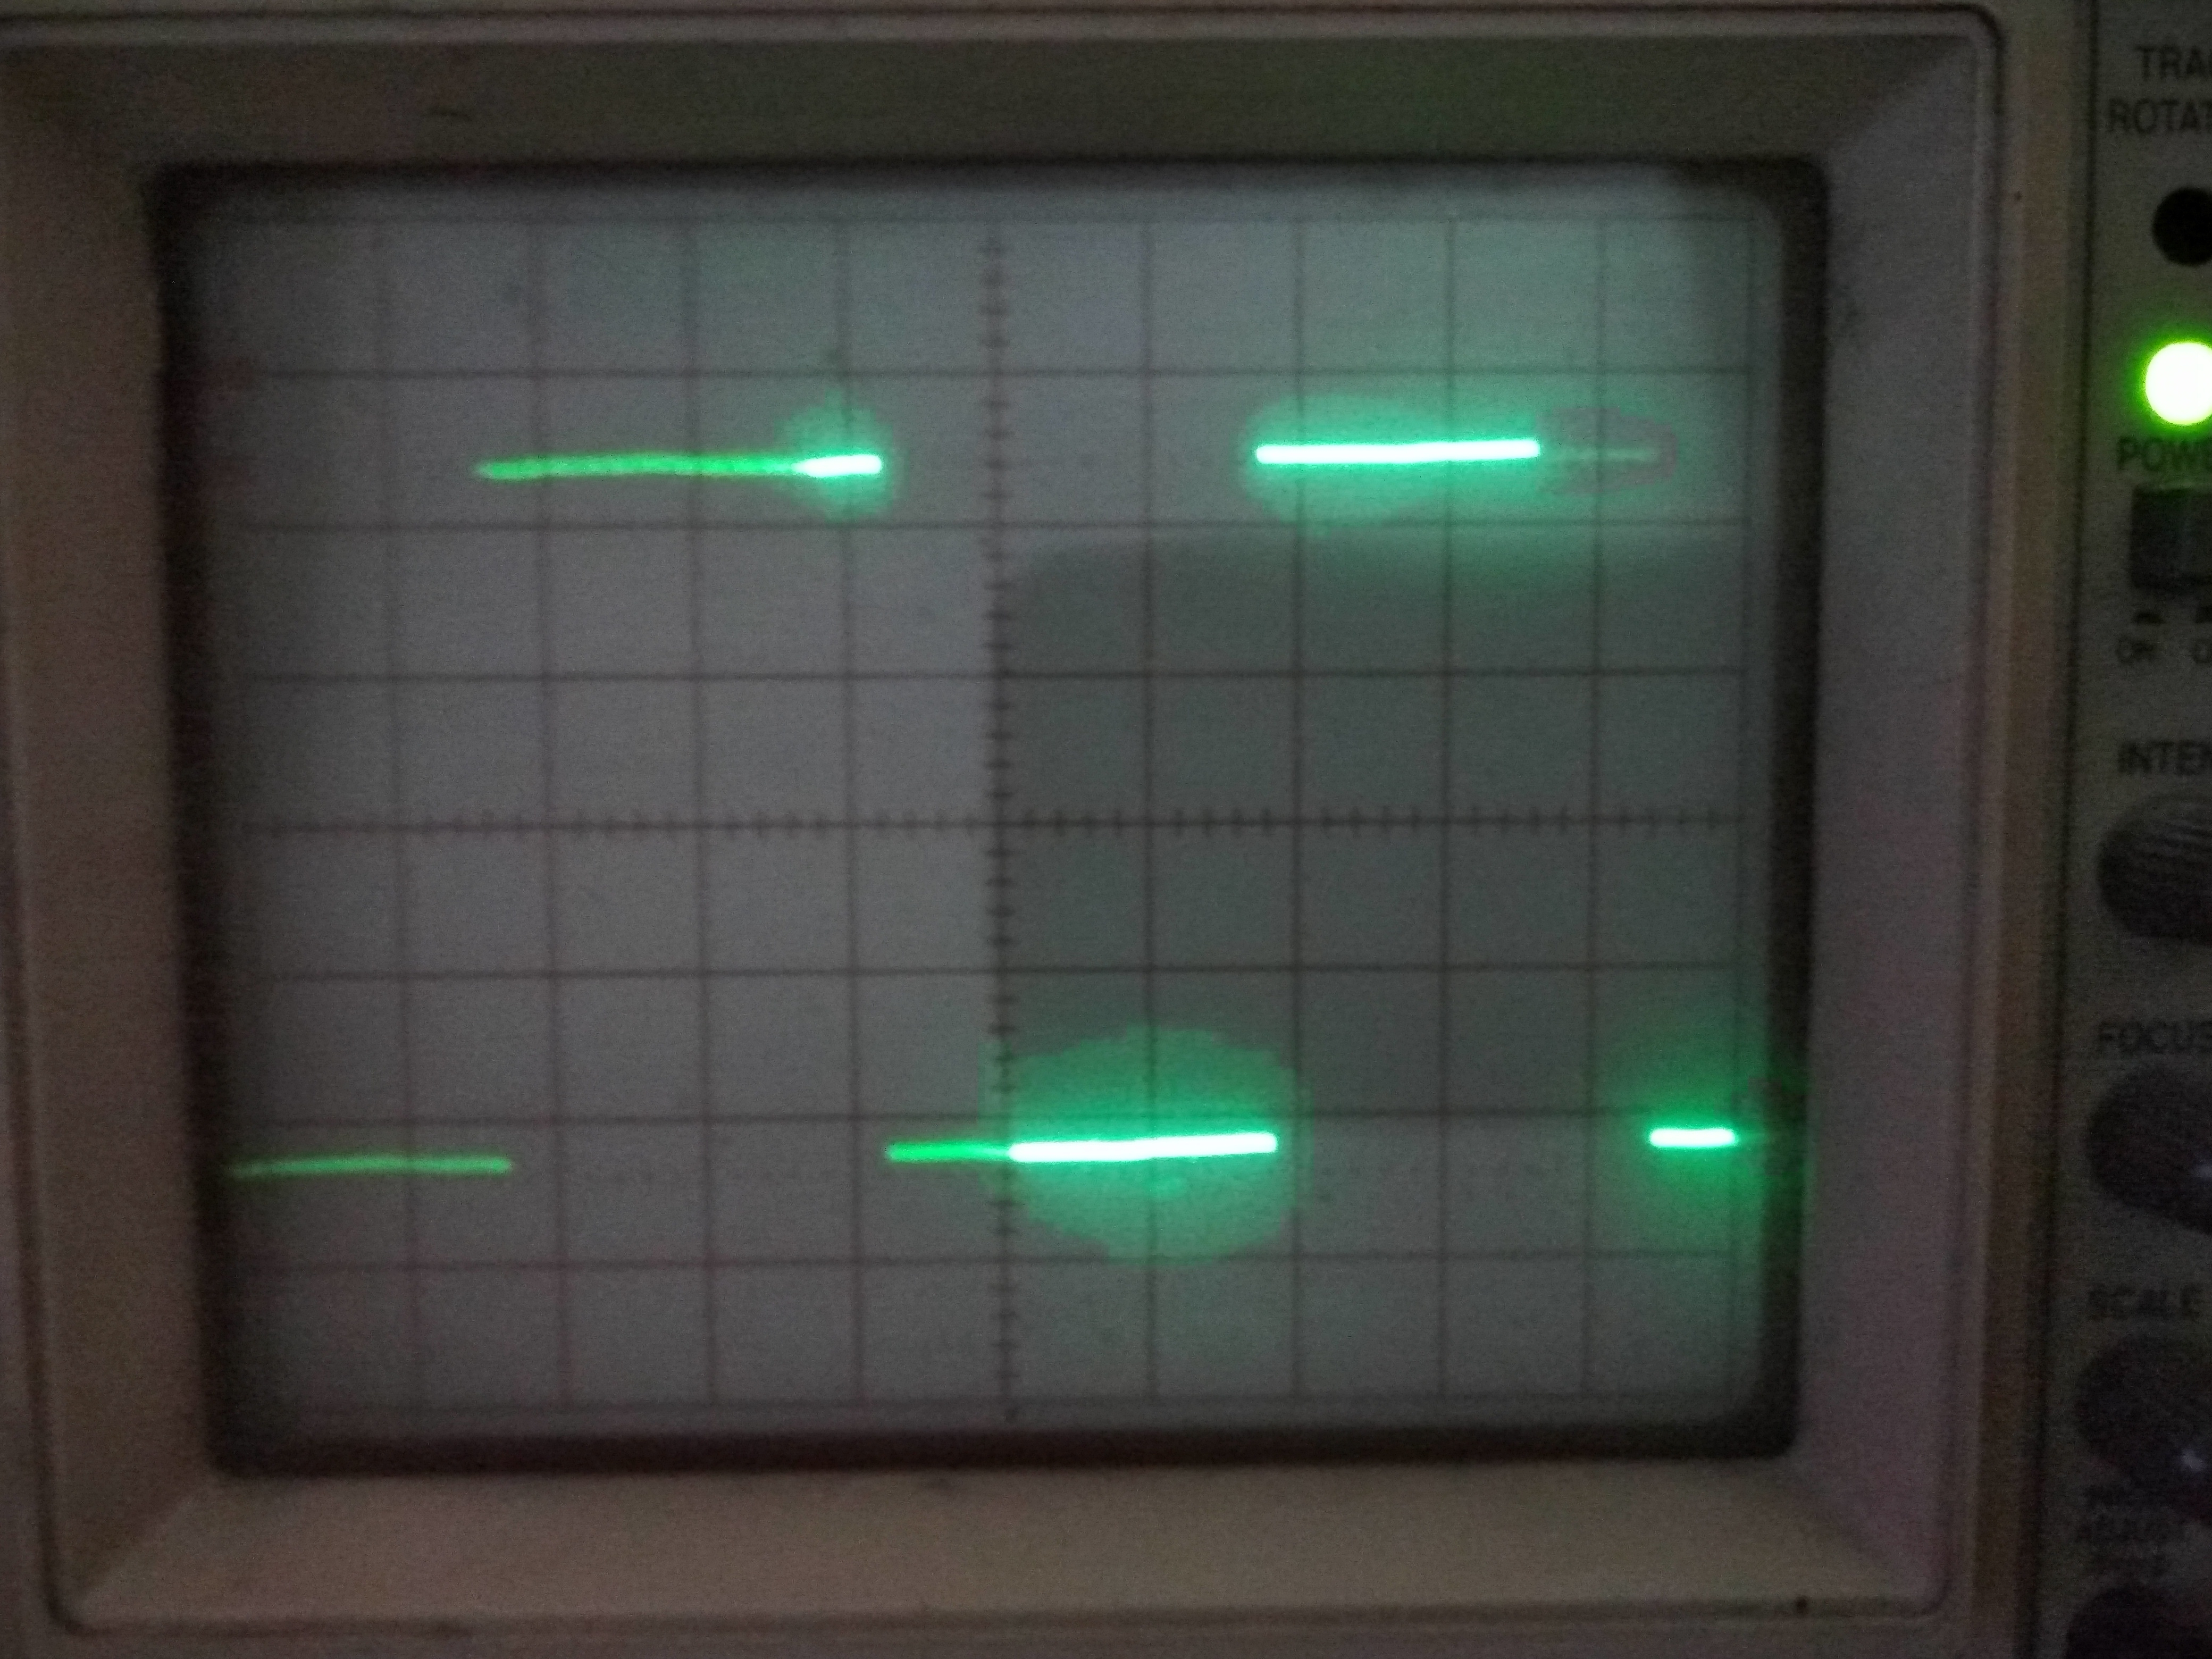
Another portion of photos.
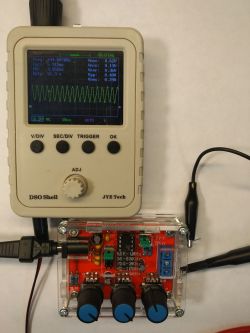
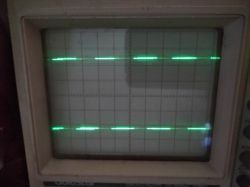
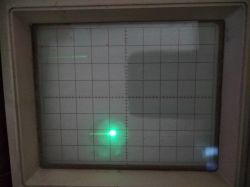
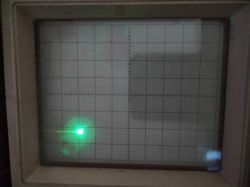
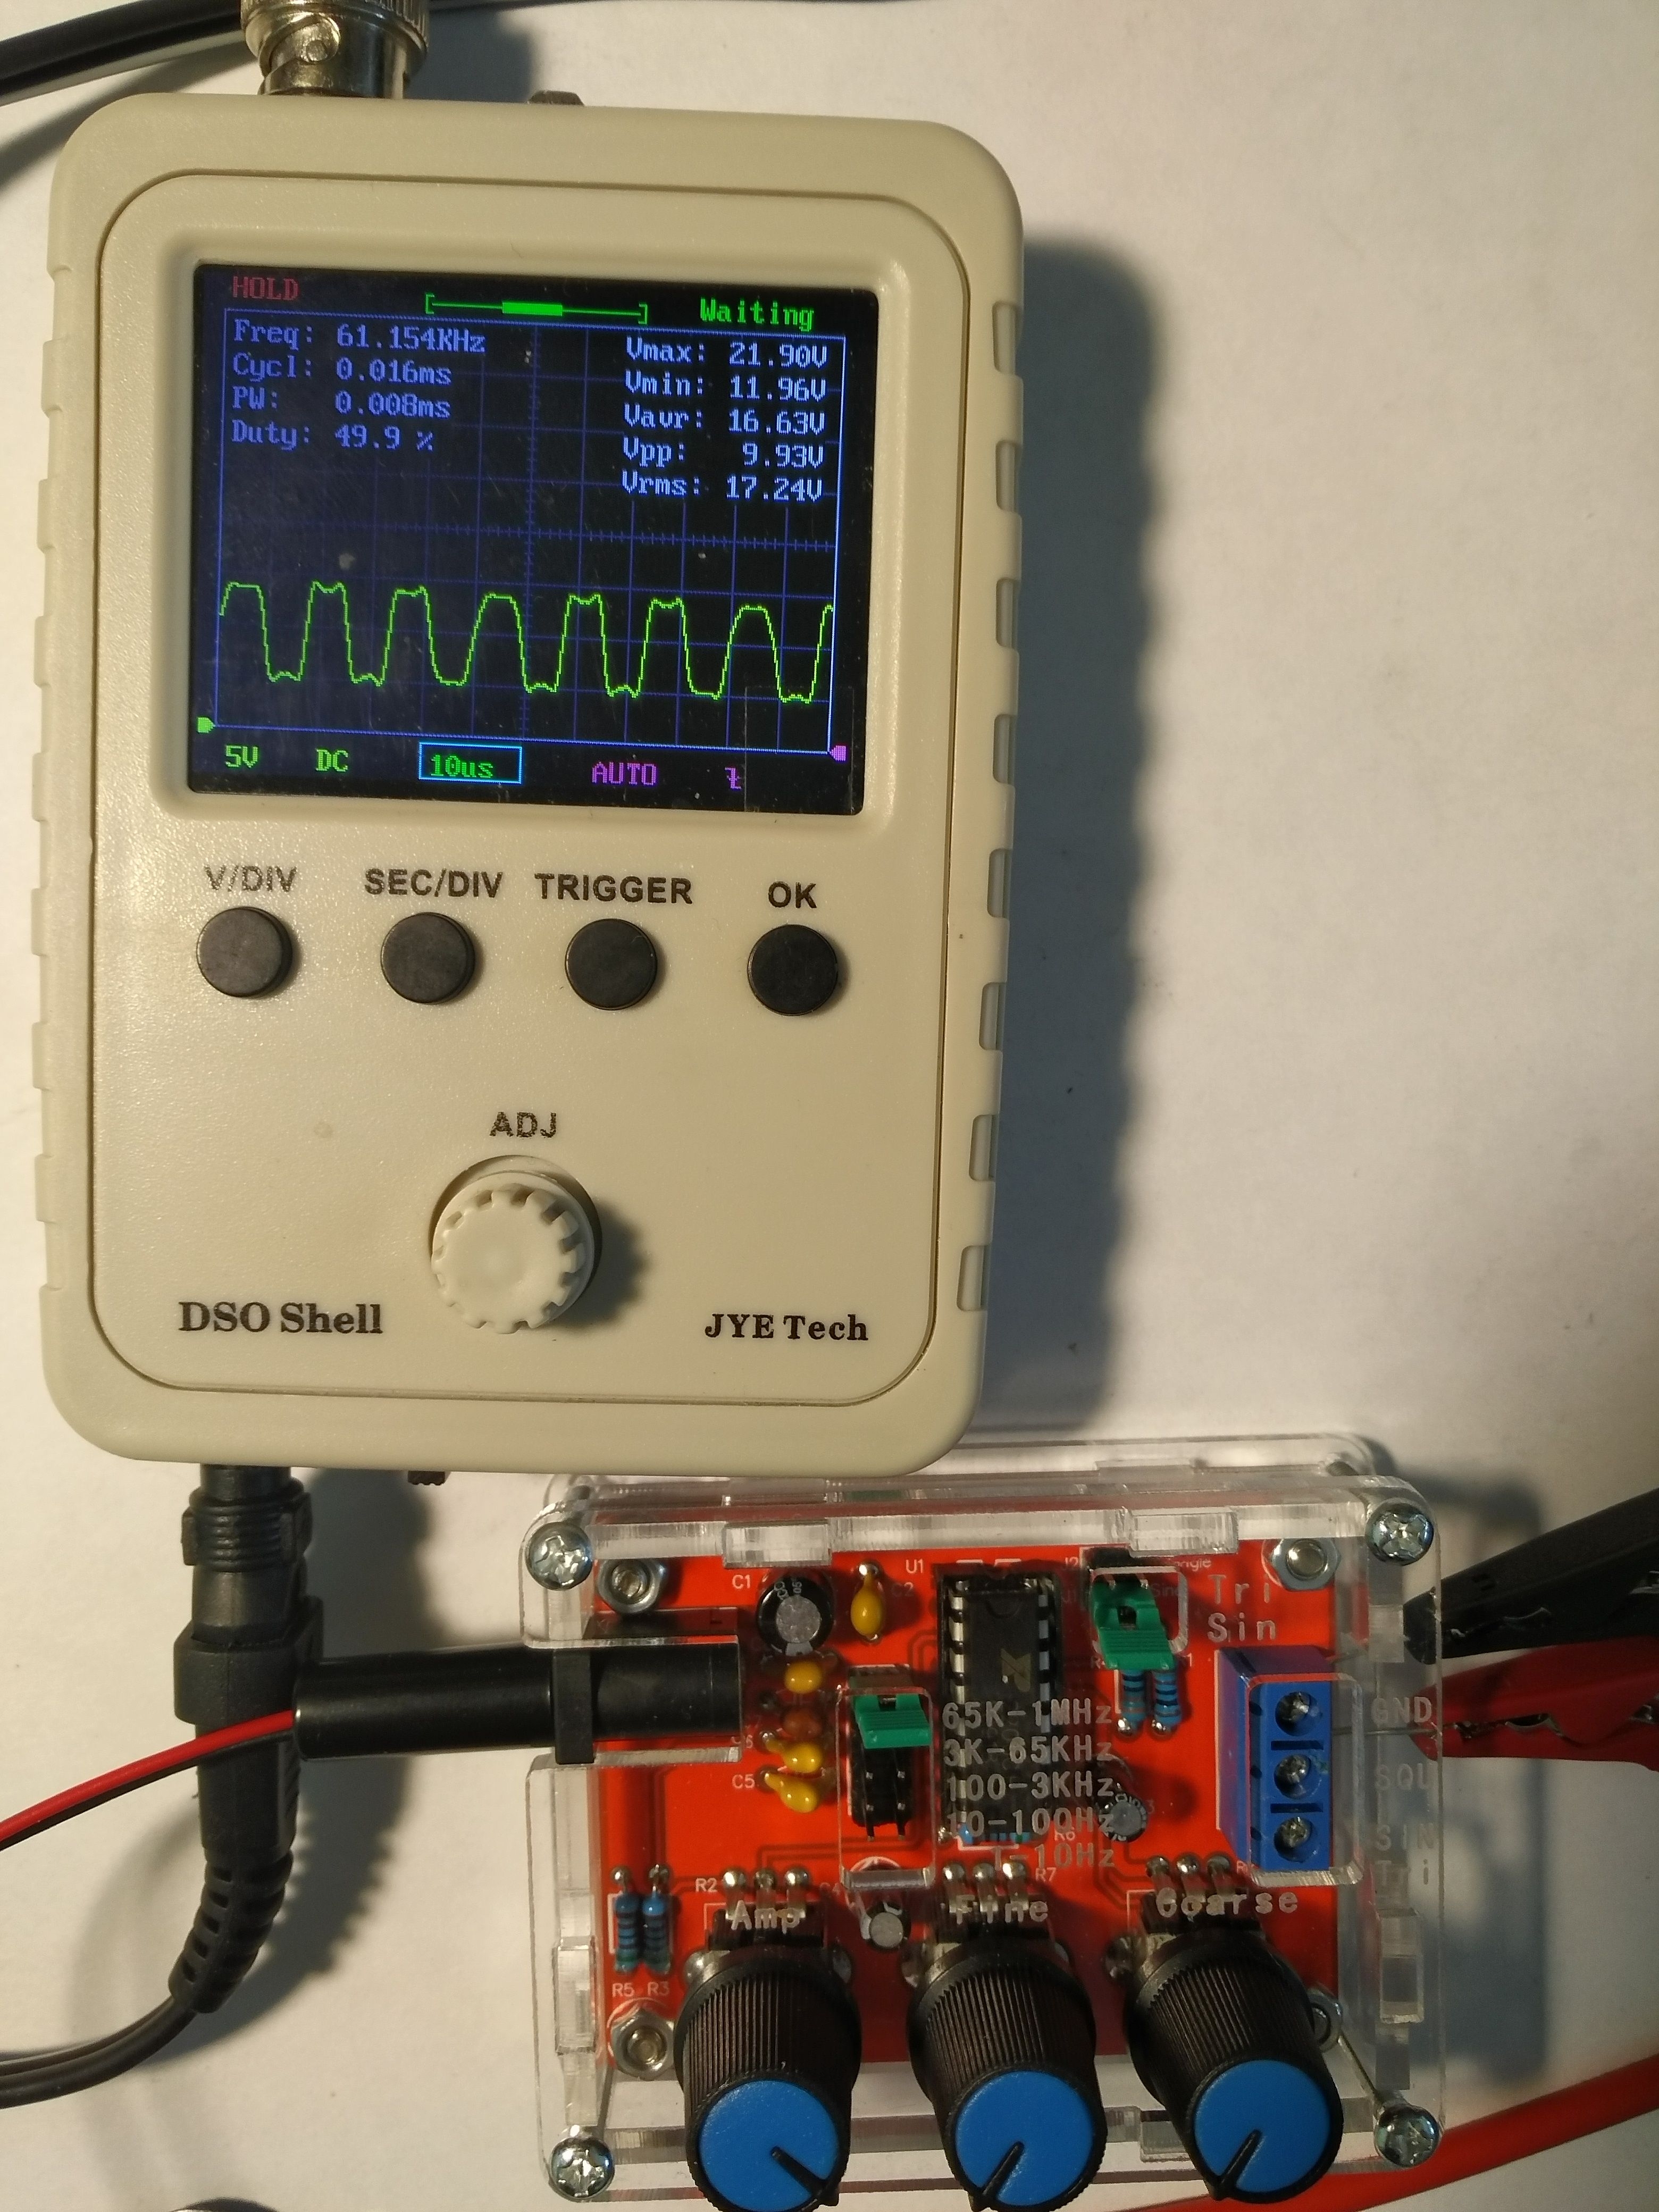
This time TRÓJKĄT, here the waveforms don't look so nice:

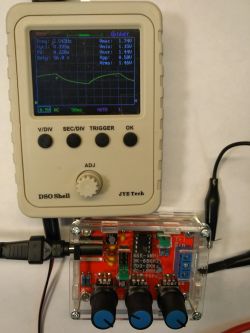


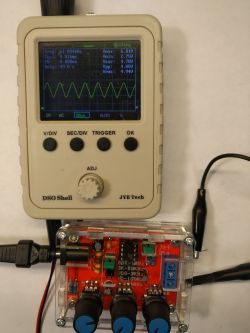

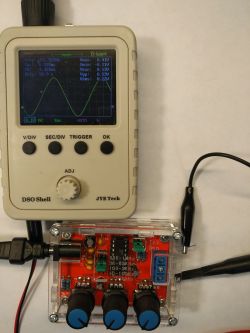
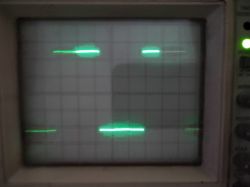
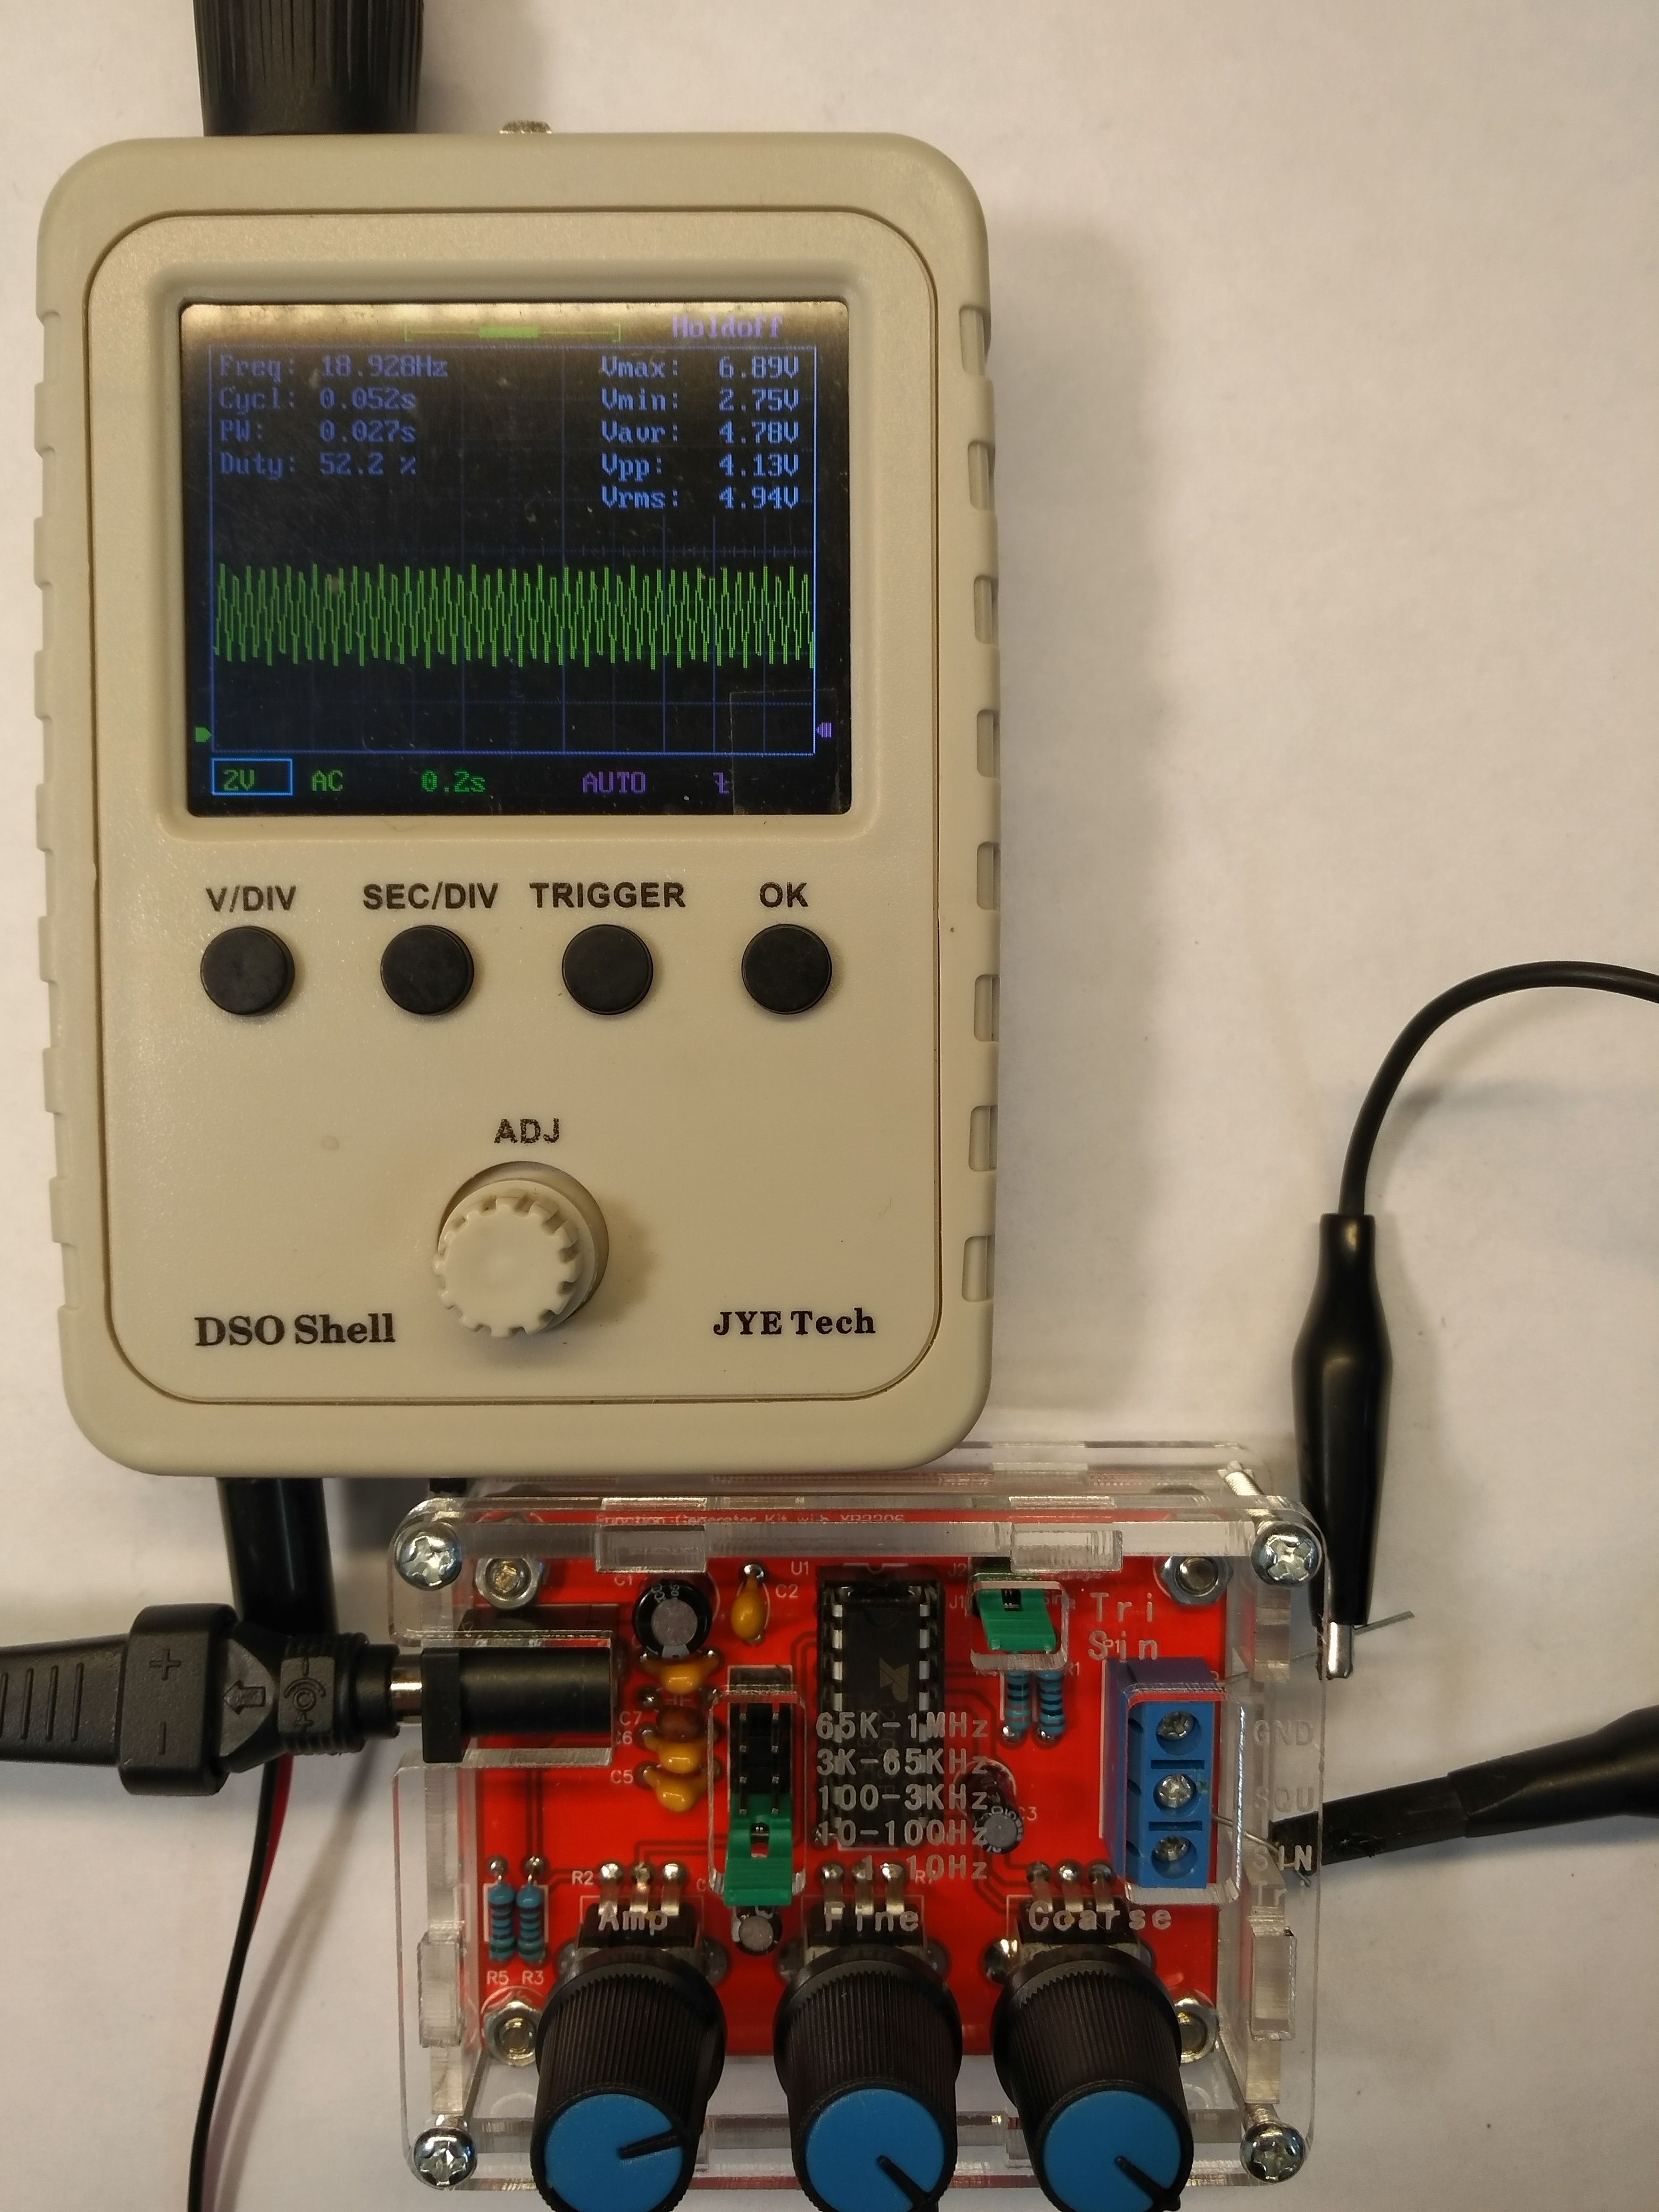
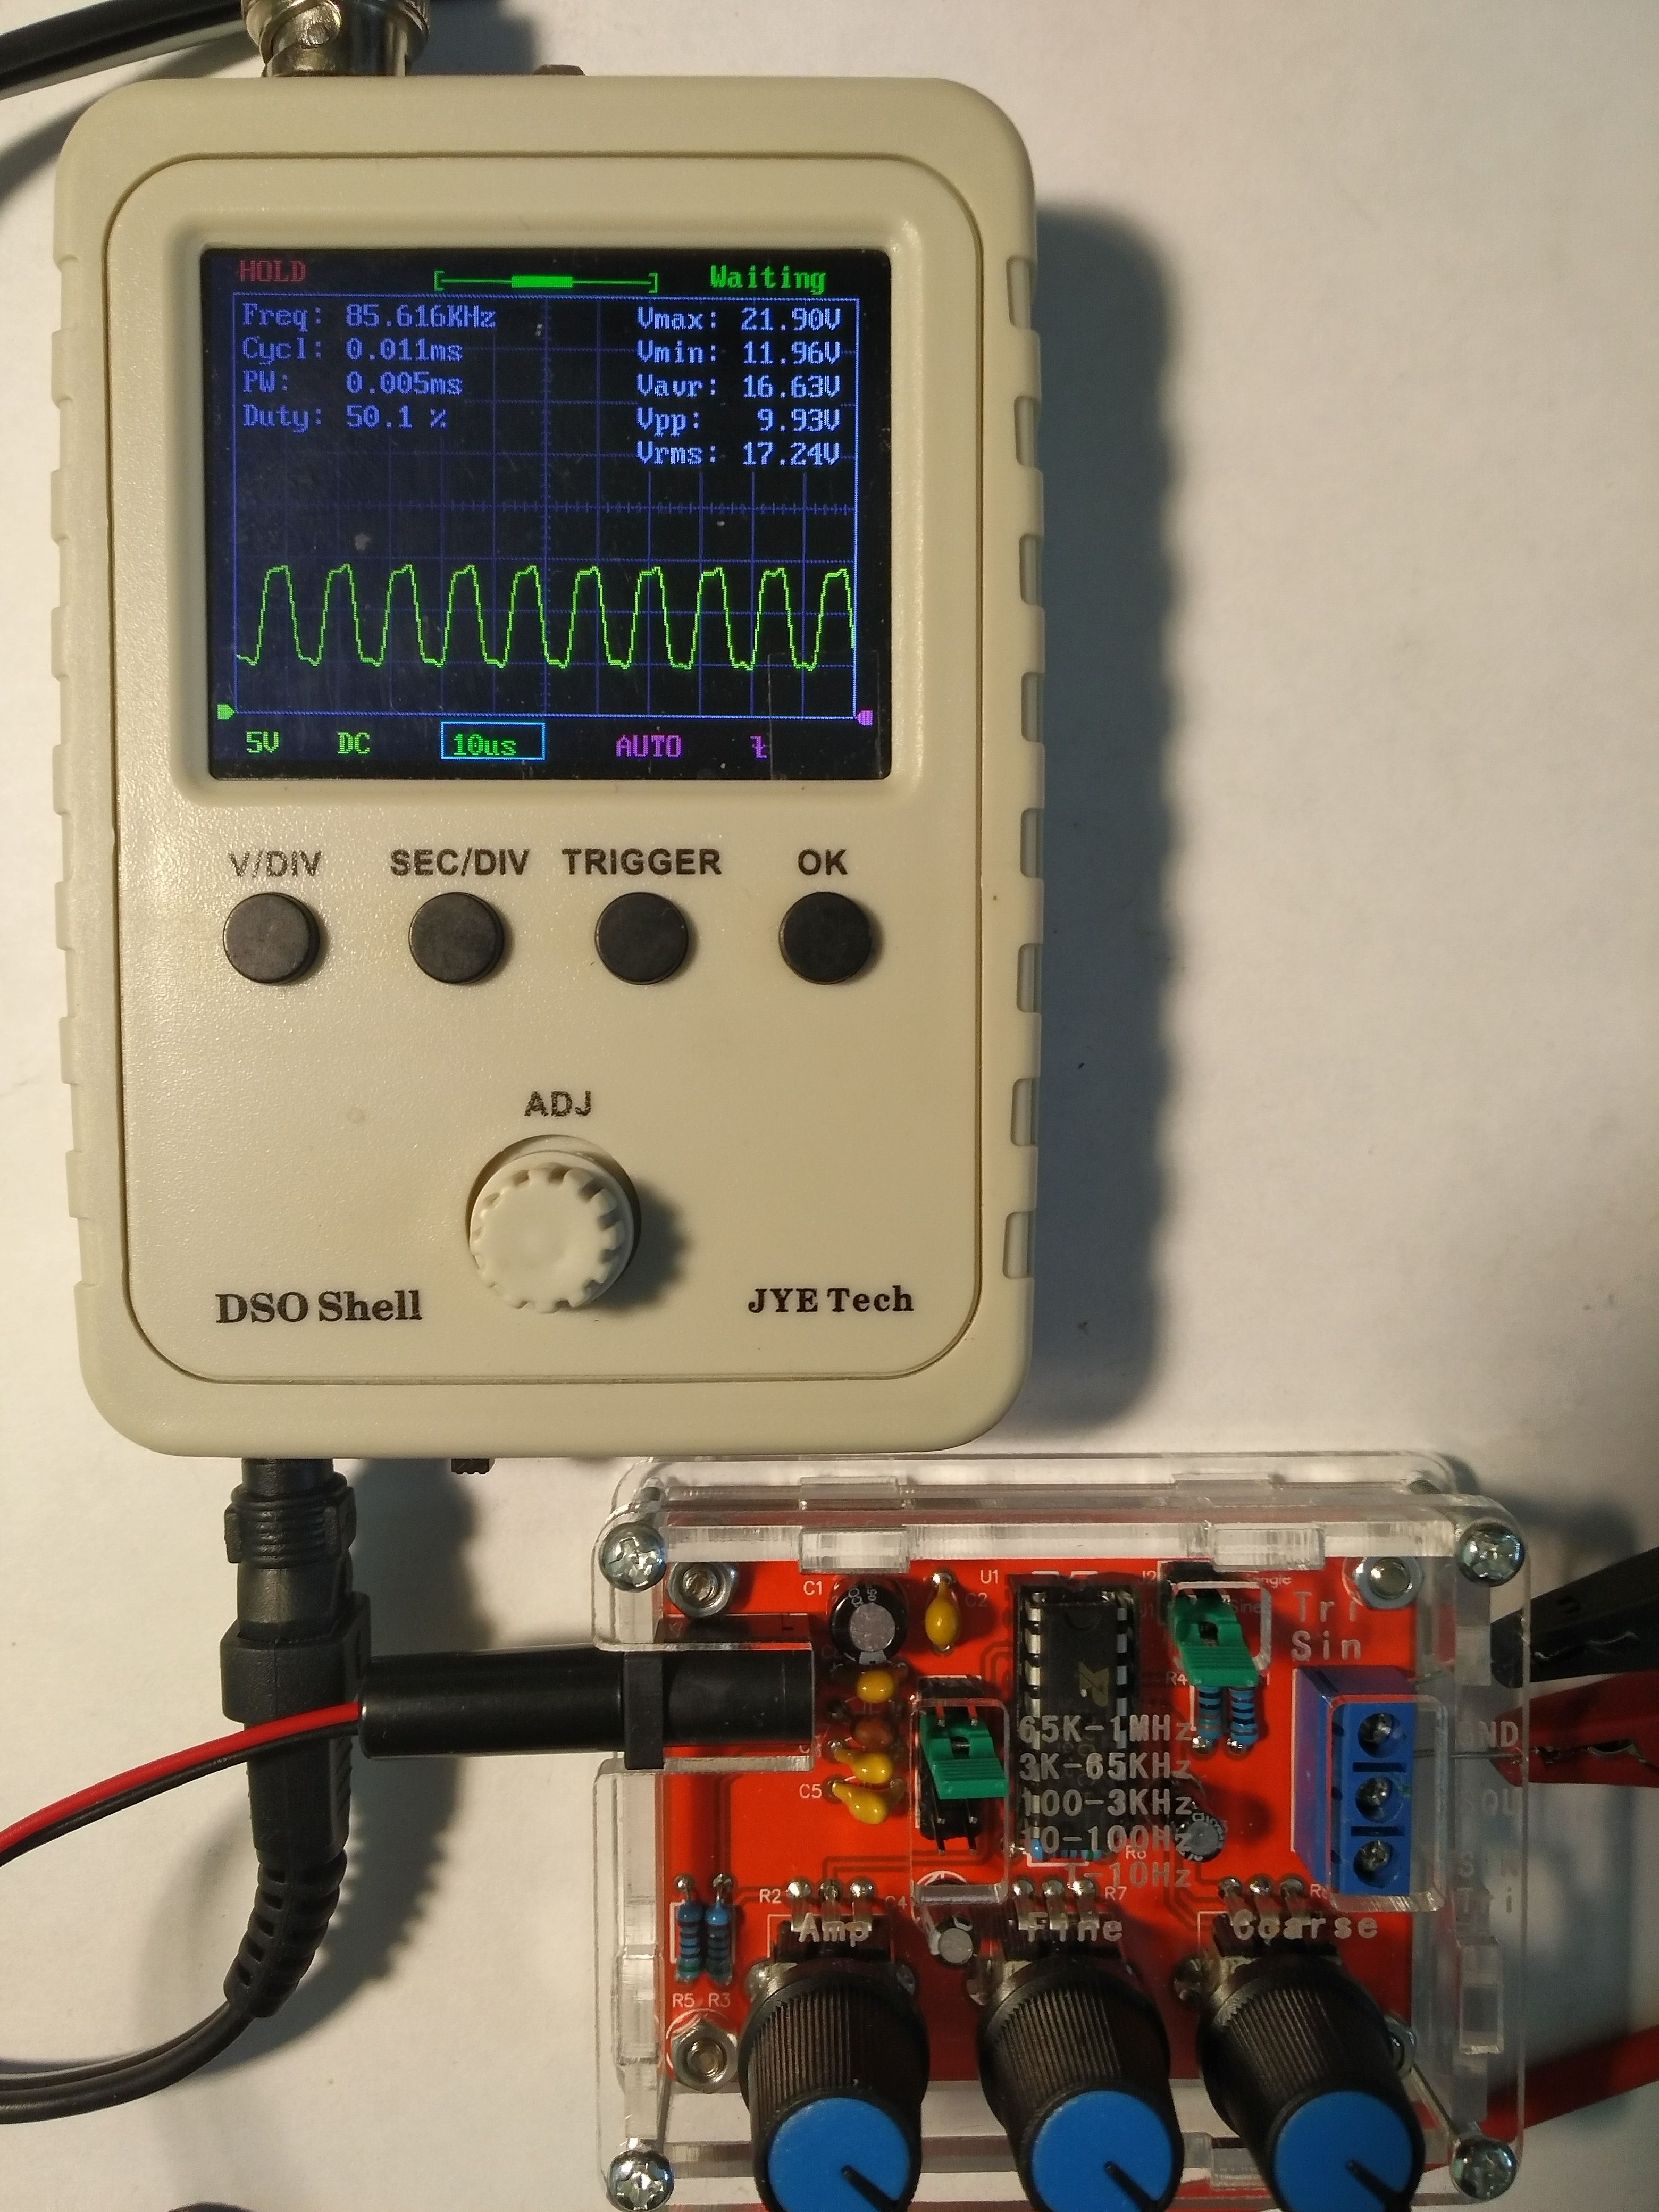
Well, we are going with a RECTANGLE:


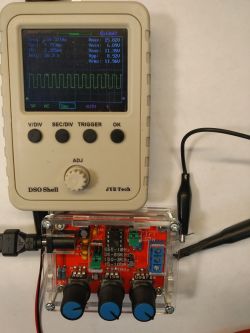


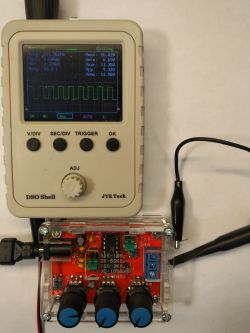

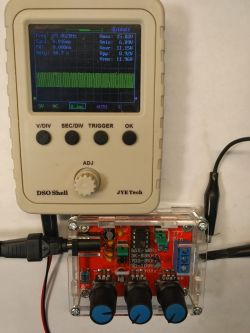

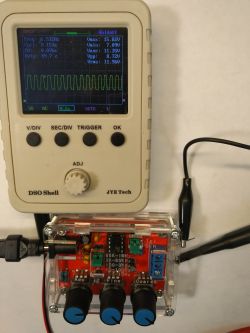

Here again, despite the confused order of the photos, it is clear that this generator is definitely the "worst-off" with the rectangle.
As you can see, this is not a PERFECT generator, but what to require for the price.
I would like to add that I also checked these "ugly waveforms" on the "old" "lawful" oscilloscope and they were just as nasty.
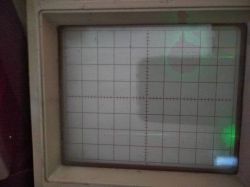
I tried to take pictures, but the phone camera somehow didn't want to cope with the CRT oscilloscope screen and in the pictures I was only able to capture a "noisy" fragment of the waveform. For this reason, I have not included pictures of oscillograms from the CRT oscilloscope. However, I would like to add that the rectangle at low frequency did not resemble a rectangle either. It looked almost identical to it here
Summarizing.
I am sure that such a cheap generator, additionally equipped with a fairly durable casing, can significantly facilitate the work of beginner electronics.
The only requirement for this generator to be useful is to have any type of oscilloscope. Otherwise, the generator will be useless, because it does not have any display showing the given parameters.
I recommend it especially for electronics from the AUDIO industry.
The main disadvantage of this device is its "smallness" and lightness. It is the power cord that decides where the generator will lie
. Some sucker feet would be nice.
EDIT April 15, 2018:
I'm sorry it's so late, but something came up and I wasn't going to come here.
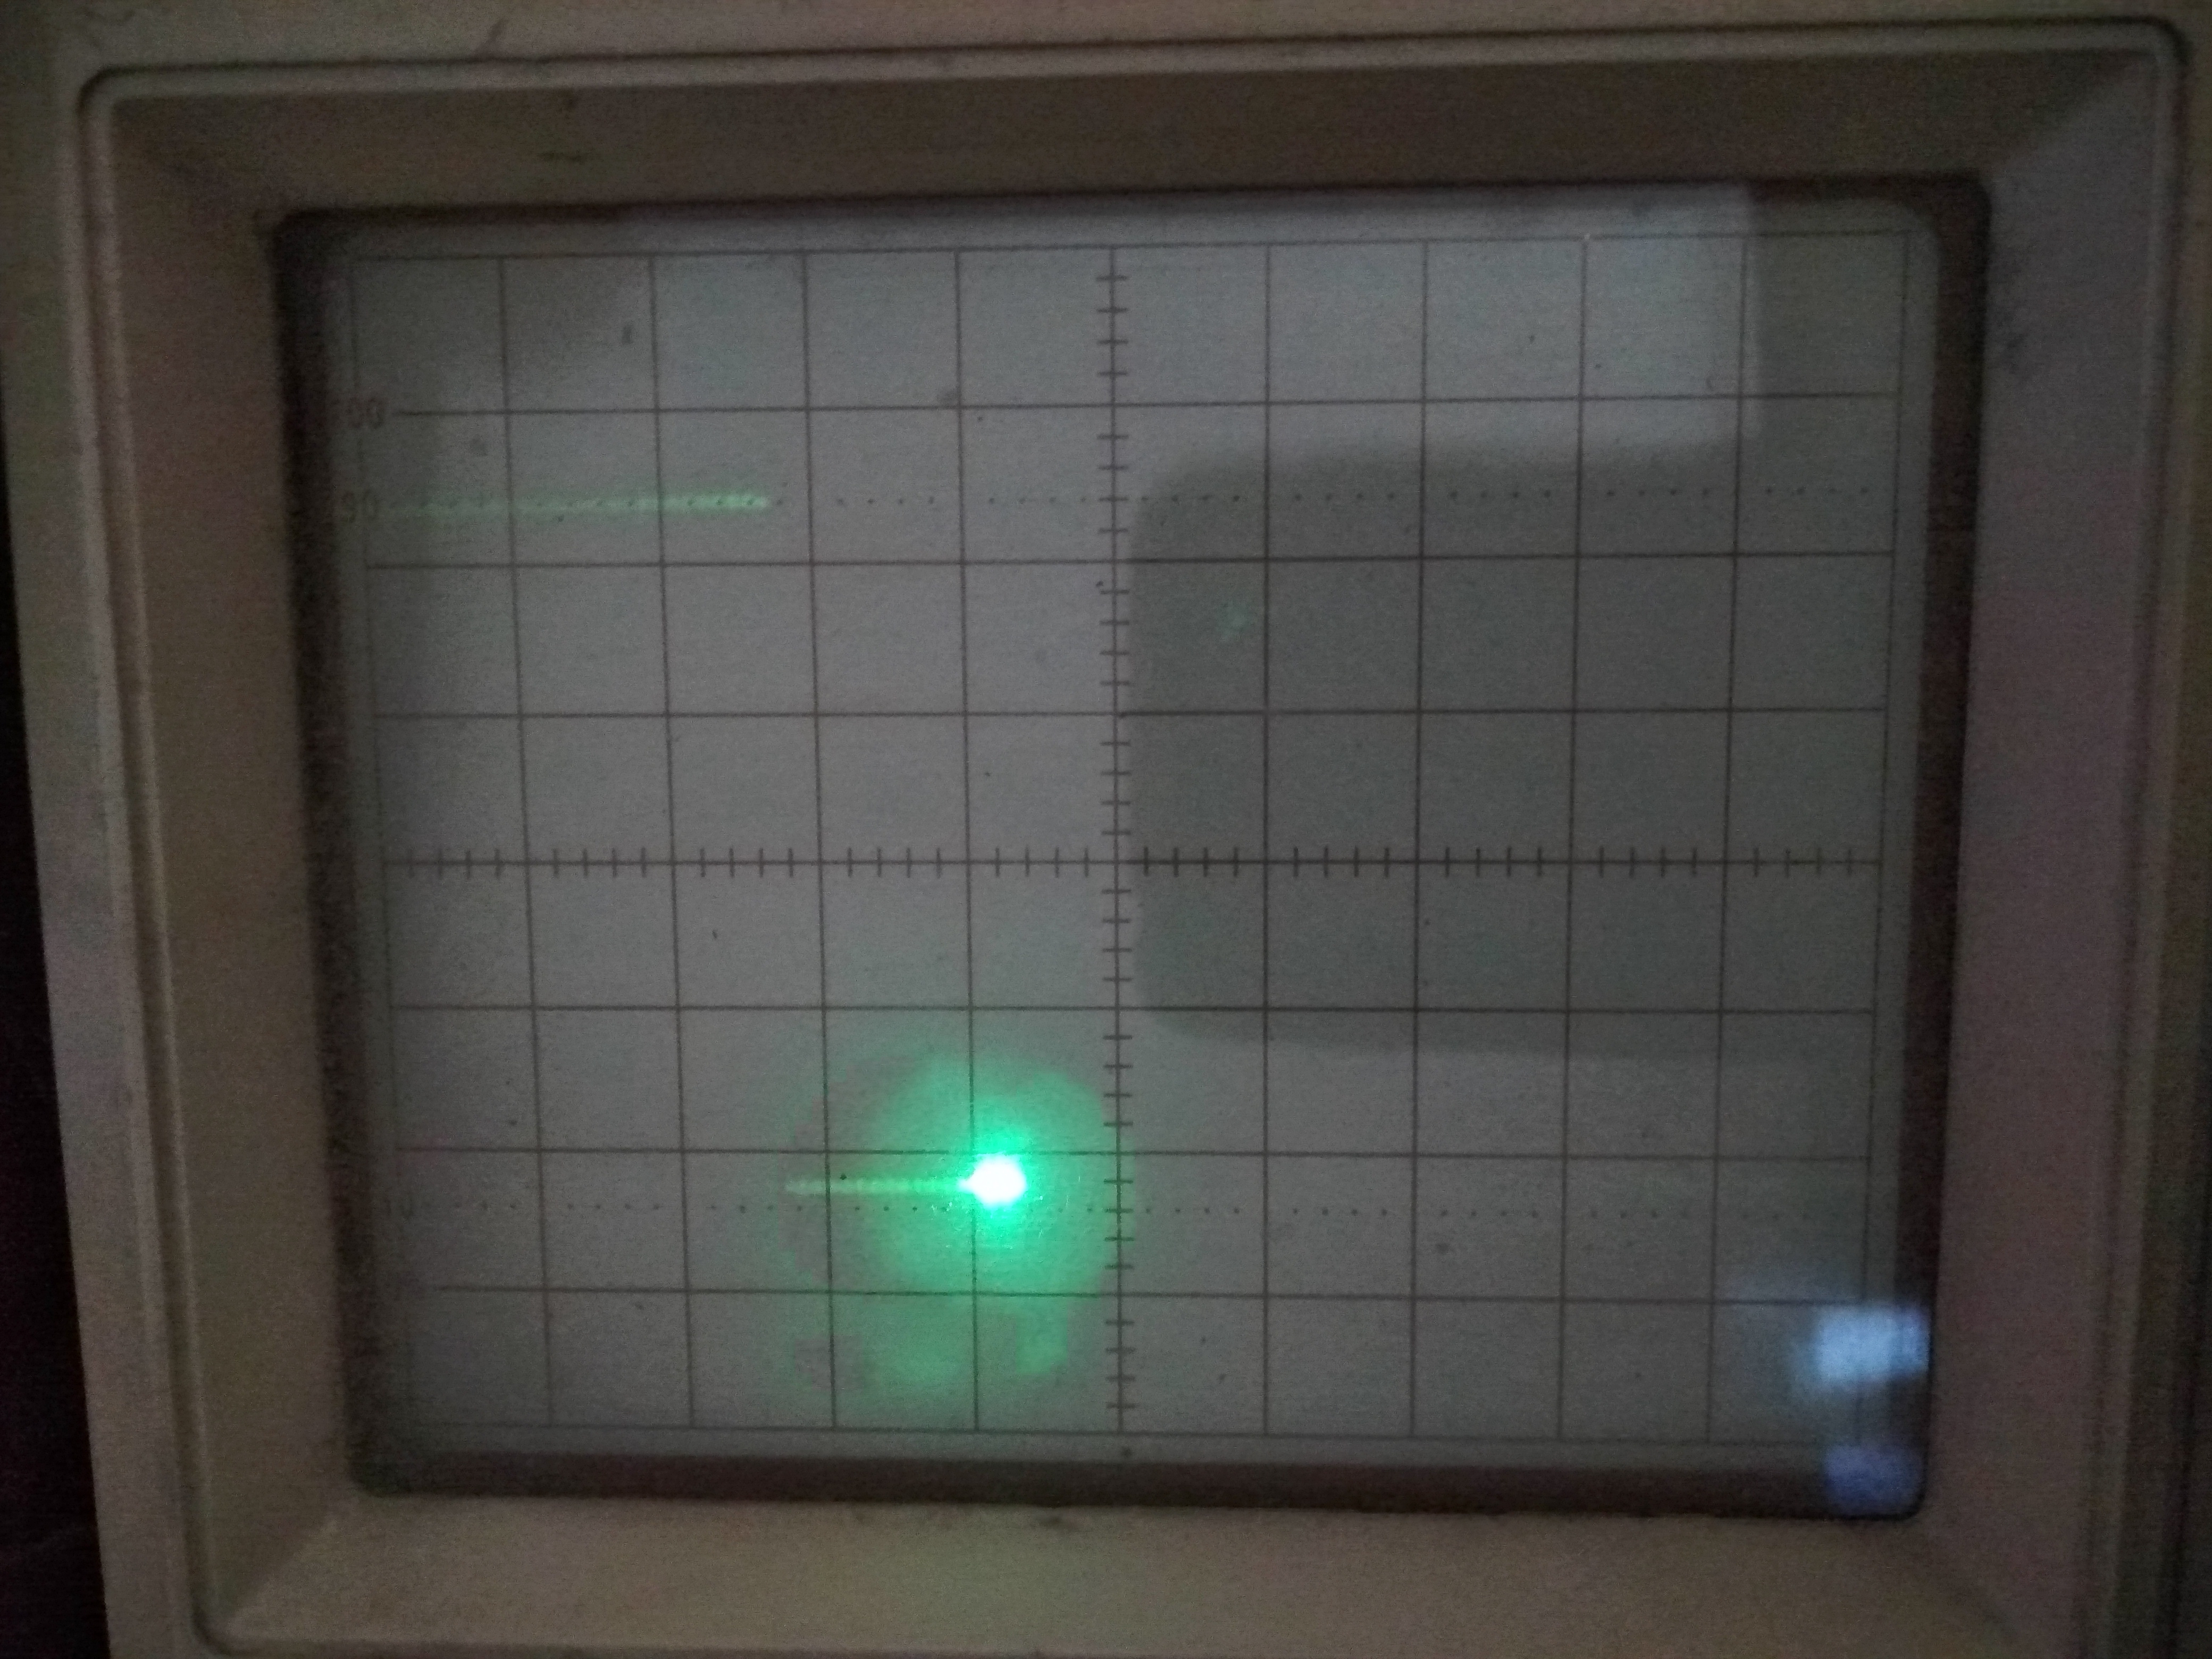
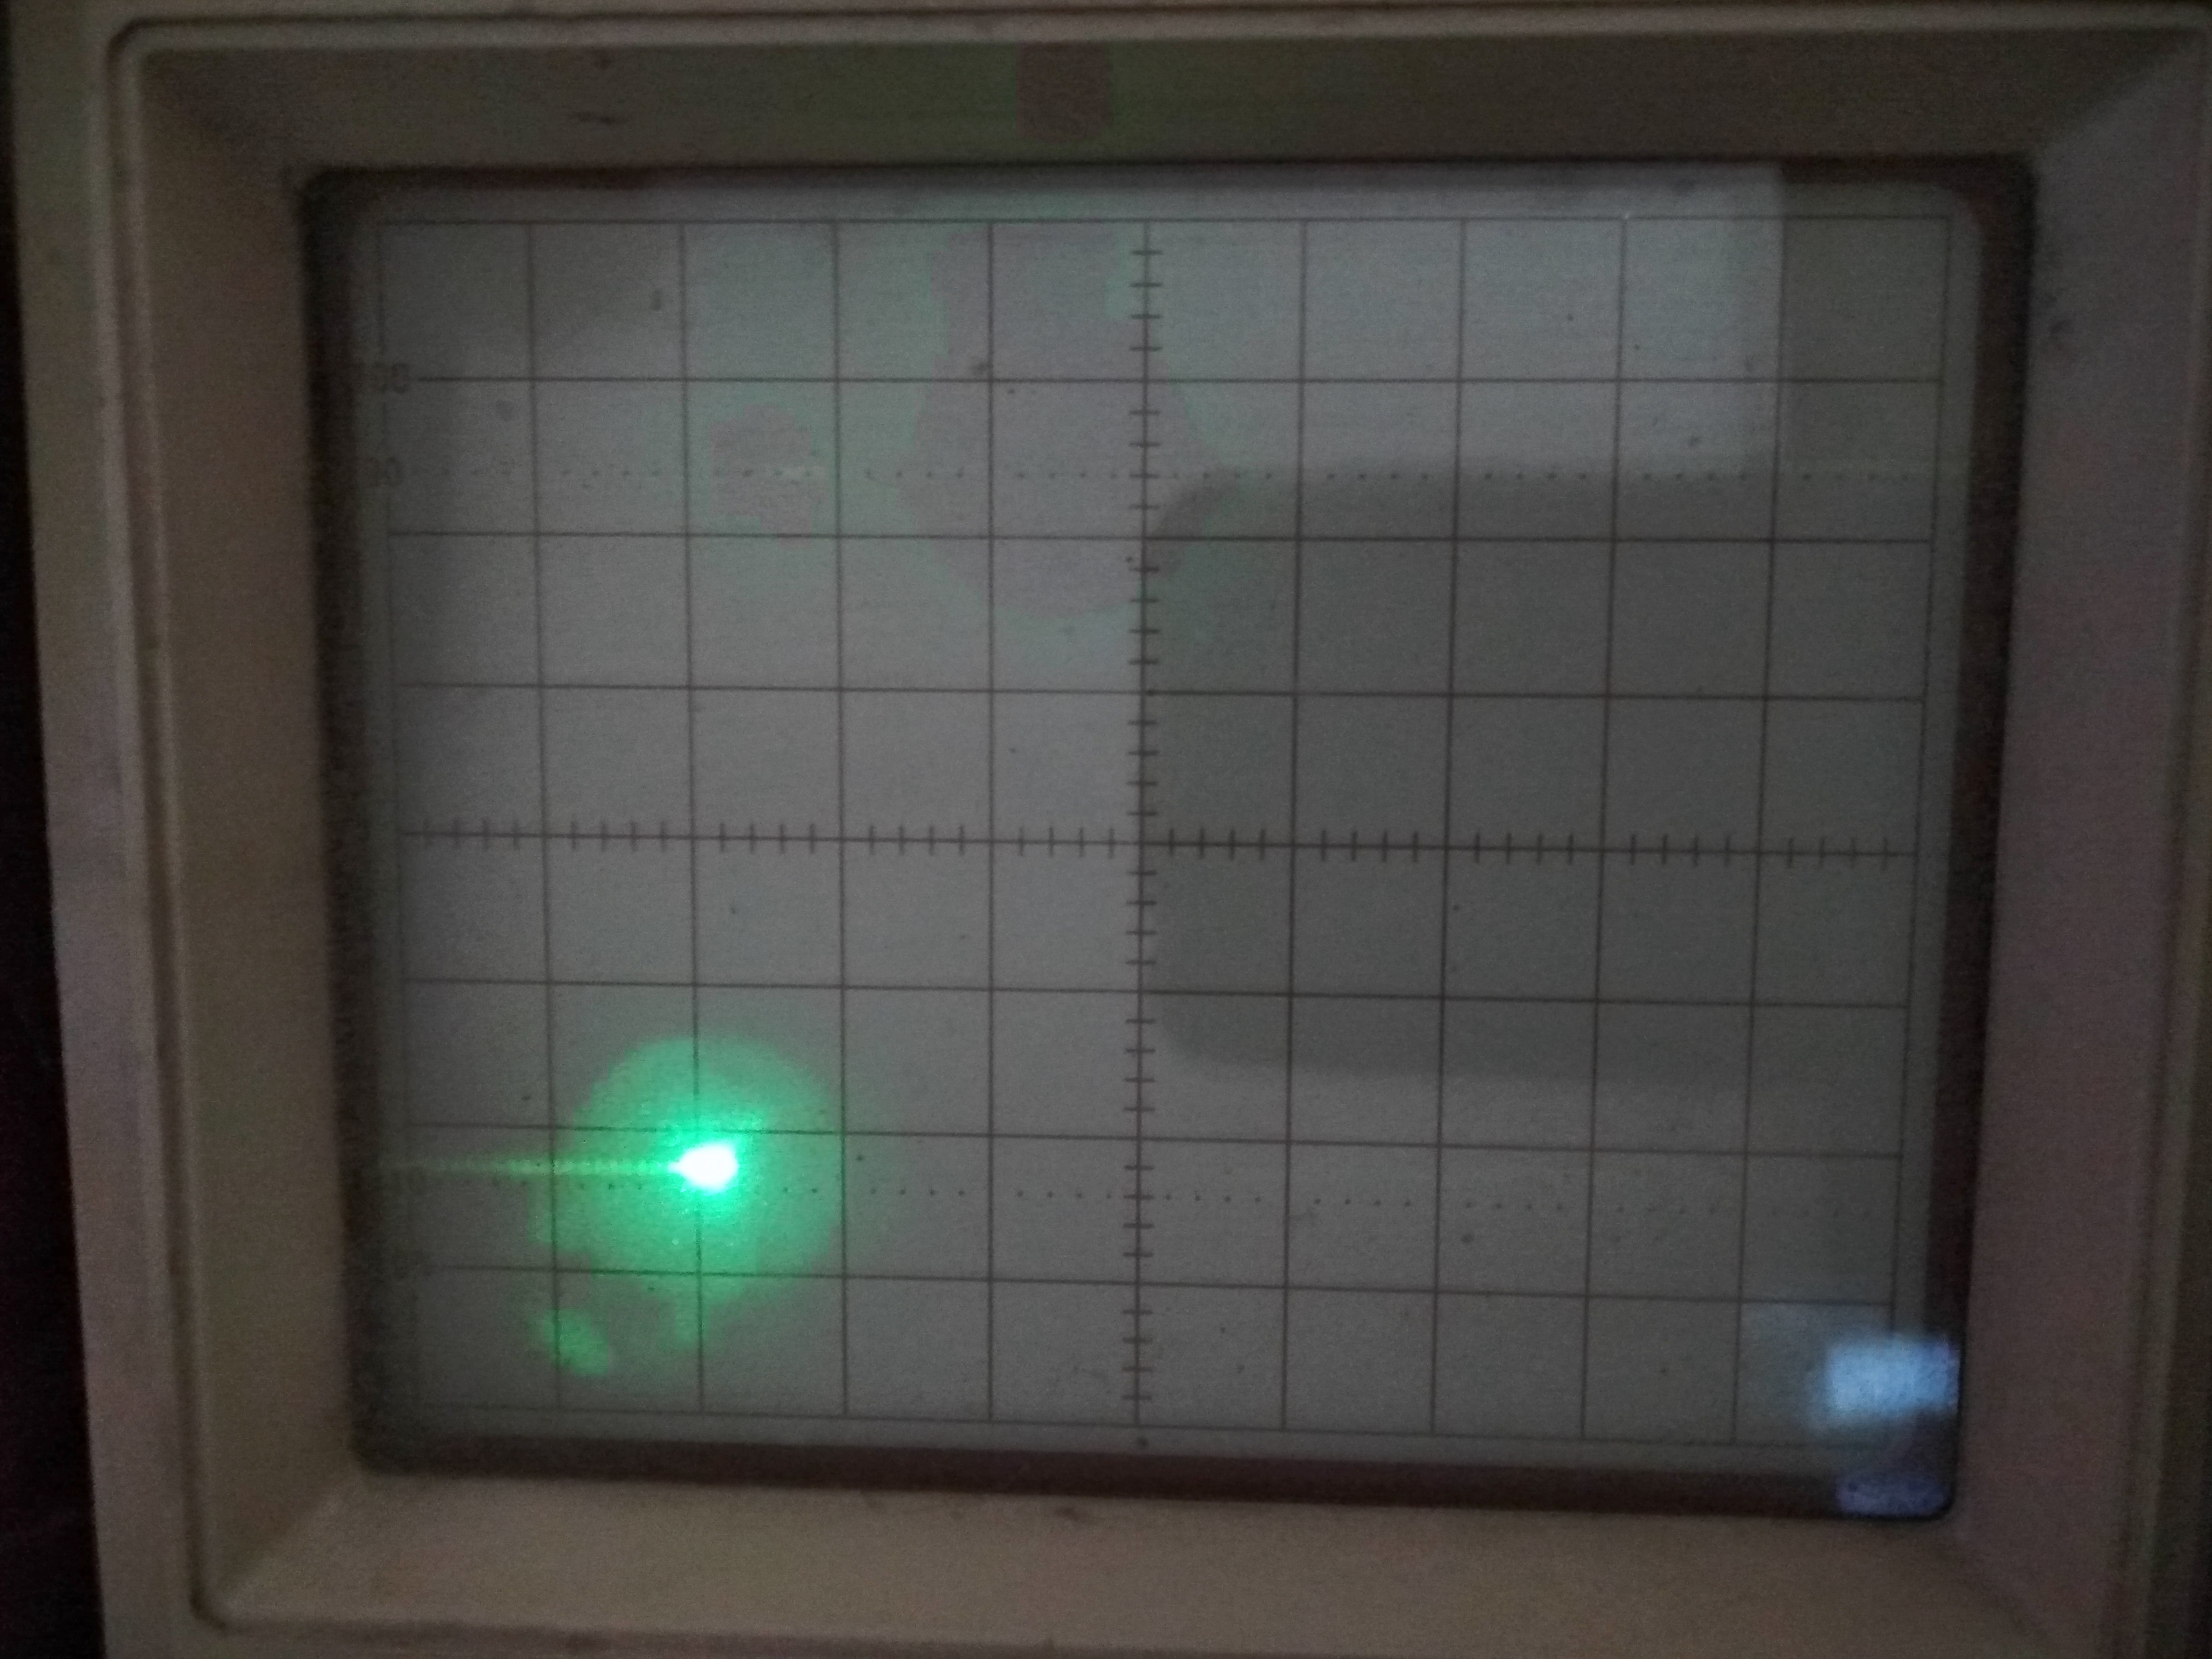
I am adding the promised photos of the waveforms in DC mode. The principle of measurement is the same as before.


Gulson introduced the amendment and I have the impression that the photos are no longer in a random order, but are added from the end.
As for the oscillograms from a real oscilloscope, I really tried, took about forty photos for different waveforms and only managed to select a few photos where you can see anything.
I only put them in "so that I don't want to try"
.
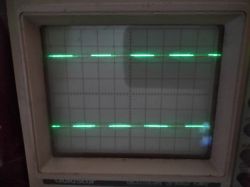
It was impossible to capture the picture tube and oscilloscope settings at the same time.
Best regards.
CMS


Comments
It's nice to see the construction based on old analog bones. I use my own design of an audio generator based on the ICL8038 (ceramic original from Intersil, factory housing made of 1.5mm sheet metal).... [Read more]
I have the same. With this amplitude potentiometer, it is a matter of cutting one track and soldering another pot with a wire. The device generates a DC component at the output, probably 1/2 of the supply... [Read more]
Which runs do your friend consider the most "Nasty"? [Read more]
My old G432 is probably behaving nicer ..... even though it is very old and it has never been calibrated :) [Read more]
Anyway, why does this DSO150 show Vpp and Vrms strangely? Vrms should be Vpp / (2sqr (2)). [Read more]
These measurements are a bit stretched with an oscilloscope with a bandwidth of 200 kHz and sampling with 1 Msps. Here, at higher frequencies of triangular and rectangular signals, it is difficult to say... [Read more]
Good point, you have to put it on a normal oscilloscope, then you will see the quality of the waveform. However, I think that for the price of domestic courier delivery it will be a useful device. :D [Read more]
Tomorrow I will post new measurements. I actually shot a blunder. I will try to get some other camera and take pictures of oscillograms from a real oscilloscope. [Read more]
Take pictures of DSO150 and "real oscilloscope" just for comparison. [Read more]
I added some photos to the first post. [Read more]
Looking at the presented layout, one question arises. Is it still worth building generators on your own based on the structures presented in the years 1990 - 2000, or is it worth buying such a prefab?... [Read more]
When it comes to price, it is not worth building, and when it comes to functionality and educational values, it is worth building yourself. [Read more]
Perhaps not everyone understands it, but the creation of any electronic project by hand is associated with the need to overcome many design and strictly electronic problems. In such a process, a person... [Read more]
Price .. Stop .. It's not about price, it's about quality. Is this Chinese enough to be used as a hobby? [Read more]
Depends on what hobbies. Whether audio equipment or ultrasound or digital circuits. [Read more]
A colleague is flying the frequency criterion, or some other? [Read more]
I just bought one from OLX. The net price is 24 plus their fees and shipping. The gentleman who sells this after the purchase asks if we want the device in parts or assembled. It will be useful for audio... [Read more]
This kit on the XR2206 is nice, sine waveform better than from kits on the ICL8038. I have investigated all those available as DYI n Ali.... It is a pity that at least a capacitive negative voltage converter... [Read more]