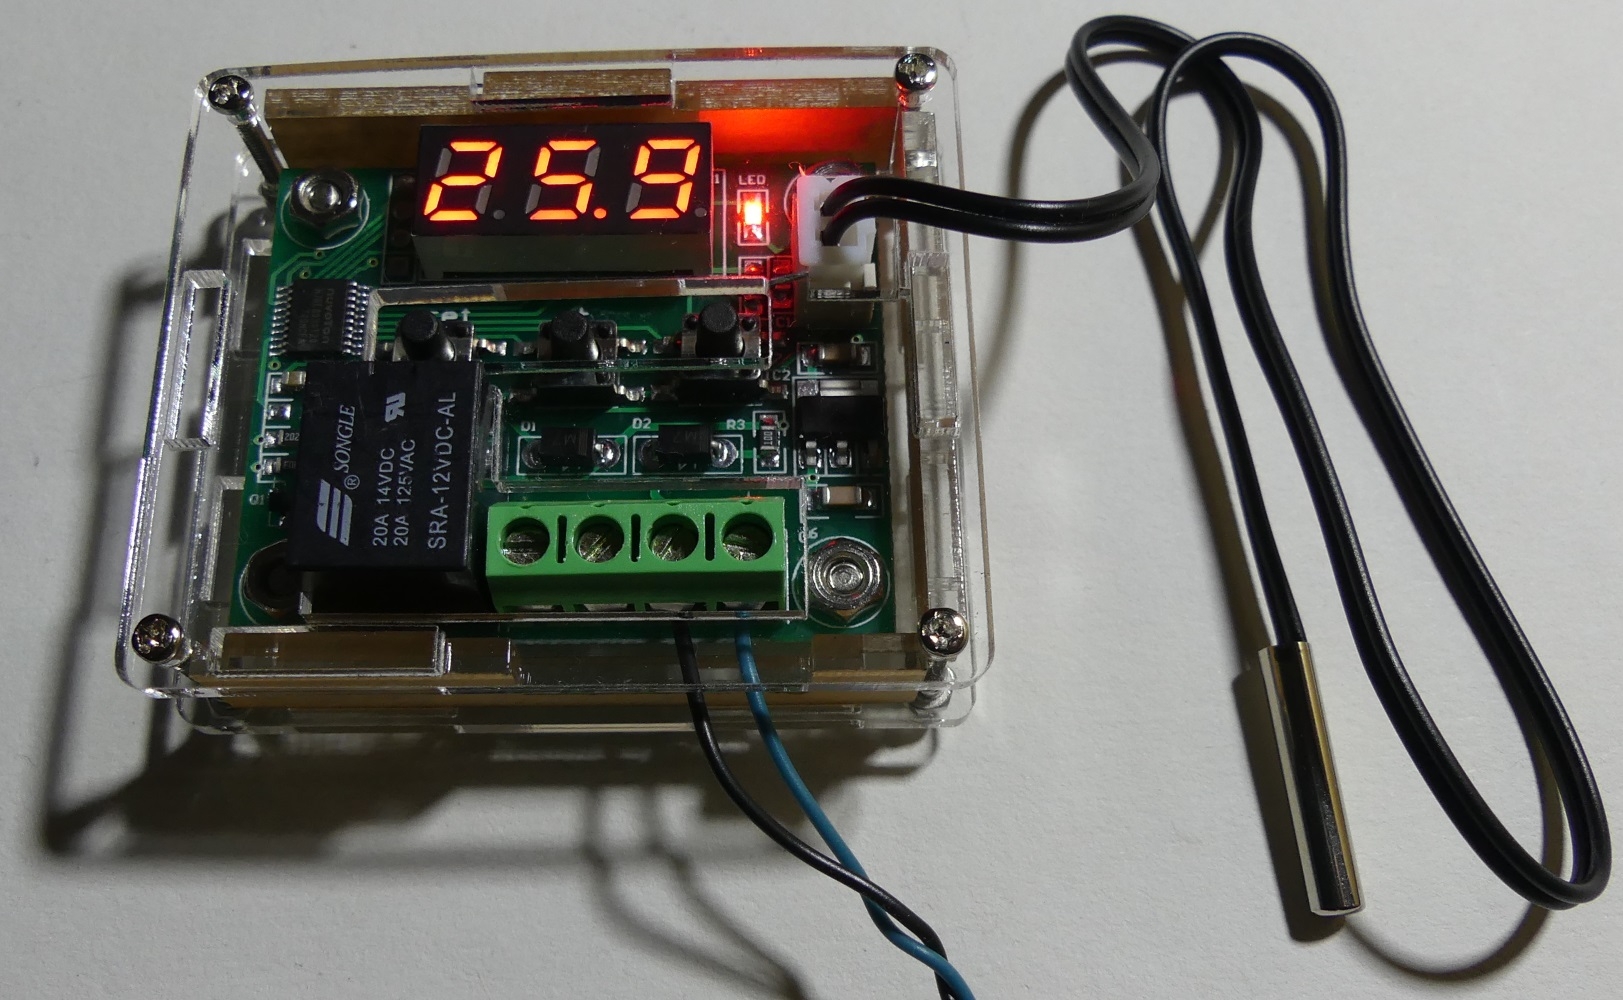
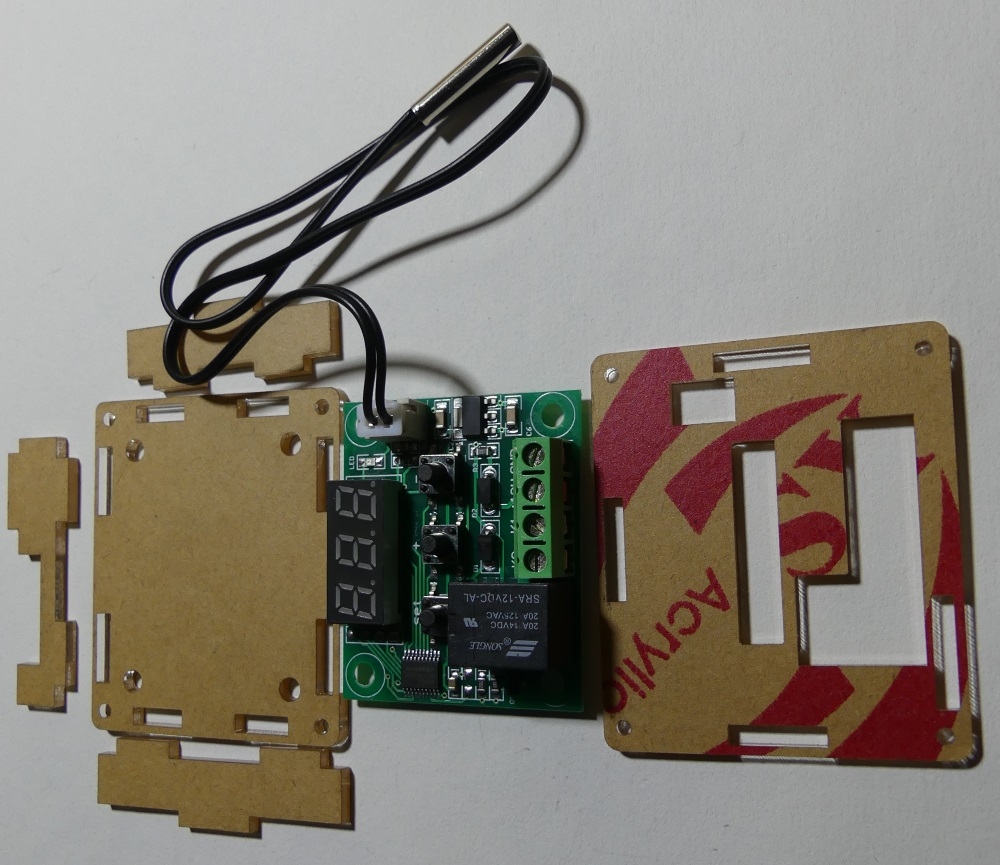
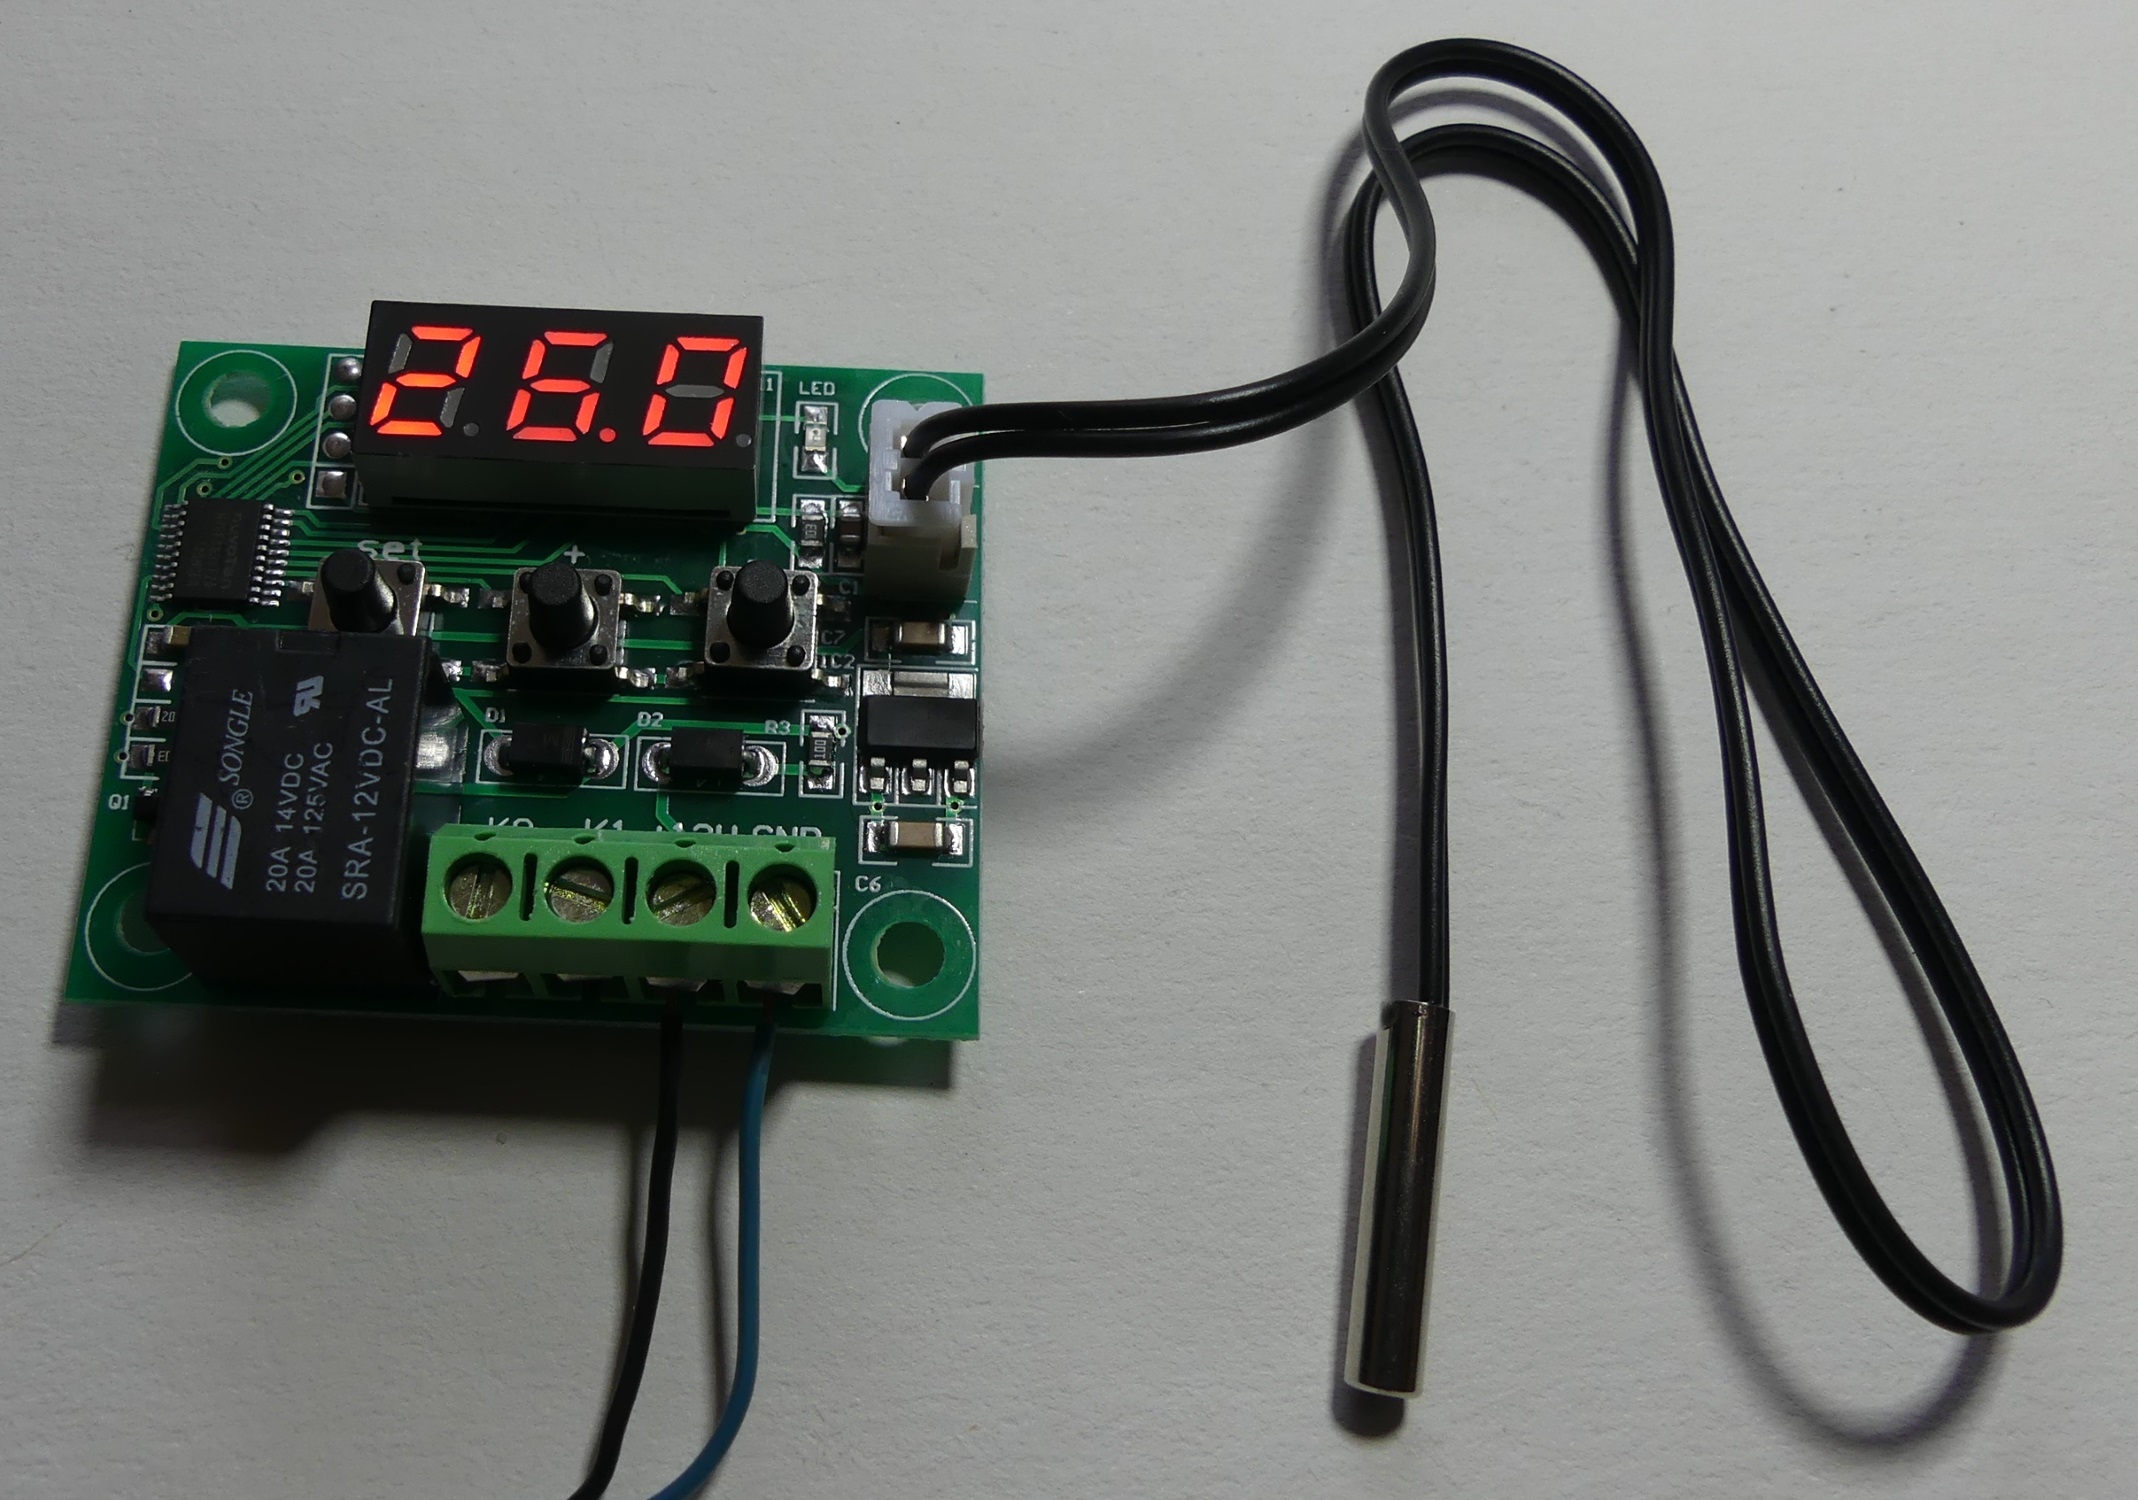
The W1209 thermostat can control a heating or cooling device. The LED display shows the current temperature with a resolution of 0.1C, measured with a sensor based on the NTC element. The simple menu of the system allows, among others, to define the type of controlled device, calibrate the thermometer readings, and determine the hysteresis range. The system is supplied with 12V and consumes ~ 16mA with the relay turned off, while the relay coil is powered, the current consumption increases to 65mA. Relay contacts, as described, can switch 20A at 14VDC and 20A at 125VAC. A plexiglass housing is included with the thermostat.
The W1209 thermostat will soon appear in the elektroda.pl gadgets. To set the set temperature, shortly press the microswitch marked SET (the digits on the display will start blinking) and use the + - buttons to set the temperature to be stabilized by the thermostat. We can set the value from -50C to 110C.
Holding the SET button for longer than 5s displays the menu items from P0 to P6. Entering the settings of a certain menu level is done by pressing the SET button.
P0 - select the type of connected device:
H- a device generating heat, i.e. a heater, e.g. in the form of a resistor
C- cooling device, e.g. fan or Peltier module, C is the default setting
P1 - we set the hysteresis, i.e. the deliberate interval between switching on and switching off an element, by default they are 2C (0.1-15 adjustment),
e.g. in case of cooling and the thermostat temperature is set to 20C, cooling will be turned on after reaching 20C,
while cooling will be turned off at 18C (2C hysteresis). Setting the hysteresis will reduce the number of switchings of the relay, increasing the life of the contacts.
P2 and P3 - setting the maximum and minimum temperature (by default set to the maximum and minimum measurement, I do not know what is the practical application)
P4 - temperature sensor calibration -7C to 7C. A one-point calibration is debatable, but for the thermostat's setpoint temperature it may make sense.
P5 - delay time of switching on the relay.
P6 - extreme temperature alarm, when the temperature reading reaches the set alarm threshold, the relay will be turned off, the symbol --- will appear on the display. You can set this value to a temperature that is dangerous for the system, in an emergency the heater power supply will be turned off.
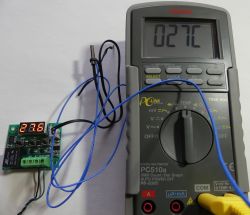
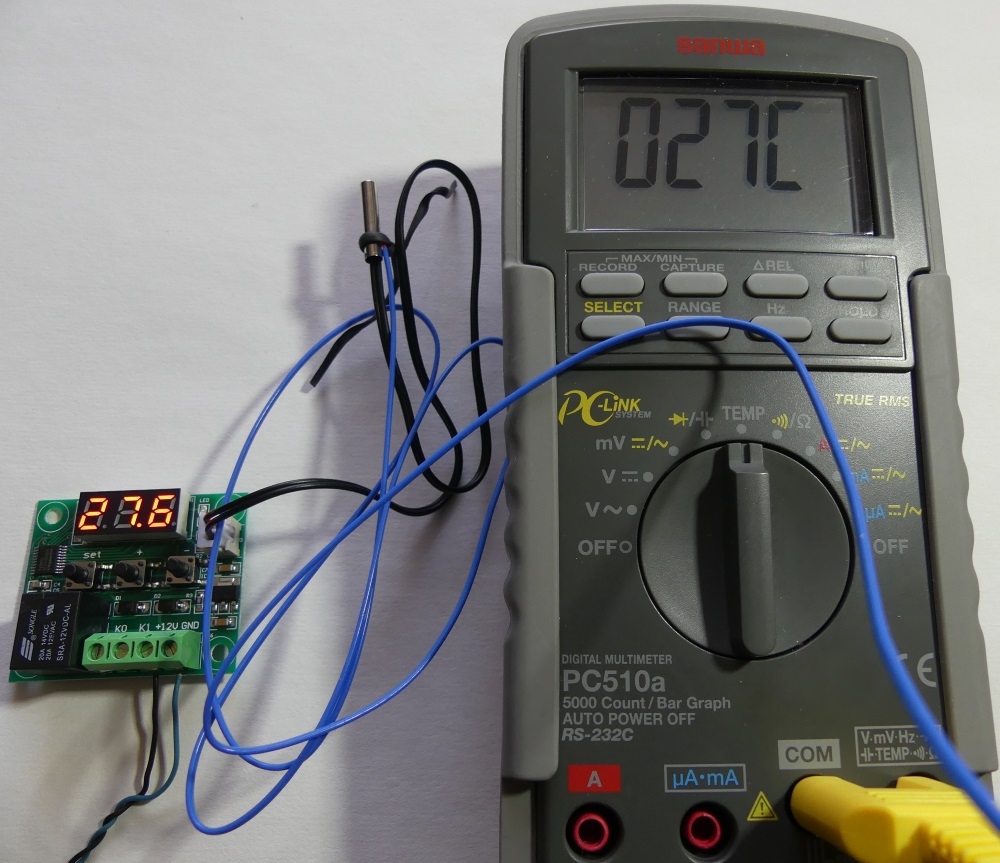
The NTC sensor is closed in a metal housing which increases its resistance to damage. When the sensor is disconnected, the thermostat displays LLL. Room temperature readings are the same as with a thermocouple multimeter.
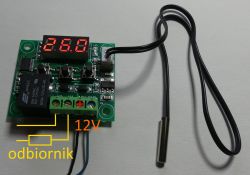
Connecting the controlled receiver is very simple. The relay is connected in series in the receiver power supply circuit. We supply 12V DC to the thermostat.
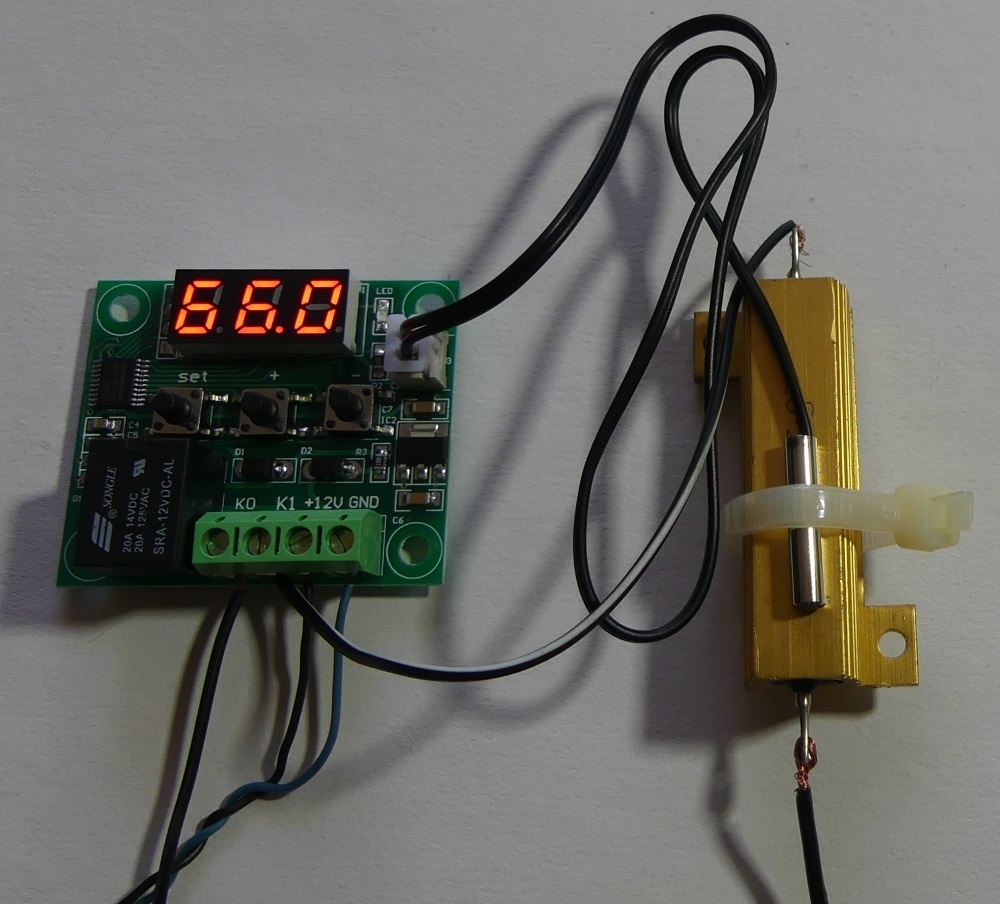
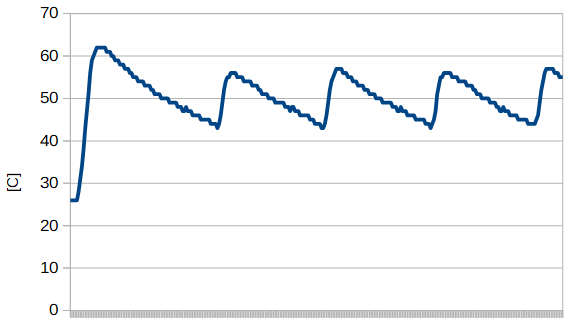
Let's make a test and use a 4.7om resistor powered from 12V as a heating element. Place the sensor so that it measures the heater temperature. At the same time, we can record the temperature of the resistor.
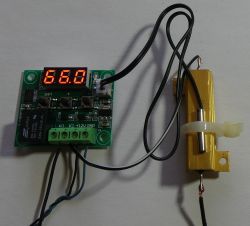
We set the thermostat to 45C and see how the on / off control is doing.
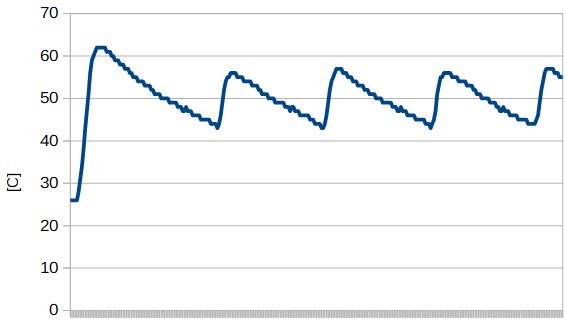
Considerable temperature fluctuations caused by the "inertia" of the system are visible. Around 45C you can see the moments of switching on the relay, but despite switching off the power supply to the resistor, the temperature rises for some time, then the temperature drops until the relay is switched on again. This example shows that the accuracy of the temperature sensor and measurement may not be of great importance in on / off control. Such simple control will prove itself in many applications. In more demanding applications, the heater can be controlled, for example, by PWM or phase, and even a PID controller as a controller.
In the set with the W1209 thermostat you will find a plexiglass housing.
 Where do you see the applications for the W1209 thermostat?
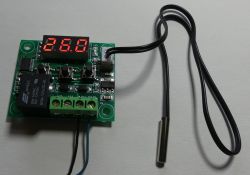


Comments
And how to measure negative temperatures, e.g. -10 degrees Celsius or - 20. [Read more]
For me, the third season controls the central heating pump. [Read more]
How are minus temperatures indicated? Somehow I was recently looking for an alternative to a mechanical freezer thermostat because I couldn't find a suitable one for my medel and was considering buying... [Read more]
@ElectroTom @ miszczo997 negative temperatures are indicated by a minus, with two-digit numbers the resolution of indications is reduced: https://obrazki.elektroda.pl/6615403900_1524249541_thumb.jpg... [Read more]
The biggest disadvantage of this thermostat in my opinion is that when the maximum temperature (I don't know how the minimum) is reached in cooling mode, the relay is turned off. Let's assume... [Read more]
This may be a deliberate safeguard, i.e. the controller switches the actuator on, but sees no changes in the feedback signal. It may be a situation that you write about, e.g. cooling does not work, but... [Read more]
Hello, I control the CO circulating pump in the furnace. OK. [Read more]
You do not need to use this feature, it can actually be troublesome in some situations. [Read more]
@krisRaba P6 can be set to OFF. [Read more]
And after the "biggest flaw" ;) [Read more]
I have been using two such thermostats for two years. One controls the hot water circulation pump, the other controls the relay that activates the electric heater when the water temperature in the boiler... [Read more]
I use three such modules to control the airflow power in the DGP installation in the fireplace and they do well with the appropriate setting of parameters. The only drawback, in my opinion, is the lack... [Read more]
I read on the electrode forum that while the indications in the range of 10-30 ° C are correct with an accuracy of 1 ° C, as the temperature increases, they are burdened with more and more errors. When... [Read more]
an interesting thing about this thermostat. For me, it would be used with a laminate etching machine. I can never sense the matter and sometimes I can boil acid. This thermostat fits perfectly, if the... [Read more]
I believe that the range of voltage of the executive relay contacts (24 and 125 V) is a big disadvantage. After all, the typical voltage of our home installations is 240 V AC. :cry: [Read more]
It will withstand 125V, it (judging from previous posts) will also withstand 240V at a much lower current, and at 20A I do not believe it, despite the manufacturer's assurances. [Read more]
P6 does not work on off, only a range is set. I have it set to max, ie 110. The sensor is on the boiler flue, at a distance from it, otherwise it would be 300 ° C. Rarely, because rarely, but if you want... [Read more]
Hello, I apply to CO in a single-family home. It works fine [Read more]
I have a single-function boiler and a heat exchanger. The thermostat controls the pump in the radiator circuit. It turns it on when hot water from the boiler appears and turns it off when it cools down... [Read more]