Hello everyone once again.
Today I will try to describe to you a very cheap Chinese digital thermostat W1209.
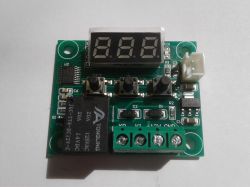
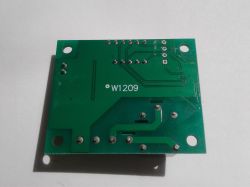
To buy this thermostat, you need to spend about $ 1.30 on Aliexpress, including shipping. Prices on Polish auction portals with shipping start from about PLN 14.
The device is sold complete with a temperature sensor.
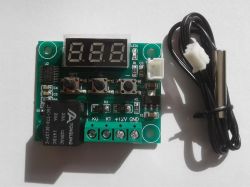
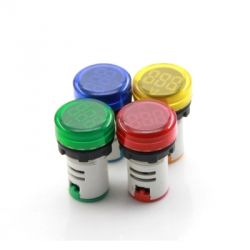
Sometimes, when buying a thermostat, we have a choice of the color of the display, you can choose from: green, red, blue.
We also have the option of purchasing additional elements for this device - we can purchase a transparent colorless housing for approx. $0.8 with shipping or, for example, if we decide that our sensor has a too short cable (the sensor cable length is 0.5 m in the set) or it will be if it is damaged, we have a choice of sensors with wires of the following lengths: 0.5m, 1m, 2m.
parameters:
- supply voltage: 12VDC;
- minimum current consumption approx. 18mA, maximum approx. 66mA;
- temperature control range: -50 to 110°C;
- measurement resolution; 0.1°C;
- adjustable hysteresis: 0.1-30°C;
- temperature display resolution 0.1°C in the range -9.9°C - 99.9°C, the remaining range 1°C;
- resolution of temperature setting 0.1°C in the range -9.9°C - 99.9°C, in the remaining range the resolution is the same. but the display does not show decimal values;
- temperature measurement refresh rate: 0.5s;
- load capacity of the relay contacts: depending on the soldered relay - for me it is 20A at 14VDC and 20A at 125VAC;
- dimensions: 40x49x16mm - dimensions may vary depending on the relay used.
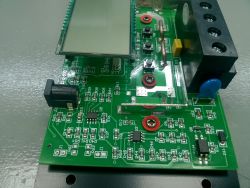
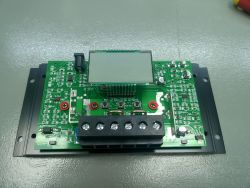
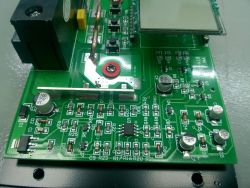
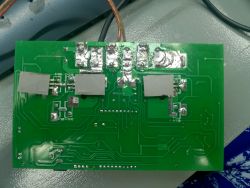
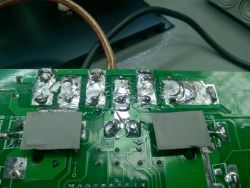
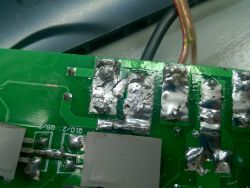
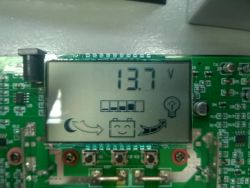
Our tested thermostat is built on the STM8S003F3 microcontroller. In addition, on the PCB we can find 3 buttons described as "SET", "+" and "-" for changing settings, 5V stabilizer, 3-digit, seven-segment display, temperature sensor socket, LED for visualization of relay activation, relay and 4-pin screw connector, to which we supply 12VDC (+12V, GND) and where we have the working contact of the relay (K0, K1).
In the power supply circuit, we have a diode D1 working there as a protection against reverse connection of the power supply.
After supplying the power supply, the display shows the current temperature from the sensor (as the sensor here the NTC thermistor 10k, 0.5%). If there is no temperature reading from the sensor, the display will show "888".
Changes of the temperature setting to which our thermostat will strive are made by briefly pressing the "SET" button. From now on, the displayed value starts flashing and you can change it using the "+" and "-" buttons. After making the change, we must press the "SET" button again, after which the display will switch to displaying the current temperature.
By holding down the "SET" button for 3 seconds, we enter the menu, where we have access to 8 different parameters:
- P0 - change of operating modes: heating (H) or cooling (C) - factory setting - C;
- P1 - hysteresis setting: 0.1 - 30°C - factory setting: 2.0;
- P2 - upper setting limit: -50 - 110°C - factory setting: 110;
- P3 - lower setting limit: -50 - 110°C - factory setting: -50;
- P4 - temperature measurement correction: -7 - 7°C - factory setting: 0;
- P5 - relay activation delay: 0 - 600sec - factory setting: 0;
- P6 - ??????: ON - OFF; factory setting: OFF;
- P7 - alarm after exceeding the temperature: OFF - 0 - 110°C - factory setting: 50;
- P8 - parameter reset and settings: C - H - factory setting: C
I failed to notice any changes after changing parameter P6. The descriptions that the sellers post do not match my version of the thermostat, even though both my thermostat and the seller's descriptions have the same name. You may also encounter a different version of the software.
Setting the C value in parameter P8 brings factory settings everywhere. The same can be done by supplying power to the device while pressing the "+" and "-" buttons.
When moving through the menu, if we want to change an option, we can press the "+" or "-" buttons several times, or if we want to significantly change the value, and we do not want to click dozens of times, we can hold one of these buttons longer, which will automatically change this value.
Exit the menu by pressing the "SET" button for a long time or it is enough to leave the selected parameter for 10 seconds and then the device will automatically exit the menu returning to displaying the temperature reading (the device will automatically exit the menu only if the parameter is displayed, e.g. P6, and not its value).
The thermostat remembers the settings after disconnecting it from the power supply. If, for example, we change the temperature setting, enter the menu, change the P1 and P2 parameters, exit the menu, enter the menu again and change the P4 parameter, but do not exit the menu and disconnect the power supply, the P4 parameter will not be saved, and the setting and parameters P1 and P2 will be saved.
Changing the operating mode. If we set parameter P0 to C, setting to 30°C, P1 to 2°C, then the relay will be activated when the temperature on the sensor is 32°C and it will be deactivated when the temperature is 28°C.
If we set parameter P0 to H, setting to 30°C, P1 to 2°C, the relay will be switched on when the temperature on the sensor is 28°C and it will be switched off when the temperature is 30°C.
The resolution of all settings is accurate to 0.1°C, but the device behaves as if the program was written on a 4-digit display - i.e. in the setting range -9.9°C to 99.9°C, one press of the button changes the setting by 0, 1 but outside this range, if we want to change e.g. the value 105 to 106, we must press the button as many as 10 times, because one pressing changes the setting by 0.1.
If the measured temperature exceeds the value declared in parameter P7, "---" will appear on the display.
In the absence of a reading from the measuring sensor, the state of the relay will remain unchanged - i.e. if, for example, we disconnect the sensor when the relay was on, the relay will remain in this state until we reconnect the sensor.
On the display we can still meet such characters as "LLL" and "HHH". This can happen if the temperature on the sensor reaches -50°C or over 110°C, or if we change the limits in parameters P2 and P3 and the current temperature is outside these settings.
Below is a diagram of the described thermostat.
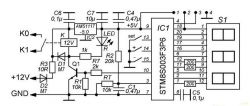
The thermostat is quite cheap and as you can see it has some setting options.
We can use it, for example, to maintain the temperature of the solution when etching PCBs or, for example, in aquariums.
INin the next description I will try to present the W1219 thermostat with two seven-segment displays.
Here is the link to the article.
https://www.elektroda.pl/rtvforum/topic3437967.html#17076082
Update
As earlier on the forum I added a description of another thermostat - XH-W1219, I decided to compare the accuracy of temperature measurement between these versions of thermostats. As a reference, I used a thermometer built on the AVR processor and the Dallas DS18B20 sensor.
Here are some measurements:
As you can see, the W1209 thermostat begins to cheat us at higher temperatures - it overestimates the measurements and we can't change the P4 parameter here because after changing it, the measurement of lower temperatures will start to fail.
I thought that these thermostats are Chinese toys for a few zlotys, so maybe it's the fault of the thermistor used as a temperature sensor - some of its non-linearity or inaccuracy. Since both thermostats use exactly the same type of thermistor as a sensor, I decided to swap the measuring probes between the thermostats and measure again to see if it was the thermistor's fault.
Measurement results after replacing the measuring probes:
After taking these measurements, you can see that it is not the thermistor's fault, but the conversion of measurements into temperature by the software in the W1209 thermostat.
Today I will try to describe to you a very cheap Chinese digital thermostat W1209.


To buy this thermostat, you need to spend about $ 1.30 on Aliexpress, including shipping. Prices on Polish auction portals with shipping start from about PLN 14.
The device is sold complete with a temperature sensor.

Sometimes, when buying a thermostat, we have a choice of the color of the display, you can choose from: green, red, blue.
We also have the option of purchasing additional elements for this device - we can purchase a transparent colorless housing for approx. $0.8 with shipping or, for example, if we decide that our sensor has a too short cable (the sensor cable length is 0.5 m in the set) or it will be if it is damaged, we have a choice of sensors with wires of the following lengths: 0.5m, 1m, 2m.
parameters:
- supply voltage: 12VDC;
- minimum current consumption approx. 18mA, maximum approx. 66mA;
- temperature control range: -50 to 110°C;
- measurement resolution; 0.1°C;
- adjustable hysteresis: 0.1-30°C;
- temperature display resolution 0.1°C in the range -9.9°C - 99.9°C, the remaining range 1°C;
- resolution of temperature setting 0.1°C in the range -9.9°C - 99.9°C, in the remaining range the resolution is the same. but the display does not show decimal values;
- temperature measurement refresh rate: 0.5s;
- load capacity of the relay contacts: depending on the soldered relay - for me it is 20A at 14VDC and 20A at 125VAC;
- dimensions: 40x49x16mm - dimensions may vary depending on the relay used.
Our tested thermostat is built on the STM8S003F3 microcontroller. In addition, on the PCB we can find 3 buttons described as "SET", "+" and "-" for changing settings, 5V stabilizer, 3-digit, seven-segment display, temperature sensor socket, LED for visualization of relay activation, relay and 4-pin screw connector, to which we supply 12VDC (+12V, GND) and where we have the working contact of the relay (K0, K1).
In the power supply circuit, we have a diode D1 working there as a protection against reverse connection of the power supply.
After supplying the power supply, the display shows the current temperature from the sensor (as the sensor here the NTC thermistor 10k, 0.5%). If there is no temperature reading from the sensor, the display will show "888".
Changes of the temperature setting to which our thermostat will strive are made by briefly pressing the "SET" button. From now on, the displayed value starts flashing and you can change it using the "+" and "-" buttons. After making the change, we must press the "SET" button again, after which the display will switch to displaying the current temperature.
By holding down the "SET" button for 3 seconds, we enter the menu, where we have access to 8 different parameters:
- P0 - change of operating modes: heating (H) or cooling (C) - factory setting - C;
- P1 - hysteresis setting: 0.1 - 30°C - factory setting: 2.0;
- P2 - upper setting limit: -50 - 110°C - factory setting: 110;
- P3 - lower setting limit: -50 - 110°C - factory setting: -50;
- P4 - temperature measurement correction: -7 - 7°C - factory setting: 0;
- P5 - relay activation delay: 0 - 600sec - factory setting: 0;
- P6 - ??????: ON - OFF; factory setting: OFF;
- P7 - alarm after exceeding the temperature: OFF - 0 - 110°C - factory setting: 50;
- P8 - parameter reset and settings: C - H - factory setting: C
I failed to notice any changes after changing parameter P6. The descriptions that the sellers post do not match my version of the thermostat, even though both my thermostat and the seller's descriptions have the same name. You may also encounter a different version of the software.
Setting the C value in parameter P8 brings factory settings everywhere. The same can be done by supplying power to the device while pressing the "+" and "-" buttons.
When moving through the menu, if we want to change an option, we can press the "+" or "-" buttons several times, or if we want to significantly change the value, and we do not want to click dozens of times, we can hold one of these buttons longer, which will automatically change this value.
Exit the menu by pressing the "SET" button for a long time or it is enough to leave the selected parameter for 10 seconds and then the device will automatically exit the menu returning to displaying the temperature reading (the device will automatically exit the menu only if the parameter is displayed, e.g. P6, and not its value).
The thermostat remembers the settings after disconnecting it from the power supply. If, for example, we change the temperature setting, enter the menu, change the P1 and P2 parameters, exit the menu, enter the menu again and change the P4 parameter, but do not exit the menu and disconnect the power supply, the P4 parameter will not be saved, and the setting and parameters P1 and P2 will be saved.
Changing the operating mode. If we set parameter P0 to C, setting to 30°C, P1 to 2°C, then the relay will be activated when the temperature on the sensor is 32°C and it will be deactivated when the temperature is 28°C.
If we set parameter P0 to H, setting to 30°C, P1 to 2°C, the relay will be switched on when the temperature on the sensor is 28°C and it will be switched off when the temperature is 30°C.
The resolution of all settings is accurate to 0.1°C, but the device behaves as if the program was written on a 4-digit display - i.e. in the setting range -9.9°C to 99.9°C, one press of the button changes the setting by 0, 1 but outside this range, if we want to change e.g. the value 105 to 106, we must press the button as many as 10 times, because one pressing changes the setting by 0.1.
If the measured temperature exceeds the value declared in parameter P7, "---" will appear on the display.
In the absence of a reading from the measuring sensor, the state of the relay will remain unchanged - i.e. if, for example, we disconnect the sensor when the relay was on, the relay will remain in this state until we reconnect the sensor.
On the display we can still meet such characters as "LLL" and "HHH". This can happen if the temperature on the sensor reaches -50°C or over 110°C, or if we change the limits in parameters P2 and P3 and the current temperature is outside these settings.
Below is a diagram of the described thermostat.

The thermostat is quite cheap and as you can see it has some setting options.
We can use it, for example, to maintain the temperature of the solution when etching PCBs or, for example, in aquariums.
INin the next description I will try to present the W1219 thermostat with two seven-segment displays.
Here is the link to the article.
https://www.elektroda.pl/rtvforum/topic3437967.html#17076082
Update
As earlier on the forum I added a description of another thermostat - XH-W1219, I decided to compare the accuracy of temperature measurement between these versions of thermostats. As a reference, I used a thermometer built on the AVR processor and the Dallas DS18B20 sensor.
Here are some measurements:
| DS18B20 | W1209 | W1219 |
| 87.2 | 93.1 | 87.0 |
| 85.0 | 90.8 | 84.7 |
| 82.3 | 87.2 | 82.3 |
| 75.7 | 79.9 | 75.7 |
| 65.0 | 67.7 | 65.0 |
| 56.0 | 57.9 | 56.1 |
| 49.6 | 50.8 | 49.7 |
| 40.8 | 41.5 | 40.8 |
| 28.3 | 28.5 | 28.4 |
| 17.1 | 17.1 | 17.0 |
As you can see, the W1209 thermostat begins to cheat us at higher temperatures - it overestimates the measurements and we can't change the P4 parameter here because after changing it, the measurement of lower temperatures will start to fail.
I thought that these thermostats are Chinese toys for a few zlotys, so maybe it's the fault of the thermistor used as a temperature sensor - some of its non-linearity or inaccuracy. Since both thermostats use exactly the same type of thermistor as a sensor, I decided to swap the measuring probes between the thermostats and measure again to see if it was the thermistor's fault.
Measurement results after replacing the measuring probes:
| DS18B20 | W1209 | W1219 |
| 84.3 | 90,0 | 84,5 |
| 75,6 | 79,9 | 75,5 |
| 63,8 | 66,6 | 63,8 |
| 51,3 | 52,8 | 51,3 |
| 45,6 | 46,7 | 45,7 |
| 40,4 | 41,2 | 40,4 |
| 31,8 | 32,2 | 31,9 |
| 19,8 | 19,7 | 19,7 |
| 16,9 | 16.9 | 16.9 |
After taking these measurements, you can see that it is not the thermistor's fault, but the conversion of measurements into temperature by the software in the W1209 thermostat.
Cool? Ranking DIY


