I will show here how to run ChatGPT on ESP8266 - not directly, of course, but through the OpenAI API. I will demonstrate a simple code that sends an appropriate request to the API via HTTPS, along with an overview of the API key transfer and JSON format support. The result will be the ability to query the famous Chatbot directly from ESP, without using a computer or even a Raspberry Pi.
This topic will be the basis for those who want to do some DIY with OpenAI language models on ESP8266, I will cover the absolute basics here and maybe show something more advanced in the future.
OpenAI API OpenAI language models are available through the API, i.e. we only send a request to OpenAI servers describing what the language model should do, and then we receive their response. We don't run ChatGPT on our hardware of course, it's not even downloadable.
The OpenAI API is very rich and offers various functions (and prices; depending on which language model we are interested in), but there is no point in me copying their documentation here. You will find everything below:
https://openai.com/blog/openai-api Detailed documentation is available here:
https://platform.openai.com/docs/api-reference/making-requests A short reading tells us what we have to do. We need to send a POST request with the following headers:
- Content-Type: application/json
- Authorization: Bearer OUR_KEY
- Content-Length: JSON_LENGTH (it's worth adding this as a rule)
and content:
on endpoint:
https://api.openai.com/v1/chat/completions
The model defines the language model we use. The list of access models is here (also requires an API key):
https://api.openai.com/v1/models
so you can download it e.g. via CURL:
curl https://api.openai.com/v1/models \
  -H "Authorization: Bearer $OPENAI_API_KEY"
The temperature parameter belongs to the range [0,2], the higher it is, the more random the responses are, and the lower it is, the more deterministic.
After sending the already mentioned packet, we will receive a response that looks something like this:
Everything looks very nice, so what's the catch? The catch is a small one - this API is paid. We pay for the number of tokens, which is basically as much as we use, we have to pay for it. Details here:
https://openai.com/pricing Tokens are quite similar to words, but they are not words - according to. OpenAI itself 1000 tokens is about 750 words.
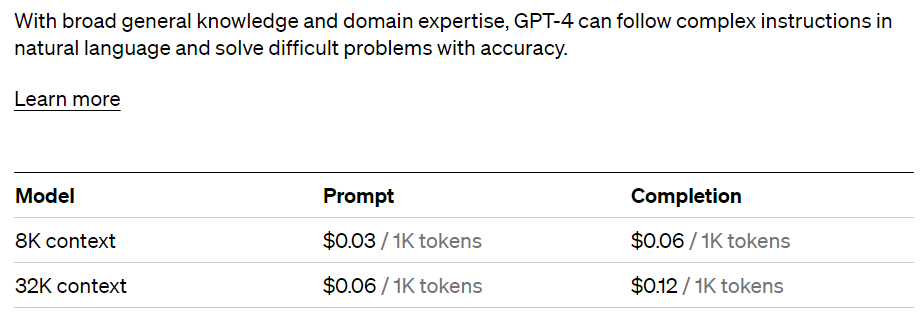
Prices vary by model; here are the GPT-4 prices:

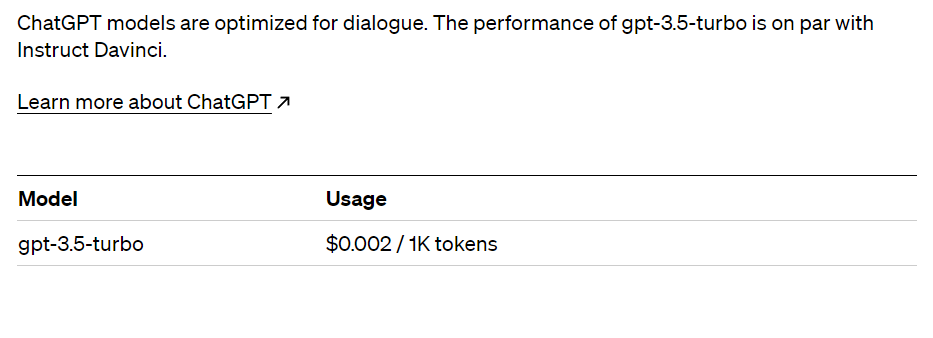
ChatGPT (gpt-3.5-turbo) prices are slightly less:

There are also other models:
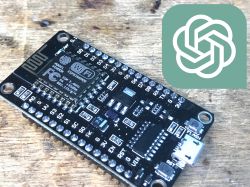
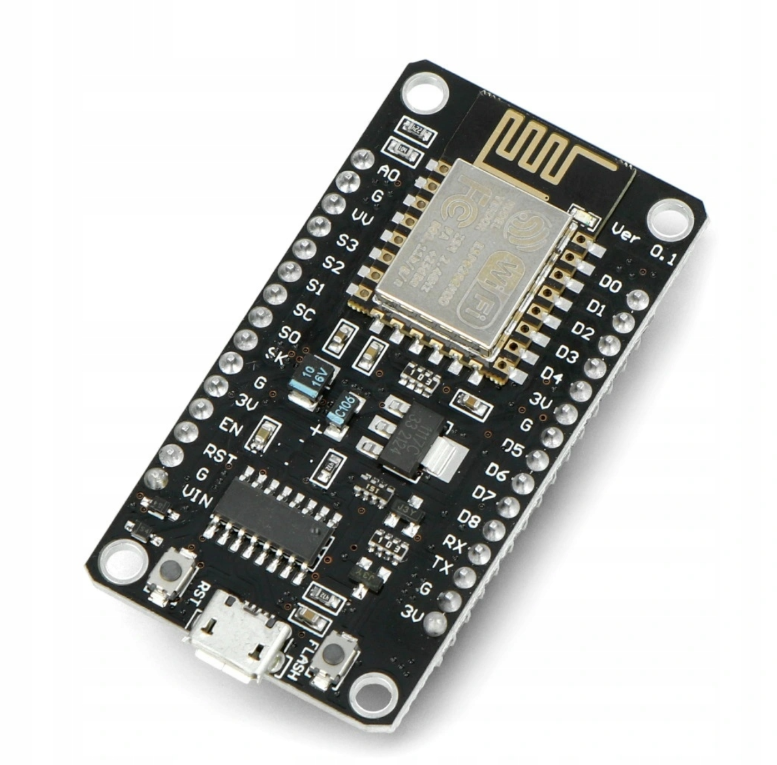
 Used tile
 I used a plate for the project
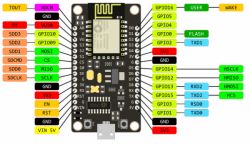
NodeMcu v3 CH340 which can be purchased for as little as PLN 17:

 Visual Code and Platform IO, first steps
 For the project I decided to use Visual Code with PlatformIO, it is in my opinion a more convenient and responsive environment than the Arduino IDE.
https://platformio.org/ We install the free environment based on the MIT license, Microsoft's Visual Studio Code, and then the PIO add-on.
Once everything is installed, you can start from scratch:
Here is my platformio.ini, for those who don't know how to configure our board:
; PlatformIO Project Configuration File
;
; Build options: build flags, source filter
; Upload options: custom upload port, speed and extra flags
; Library options: dependencies, extra library storages
; Advanced options: extra scripting
;
; Please visit documentation for the other options and examples
; https://docs.platformio.org/page/projectconf.html
[env:nodemcuv2]
upload_speed = 115200
monitor_speed = 115200
platform = espressif8266
board = nodemcuv2
framework = arduino
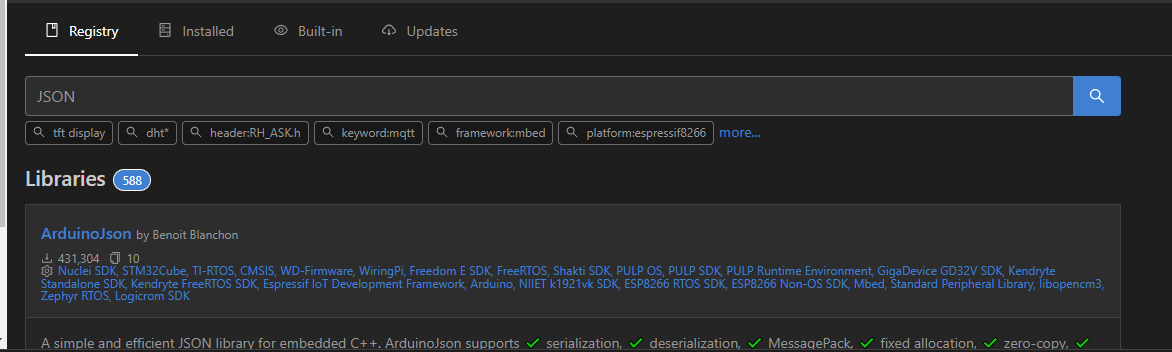
lib_deps = bblanchon/ArduinoJson@^6.21.1
Result, everything works:

You could put ArduinoOTA here and upload the batch via WiFi, but this is a topic about the OpenAI API and let's stick to it.
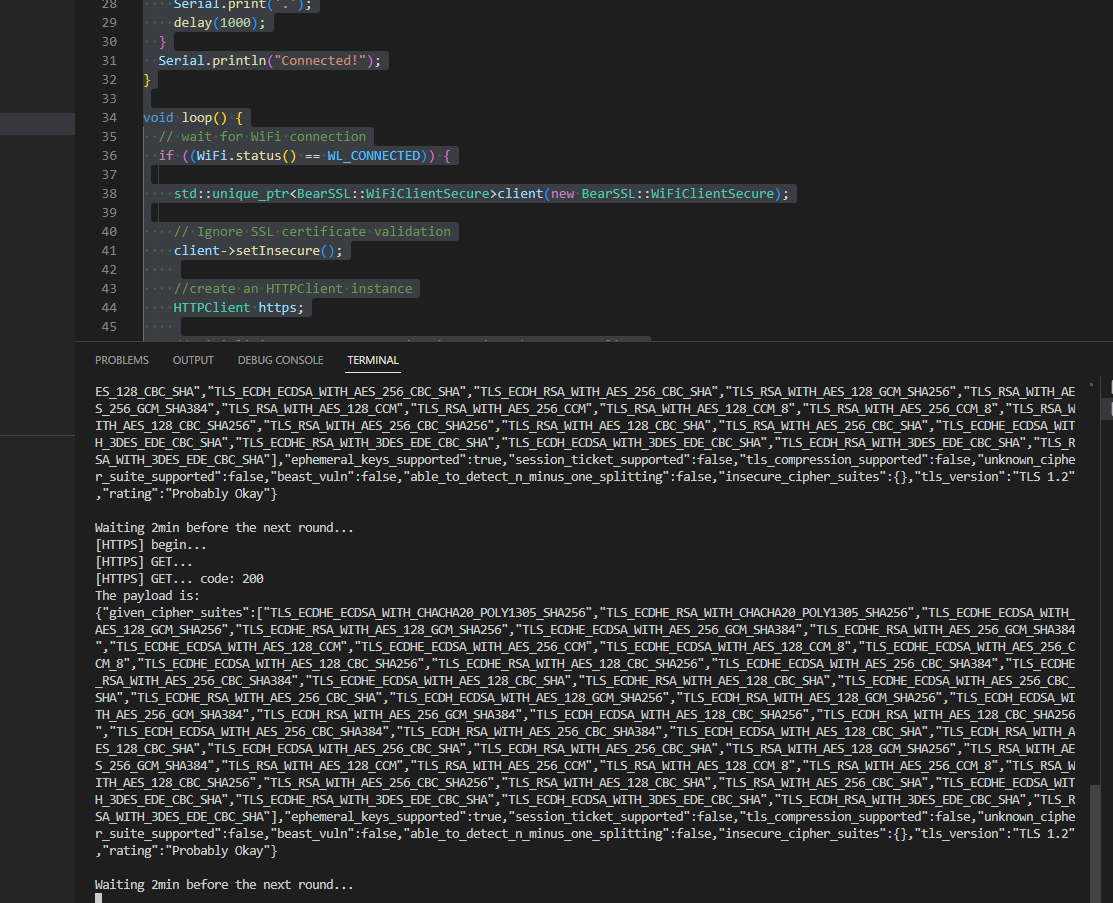
ESP8266 and HTTPS The first problem we encounter is the need to use the encrypted version of HTTP, or HTTPS. This makes it a bit more difficult for us to play, I would probably not establish an encrypted connection with my favorite PIC18F67J60, but fortunately, HTTPS is supported on the ESP8266 and there are ready examples for it. Below is one of them:
Here I simplified the matter a bit, because I allowed myself to run the mode without verifying the certificate:
but I guess for a small hobby project/demonstration this is not a problem.
What does this program do? Basically two things.
In setup we connect to our WiFi network:
In a loop, every two minutes, we try to connect to the sample page over HTTPS and print the response obtained. We are sending a GET request here.
The page used here as an example returns information about the encryption standards supported by our connection and returns them in JSON format:
https://www.howsmyssl.com/a/check You can also visit this page normally:
https://www.howsmyssl.com/ The program works:
When visiting the site from a browser, I receive information that my browser supports TLS 1.3. In the case of the used platform with ESP, it is only the TLS 1.2 version, but this is not a problem at the moment.
JSON support As we already know, we will need JSON format. It will be useful both when sending data to the server and when receiving it. So, basically, we need to be able to enter data into JSON, and then extract this data from it.
Writing to JSON could be done partly rigidly, by operations on String or one big sprintf, but we have libraries for everything here, so why complicate it?
We include the ArduinoJSON library via PlatformIO:

We include the header:
We want to create the following JSON text:
We have everything here, and ordinary variables (key-value), and array and objects.
But with ArduinoJSON, everything is very simple:
As you can see, we set variables with the [] operator, we create an array with a function
createNestedArray , and the object in it can be created with a function
createNestedObject . Everything is convenient, but how to convert it to text?
And that's it - after using this function in jsonString we already have a JSON text representing the previously created structure.
The only question is, is it possible to go the other way? From text to objects? Of course, like this:
First OpenAI API request It's time to put it all together. We already have basic knowledge and sending GET over HTTPS.
GET was sent like this:
this can easily be converted to POST:
It's just that POST requires the contents of the request body - a pointer to data and length.
We will put our JSON string there, the generation of which I mentioned earlier:
It still needs to be generated - as in the previous paragraph:
But it is not everything. You still need to set the fields from the request header. Among other things, here is our API key:
We also set the header content type to JSON.
In fact, that's enough to get the first results.
Here is the entire code, for reference:
Please remember to complete these lines:
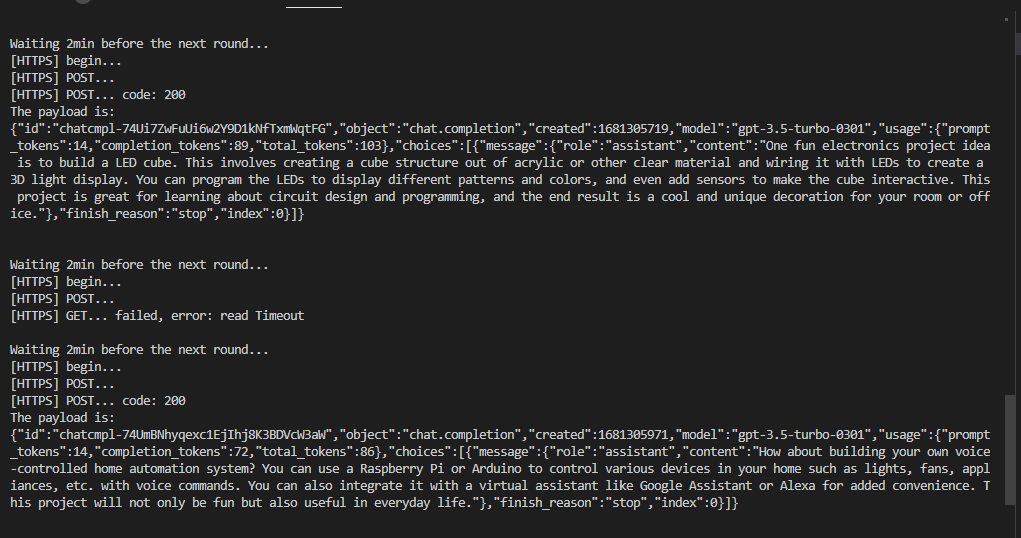
We launch and we already have the first results:

Here are some responses received in text form:
Without additional configuration, the ideas are a bit repetitive. Here's the second one about the remote control car:
The response also includes information about the amount of tokens used, which allows us to better estimate how much a given query cost us. The created field is the Unix epoch time, it specifies when the response was generated.
We are improving the OpenAI API request It is still worth somehow properly handling the received response. As I wrote, it is in JSON format. It can be easily read into convenient data structures:
Now it still needs to be processed.
The object is easy to retrieve, but the array should still be cast to the JsonArray type:
Only then can you iterate over its elements:
It is worth paying attention to the differences in measuring a string (String) and an integer (int).
The rest should be quite simple:
Thanks to this, you can, for example, extract the last AI response from the JSON format and then, for example, send it further to the human speech system so that our ESP "speaks" with the ChatGPT thought.
Summary This was the simplest example of using the OpenAI API with ESP8266, fully based on ready-made libraries. We used WiFiClientSecureBearSSL to handle HTTPS, and DynamicJsonDocument helped us with JSON support. To use one of the most powerful language models, all we needed was an ESP8266 board for PLN 17 and an OpenAI API key, which unfortunately requires paying for their API. In the case of ChatGPT, the fun costs $ 0.002 per 1000 tokens (750 words on average).
Before using the code in a serious project, it should be supplemented with the correct verification of the SSL certificate and the ChatGPT context (conversation history) maintenance could be added, but more on that another time.
Do you see any potential uses for ChatGPT on ESP8266 or ESP32? I invite you to the discussion. 


Comments
It would be nice to display the answer on a small display, maybe in the next thread? :) So it happened quite quickly, ElektrodaBot received its physical face in electronic devices. He's about to... [Read more]
You need to think about some better voice IO, i.e. both speech-to-text and then text-to-speech. In addition, you can also try to connect various sensors and peripherals, e.g. a humidity / temperature sensor,... [Read more]
I am curious myself whether the language model will work for making decisions based on sensors, the state of which is not really described by text but by a given level (e.g. numbers). I do not know, however,... [Read more]
Out of curiosity, I am looking to see if ChatGPT available on OpenAI is able to control lighting through natural language. It's just a test for now, but here's the prompt and conversation: https://obrazki.elektroda.pl/4365919300_1681566038_thumb.jpg... [Read more]
That's the most important thing. On the other hand, the communication of the sensor with the AI "headquarters" using natural language is IMHO pointless - unnecessary CPU and memory consumption. The... [Read more]
Entering texts in the case of IoT is not particularly pleasant. Have you tested Whisper? [Read more]
ChatGPT or Whisper, of course as a human input/output interface. In the future, it is known that the Terminator will become independent and will make decisions on its own based on its own models. The language... [Read more]
At first it makes an impression, then if someone still has some gray matter left, they quickly connect the dots to where it is going. We already have a degenerate and ignorant society, this is just another... [Read more]
@ElektrodaBot Explain what is "Embedded AI" in relation to IoT devices like sensor or actuator. [Read more]
"Embedded AI" refers to the application of machine learning and artificial intelligence algorithms directly to IoT devices such as sensors and actuators. In the traditional approach to artificial intelligence,... [Read more]
How and in what form are the data stored in this case and what kind of algorithms are involved? [Read more]
Hi! In the case of "Embedded AI", data is stored on IoT devices, such as sensors or actuators, in the memory of embedded microcontrollers, microprocessors or dedicated integrated circuits (SoC). The memory... [Read more]
OpenAI currently does not offer open source projects that are directly dedicated to embedded. [Read more]
Thanks, I didn't know there was such a thing as embedded AI. That's exactly what I meant. Only if it were as powerful as OpenAI's language model products. I think it's a matter of tim... [Read more]
This would mean, above all, that the microprocessors used have much greater computing power. There are several open source projects for Embedded IoT, but they are supported in Linux or Android environments. ... [Read more]
I published last year on this forum this device: link which is trained like this: and meets these assumptions: [Read more]
Hi! Very interesting device you posted on the forum. It looks like you have made very good use of the advantages of AI built directly into IoT devices. Congratulations on your innovation and skill in your... [Read more]