FAQ
TL;DR: Since 2018, users report ESPEasy stability issues; "it is stable" refers to Tasmota running for months. Flash Sonoff Mini via 3.3V serial, map GPIOs per a known template, and integrate Domoticz over MQTT. [Elektroda, xury, post #18742132]
Why it matters: This FAQ helps Sonoff Mini owners flash ESPEasy/Tasmota, wire safely to a programmer, and pair with Domoticz on Raspberry Pi.
Quick Facts
- Sonoff Mini typically uses an ESP8285 and a 10 A relay (230 VAC); GPIO12=Relay, GPIO4=Switch input, GPIO13=LED. “Template” available. “Typical” mappings apply. “Do not exceed rated load.” “ [Sonoff Mini — Blakadder Templates]
- Tasmota is reported more stable than ESPEasy and works with Domoticz or other hubs. [Elektroda, xury, post #18742132]
- Flash over 3.3 V TTL only: connect GND, RX↔TX, TX↔RX, 3V3; hold GPIO0 low at power-up; never connect mains while flashing. [Sonoff Basic Switch ESPEasy — Random Nerd Tutorials]
- Domoticz MQTT: use a lightweight helper library to publish device IDX and state; examples available for ESP8266. [ESP_DomoticzMQTT_library — GitHub]
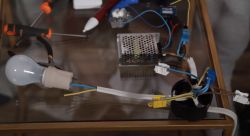
- Safety: Open, mains-powered breadboards are unsafe; keep mains gear enclosed and strain-relieved. [Elektroda, khoam, post #18748000]
How do I flash ESPEasy or Tasmota onto a Sonoff Mini?
Use a 3.3 V USB‑TTL adapter. Disconnect mains. Wire 3V3, GND, TX↔RX, RX↔TX. Pull GPIO0 to GND, then power to enter flash mode. Flash with esptool.py or Tasmotizer. First boot, set Wi‑Fi, then MQTT. Do not use 5 V; it can kill the ESP. [Sonoff Basic Switch ESPEasy — Random Nerd Tutorials]
Which GPIOs on Sonoff Mini control the relay, switch input, and LED?
Typical mapping: Relay1 on GPIO12, External Switch on GPIO4 (S1/S2), Status LED on GPIO13, Button on GPIO0. The Mini is commonly rated 10 A at 230 VAC, so size loads accordingly. Use the published device template to avoid guesswork. [Sonoff Mini — Blakadder Templates]
Is Tasmota better than ESPEasy, and does it work with Domoticz?
Users report Tasmota as more stable. One expert said, “it is stable,” and noted ESPEasy became less stable since 2018. Tasmota works with Domoticz and other smart home systems. Use MQTT for integration. This is a practical, set‑and‑forget path. [Elektroda, xury, post #18742132]
What’s the safe wiring diagram from Sonoff Mini to a programmer?
Connect a 3.3 V USB‑TTL: Mini 3V3 to adapter 3.3 V, Mini GND to adapter GND, Mini RX to adapter TX, Mini TX to adapter RX. Hold GPIO0 low at power to enter bootloader. Never connect mains while programming. Crossed RX/TX is a common flashing failure. [Sonoff Basic Switch ESPEasy — Random Nerd Tutorials]
Which USB‑TTL programmer should I buy and what voltage do I use?
Use a 3.3 V capable CH340, CP2102, or FT232 adapter. Ensure it can supply adequate 3.3 V current. Set the adapter to 3.3 V output. Do not power with 5 V. If the device keeps resetting, use a stable external 3.3 V source. [Sonoff Basic Switch ESPEasy — Random Nerd Tutorials]
How do I configure ESPEasy devices on Sonoff Mini for Domoticz?
Map GPIOs per the Mini template: set Relay to GPIO12 and Switch to GPIO4. In Controllers, configure MQTT for Domoticz. Create corresponding devices in Domoticz and bind via MQTT IDX. This mirrors Sonoff Basic workflows for Domoticz control. [Sonoff Basic w systemie Domoticz]
Will Sonoff Mini support both a wall switch and Domoticz at the same time?
Yes. Use the S1/S2 low‑voltage input mapped as a Switch (GPIO4) and the relay on GPIO12. The firmware can toggle relay state on physical change while also reporting to MQTT/Domoticz. This allows local and remote control together. [Sonoff Mini — Blakadder Templates]
Should I pick Sonoff Mini, Shelly, or build a DIY ESP8266 relay?
For a first project, Sonoff is easier to flash than Shelly. DIY with ESP8266 is fine, but safe mains power supplies are the hard part. If you DIY, budget time for proper isolation and certification considerations. [Elektroda, khoam, post #18747513]
Is Sonoff Mini safe for lighting circuits?
When installed in an enclosure and within ratings, it’s widely used. Avoid exposed mains on breadboards. As one expert cautioned, table‑top mains rigs are only “safe” until they move. Use proper wiring, strain relief, and insulation. [Elektroda, khoam, post #18748000]
How do I integrate with Domoticz using MQTT from custom ESP8266 code?
Use a helper library tailored for Domoticz MQTT. It wraps publishing IDX and state in simple calls, reducing JSON glue code. Configure broker settings, then publish commands/states to Domoticz topics in your sketch. Examples are included. [ESP_DomoticzMQTT_library — GitHub]
Are there beginner-friendly guides for flashing Sonoff and pairing with Domoticz?
Yes. Follow a Sonoff+ESPEasy tutorial for flashing and a Domoticz‑focused guide to set MQTT, IDX, and devices. These walk through end‑to‑end configuration for basic on/off control and status reporting. [Sonoff Basic w systemie Domoticz]
Can I automate blinds with ESP8266 and report percentage to Domoticz?
Yes. Use an ESP8266 driving a stepper or DC motor and time‑based calibration to estimate 0–100%. Then publish positions to Domoticz via MQTT. See the referenced blinds control thread for implementation details and ideas. [Elektroda, khoam, post #18751502]
What are common flashing pitfalls and how do I avoid them?
Do not connect mains while flashing. Use 3.3 V only. Cross RX/TX correctly. Pull GPIO0 low before applying 3.3 V to enter bootloader. If serial won’t connect, check ground continuity and try a shorter USB cable. [Sonoff Basic Switch ESPEasy — Random Nerd Tutorials]


