Sorry I didn't take many pictures. Amazon started to ship this with a WB3S when it used to have an ESP chip, so I found this forum. Thanks for all the hard work.
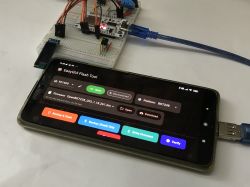
I was able to flash by first erasing using Windows, then using my Mac to write the firmware. I followed the instructions here: https://github.com/openshwprojects/OpenBK7231T_App
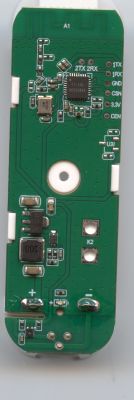
This top view of the chip was useful to determine which pins needed soldering: https://obrazki.elektroda.pl/4208721600_1628153867.png
At first I tried while it was mains powered (dangerous) but it didn't work, so I used my USB-TTL adapter at 3.3V. My poorly-soldered GND, 3.3V, and TXD, and RXD points were enough to get flashing working.
Image of chip
![[BK7231T - WB3S] POWRUI Smart Power Strip with 4-Outlet Extender (Outdoor Smart Plug) [BK7231T - WB3S] POWRUI Smart Power Strip with 4-Outlet Extender (Outdoor Smart Plug)](https://obrazki.elektroda.pl/1323422400_1670713597_thumb.jpg)
PIN assignments
Pin 6 - Relay 4
Pin 8 - Led_N - Power LED
Pin 9 - Relay 1
Pin 24 - Relay 3
Pin 26 - Relay 2
Those numbers assume left to right if you are looking at the front of the device.
I haven't yet been able to figure out how to get the button to work, but that was less important to me than using a 3rd party, open-source firmware. Hope this helps someone, and any ideas on the button would be appreciated.
Product Link: https://www.amazon.com/dp/B07KK62GB7
Cool? Ranking DIY


![[BK7231T - WB3S] POWRUI Smart Power Strip with 4-Outlet Extender (Outdoor Smart Plug) [BK7231T - WB3S] POWRUI Smart Power Strip with 4-Outlet Extender (Outdoor Smart Plug)](https://obrazki.elektroda.pl/9727759600_1670758192_thumb.jpg)
![[BK7231T - WB3S] POWRUI Smart Power Strip with 4-Outlet Extender (Outdoor Smart Plug) [BK7231T - WB3S] POWRUI Smart Power Strip with 4-Outlet Extender (Outdoor Smart Plug)](https://obrazki.elektroda.pl/2516532800_1670758253_thumb.jpg)
![[BK7231T - WB3S] POWRUI Smart Power Strip with 4-Outlet Extender (Outdoor Smart Plug) [BK7231T - WB3S] POWRUI Smart Power Strip with 4-Outlet Extender (Outdoor Smart Plug)](https://obrazki.elektroda.pl/8175200700_1670758273_thumb.jpg)
![[BK7231T - WB3S] POWRUI Smart Power Strip with 4-Outlet Extender (Outdoor Smart Plug) [BK7231T - WB3S] POWRUI Smart Power Strip with 4-Outlet Extender (Outdoor Smart Plug)](https://obrazki.elektroda.pl/7276455000_1670758294_thumb.jpg)