logo elektroda
logo elektroda
X
logo elektroda

Converting KMC Smart Tap Mini YAML File to Template for ESPHome/OpenBeken Conversion

starfoxinstinct 1206 3
ADVERTISEMENT
  • #1 20678673
    starfoxinstinct
    Level 2  
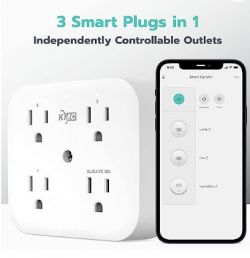
    White KMC Smart Tap Mini with three independently controlled outlets and one ALWAYS ON outlet, shown next to a smartphone displaying a control app.
    The KMC Smart Tap Mini is a Tuya smart outlet with 3 controllable outlets, and 1 always hot.
    It can be purchased here: https://www.amazon.com/gp/product/B087FTZGGY/
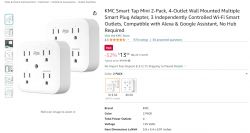
    Two white KMC Smart Tap Mini adapters, each with four outlets; three individually controlled, one always on.
    Quote:
    Product Dimensions ‏: ‎ 3.8 x 3.4 x 0.01 inches; 13.12 Ounces
    Date First Available ‏: ‎ April 22, 2020
    Manufacturer ‏: ‎ kt30407
    ASIN : ‎ B087FTZGGY


    GPIO roles in this devices:
    - P26 - Relay 1
    - P24 - Relay 2
    - P6 - Relay 3
    - P10 - button
    - P11 - WiFi LED
    Button can be scripted to use OBK press events:
    https://github.com/openshwprojects/OpenBK7231T_App/blob/main/docs/autoexecExamples.md

    It can be converted to ESPHome or OpenBeken using tuya-cloudcutter using the following options.
    1.1.8 - BK7231N / oem_bk7231n_plug
    Tuya GenericL
    SPA9 Plug v1.1.8


    JSON OBK template:
    Code: JSON
    Log in, to see the code


    YAML template:
    
    esphome:
      name: "kickstart-bk7231n"
    
    libretiny:
      board: generic-bk7231n-qfn32-tuya
      framework:
        version: dev
    
    logger:
    
    web_server:
    
    captive_portal:
    
    mdns:
    
    api:
      encryption:
        key: !secret api_key
    
    ota:
      password: !secret ota_password
    
    wifi:
      ssid: !secret wifi_ssid
      password: !secret wifi_password
      # Enable fallback hotspot in case wifi connection fails
      ap:
        ssid: "ESPHome Fallback"
        password: !secret fallback_password
        
    
    button:
    - platform: restart
      name: Restart
    
    debug:
      update_interval: 30s
    
    text_sensor:
    - platform: debug
      reset_reason:
        name: Reset Reason
    - platform: libretiny
      version:
        name: LibreTiny Version
    
    sensor:
    - platform: uptime
      name: Uptime
    
    switch:
    - platform: gpio
      id: switch_1
      name: Relay 1
      pin: P26
    - platform: gpio
      id: switch_2
      name: Relay 2
      pin: P24
    - platform: gpio
      id: switch_3
      name: Relay 3
      pin: P6
    
    binary_sensor:
    - platform: gpio
      id: binary_switch_all
      pin:
        number: P10
        inverted: true
        mode: INPUT_PULLUP
      on_press:
        then:
        - switch.toggle: switch_1
        - switch.toggle: switch_2
        - switch.toggle: switch_3
    
    status_led:
      pin: P11
    

    I am not sure how to convert this to a "template". Anyone that knows how, please go ahead and do it for me...
  • ADVERTISEMENT
  • #2 20678691
    p.kaczmarek2
    Moderator Smart Home
    Hello, I have edit your post for more clearer understanding (corrected tags and added a screenshot from offer because link will expire after some time).

    Regarding your question - you are using the incorrect approach. That will not work.

    To get GPIO config automatically for OBK, use this guide:


    You can also post here the binary file, JSON and template you've extracted to help other users. Thanks!


    PS: In a free time, I can write that strange YAML to OBK converter to help you, but in general, please use the proposed solution, it's easier, faster and better.

    PS2: You can also manually enter those settings in OBK:
    
    switch:
    - platform: gpio
      id: switch_1
      name: Relay 1
      pin: P26
    - platform: gpio
      id: switch_2
      name: Relay 2
      pin: P24
    - platform: gpio
      id: switch_3
      name: Relay 3
      pin: P6
    

    ok so you can see that P26 is Relay index 1, so in OBK, go to Config->Module, find P26:
    Screenshot of the OBK configuration interface highlighting the settings field for pin P26 (PWM5).
    Select role, enter index, save. Do the same for other pins..
    A section of the OBK configuration interface showing GPIO pin settings, with P26 set as “Rel” and index set to 1.
    Helpful post? Buy me a coffee.
  • ADVERTISEMENT
  • #3 20678767
    starfoxinstinct
    Level 2  
    p.kaczmarek2 wrote:
    Hello, I have edited your post for clearer understanding (corrected tags and added a screenshot from the offer because the link will expire after some time).

    Regarding your question - you are using the incorrect approach. That will not work.


    Thank you for your kind response. The YAML I sent is actually for ESPHome, not OpenBeken. I think that's why the format is different. I only know the configuration for ESPHome, but users of OpenBeken will appreciate your example.

    My setup is working as I need it to within HomeAssistant, so I am all set. I was just posting the pin configuration I found to help others. Thank you again!
  • #4 20678921
    p.kaczmarek2
    Moderator Smart Home
    Ah, I see. If you're submitting a device template, it may be also useful to post pins in human-readable format. I'll add that to the first post as well.

    I will also add a JSON, so we can add the entry here:
    https://openbekeniot.github.io/webapp/devicesList.html
    EDIT: Json template added, thanks.
    Helpful post? Buy me a coffee.
ADVERTISEMENT