Homemate (https://homemate.co.in/) IoT devices is using tuya platform in their devices. It has a CB3S chip instead of esp8266. I did tried to replace the chip with an esp 12 e, but cloudcutter works just fine with these. So no need to replace or open the device. So you can replace the firmware with openbeken. Follow the guides for cloudcutter here (https://github.com/tuya-cloudcutter/tuya-cloudcutter).
Use BK7231N (https://github.com/openshwprojects/OpenBK7231T_App/releases/tag/1.17.192) for the firmware and find out your version from tuya smart app. Once you finished installing the firmware, go to http://192.168.4.1 and configure your WiFi and MQTT settings. Use the following configurations for the device.
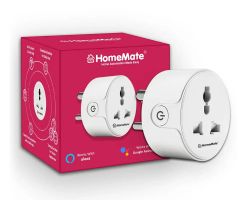
1. Homemate WiFi mini Smart Plug Socket 10 A

https://homemate.co.in/product/smart-plug/
For pin configuration use the following
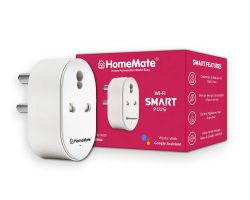
2. Homemate WiFi mini Smart Plug Socket 16 A
For pin configuration use the following

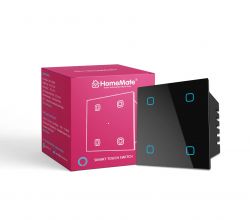
3. Homemate WiFi 4 Gang Smart Touch Switch
https://homemate.co.in/product/wi-fi-4g-touch-panel/
Add these to autoexec.bat
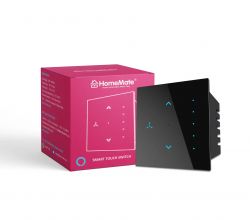
4. Homemate WiFi Smart Regulator Switch
https://homemate.co.in/product/wi-fi-fan-touch-switch/
Add these to autoexec.bat
If anyone knows how to submit the device information to openbeken, let me know.
Use BK7231N (https://github.com/openshwprojects/OpenBK7231T_App/releases/tag/1.17.192) for the firmware and find out your version from tuya smart app. Once you finished installing the firmware, go to http://192.168.4.1 and configure your WiFi and MQTT settings. Use the following configurations for the device.
1. Homemate WiFi mini Smart Plug Socket 10 A

https://homemate.co.in/product/smart-plug/
For pin configuration use the following
{
  "vendor": "Homemate",
  "bDetailed": "0",
  "name": "Homemate WiFi mini Smart Plug Socket 10 A",
  "model": "Smart Plug Socket 10 A",
  "chip": "BK7231N",
  "board": "TODO",
  "flags": "1024",
  "keywords": [
    "TODO",
    "TODO",
    "TODO"
  ],
  "pins": {
    "6": "BL0937CF1;1",
    "7": "BL0937CF;1",
    "8": "LED_n;1",
    "10": "Btn;1",
    "24": "BL0937SEL;1",
    "26": "Rel;1"
  },
  "command": "startDriver BL0937",
  "image": "https://obrazki.elektroda.pl/YOUR_IMAGE.jpg",
  "wiki": "https://www.elektroda.com/rtvforum/topic_YOUR_TOPIC.html"
}
2. Homemate WiFi mini Smart Plug Socket 16 A
For pin configuration use the following

{
  "vendor": "Tuya",
  "bDetailed": "0",
  "name": "Full Device Name Here",
  "model": "enter short model name here",
  "chip": "BK7231T",
  "board": "TODO",
  "flags": "1024",
  "keywords": [
    "TODO",
    "TODO",
    "TODO"
  ],
  "pins": {
    "7": "BL0937CF;1",
    "8": "BL0937CF1;1",
    "10": "Btn;1",
    "24": "BL0937SEL;1",
    "26": "Rel;1"
  },
  "command": "startDriver BL0937",
  "image": "https://obrazki.elektroda.pl/YOUR_IMAGE.jpg",
  "wiki": "https://www.elektroda.com/rtvforum/topic_YOUR_TOPIC.html"
}
3. Homemate WiFi 4 Gang Smart Touch Switch
https://homemate.co.in/product/wi-fi-4g-touch-panel/
Add these to autoexec.bat
startDriver TuyaMCU

setChannelType 1 toggle
setChannelType 2 toggle
setChannelType 3 toggle
setChannelType 4 toggle
setChannelType 13 toggle

setChannelType 7 TextField
setChannelType 8 TextField
setChannelType 9 TextField
setChannelType 10 TextField

linkTuyaMCUOutputToChannel 1 1 1
linkTuyaMCUOutputToChannel 2 1 2
linkTuyaMCUOutputToChannel 3 1 3
linkTuyaMCUOutputToChannel 4 1 4
linkTuyaMCUOutputToChannel 7 2 7
linkTuyaMCUOutputToChannel 8 2 8
linkTuyaMCUOutputToChannel 9 2 9
linkTuyaMCUOutputToChannel 10 2 10
linkTuyaMCUOutputToChannel 13 1 13
4. Homemate WiFi Smart Regulator Switch
https://homemate.co.in/product/wi-fi-fan-touch-switch/
Add these to autoexec.bat
AutoExec

// start MCU driver
startDriver TuyaMCU

// fan on/off channel
setChannelType 1 toggle

//fan speed channel
setChannelType 3 OffLowestLowMidHighHighest

// child Lock channel
setChannelType 14 toggle

// countdown channel
setChannelType 22 TextField

// remaining timer channel
setChannelType 23 TextField

// link output 1 to channel 1
linkTuyaMCUOutputToChannel 1 1 1

// link output 3 to channel 3
linkTuyaMCUOutputToChannel 3 2 3

// link output 14 to channel 14
linkTuyaMCUOutputToChannel 14 1 14

// link output 22 to channel 22
linkTuyaMCUOutputToChannel 22 2 22

// link output 23 to channel 23
linkTuyaMCUOutputToChannel 23 2 23
If anyone knows how to submit the device information to openbeken, let me know.


