 .
.
I will show here how to easily set up Linux rsync on Windows via WSL and then use it to make a copy of our files to a local NAS server via SMB, although analogously copies can also be made to a regular external hard drive. In a way, this method will automate what we often do quite unnecessarily manually, so it will ultimately save us time in keeping our files safe. In addition, the whole thing will work more efficiently, thanks to the fact that rsync only sends changed files and does not blindly copy everything.
Today's electronics are inextricably linked to IT. It's really hard to imagine sifting through tonnes of catalogue notes in the form of physical binders taking up half our cupboard, and even harder to imagine designing a circuit fully on paper - from schematic to PCB design, which is also increasingly at least two layers. For this reason, I thought it worthwhile here to present a method for automatically creating copies via the tool rsync . Rsync is a console tool, normally available on Linux systems, but with a little effort it can be run on Windows too. I'll outline the whole process here step by step and perhaps save someone from losing files.
Step 1 - Install WSL <span>
These Windows steps are skipped if we are on Linux! .
For some time now, Microsoft has offered us the possibility to install WSL, the so-called Windows Subsystem for Linux. WSL allows us to install a Linux distribution (such as Ubuntu, OpenSUSE, Kali, Debian, Arch Linux, etc.) on Windows without having to resort to less efficient and inconvenient solutions such as dual boot or there virtual machine. This allows us to run Linux programs from within our ten (or eleven...).
Before installation, we need to check that we meet the requirements.
You need Windows 10 version2004 or higher (Build 19041 or higher) or Windows 11. If we don't meet this, we do an upgrade.
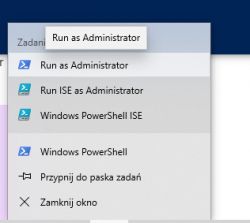
Then we open PowerShell - as administrator:
 .
.
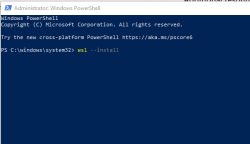
We type wsl --install :
 .
.
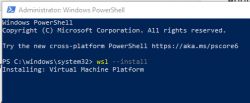
The laborious installation process will then begin:
 .
.
Waiting:
 .
.
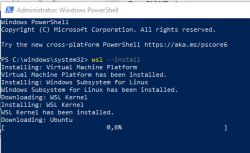
In my case it continued to install Ubuntu by default, but the installation was stuck at 0.6%:
 .
.
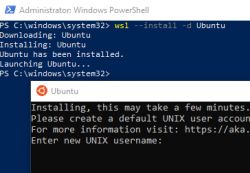
I aborted the process and performed the necessary reboot of the machine. Reboot can be done with the command wsl --install -d Ubuntu :
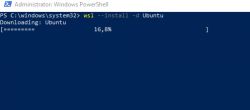 .
.
After a while, our Linux system will install and our Ubuntu prompt will start.
Step 2 - we are finalizing Ubuntu on Windows .
It's time to configure our Windows Ubuntu. We provide a username and password:
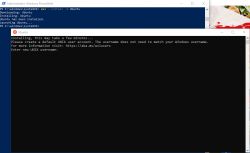 .
.
Ubuntu is picky, I had to enter the name in lower case:
 .
.
We also set a password, I myself chose a fairly short four-letter one:
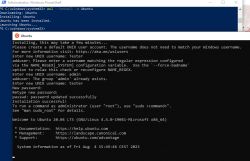 .
.
Step 3 - getting familiar with Ubuntu .
From now on, we can type "WSL" on the Windows bar and run the Linux command line this way:
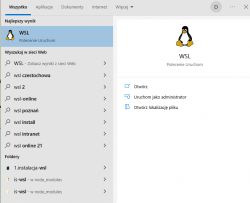 .
.
In my case it looks like this:
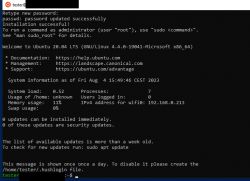 .
.
The obvious implication of this is that you need to know the Linux commands. That is, we operate via cd (change folder), mkdir (create), chmod (set permissions), etc, etc. Our disks can be found in the mnt folder:
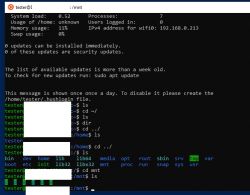 .
.
For example, below I have looked at my W drive - lower case there. All files are visible:
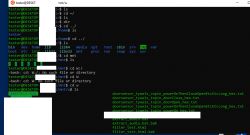 .
.
Step 4 - plug the backup media into the WSL .
Now we still need to access our media from the backup in WSL. Initially I wanted to use the normal Linux way of SMB, i.e. mapping the Samba resource to mnt via mount, but that didn't want to work here.
Eventually I decided that I would map my server on Windows as a network drive .
This is performed in This Computer, here:
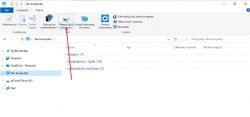 .
.
We click through the wizard:
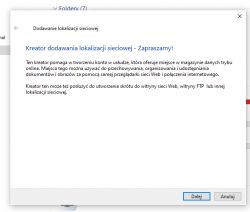 .
.
We enter the address of the share in the format <span>share:
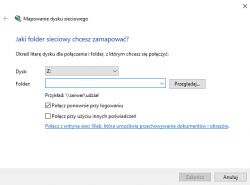 .
.
Below you have an example of what this looked like for me:
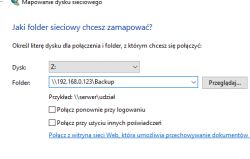 .
.
It's worth ticking the box from automatically connecting after a reboot.
Then in my case the disk did not appear at first, but after the reboot everything was ok:
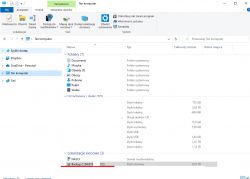 .
.
If you want to copy to a regular drive connected via USB it is even simpler - you don't need to map the network drive.
Step 5 - rsync command .
The name rsync comes from Remote Sync - meaning remote synchronisation. It is not a simple command cp , but much more. Rsync offers a lot of switches and possibilities, which you can read about in the documentation:
https://linux.die.net/man/1/rsync
Rsync is a much more efficient solution than blindly copying data. Rsync analyses the files and only transfers what has changed. Rsync can be easily resumed and paused. Rsync also compresses data on transfer.
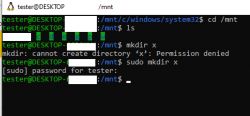
I didn't even have to install rsync itself. I only had to mount the newly added network share to WSL by first creating a folder for it in mnt (as root) with the mkdir command:
 .
.
And then by executing mount:
sudo mount -t drvfs X: /mnt/x
As a result, WSL also started to see files from my mapped network drive.
Then all I had to do was use the rsync command.
I recommend this for a trial:
rsync -av --delete --dry-run /mnt/w /mnt/x/b/w
The basic syntax is:
rsync [przełączniki] [źródło] [cel]
This will make a copy of the files from the source on the specified target.
Let's decipher the arguments one by one:
- a is the archive mode (recursive synchronisation with the option to preserve attributes)
- v - verbose mode (displaying progress and processing information)
- delete - deletes files on the target location that do not exist on the source location
- dry-run - enables simulation mode, where rsync displays what would happen, but does not perform the actual synchronisation, so you can experiment to your heart's content
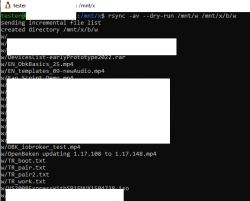
This is what it looked like for me:
 .
.
rsync will also give information about deleted files. And of course - the process can be interrupted and resumed, the whole thing works "smart" and does not copy blindly, it is an efficient solution.
Summary
Installing WSL on Windows really opens up a lot of possibilities and allows you to run a lot of convenient, previously rather inaccessible applications comfortably on "windows". Rsync is one of them and does quite well, especially as it synchronises everything locally. There are no clouds, Boxes, Drives or thereabouts commercial intermediaries, additionally constantly trying to persuade us to buy additional storage space. For this reason, I believe that the solution presented here is attractive to those who value privacy and want to have everything under their control.
Finally, let me remind you of the important 3-2-1 rule:
- 3 means that all our data should be kept in at least 3 copies (3 x backup)
- 2 means that the copies should be on at least two different media
- 1 means that at least one copy should be in a different location (physically, so-called "offsite").. off-site backup)
In my case there are a bit more of these copies, as I also regularly burn DVDs with progress shots, but these 3 (or is it 4?) copies are the bare minimum when something is important.
That's about it from my side. If something is not clear, please ask in the forum, I will help. .
I hope to save at least one person from data loss this way....
Do any readers use rsync? Or do you have any other methods to protect against data loss? .
PS: With these at least three copies it's not a joke - just recently on our forum I read a story of a user who supposedly made a copy, but when the main media broke down (one with SMR - but that's another matter...) this copy failed him.... so three copies is the minimum.
PS2: Just for the record - nothing replaces a version control system, but if it's about e.g. photos etc, then rather rsync will suffice
Cool? Ranking DIY Helpful post? Buy me a coffee.


