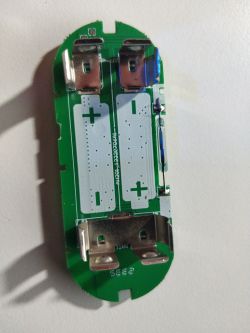
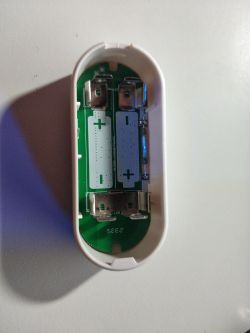
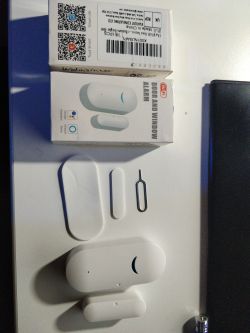
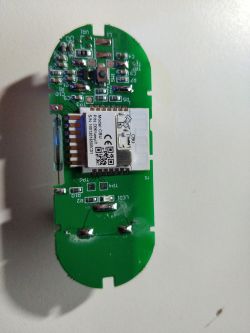
Hello, I got a battery powered Door/Window-Sensor from Amazon which is compatible with Tuya and Smart Life.
It looks like this one:
https://www.elektroda.pl/rtvforum/topic3771510.html#gallery-29
But with a CBU processor.


With this configuration the device connects to the mqtt broker and goes to sleep until the magnet sensor state is changed.
It will indicate a state change with the build in LED on the front.
######## Template
######## autoexec.bat
####### Konfiguration
Config -> MQTT
Set your parameters
Config -> General/Flags
Flag 36 (disable autostart drivers) -> OFF
####### OTA Flashing
Additional-Information:
It can be flashed via cloudcutter OTA: https://github.com/tuya-cloudcutter/tuya-cloudcutter
-> Place OpenBK7231N_UG_1.17.391.bin or newer to the folder "custom-firmware" inside the github-repo
-> Start Cloudcutter: sudo ./tuya-cloudcutter.sh -w *wifiInterfaceName* -s YourSSID 'YourSSIDPass'
(-w Parameter ist not mandatory, try it if it not working without it)
-> Select "2) Flash 3rd Party Firmware"
-> Select "By firmware version and name" and select "1.0.10 - BK7231N / oem_bk7231n_gate_magnet"
-> Select your Firmware in my case "OpenBK7231N_UG_1.17.391.bin"
-> Power up the device and put it to slow blink mode
Long press reset button -> Fast Blink Mode, then again for long blink mode
Follow the instructions
It looks like this one:
https://www.elektroda.pl/rtvforum/topic3771510.html#gallery-29
But with a CBU processor.


With this configuration the device connects to the mqtt broker and goes to sleep until the magnet sensor state is changed.
It will indicate a state change with the build in LED on the front.
######## Template
Code: JSON
ADVERTISEMENT
######## autoexec.bat
addChangeHandler Channel2 == 1 backlog setChannel 0 1;addRepeatingEvent 2 1 setChannel 0 0
addChangeHandler Channel2 == 0 backlog setChannel 0 1;addRepeatingEvent 2 1 setChannel 0 0

setChannel 0 1
delay_s 2
setChannel 0 0
DSTime 30
DSEdge 0
####### Konfiguration
Config -> MQTT
Set your parameters
Config -> General/Flags
Flag 36 (disable autostart drivers) -> OFF
####### OTA Flashing
Additional-Information:
It can be flashed via cloudcutter OTA: https://github.com/tuya-cloudcutter/tuya-cloudcutter
-> Place OpenBK7231N_UG_1.17.391.bin or newer to the folder "custom-firmware" inside the github-repo
-> Start Cloudcutter: sudo ./tuya-cloudcutter.sh -w *wifiInterfaceName* -s YourSSID 'YourSSIDPass'
(-w Parameter ist not mandatory, try it if it not working without it)
-> Select "2) Flash 3rd Party Firmware"
-> Select "By firmware version and name" and select "1.0.10 - BK7231N / oem_bk7231n_gate_magnet"
-> Select your Firmware in my case "OpenBK7231N_UG_1.17.391.bin"
-> Power up the device and put it to slow blink mode
Long press reset button -> Fast Blink Mode, then again for long blink mode
Follow the instructions


