Today we will flash another Tuya-based smart plug.
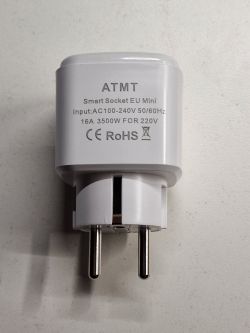
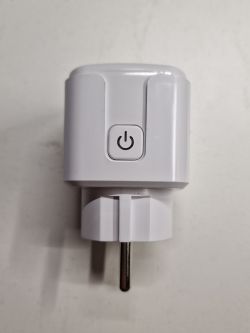
I bought it on famous russian marketplace for 4 EUR. However I've also seen similar on international chinese store.
At the time of purchase there was no informaiton about vendor and model name. But according to the text on case this is ATMT Smart Socket EU Mini.
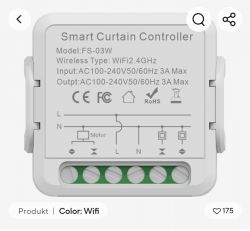
Generally it looks like this one but using completely different pinout.
Pinout details:
Device configuration, as extracted from Tuya:
- BL0937 SEL on P26
- Button (channel 1) on P24
- BL0937 VI on P7
- WiFi LED on P23
- BL0937 ELE on P6
- Relay (channel 1) on P8
Device seems to be using CB2S module, which is using BK7231N.
And the Tuya section starts, as usual, at 2023424
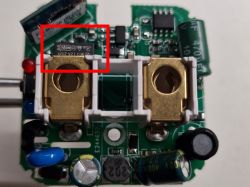
Some photos of internal PCB:
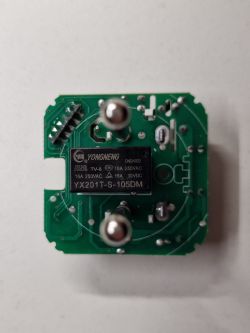
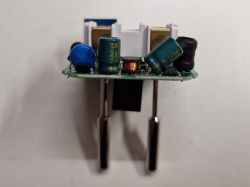
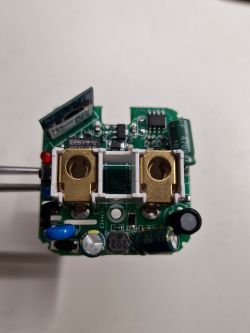
I flashed two devices and in both cases that green capacitor was soldered in very inclined way.
For flashing I removed CB2S module from main PCB
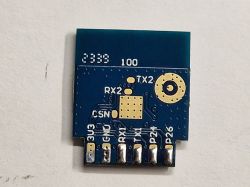
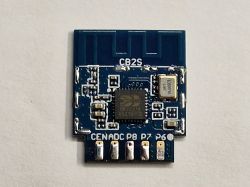
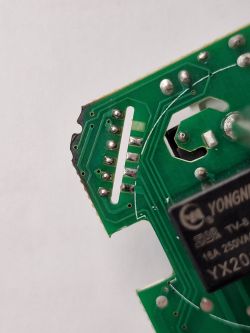
and connected it to CH340 USB-TTL adapter.
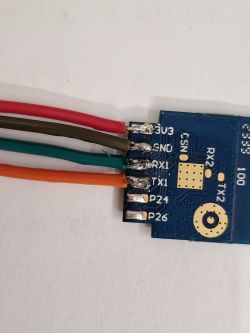
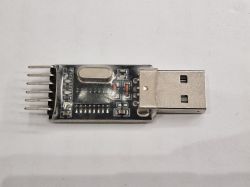
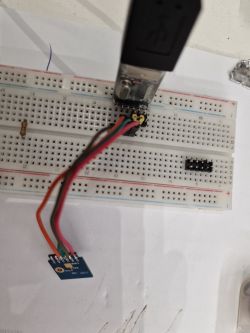
VCC->3v3
TXD->RX
RXD->TX
GND->GND
It is recommended to use a stable 3v power source, but I was too lazy so I connected chip directly to USB-TTL and everything flashed well.
Flashed successfully as in manual here
Firmware version 1.17.592. Flashed with GUI Tool.
Extracted config:
And template:
Now I have a fully featured smart socket. Many thanks to firmware developer.


I bought it on famous russian marketplace for 4 EUR. However I've also seen similar on international chinese store.
At the time of purchase there was no informaiton about vendor and model name. But according to the text on case this is ATMT Smart Socket EU Mini.
Generally it looks like this one but using completely different pinout.
Pinout details:
Device configuration, as extracted from Tuya:
- BL0937 SEL on P26
- Button (channel 1) on P24
- BL0937 VI on P7
- WiFi LED on P23
- BL0937 ELE on P6
- Relay (channel 1) on P8
Device seems to be using CB2S module, which is using BK7231N.
And the Tuya section starts, as usual, at 2023424
Some photos of internal PCB:


I flashed two devices and in both cases that green capacitor was soldered in very inclined way.
For flashing I removed CB2S module from main PCB


and connected it to CH340 USB-TTL adapter.


Spoiler:
(yes, it is not a well soldering, but enough for flashing)
VCC->3v3
TXD->RX
RXD->TX
GND->GND
It is recommended to use a stable 3v power source, but I was too lazy so I connected chip directly to USB-TTL and everything flashed well.
Flashed successfully as in manual here
Firmware version 1.17.592. Flashed with GUI Tool.
Extracted config:
{
   "sel_pin_pin":"26",
   "rl1_lv":"1",
   "bt1_pin":"24",
   "net_trig":"2",
   "jv":"1.0.5",
   "netled1_lv":"0",
   "netled_reuse":"0",
   "bt1_type":"0",
   "ffc_select":"0",
   "nety_led":"1",
   "vi_pin":"7",
   "resistor":"1",
   "over_cur":"16000",
   "bt1_lv":"0",
   "reset_t":"5",
   "netled1_pin":"23",
   "chip_type":"0",
   "lose_vol":"85",
   "over_vol":"265",
   "module":"CB2S",
   "ele_pin":"6",
   "ch_cddpid1":"9",
   "ch1_stat":"2",
   "rl1_type":"0",
   "ch_num":"1",
   "ele_fun_en":"1",
   "rl1_pin":"8",
   "netn_led":"0",
   "vol_def":"0",
   "ch_dpid1":"1",
   "sel_pin_lv":"1",
   "crc":"75"
}
And template:
{
  "vendor": "ATMT",
  "bDetailed": "0",
  "name": "Smart Socket EU Mini",
  "model": "smartplug",
  "chip": "BK7231N",
  "board": "TODO",
  "flags": "0",
  "keywords": [
    "TODO",
    "TODO",
    "TODO"
  ],
  "pins": {
    "6": "BL0937CF;0",
    "7": "BL0937CF1;0",
    "8": "Rel;1",
    "23": "WifiLED_n;0",
    "24": "Btn;1",
    "26": "BL0937SEL;0"
  },
  "command": "",
  "image": "https://obrazki.elektroda.pl/9965663600_1717265759.jpg",
  "wiki": "https://www.elektroda.com/rtvforum/topic4057500.html"
}
Now I have a fully featured smart socket. Many thanks to firmware developer.


