logo elektroda
logo elektroda
X
logo elektroda

Tear down of Antela WiFi Smart Plug [F1s392-UK] (?/CB2S/BL0937)

pseudonymity0000 837 10
ADVERTISEMENT
  • Helpful post
    #1 21394149
    pseudonymity0000
    Level 6  
    I got a bunch of these round the home and decided I would use one to attempt a non-destructive disassembly. Not much documentation out there on this particular plug.
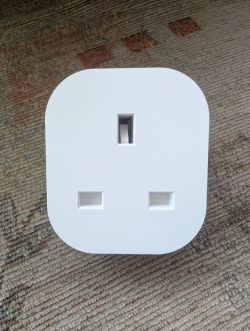
    First off, the plug is very slick, with a basic rectangular minimalist design. The ones I got came in two and four packs.
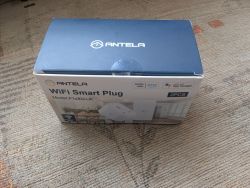
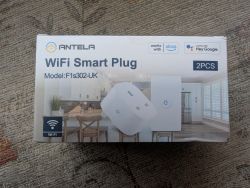
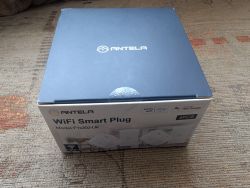
    Package of Antela WiFi Smart Plug, model F1s302-UK, on a carpet.
    Box of Antela WiFi Smart Plug, model F1s302-UK.
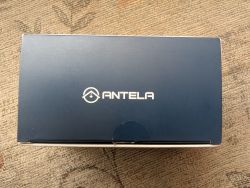
    Box with ANTELA logo on a carpet.
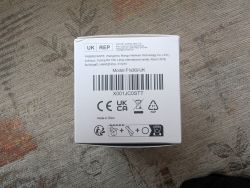
    Back of the packaging box with product information.
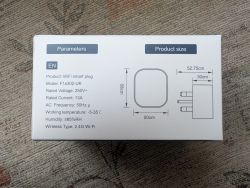
    WiFi smart plug packaging with technical specifications.
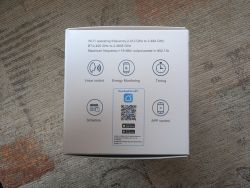
    Smart plug packaging with features like voice control, energy monitoring, scheduling, and app control.
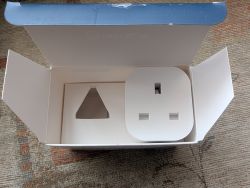
    Inside of an open box containing a single, minimally designed electronic plug.
    Box of Antela WiFi Smart Plugs resting on a table.
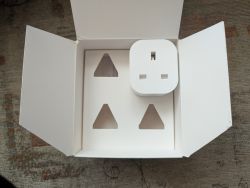
    Modern white plug in an open cardboard box
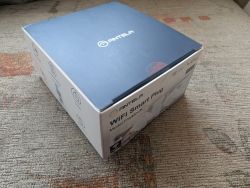
    ANTELA WiFi Smart Plug box resting on a carpet.
    White plug with a minimalist design on a carpet.
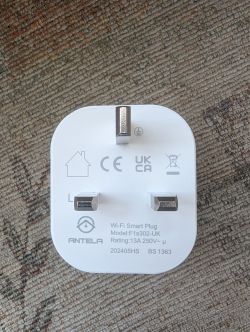
    Wi-Fi Smart Plug with three prongs on a carpet.

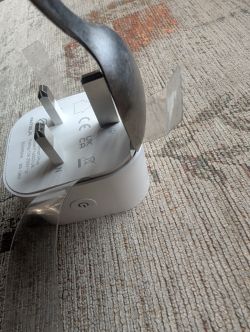
    After spending a while carefully prying at the casing, I found that this particular plug is quite tightly clipped due to the fact that they have put clips in the corners. This leaves little room to pry the plastic all the way round as it tightens the more you open up gaps, Meaning you need to apply more force to get the corners to release. That would mean a plastic pry won't cut it, And a metal one would normally result in marring. Luckily, I came up with a solution.

    Standard soda bottles make great strong and thin shims, as well as great protectors for the plastic when needing to pry with metal pry tools.
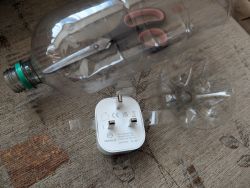
    Plastic bottle and smart plug on a carpet.
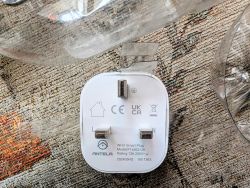
    Close-up of the back of an ANTELA smart plug on fabric background.
    Plug disassembly using a metal tool and plastic shield.
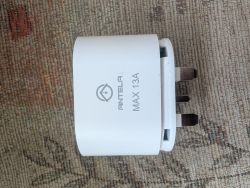
    ANTELA electrical plug with a maximum current of 13A on a carpet.
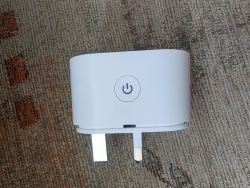
    White plug with power button on carpet.
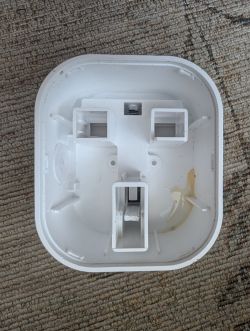
    Interior of a plastic plug casing.
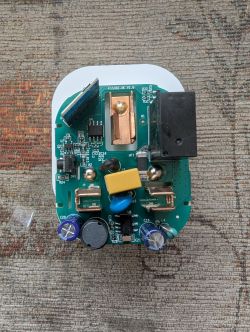
    Interior of an open plug showing electronic components.

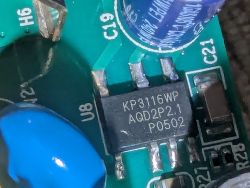
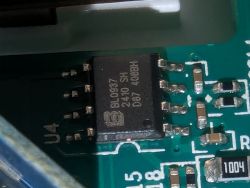
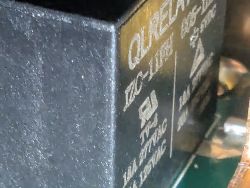
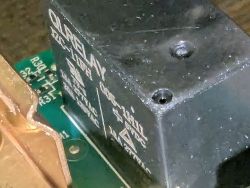
    Now we've got to the guts of this plug. Inside we can see it uses a BL0937, CB2S Tuya module, KP3116WP Power chip, and a Qlrelay Relay rated for 16A 277VAC/20A 125VAC With 5 Volt DC switch current. I don't have a soldering iron handy at the moment, so unfortunately, I can't see what chip is under the shield on the CB2S module.
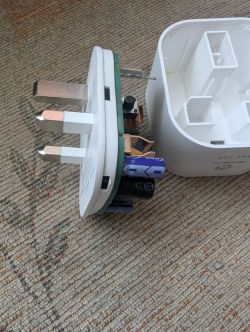
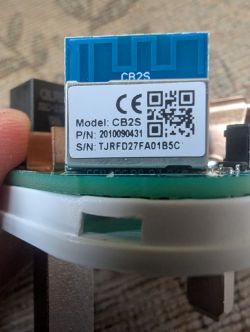
    Dismantling of an electrical plug with visible internal components
    Close-up of a plug's interior with a CB2S module and other components.
    Close-up of the KP3116WP chip on a printed circuit board.
    Close-up of the BL0937 microchip on a printed circuit board.
    Close-up of a QLRELAY relay on a circuit board with visible technical parameters.
    Close-up of Qlrelay relay on a circuit board.

    Everything clips together nice and neatly again, However, I would recommend squeezing in the plastic housing on the sides to get them to clip tightly and flush before reassembly.

    As for their performance. They seemed to come with some older firmware, so potentially could be flashed OTA. I come to this reasoning because they can't handle five second polling requests from home assistant out of the box, and keep intermittently going unavailable. But after 5-10 Minutes, they reboot themselves and work just fine at that polling rate, Indicating they pulled a firmware update from Tuya that patched a crash condition.

    As for their accuracy, they seem to be good enough. I noticed about a 4-5% variance compared to what my metre was reporting. However, that could be losses From the wiring in the house and other circuits not on the socket mains.
  • ADVERTISEMENT
  • #2 21394163
    p.kaczmarek2
    Moderator Smart Home
    A BL0937 device, I see. Nice, can you also share a JSON template of this device (either OBK format, or Tuya), or maybe a 2MB backup?
    Helpful post? Buy me a coffee.
  • ADVERTISEMENT
  • #3 21394235
    pseudonymity0000
    Level 6  
    >>21394163 I'm not sure I'll be able to do that. I have no tools to serial into the chip, Nor do I have a spare AP device to Attempt a wireless Extraction using cloud cutter.

    I do, however, know that it uses the Tuya 3.4 API and works under the smartplugv2_energyv3 Profile in Tuya local, With the only unavailable entities being childlock and temperature.

    Here's a snippet from the debug from Tuya local.

    },
      "data": {
        "name": "Local Computer Desk",
        "type": "smartplugv2_energyv3",
        "device_id": "**REDACTED**",
        "device_cid": "",
        "local_key": "**REDACTED**",
        "host": "**REDACTED**",
        "protocol_version": 3.4,
        "tinytuya_version": "1.15.1",
        "api_version_set": 3.4,
        "api_version_used": 3.4,
        "api_working": true,
        "status": {},
        "cached_state": {
          "updated_at": 1736957991.0258596,
          "1": true,
          "9": 0,
          "17": 100,
          "18": 1209,
          "19": 2383,
          "20": 2417,
          "21": 1,
          "22": 567,
          "23": 28250,
          "24": 15212,
          "25": 2740,
          "26": 0,
          "38": "on",
          "39": false,
          "40": "none",
          "42": "",
          "43": ""
        },
        "pending_state": {},
        "connected": true,
        "force_dps": [
          18,
          19,
          20
        ],
        "home_assistant": {
          "name": "Local Computer Desk",
          "name_by_user": null,
          "disabled": false,
          "disabled_by": null,
          "entities": [
            {
              "disabled": false,
              "disabled_by": null,
              "entity_category": "diagnostic",
              "device_class": null,
              "original_device_class": "problem",
              "icon": null,
              "unit_of_measurement": null,
              "state": {
                "entity_id": "binary_sensor.local_computer_desk_problem",
                "state": "off",
                "attributes": {
                  "fault_code": 0,
                  "device_class": "problem",
                  "friendly_name": "Local Computer Desk Problem"
                },
                "last_changed": "2025-01-15T08:33:42.642192+00:00",
                "last_reported": "2025-01-15T16:19:51.026939+00:00",
                "last_updated": "2025-01-15T08:33:42.642192+00:00"
              }
            },
            {
              "disabled": false,
              "disabled_by": null,
              "entity_category": "config",
              "device_class": null,
              "original_device_class": "duration",
              "icon": null,
              "unit_of_measurement": "min",
              "state": {
                "entity_id": "number.local_computer_desk_timer",
                "state": "0.0",
                "attributes": {
                  "min": 0.0,
                  "max": 1440.0,
                  "step": 1.0,
                  "mode": "auto",
                  "unit_of_measurement": "min",
                  "device_class": "duration",
                  "friendly_name": "Local Computer Desk Timer"
                },
                "last_changed": "2025-01-15T08:33:42.642141+00:00",
                "last_reported": "2025-01-15T16:19:51.026869+00:00",
                "last_updated": "2025-01-15T08:33:42.642141+00:00"
              }
            },
            {
              "disabled": false,
              "disabled_by": null,
              "entity_category": "diagnostic",
              "device_class": null,
              "original_device_class": null,
              "icon": null,
              "unit_of_measurement": "Wh",
              "state": {
                "entity_id": "sensor.local_computer_desk_energy",
                "state": "100",
                "attributes": {
                  "calibration": 2740,
                  "unit_of_measurement": "Wh",
                  "friendly_name": "Local Computer Desk Energy"
                },
                "last_changed": "2025-01-15T14:18:01.900125+00:00",
                "last_reported": "2025-01-15T16:19:51.026126+00:00",
                "last_updated": "2025-01-15T14:18:01.900125+00:00"
              }
            },
            {
              "disabled": false,
              "disabled_by": null,
              "entity_category": "diagnostic",
              "device_class": null,
              "original_device_class": "current",
              "icon": null,
              "unit_of_measurement": "mA",
              "state": {
                "entity_id": "sensor.local_computer_desk_current",
                "state": "1209",
                "attributes": {
                  "state_class": "measurement",
                  "calibration": 28250,
                  "unit_of_measurement": "mA",
                  "device_class": "current",
                  "friendly_name": "Local Computer Desk Current"
                },
                "last_changed": "2025-01-15T16:19:45.402290+00:00",
                "last_reported": "2025-01-15T16:19:51.026230+00:00",
                "last_updated": "2025-01-15T16:19:45.402290+00:00"
              }
            },
            {
              "disabled": false,
              "disabled_by": null,
              "entity_category": "diagnostic",
              "device_class": null,
              "original_device_class": "power",
              "icon": null,
              "unit_of_measurement": "W",
              "state": {
                "entity_id": "sensor.local_computer_desk_power",
                "state": "238.3",
                "attributes": {
                  "state_class": "measurement",
                  "switch": true,
                  "calibration": 15212,
                  "unit_of_measurement": "W",
                  "device_class": "power",
                  "friendly_name": "Local Computer Desk Power"
                },
                "last_changed": "2025-01-15T16:19:45.402432+00:00",
                "last_reported": "2025-01-15T16:19:51.026363+00:00",
                "last_updated": "2025-01-15T16:19:45.402432+00:00"
              }
            },
            {
              "disabled": false,
              "disabled_by": null,
              "entity_category": "diagnostic",
              "device_class": null,
              "original_device_class": "voltage",
              "icon": null,
              "unit_of_measurement": "V",
              "state": {
                "entity_id": "sensor.local_computer_desk_voltage",
                "state": "241.7",
                "attributes": {
                  "state_class": "measurement",
                  "calibration": 567,
                  "unit_of_measurement": "V",
                  "device_class": "voltage",
                  "friendly_name": "Local Computer Desk Voltage"
                },
                "last_changed": "2025-01-15T16:19:34.346570+00:00",
                "last_reported": "2025-01-15T16:19:51.026561+00:00",
                "last_updated": "2025-01-15T16:19:34.346570+00:00"
              }
            },
            {
              "disabled": true,
              "disabled_by": "user",
              "entity_category": "diagnostic",
              "device_class": null,
              "original_device_class": "temperature",
              "icon": null,
              "unit_of_measurement": "\u00b0C",
              "state": null
            },
            {
              "disabled": false,
              "disabled_by": null,
              "entity_category": "config",
              "device_class": null,
              "original_device_class": null,
              "icon": null,
              "unit_of_measurement": null,
              "state": {
                "entity_id": "select.local_computer_desk_initial_state",
                "state": "on",
                "attributes": {
                  "options": [
                    "on",
                    "off",
                    "memory"
                  ],
                  "friendly_name": "Local Computer Desk Initial state"
                },
                "last_changed": "2025-01-15T08:33:42.642034+00:00",
                "last_reported": "2025-01-15T16:19:51.026722+00:00",
                "last_updated": "2025-01-15T08:33:42.642034+00:00"
              }
            },
            {
              "disabled": false,
              "disabled_by": null,
              "entity_category": "config",
              "device_class": null,
              "original_device_class": null,
              "icon": null,
              "unit_of_measurement": null,
              "state": {
                "entity_id": "select.local_computer_desk_light_mode",
                "state": "Off",
                "attributes": {
                  "options": [
                    "State",
                    "Position",
                    "Off",
                    "On"
                  ],
                  "icon": "mdi:lightbulb",
                  "friendly_name": "Local Computer Desk Light mode"
                },
                "last_changed": "2025-01-15T08:33:42.642082+00:00",
                "last_reported": "2025-01-15T16:19:51.026775+00:00",
                "last_updated": "2025-01-15T08:33:42.642082+00:00"
              }
            },
            {
              "disabled": true,
              "disabled_by": "user",
              "entity_category": "config",
              "device_class": null,
              "original_device_class": null,
              "icon": null,
              "unit_of_measurement": null,
              "state": null
            },
            {
              "disabled": false,
              "disabled_by": null,
              "entity_category": null,
              "device_class": null,
              "original_device_class": "outlet",
              "icon": null,
              "unit_of_measurement": null,
              "state": {
                "entity_id": "switch.local_computer_desk",
                "state": "on",
                "attributes": {
                  "test_bit": 1,
                  "cycle_timer": "",
                  "random_timer": "",
                  "device_class": "outlet",
                  "friendly_name": "Local Computer Desk"
                },
                "last_changed": "2025-01-15T08:33:42.641988+00:00",
                "last_reported": "2025-01-15T16:19:51.026658+00:00",
                "last_updated": "2025-01-15T08:33:42.641988+00:00"
              }
            },
            {
              "disabled": true,
              "disabled_by": "user",
              "entity_category": "config",
              "device_class": null,
              "original_device_class": null,
              "icon": null,
              "unit_of_measurement": null,
              "state": null
            },
            {
              "disabled": false,
              "disabled_by": null,
              "entity_category": null,
              "device_class": null,
              "original_device_class": "energy",
              "icon": null,
              "unit_of_measurement": null,
              "state": {
                "entity_id": "sensor.desk",
                "state": "18.24",
                "attributes": {
                  "state_class": "total",
                  "source": "sensor.local_computer_desk_power",
                  "unit_of_measurement": "kWh",
                  "device_class": "energy",
                  "friendly_name": "Desk"
                },
                "last_changed": "2025-01-15T16:18:39.157657+00:00",
                "last_reported": "2025-01-15T16:18:39.157657+00:00",
                "last_updated": "2025-01-15T16:18:39.157657+00:00"
              }
            }
          ]
        }
      }


    Don't know if that helps. (Edit. I didn't see any personal information in the below, so I just dumped the rest of the debug)

    Added after 1 [hours] 45 [minutes]:

    >>21394163 Ok Since I suspect the others have updated their firmware, and I planned to flash them all anyway, I have bought a USB to UART programmer. Will try and get you the two megabyte backup dump by tomorrow.
  • ADVERTISEMENT
  • #4 21395925
    p.kaczmarek2
    Moderator Smart Home
    Good luck, you can check out our step by step flashing guides on our channel: https://www.youtube.com/@elektrodacom
    Don't forget our flasher link: https://github.com/openshwprojects/BK7231GUIFlashTool
    Helpful post? Buy me a coffee.
  • ADVERTISEMENT
  • Helpful post
    #5 21396148
    pseudonymity0000
    Level 6  
    >>21395925
    Okay, I got the data. Unfortunately, you have to sink a lot of heat into the two live and neutral pins to release the motherboard. The unit is still operational however.

    Got any tips on how to do this quickly without risking slightly warping the plastic pin covers?
    Anyway, here's the config that I managed to extract.

    {
    	"sel_pin_pin":"8",
    	"rl1_lv":"1",
    	"bt1_pin":"26",
    	"net_trig":"2",
    	"jv":"1.0.3",
    	"netled1_lv":"1",
    	"netled_reuse":"1",
    	"bt1_type":"0",
    	"ffc_select":"0",
    	"vi_pin":"6",
    	"resistor":"1",
    	"over_cur":"17000",
    	"bt1_lv":"0",
    	"reset_t":"3",
    	"netled1_pin":"11",
    	"chip_type":"0",
    	"lose_vol":"90",
    	"over_vol":"260",
    	"module":"CB2S",
    	"ele_pin":"7",
    	"ch_cddpid1":"9",
    	"ch1_stat":"2",
    	"rl1_type":"0",
    	"ch_num":"1",
    	"ele_fun_en":"1",
    	"rl1_pin":"24",
    	"vol_def":"0",
    	"ch_dpid1":"1",
    	"sel_pin_lv":"1",
    	"crc":"80"
    }


    Text description.
    Device configuration, as extracted from Tuya:
    - BL0937 SEL on P8
    - Button (channel 1) on P26
    - BL0937 VI on P6
    - WiFi LED on P11
    - BL0937 ELE on P7
    - Relay (channel 1) on P24
    Device seems to be using CB2S module, which is using BK7231N.
    And the Tuya section starts, as usual, at 2023424
  • #6 21398706
    pseudonymity0000
    Level 6  
    >>21395925 Second attempt at disassembly and this plug is cooked. The board is fine, but there is irreversible damage to the plastic.

    Now this is destined to be a sacrificial part. I wish to do an experiment, but I'd like to get confirmation before continuing. Is it possible to flash the CB2S Module using the TX2 and RX2 test pads on the back of the module? I've already managed to path out where 3v and ground can connect on the motherboard, and it looks like I have access to TX1 from the top of the board. But I cannot clearly see access to RX1 from the top. However, these locations require a steady hand and some micro soldering.

    To make flashing this plug viable, I need to find a way to flash it from the top without attempting to sink tonnes of heat into the live and neutral pins to release the board. I was also wondering what the target looking test pads on the back are. The data sheet doesn't seem to say. If it's 3v and ground, that would be perfect, as it means avoiding micro soldering to the two locations I have identified as having a direct path to 3V and ground on the bottom. They are Ground plains.

    RX2 and TX2 viable for flashing, then everything can be done with reasonably sized pads on the back of the module making flashing easy.

    (Update: Gone over the entire board with a multi meter. There seems to be no access to RX1 on the top of the board. Only TX1, 3v and ground)
  • Helpful post
    #7 21398998
    p.kaczmarek2
    Moderator Smart Home
    No, flashing is possible only via UART1, which is RX1 and TX1. TX2 is a debug log output port.
    Helpful post? Buy me a coffee.
  • Helpful post
    #8 21400294
    pseudonymity0000
    Level 6  
    >>21398998 I'm pleased to announce that I've successfully done a top of board only flash. This means all you have to do is remove the clamshell to successfully flash it.

    You don't need to attempt a high heat soak disordering of the live and neutral pins to release the board to get to the back, risking melting the plastic and damaging the relay.

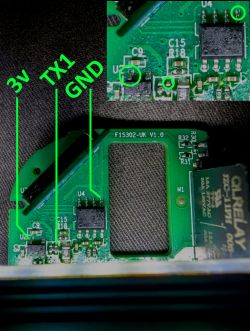
    The following image shows where you need to solder to get a direct path to TX1, 3v and ground. There are veers in the board that go straight to the other side to these points on the CB2S Module, with no other components in the way.

    Close-up of a circuit board with marked soldering points: 3V, TX1, and GND.

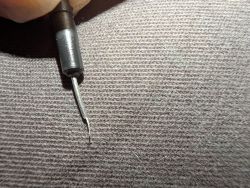
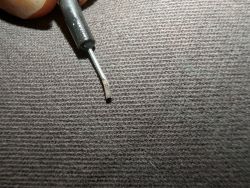
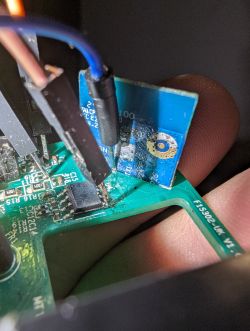
    RX1 cannot be accessed from any solder points on the top. However, there is a paper thin gap between the module and the Main board. If you flatten a test lead pin thin enough, you can wedge it down to the contact point on the other side. Luckily, the silk screen print is nicely visible on the back of the module, showing you exactly where RX1 is located.

    Close-up of a metal tester tip against a fabric-textured background.
    Test lead with thinly flattened end on a gray background.
    Close-up of a circuit board with soldered wires.

    You might be able to do this with TX1 as well. However, I would not trust such a flimsy light contact connection with the 3v and GND power connections. The wedging method also would cause mechanical strain, potentially breaking the connections. Not such a big deal for RX1 as that trace only leads to a test pad, but breaking any of the other connections to the board would break the device.
  • #9 21402386
    p.kaczmarek2
    Moderator Smart Home
    Very nice RX1 access trick, we need to remember it, @divadiow
    Helpful post? Buy me a coffee.
  • #10 21402405
    divadiow
    Level 34  
    oh nice one. I'll bear this in mind for future plugs. It's a bore heating up the main live and neutral pins for so long to get the solder to melt, even if you try pb mix first
  • #11 21403438
    pseudonymity0000
    Level 6  
    @p.kaczmarek2 @divadiow Best part is that it's not that hard to do. Hammer it, Grip it, or what I did, Draw the metal out between a hard surface and dragging a hard object across the top.

    I literally just took the lead and gently used some snips to do the bulk of the work, Then I put it on my metal desk and drew it out with the handle of a spoon I just so happened to have nearby. 😂

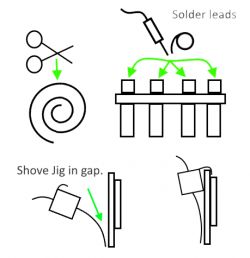
    I have had another idea which could make a jig for easy flashing of these chips. Watch/flat coil springs. They're thin enough to be able to get through the gap, and if you space them out right it should resemble a rake. You can shove all four through at once, Then just pull back and clip it to the top of the board and the spring tension should make good contact.

    Simple illustration depicting the process of extracting metal with scissors, soldering leads, and placing an element in a gap.

Topic summary

The discussion revolves around the disassembly of the Antela WiFi Smart Plug (model F1s392-UK) and the challenges faced during the process. The user attempts a non-destructive disassembly but encounters difficulties with heat application to release the motherboard from the live and neutral pins. They share insights about the device's compatibility with the Tuya 3.4 API and provide configuration data extracted from the device. Subsequent responses include advice on flashing the CB2S module, with successful methods for accessing TX1 and 3V from the top of the board, avoiding damage to the plastic casing. The conversation highlights techniques for micro soldering and potential jig designs for easier flashing.
Summary generated by the language model.
ADVERTISEMENT