

Hi,
Not exactly sure where to post, but please see the following breakdown of an ATMS4002 230VAC SMART WIFI DIN TIMER/SWITCH/POWER MON. 40A:


Supplier link: https://acdc.co.za/orbis-digital-analog-time-switches/67224-230vac-smart-wifi-din-timer-switch-power-mon-40a.html
It is rather difficult to open in order to get to the internal components - though possible. Start with prying open the three obvious clips holding down the top and bottom edges of the side panel as follows:

Now systematically lift the edges of the side panel while individually prying open the the 4 deep-reaching clips (which must be loosened on the back side with a thin profile flat screwdriver:

Et voilà, you should now have successfully opened the unit to inspect the internal components:


This switch utilizes the Beken CBU (BK7231N) chip along with the BL0942 power monitoring IC:


Connect your TTL programmer (mine required external powered 3V3 since the USB2SER dies whenever the CBU powers up) and follow the regular programming procedure (https://www.elektroda.com/rtvforum/topic3951016.html):


The config should be as follows:
"pins": {
"6": "BridgeFWD;1",
"7": "BridgeREV;1",
"8": "Btn;1",
"20": "WifiLED_n;0",
"22": "LED;1"
},
"command": "backlog startDriver NTP; startDriver BL0942",
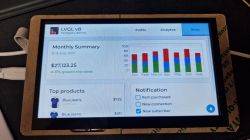
Result:

NOTE: I do not have any flags set (especially not #26 as this caused the power monitoring to fail).
What exactly would you like help with here — are you sharing a teardown/config that worked, or are you asking about a specific problem such as flashing, pin mapping, relay control, or power monitoring not working?
Working teardown
Not exactly sure where to post, but please see the following breakdown of an ATMS4002 230VAC SMART WIFI DIN TIMER/SWITCH/POWER MON. 40A:


Supplier link: https://acdc.co.za/orbis-digital-analog-time-switches/67224-230vac-smart-wifi-din-timer-switch-power-mon-40a.html
It is rather difficult to open in order to get to the internal components - though possible. Start with prying open the three obvious clips holding down the top and bottom edges of the side panel as follows:

Now systematically lift the edges of the side panel while individually prying open the the 4 deep-reaching clips (which must be loosened on the back side with a thin profile flat screwdriver:

Et voilà, you should now have successfully opened the unit to inspect the internal components:


This switch utilizes the Beken CBU (BK7231N) chip along with the BL0942 power monitoring IC:


Connect your TTL programmer (mine required external powered 3V3 since the USB2SER dies whenever the CBU powers up) and follow the regular programming procedure (https://www.elektroda.com/rtvforum/topic3951016.html):


The config should be as follows:
"pins": {
"6": "BridgeFWD;1",
"7": "BridgeREV;1",
"8": "Btn;1",
"20": "WifiLED_n;0",
"22": "LED;1"
},
"command": "backlog startDriver NTP; startDriver BL0942",
Result:

NOTE: I do not have any flags set (especially not #26 as this caused the power monitoring to fail).
What exactly would you like help with here — are you sharing a teardown/config that worked, or are you asking about a specific problem such as flashing, pin mapping, relay control, or power monitoring not working?
Working teardown