Module
WEMOS D1 mini Pro based on
ESP8266EX. A detailed description of how to integrate the module with Arduino environment can be found in the materials describing the modules previously made available:
Amica and
D1 mini. In addition to the configuration of the environment, you will find examples of digital (
DS18B20), and analog (
TMP35) use of the temperature sensor, as well as internet relay control. In the examples, you will find ways to connect the module to
Blynk and
Thingspeak to an IoT device.
To start working with the module we will use the current version of Arduino 1.8.3 environment downloaded from www.arduino.cc
In short, adapting Arduino's environment to the cooperation with D1 Mini Pro looks like this
File->Preferences->Additional URLs to the board manager - paste:
http://arduino.esp8266.com/stable/package_esp8266com_index.json
Tools->Disc->Disc Manager->Device Manager and search for "wemos" and then install the package with ESP8266.
When the D1 module is connected to the USB port, a new serial port should appear in the system.
Tools->Board->D1 mini, and Tools->Report and select the com port of the USB converter<->UART.

From now on we can write our code, run sample codes (File->Examples e. g. ESP8266WiFi->WiFiScan) or test program codes that transform the D1 mini into an IoT device connected to the Internet using WiFi:
Control of the relay and readout of the temperature from the analogue sensor via the Internet on a PC and smartphone.
Temperature readout from one or more digital sensors on your smartphone or browser on a PC.
The D1 mini Pro board is equipped with flash memory
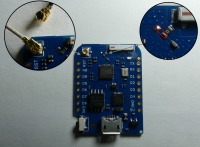
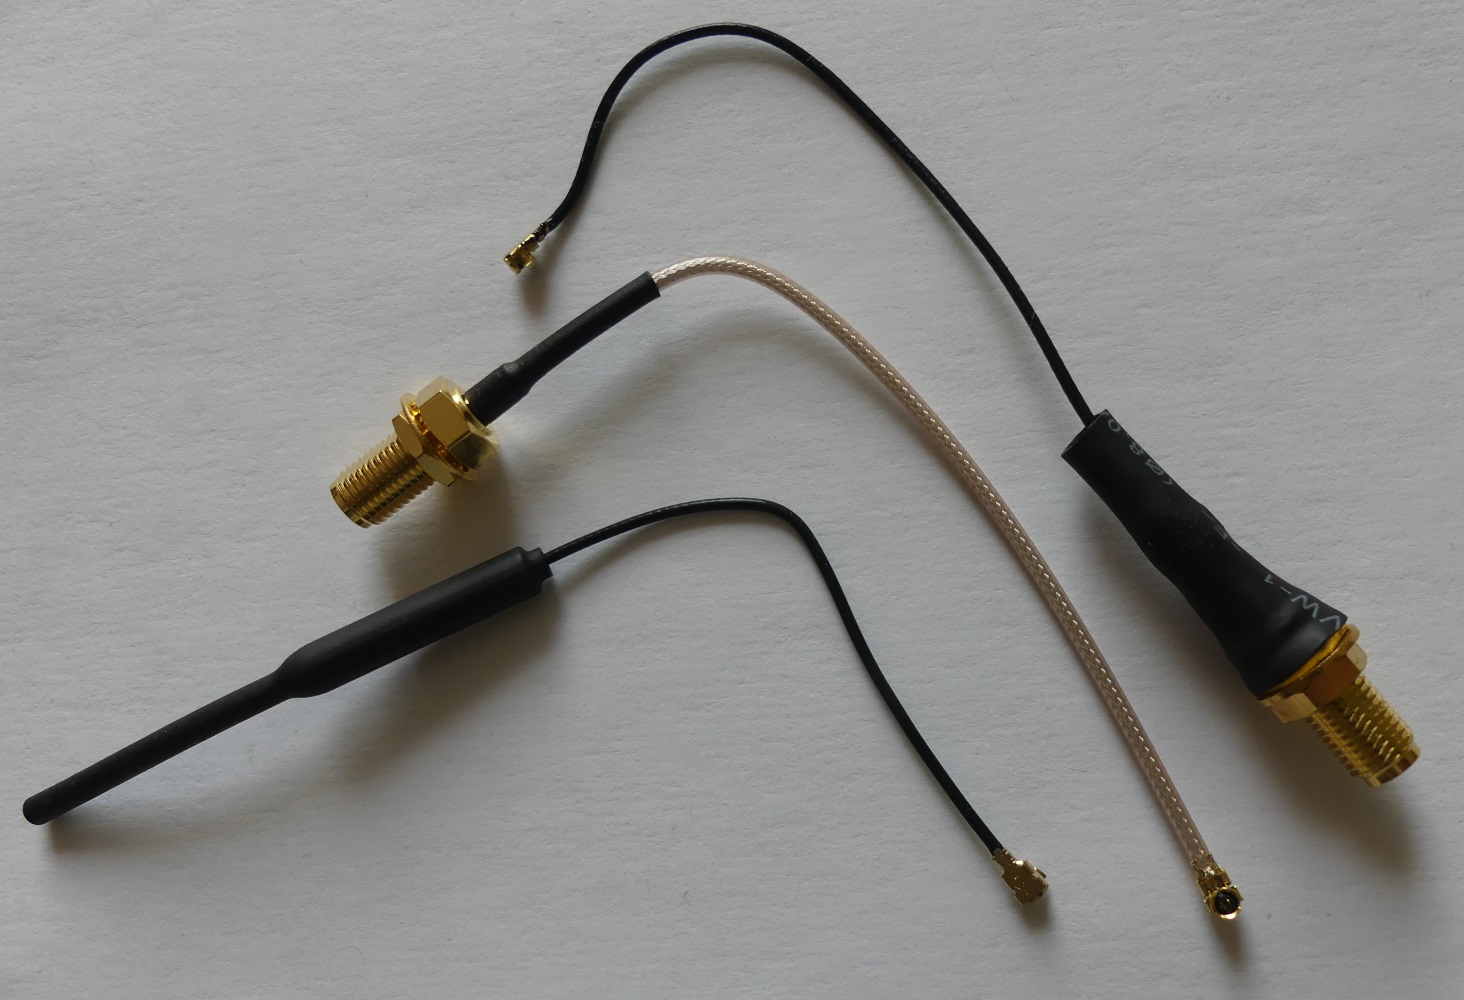
16MB and unlike the previously made available boards, the ESP8266 module does not contain soldered ESP8266Ex chip can be found on a single laminate. Unfortunately, at Arduino there is currently no easy way to use the entire 16MB flash memory and there is available 4MB as in the previous version of D1 mini. More flash capacity means "for the future"functionality. USB-converter USB<->UART is SIL2104 (I did not have to install any additional drivers during Win10 tests). The set includes a set of connectors for soldered soldering (male leaves and two female types of different lengths). On the board you will find a ceramic antenna (instead of a printed antenna) and a U. FL antenna connector, to which you can connect an external antenna using a FL U. D. Adapter to SMA. There are available antennas with a U. FL connector, antennas can be either in the form of antennas visible in the picture or flat microbeam antennas.

External antenna may be useful e. g. when installing the module in a metal housing. To use an external antenna instead of the built-in external antenna, the resistor "0" should be sold in a position allowing to connect the connector to the path leading to the circuit.
I compared the effectiveness of the D1 mini Pro ceramic antenna with the PCB antenna in the D1 mini model, the transmission range using a ceramic antenna seems to be slightly higher, but the correct operation is influenced much more by the presence of metal elements (flat metal plate can completely block communication).
Write reply how the ceramic antenna works in practice compared to the PCB antenna.
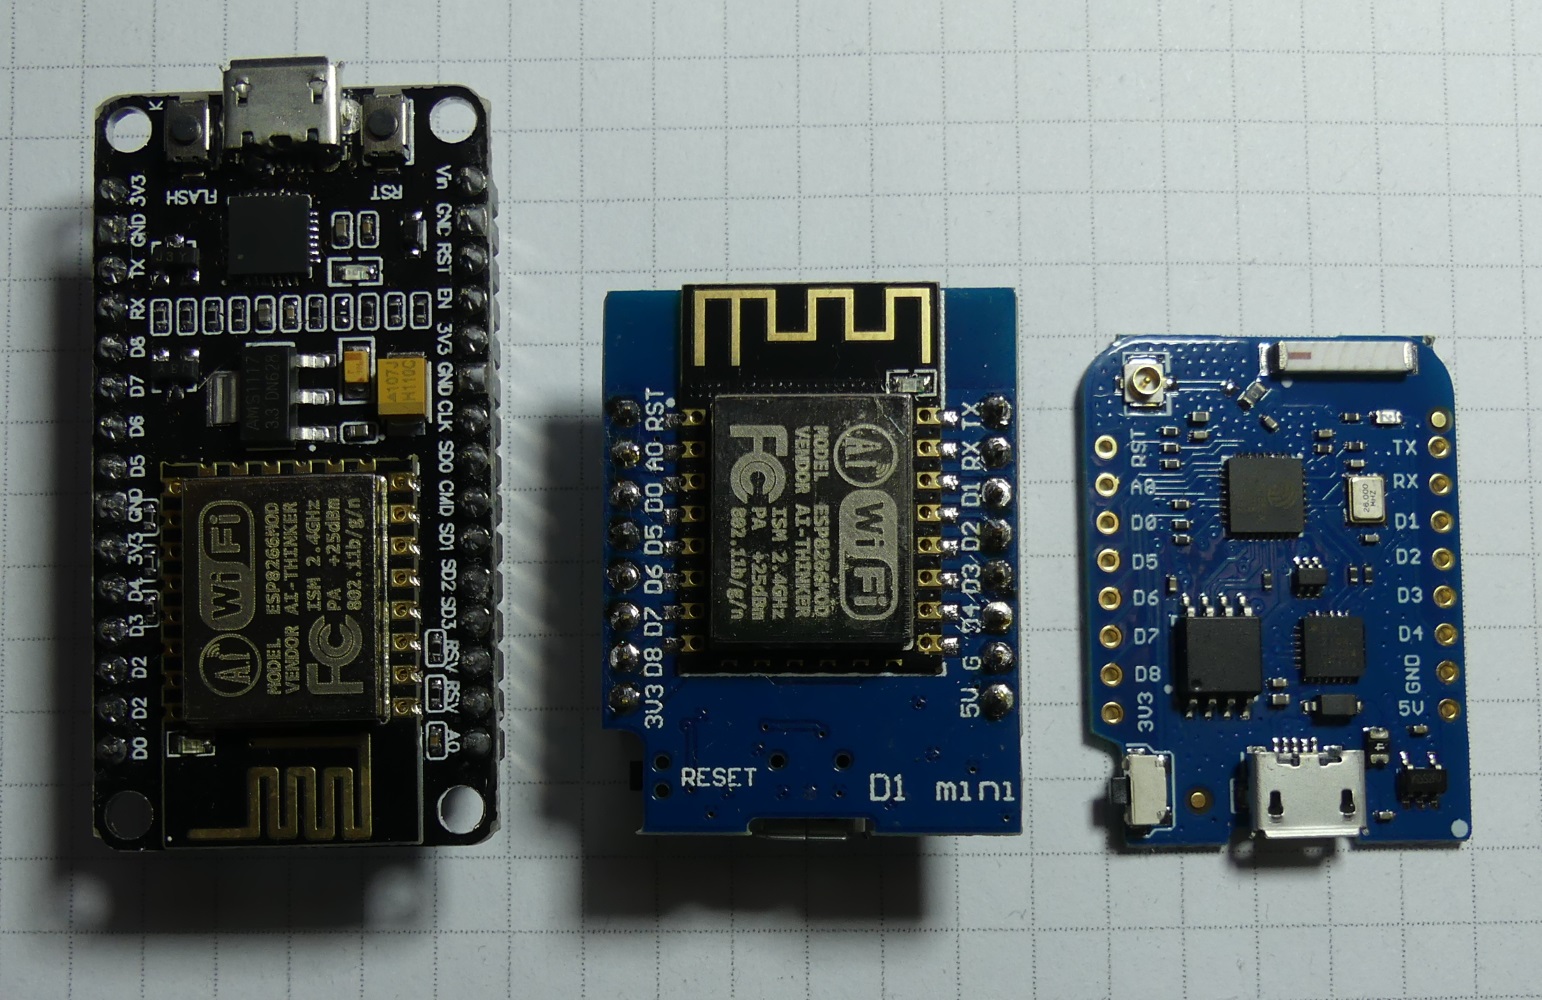
The underside of the tile is completely flat, there are no soldered elements.

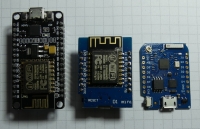
This is how the D1 mini Pro is compared to the two previous D1 mini and NodeMCU Amica modules.
 SPIFFS - flash file system.
So far, as examples, we deal with quite simple examples of WiFi internet connection and reading data from analogue and digital temperature sensors. These are very good examples for starting with the ESP8266 based modules. Let's go beyond the diagram of the Internet temperature sensor and discuss the topic of data storage in FLASH memory module.
The D1 mini Pro D1 flash memory module can be used to store data organized in the file system
SPIFFS. These can be e. g. files created by the module during operation (e. g. temporary data, or log), as well as files stored in the memory for the program (e. g. photos, graphics and other data needed e. g. to generate a menu on the graphic display screen).

The SPIFFS file system will not support directories, all files will be in the root directory "/". File name lengths are limited to 31 characters. In Arduino environment we can add a tool that will allow you to prepare the image of the file system and copy all necessary files placed in the "data" directory in the sketch directory. Download the tool:
https://github.com/esp8266/arduino-esp8266fs-...n/releases/download/0.3.0/ESP8266FS-0.3.0.zip and in the Arduino directory (<home_dir>/Arduino/tools/) insert the unpacked jar file (<home_dir>/Arduino/tools/ESP8266FS/tool/esp8266fs.jar).
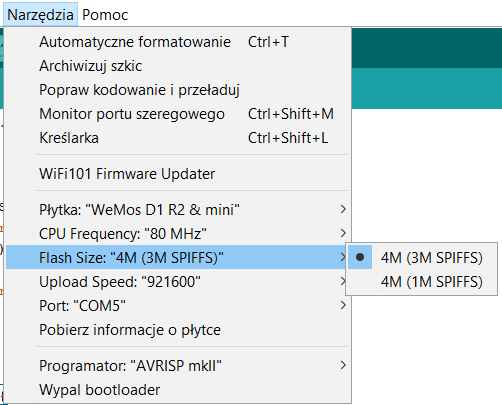
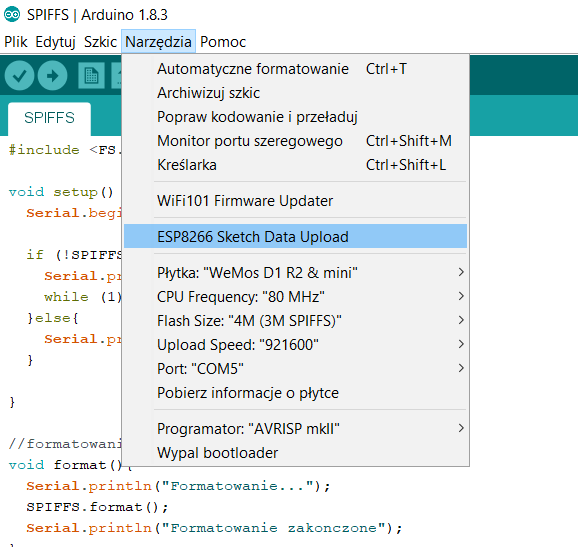
After restarting the Arduino environment, an additional option appears in the tools, which will overwrite the SPIFFS content with the data directory in the sketch directory.
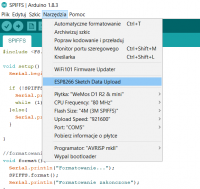
Below the primitive program code that tests the capabilities of SPIFFS, after running the program from the serial console, we will be able to create, delete the file, add data to the file, view the file content, list the SPIFFS content, format the SPIFFS.
The organization of file system data in a small flash memory built into the D1 mini Pro module may be useful in more advanced projects and will also eliminate the need for additional EEPROM memory or SD card.
What's your idea of using WEMOS D1 mini Pro?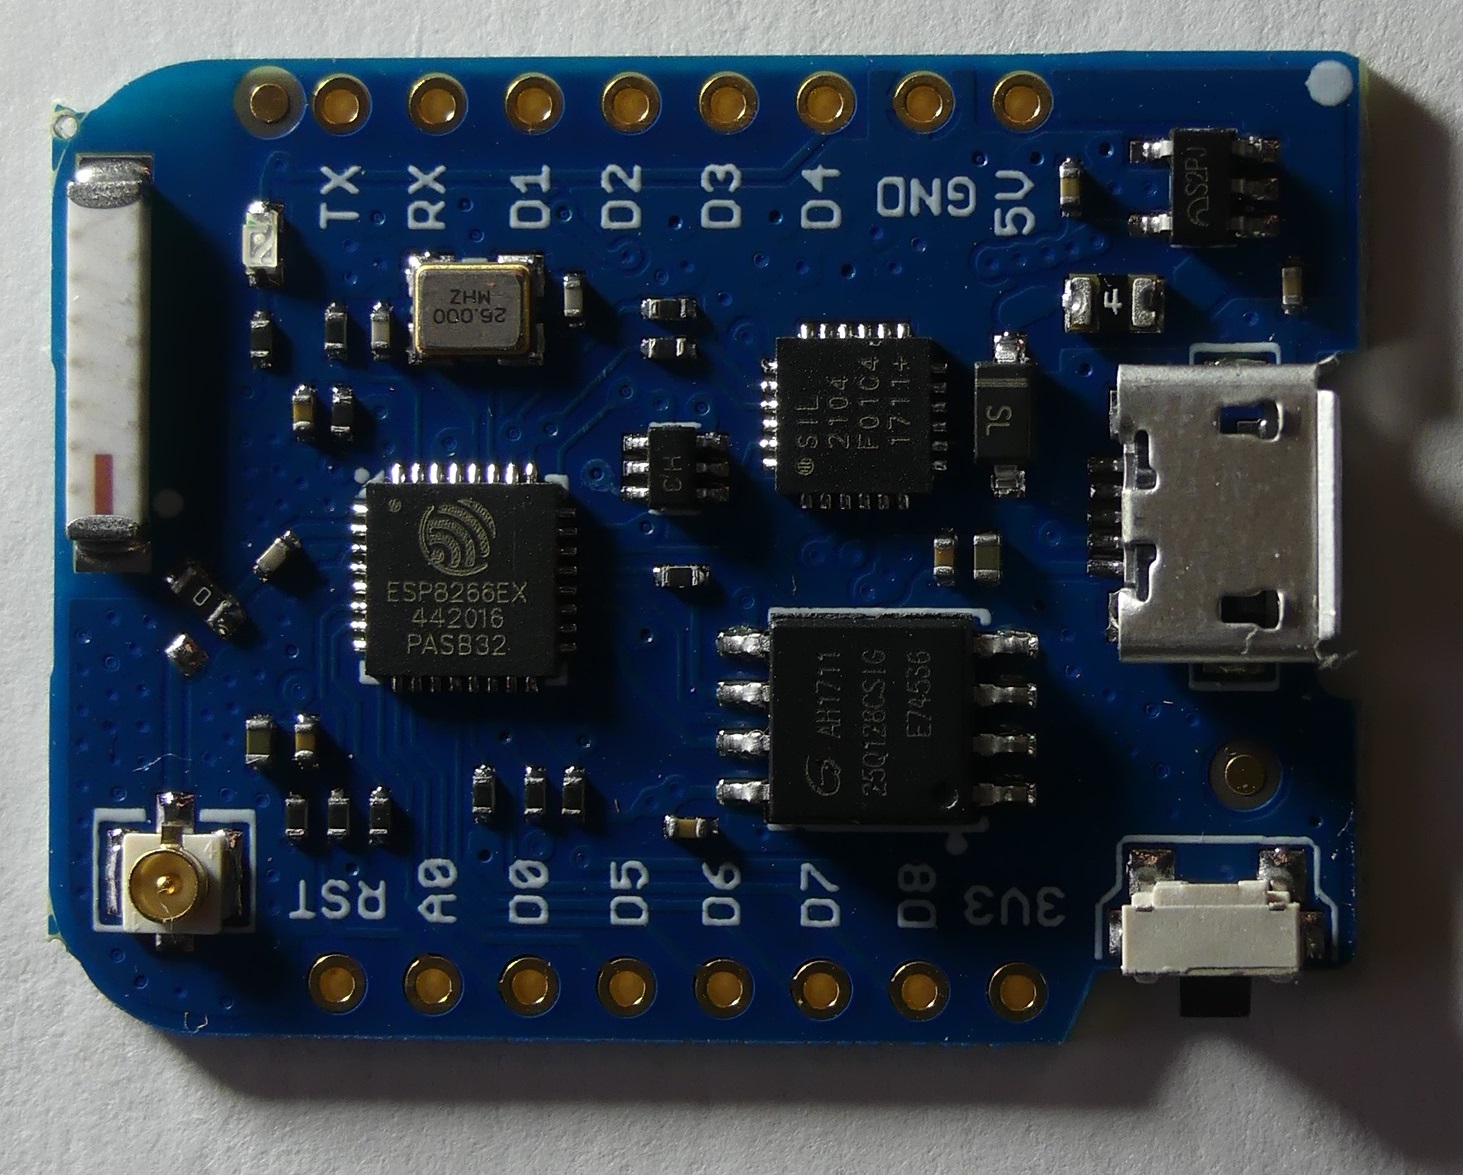


Comments
How much does this module consume in various settings? Is it possible to lull the WiFi and what will be the consumption then? [Read more]
The current consumption depends on the program being implemented, during tests it oscillated around 70mA with 5V power supply. ESP8266 can be entered from a sleep state for a certain period of time, e.g. ESP.deepSleep... [Read more]
The module appeared in electrode gadgets. [Read more]
I am very curious about your observations about the properties of the ceramic antenna, please give feedback in the subject. [Read more]
Hello. I have a problem with compiling any program. What's wrong? [Read more]
Check the tile manager you have installed the version for ESP. Have you installed the package from arduino.esp8266.com? [Read more]
Well, I installed normally from the tile manager, typing wemos, there is only one option to choose from ... [Read more]
Ok, let's try to get "on the same page": uninstall this package in the manager. Restart the Arduino IDE. In the FILE menu, select PREFERENCES. In the window that appears, you'll have the field "Additional... [Read more]
Wow, wow, wow ... Well, you guys, I respect you !!! For patience and willingness to help. Thank you. It helped. I would not get it in my life ... Thank you again !!! pzdr [Read more]
I'm glad it moved :) There's probably a mistake in the worm package from WEMOS. But now you have the latest, quite well-built package and everything works as it should. [Read more]
When you can get something interesting on ESP8266, it is worth to share the effect or course of experiments, e.g. in Articles . [Read more]
Maybe not on D1 mini Pro but also on this module you can adapt my solution for the use of ESP8266. Modbus RTU Gate - My Devices Cayenne IoT [Read more]