logo elektroda
logo elektroda
X
logo elektroda

LED hourglass for self-assembly - Made in China - Review.

CMS  12 4116 Cool? (+3)
📢 Listen (AI):

TL;DR

  • An electronic self-assembly LED hourglass DIY kit from China uses 57 blue LEDs and an STC15W201S controller.
  • The 84 mm × 41 mm PCB includes a DC jack, ISP header, 5mm × 5mm momentary button, and miniature power switch.
  • The circuit starts at 2.6 V and draws 14 mA at full voltage.
  • Power-up runs a default slow animation, and holding S2 for a few seconds switches it to a faster mode.
  • It lacks adjustable timing, a buzzer, and a rotation sensor, so it seems mostly useless as a real hourglass.
Generated by the language model.
Hello my dear readers.

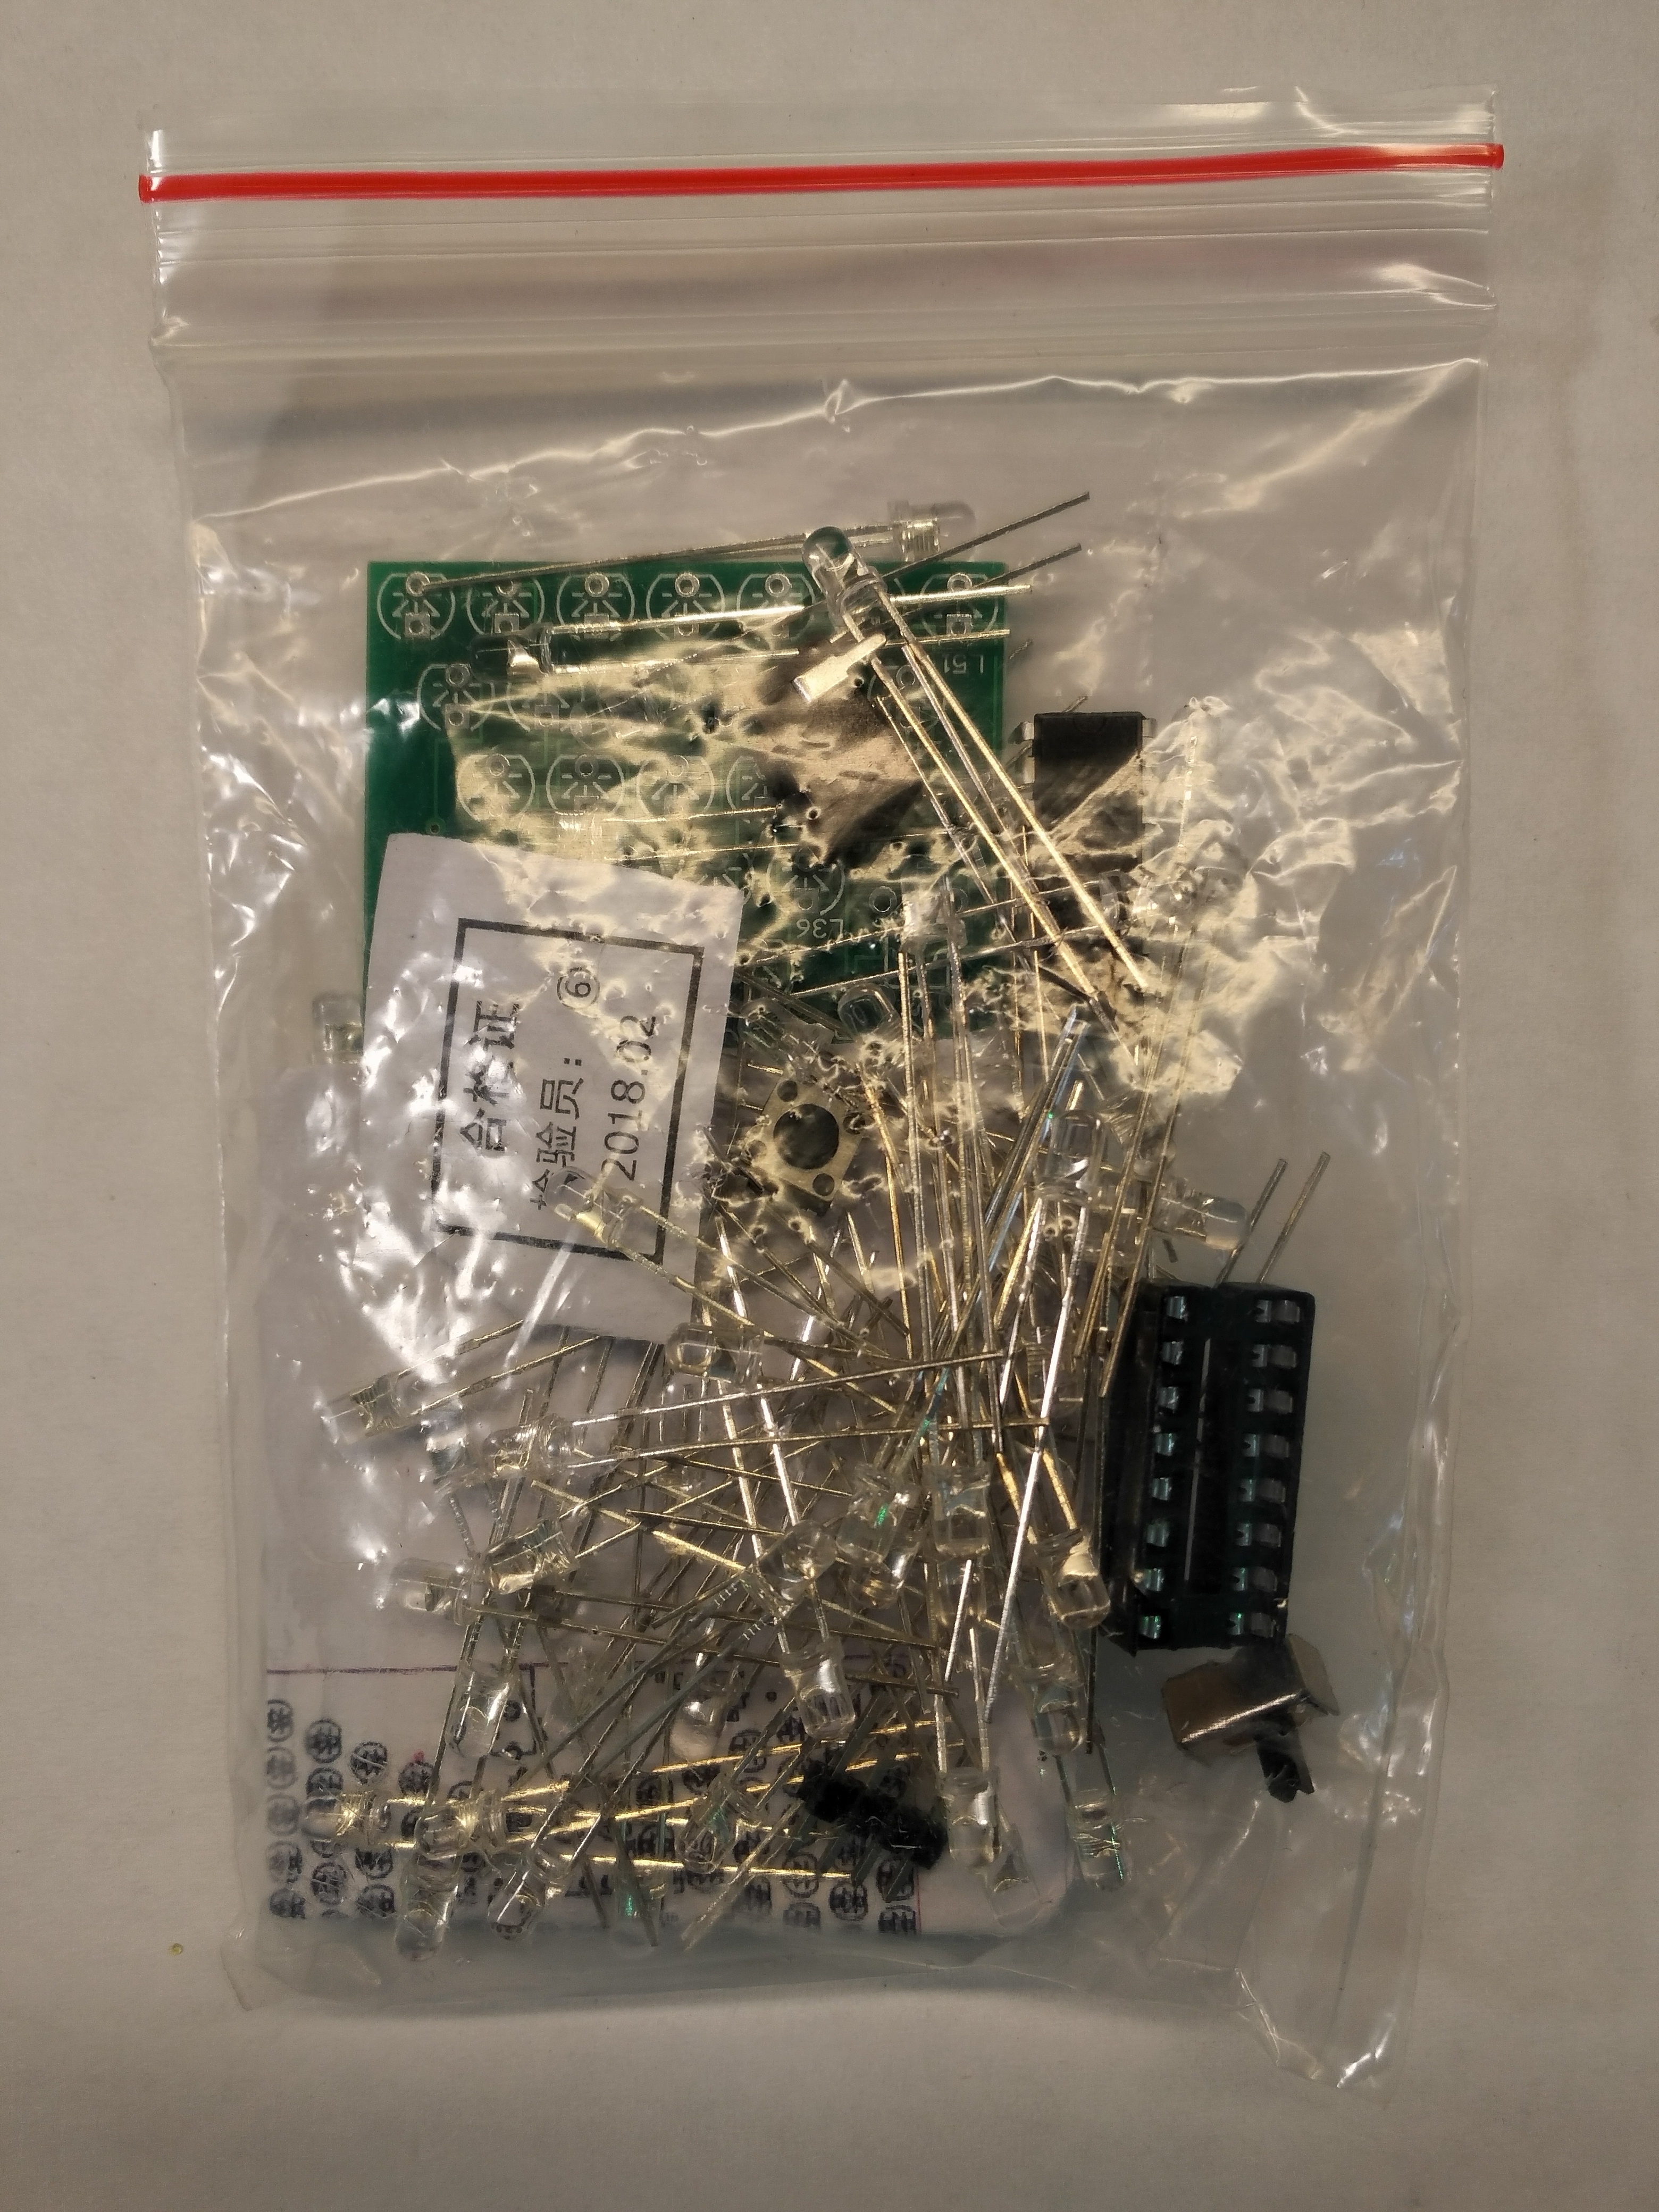
One of the gadgets I found in the test package I received from Gulson was an electronic self-assembly hourglass, the so-called DIY Kit.


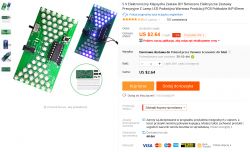
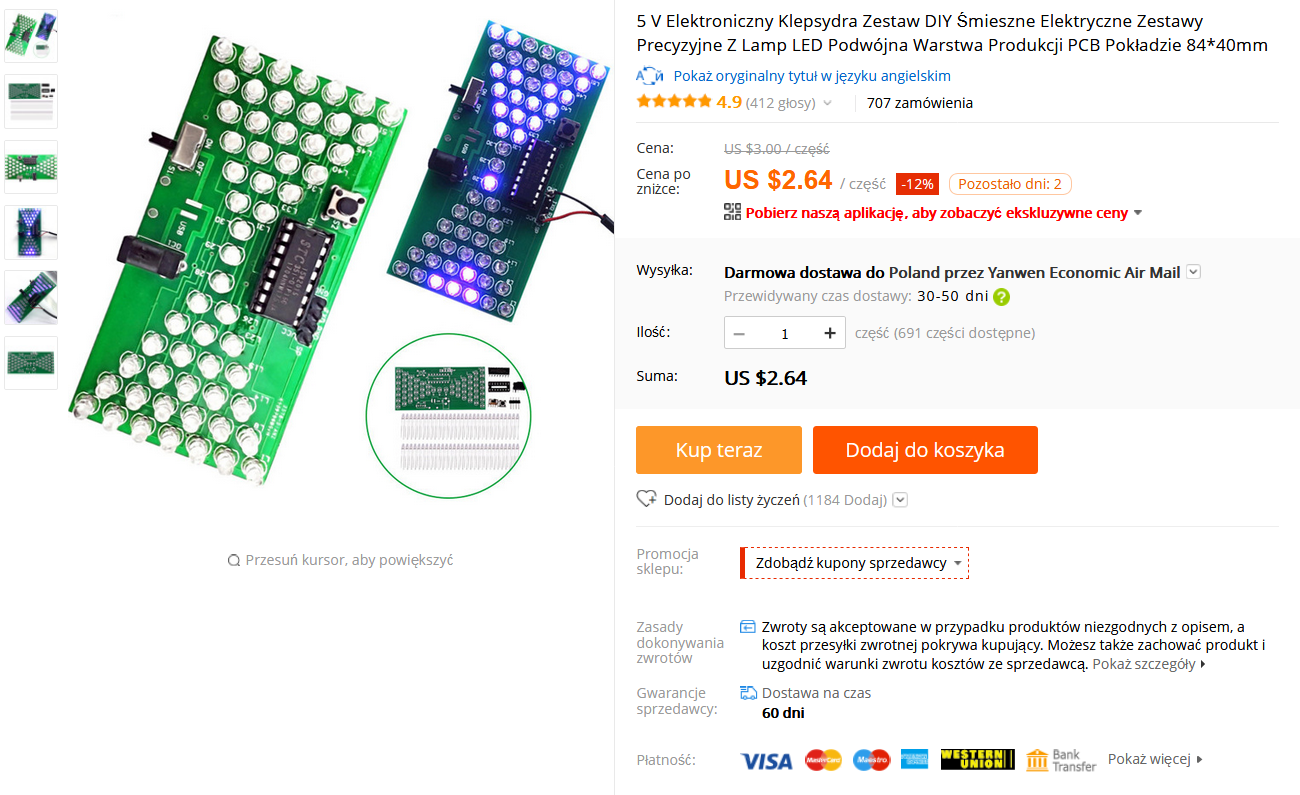
For the price of about eleven zlotys, we can buy ...
Exactly what? Because for me it is a completely useless gadget, but more on that soon. First, to avoid lynching, let me quote Kamil and then insert a screenshot:

gulson wrote:
The modules were chosen on the basis of what most people from all over the world order. If people order an electronic hourglass for timing, it means it's popular for some reason, and we need to see why! :) There are modules from advanced to beginner.


I was expecting something useful (boiling eggs, etc.), that is, the ability to adjust the time, some pipek / beeper / buzzer, as he called it, reminding that time is running out and that it has already expired. I was quietly counting on even the simplest sensor, detecting the rotation of the hourglass by 180 ° and thus resetting it.

Meanwhile, we get:


As you can see not much :( .

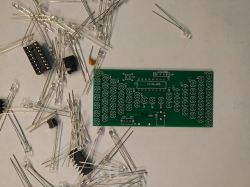
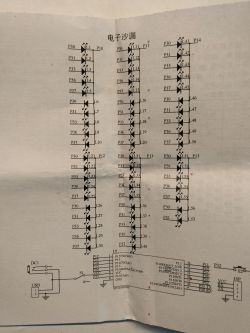
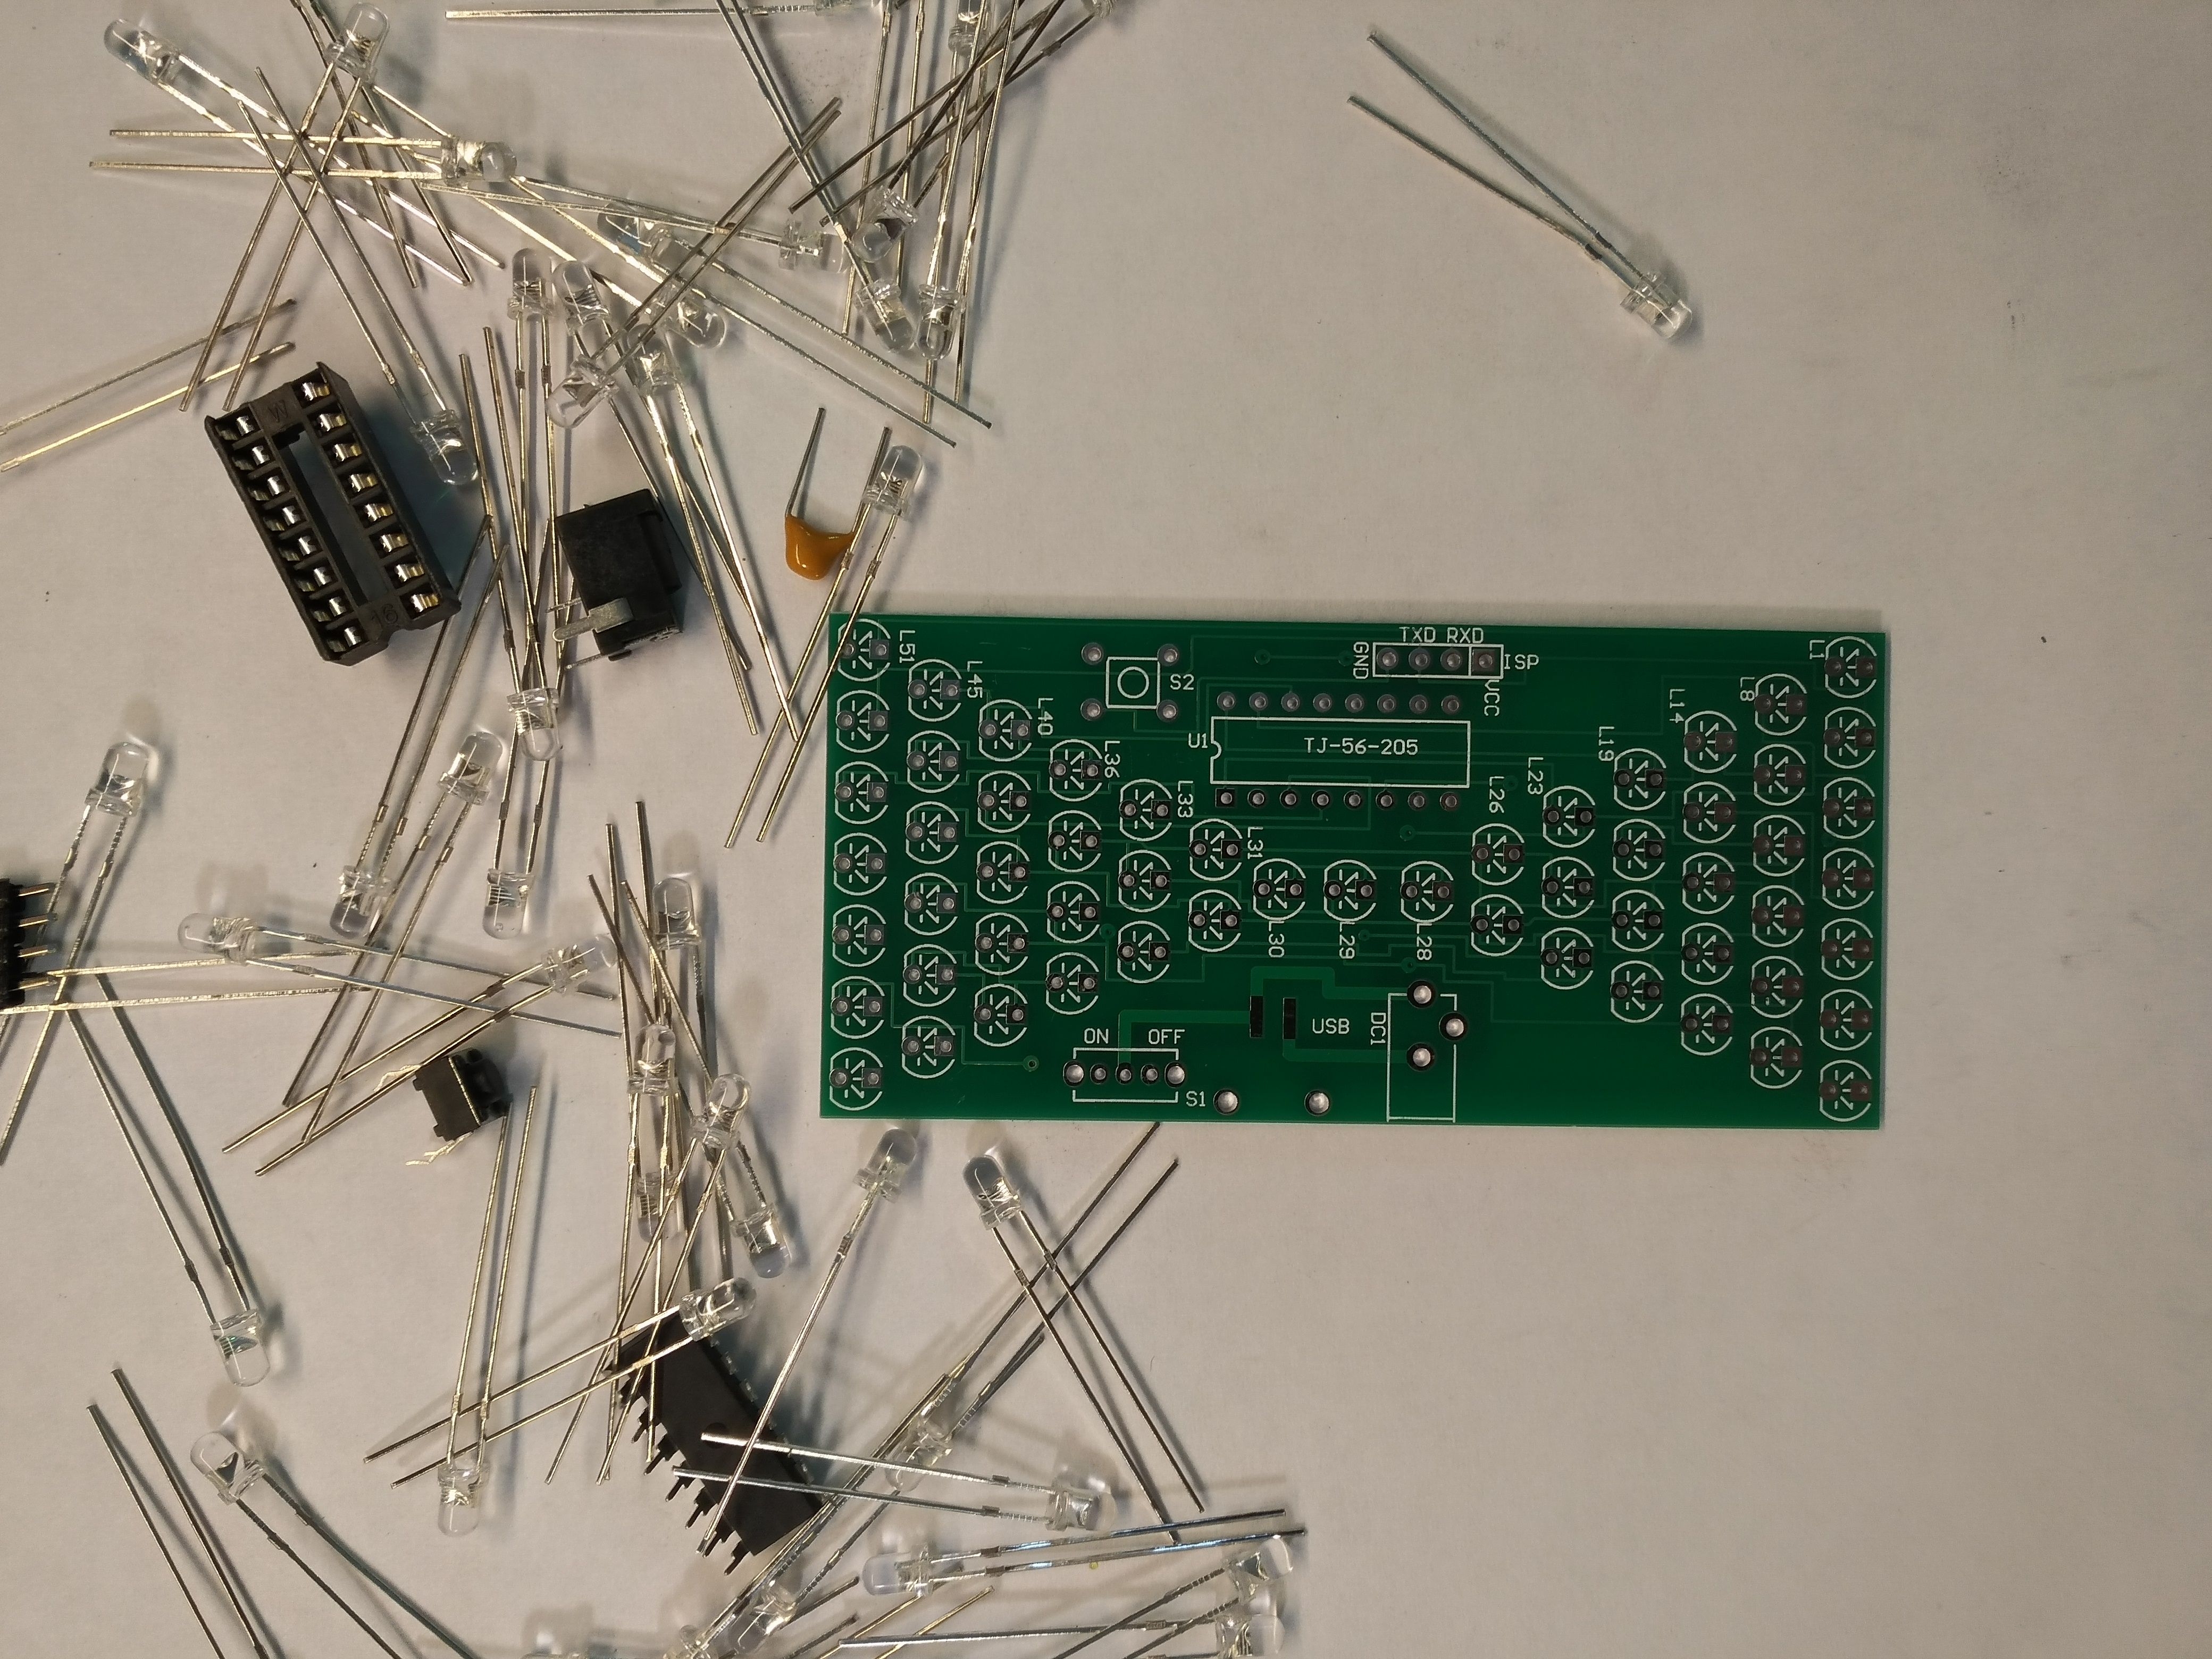
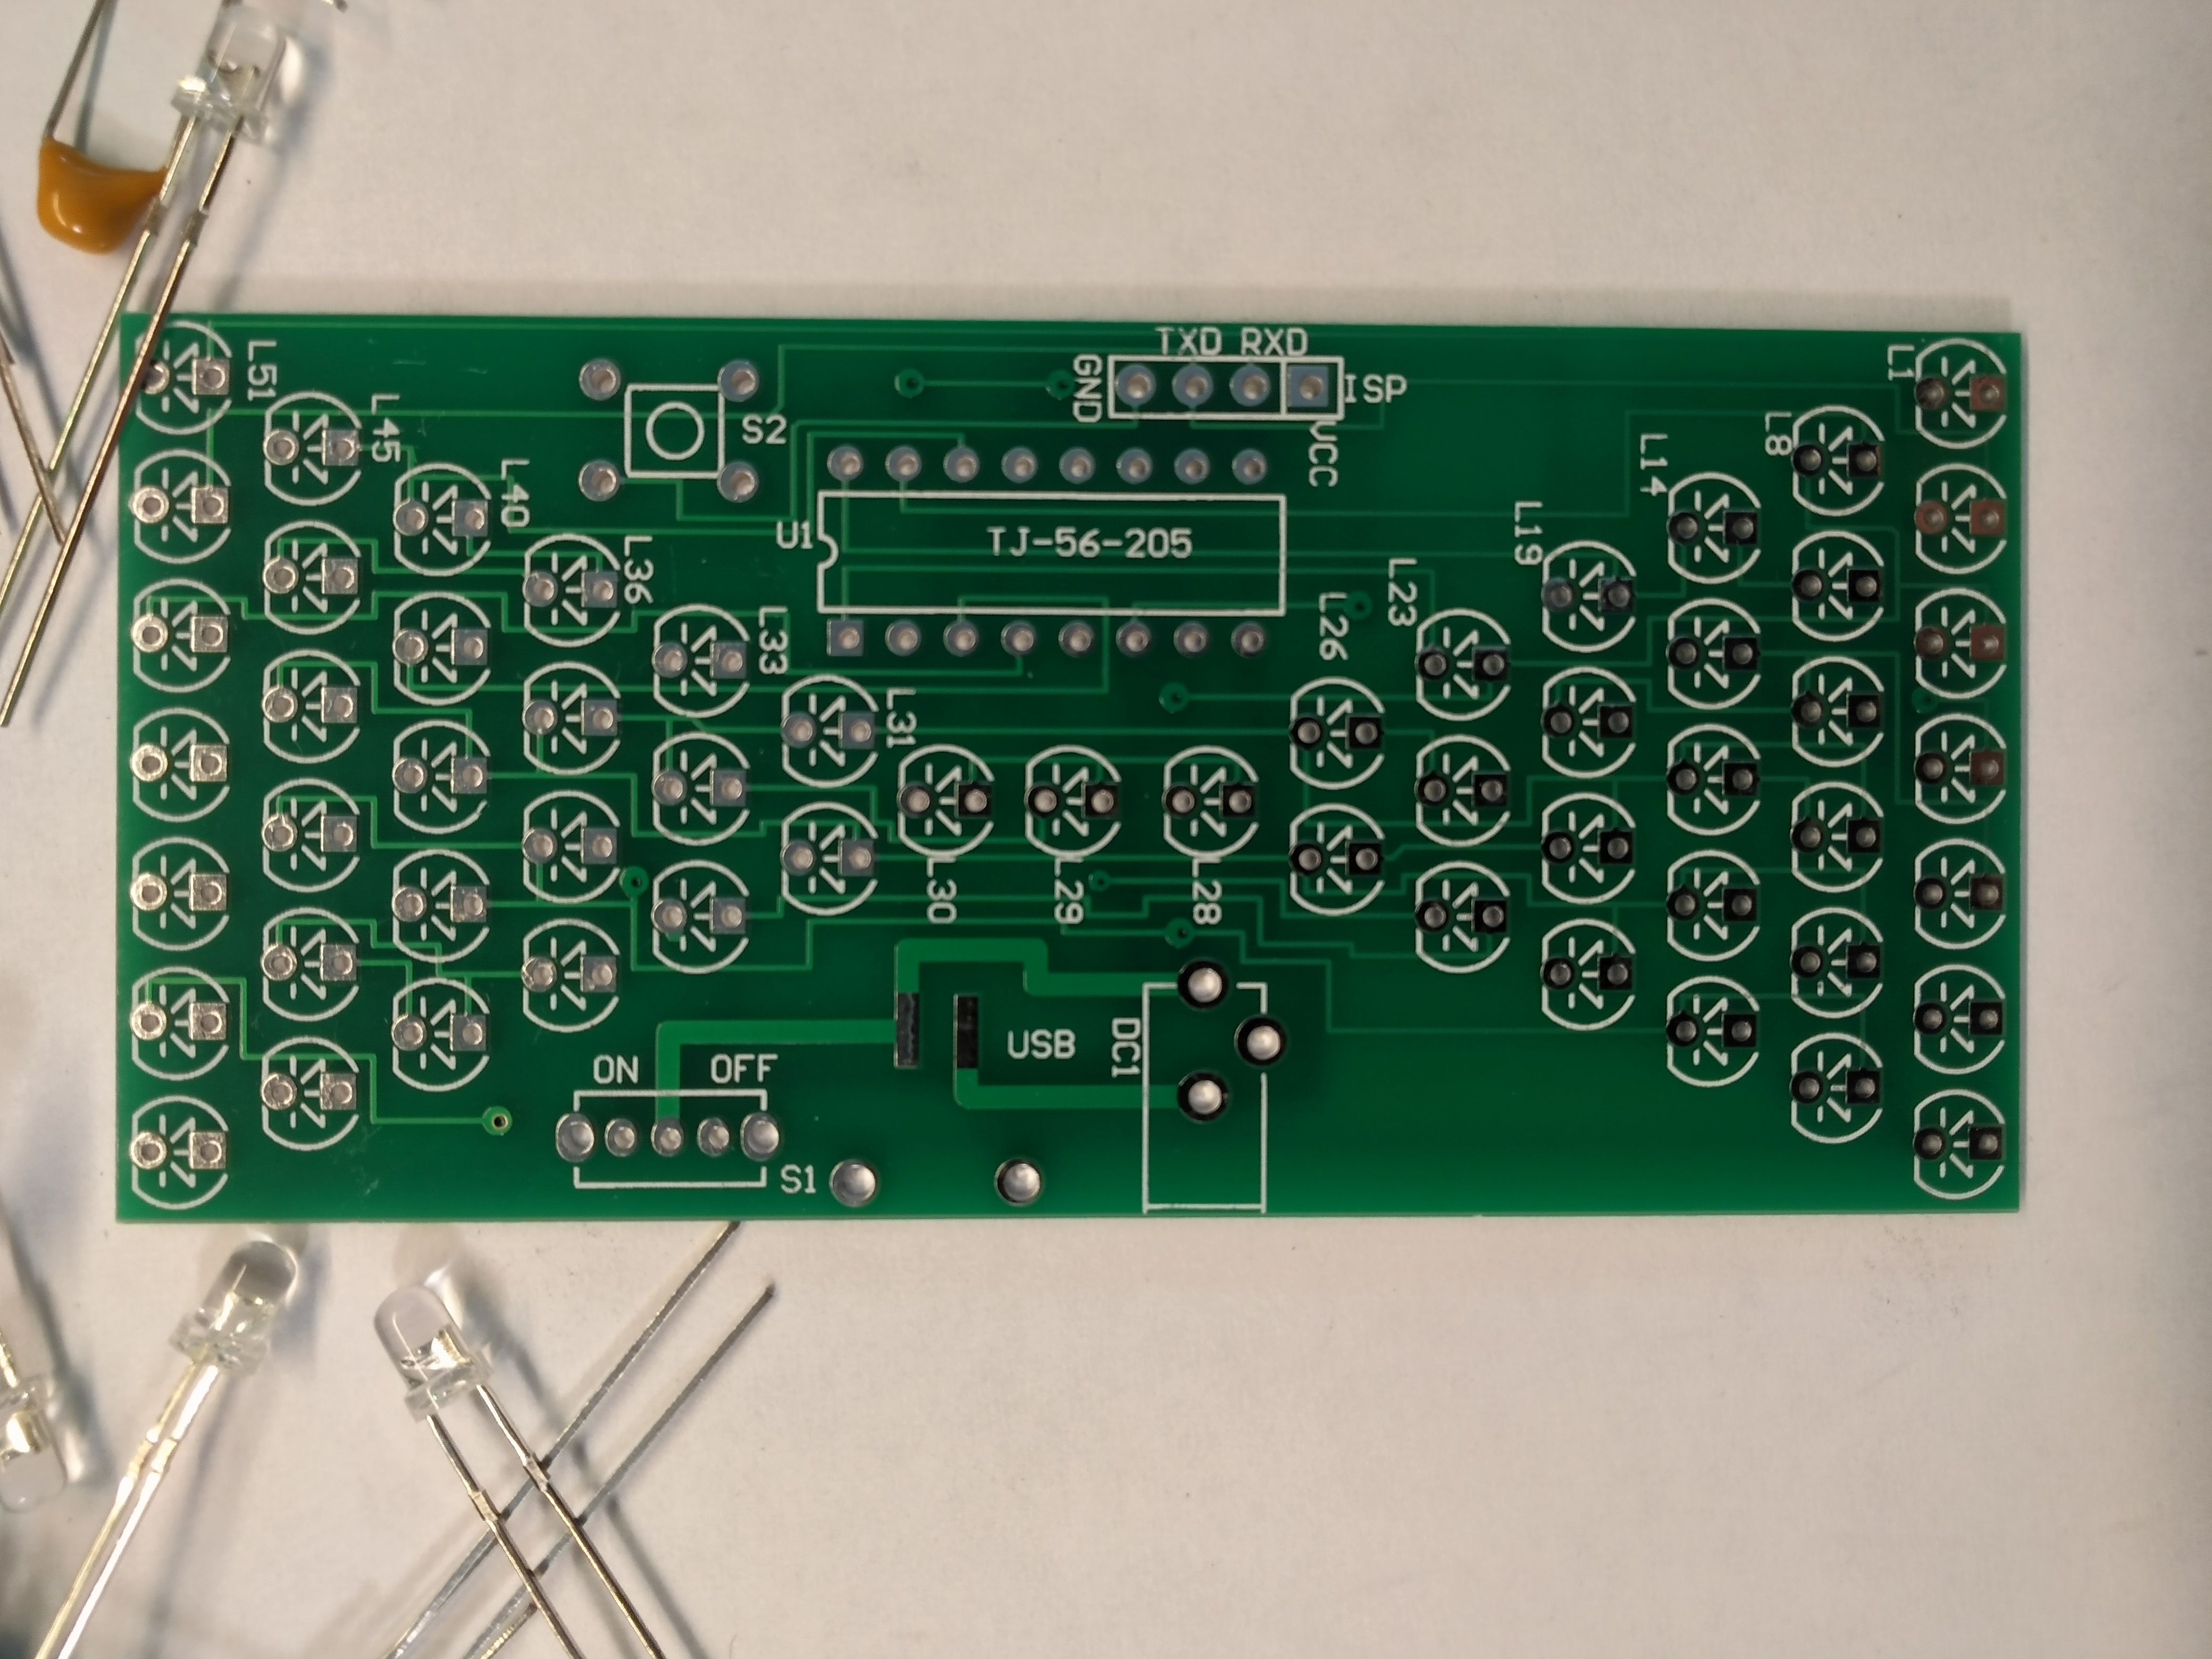
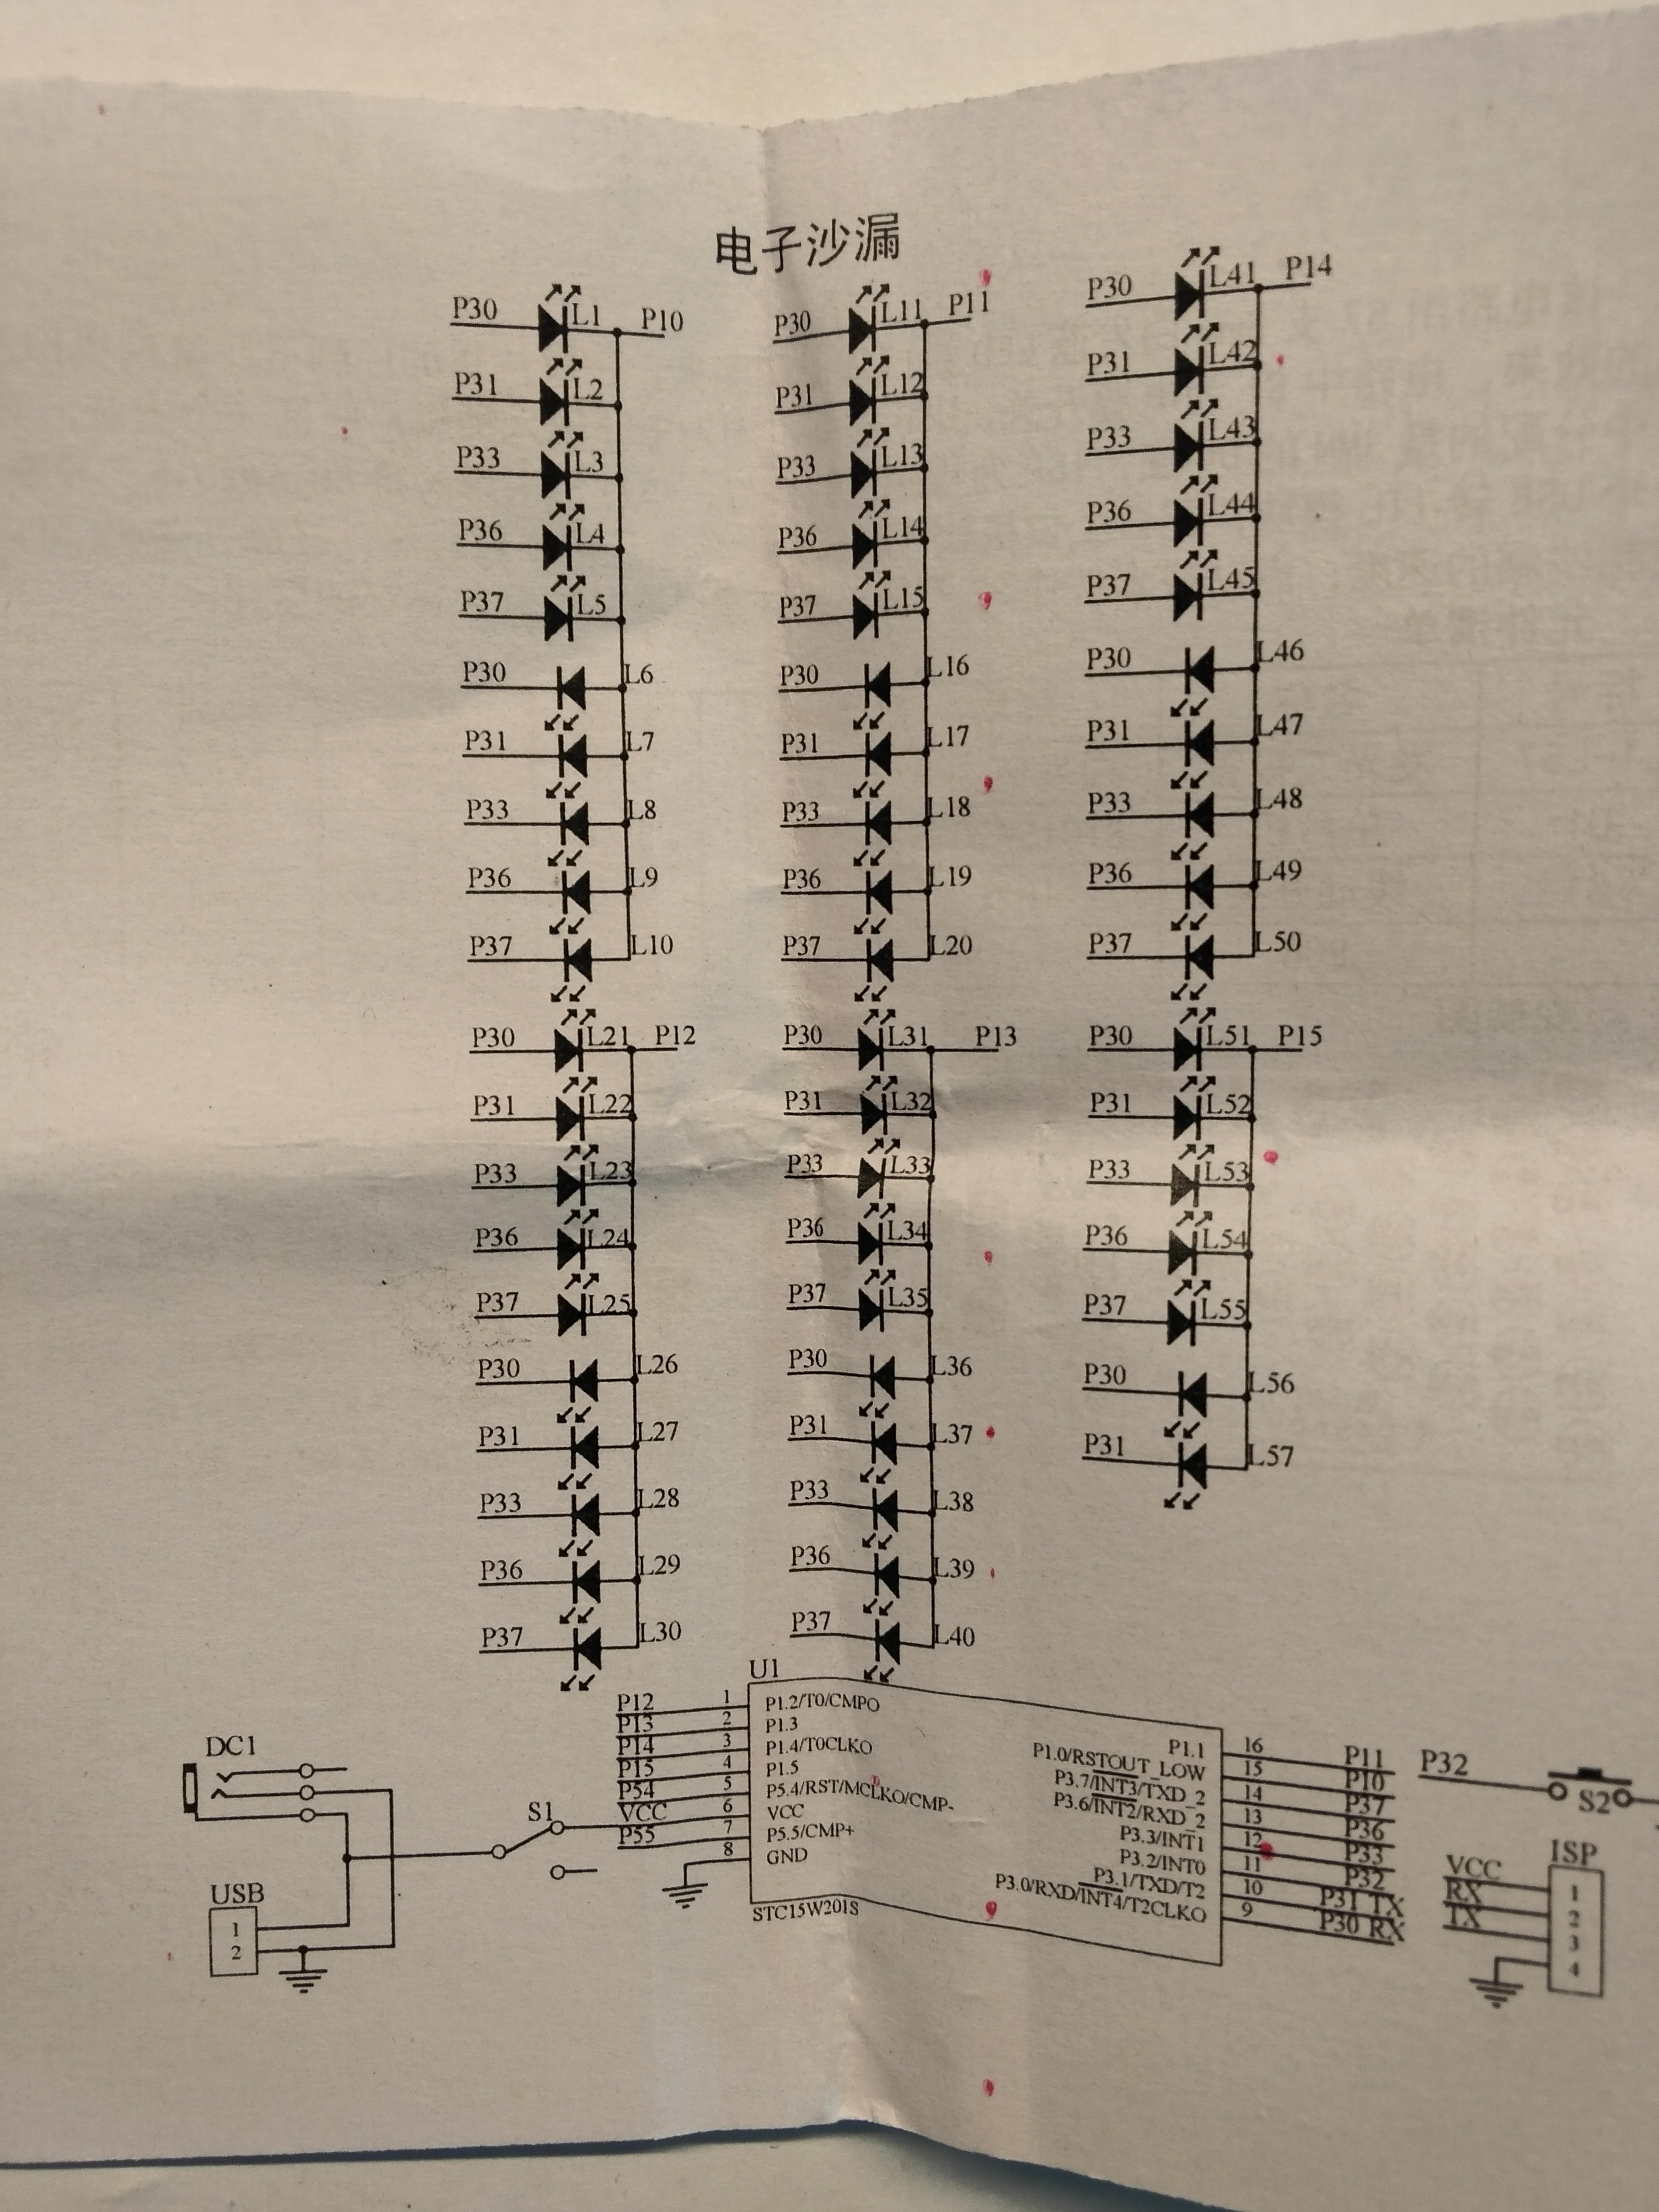
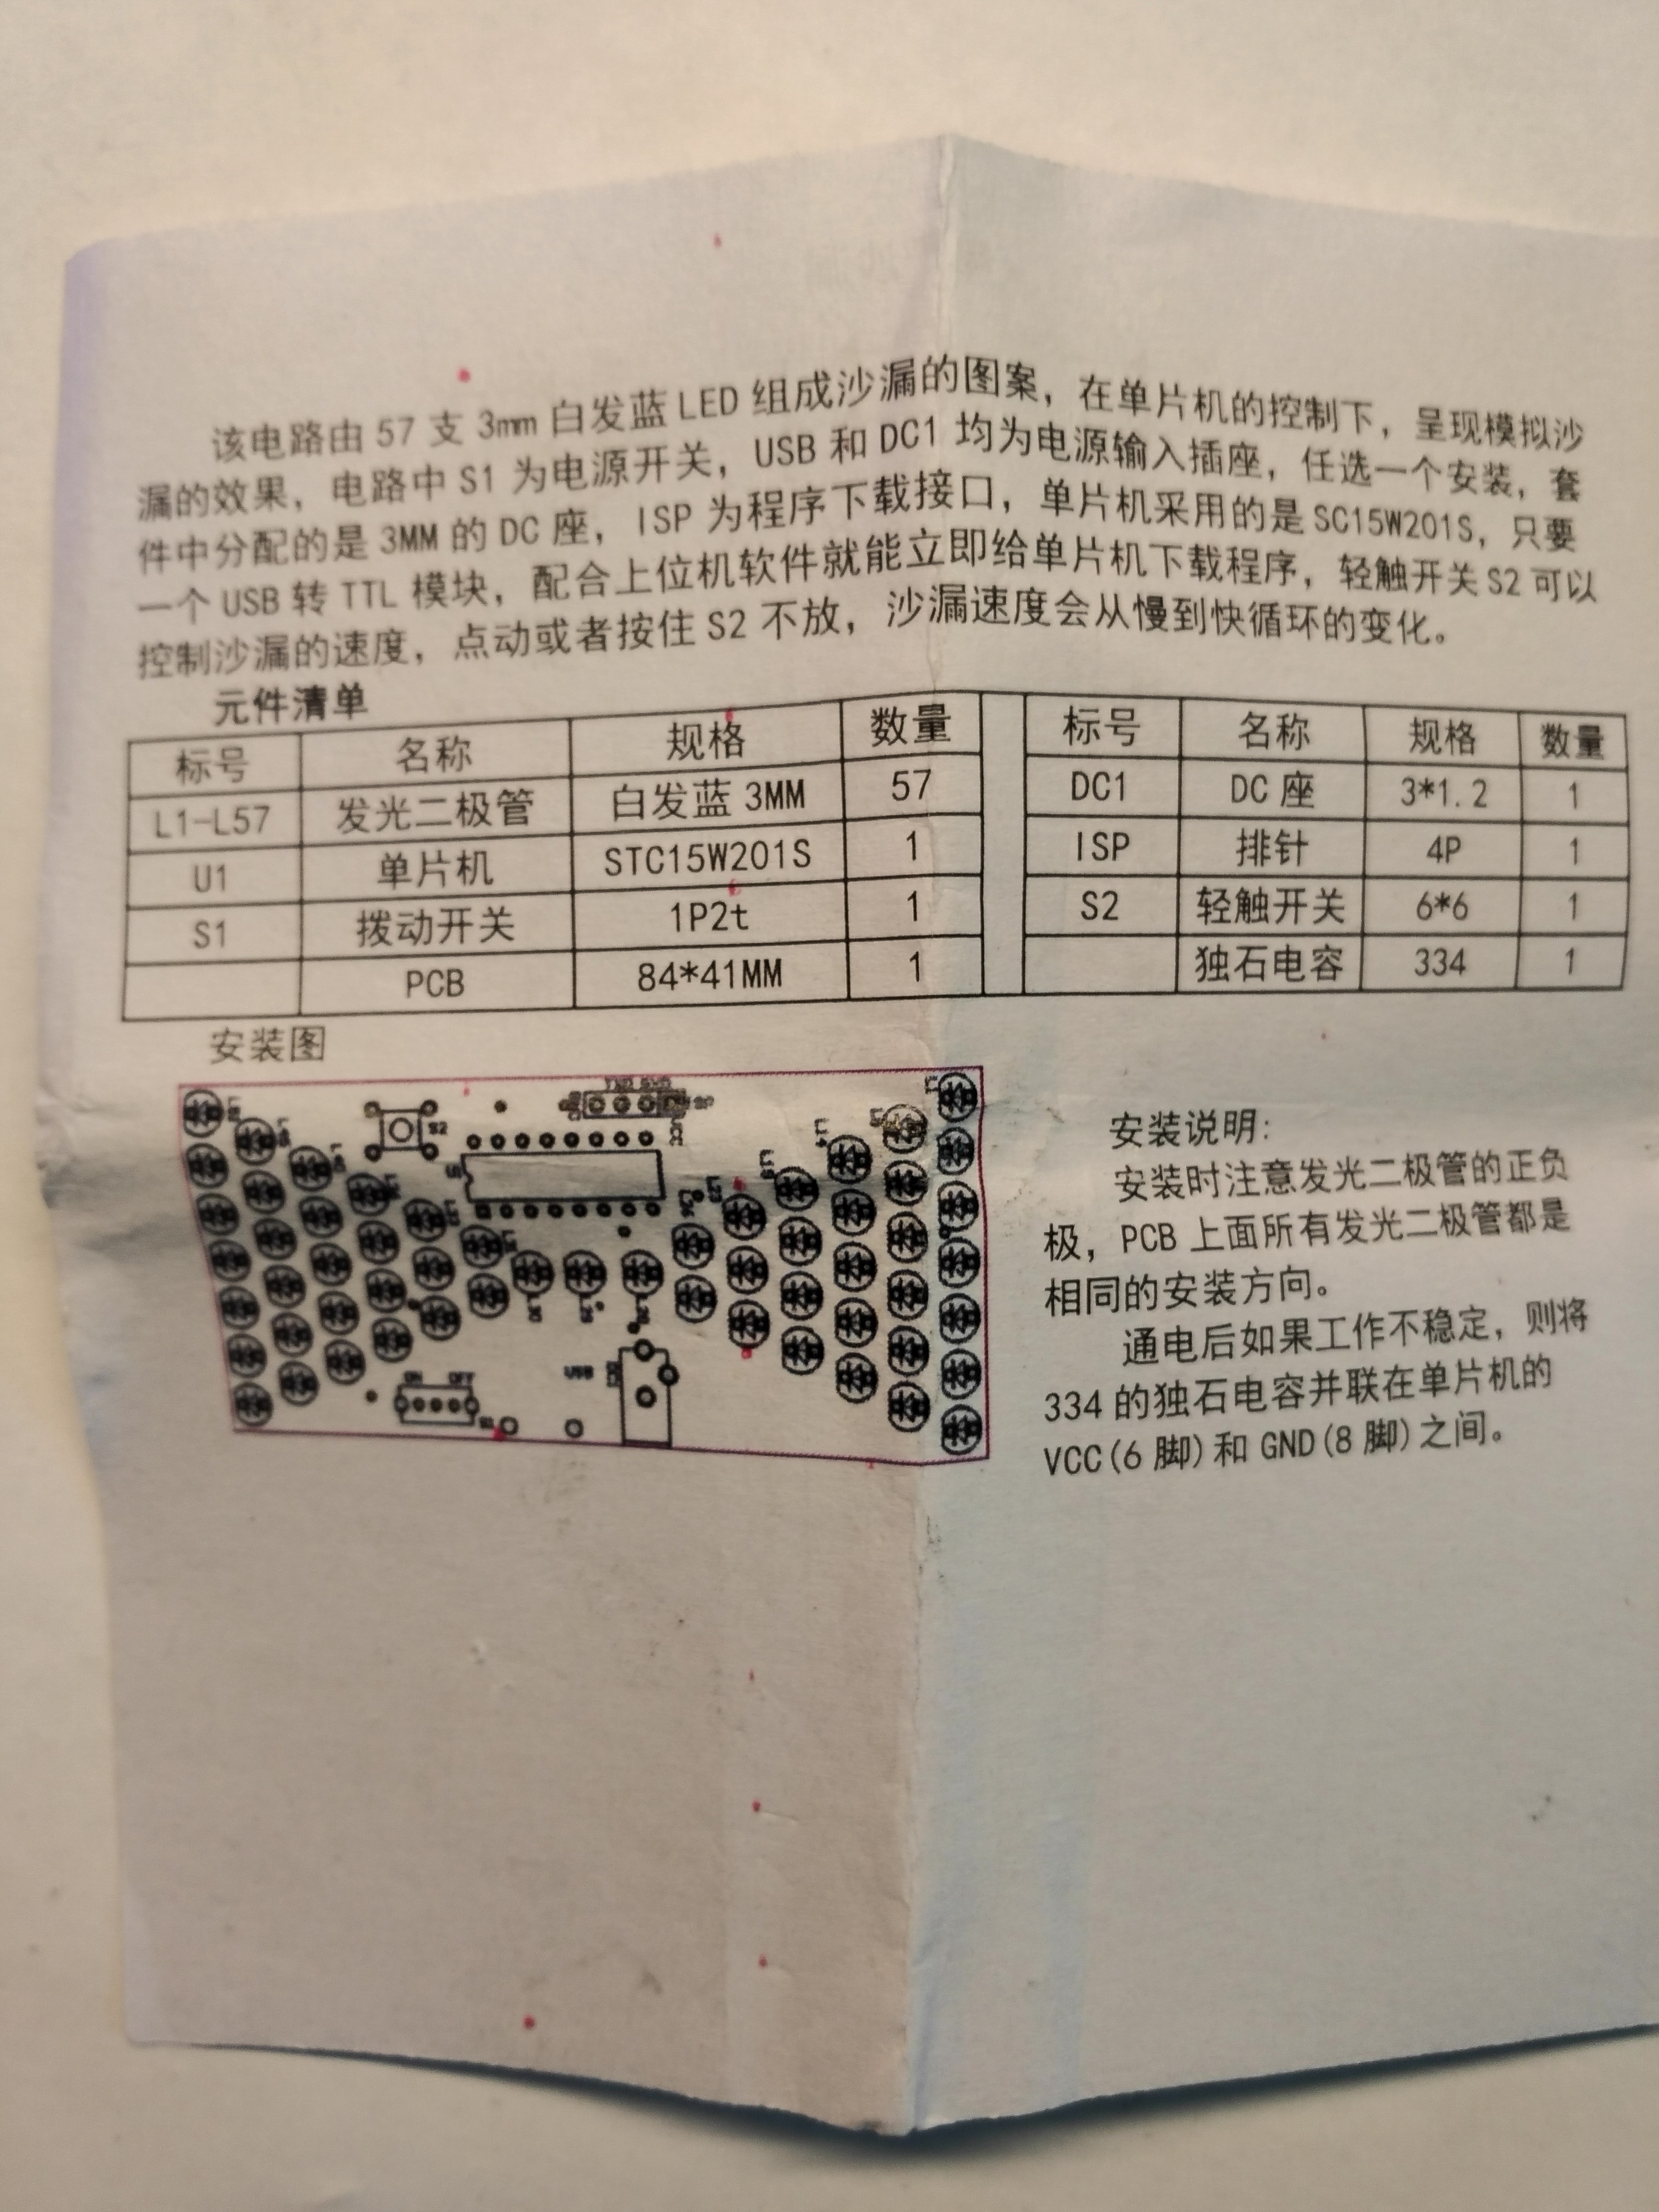
We also have a diagram and a list of elements (I don't know why, but it is).


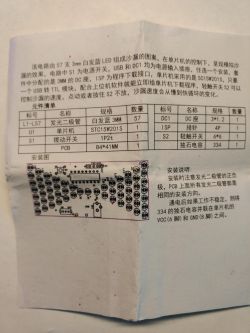
The list shows that the set includes:

1. 57 LEDs, blue in this case.
2. STC15W201S chip pcs one.
3. PCB with dimensions of 84mm x 41mm.
4. DC Jack 3mm x 1.2mm. With a plus inside.
5. ISP connector in the form of a four-pin goldpin strip.
6. 5mm x 5mm microswitch momentary button.
7. Power switch - miniature switch.
8. The power supply of the system is 5VDC. We can put them on the DC Jack socket (then the switch works), or on the goldpins, as in the pictures. In this case, the circuit breaker will not work.
9. The system starts at a voltage of 2.6V. At full voltage, it consumes 14mA.
10. After assembly, a few more components remain, namely ceramic capacitor 334 and three diodes.

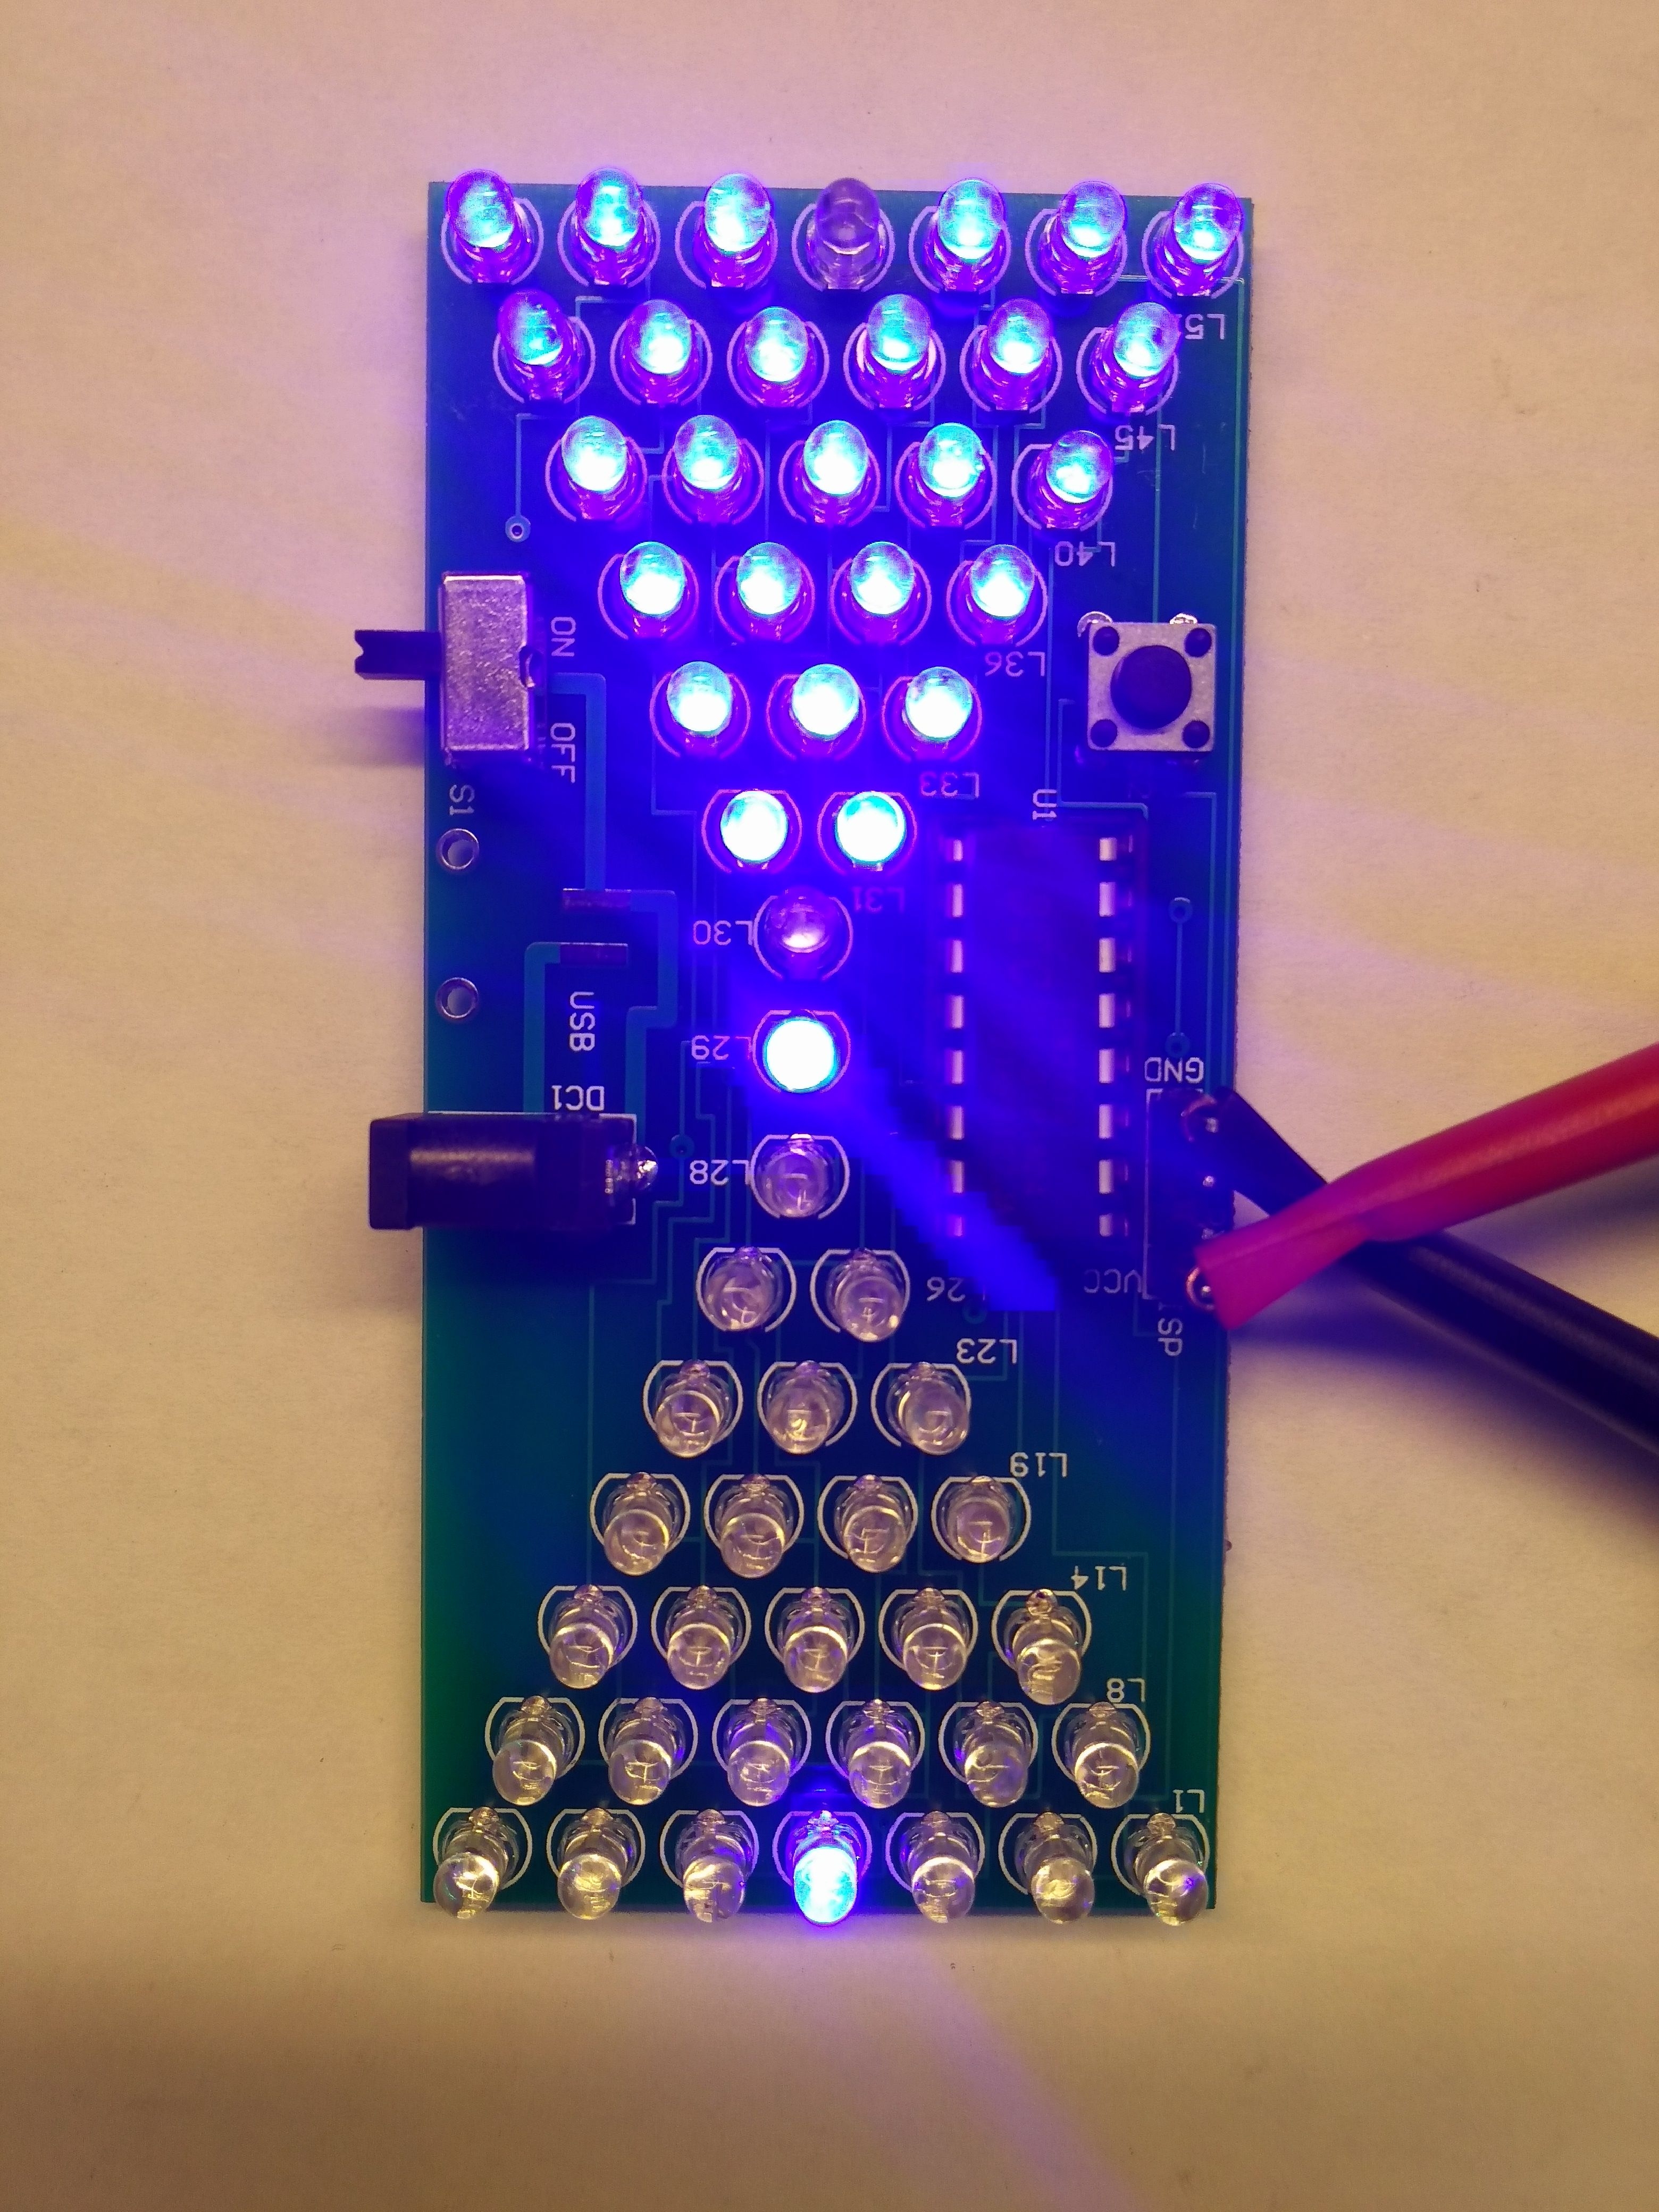
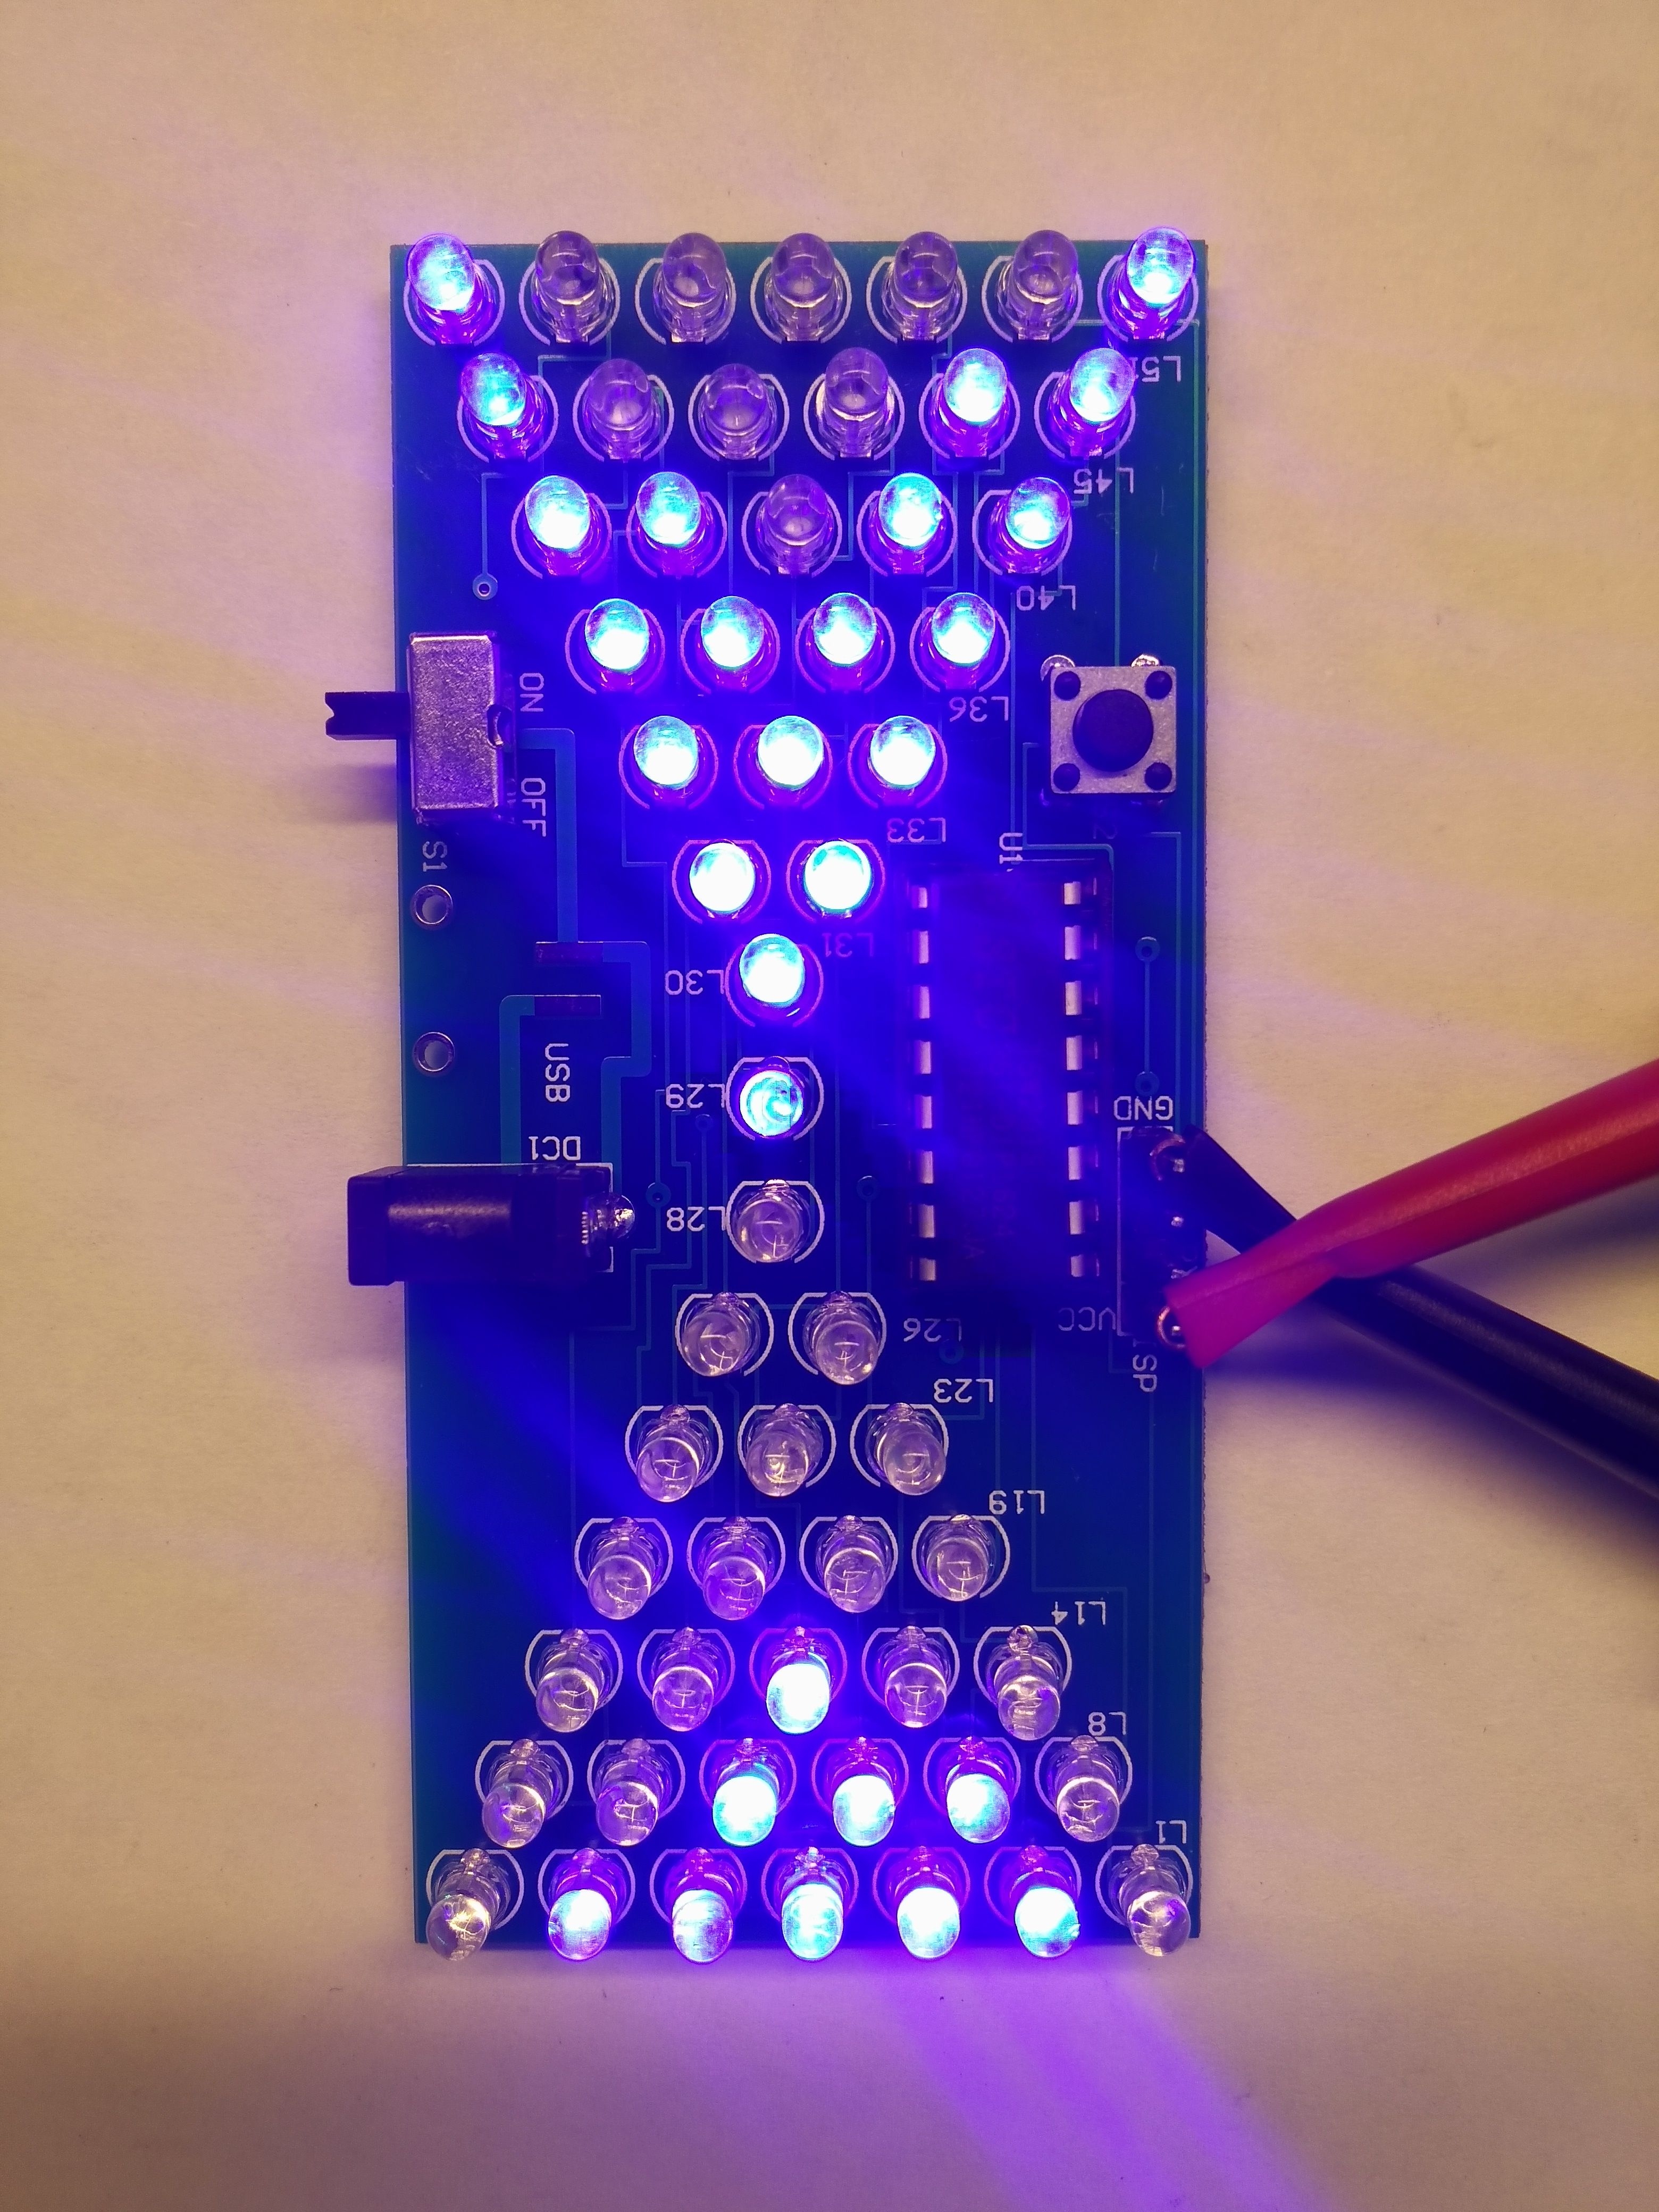
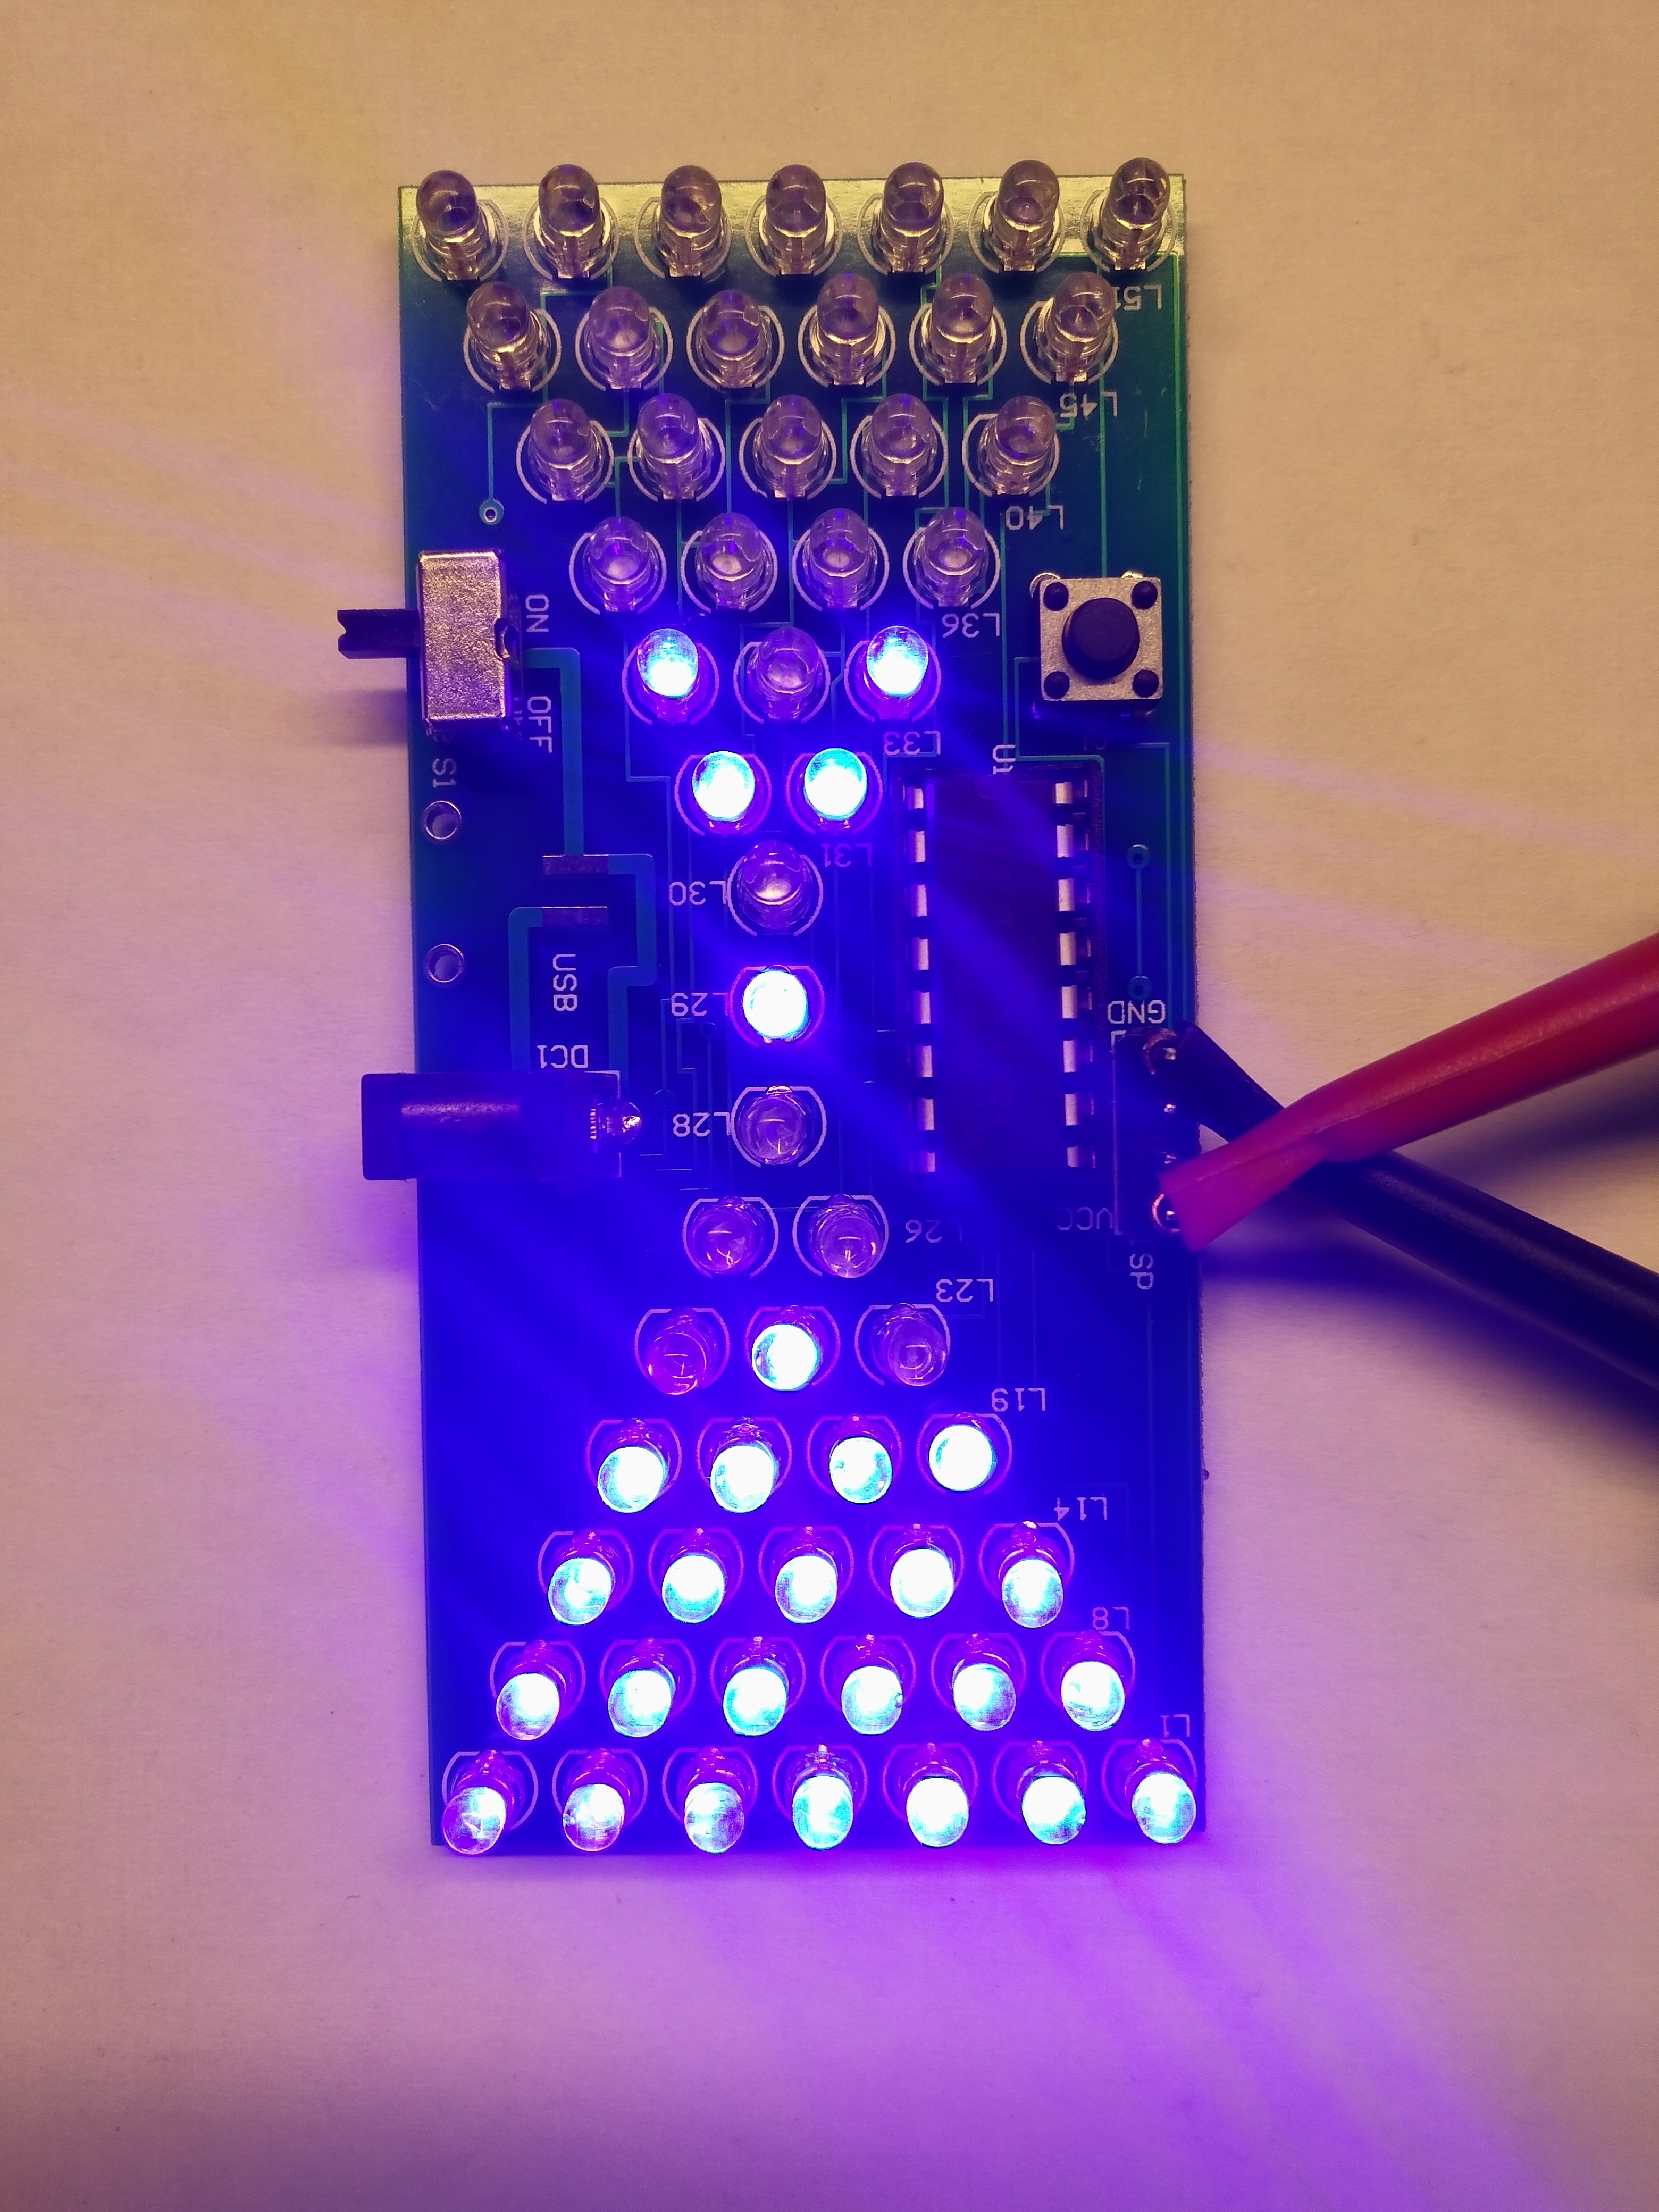
After assembling. (And it took me a lot of time for such a small circuit. That's because of quite a lot of LEDs placed close to each other.) The circuit looks like this:


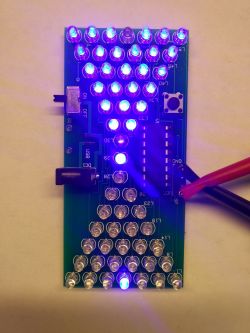
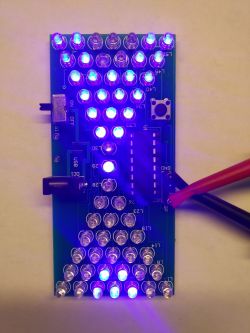
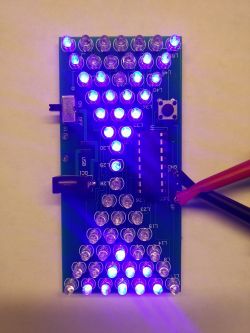
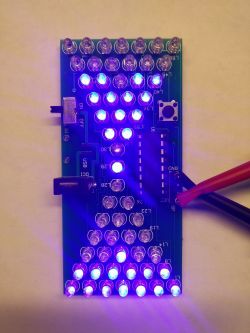
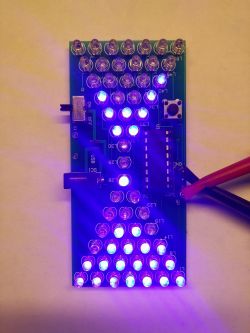
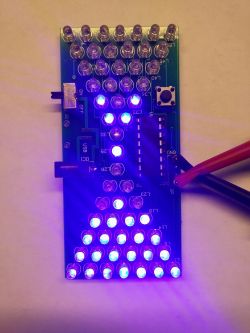
After connecting the power, the hourglass starts in the default mode, let's call it slow. When we hold the S2 button for a few seconds, the second mode will be activated, let's call it fast. I have absolutely no idea what this gadget would be used for. Well, he gets tested and described, they do their job.

Finally, two more videos of the action.

Slow:


Fast:


As you can see, this is not any useful length of time. I have no idea why this crap is so popular on Aliexpress, or what people use it for.

Best regards.
CMS

About Author
CMS
CMS wrote 8440 posts with rating 2581 , helped 256 times. Live in city Warszawa. Been with us since 2004 year.

Comments

adamGazda 29 Apr 2018 10:44

Maybe to acquire single items for other projects. The average cost of one element is approximately PLN 0.16. [Read more]

piotr_go 29 Apr 2018 13:17

Learning to solder? To a new time machine as he found :) https://obrazki.elektroda.pl/1991869200_1525000546_thumb.jpg [Read more]

398216 Usunięty 29 Apr 2018 15:29

You can get items in a more thoughtful way. There are different sets of LEDs, resistors, transistors, integrated circuits ... And this is a gadget for little ones learning to solder, which is probably... [Read more]

pawel1029384756 29 Apr 2018 16:45

Usefulness is like any other kit, which is only a gadget, that is, practically none. You solder to the "cannon" and to the wardrobe, and in about five years to the trash, or split into parts. Although... [Read more]

Gonza 29 Apr 2018 18:27

It seems to me that such a kit will be the most popular among beginner electronics. I myself, when I started almost 20 years ago with Nord Elektronik and Jabela kits, I mainly bought various kinds of sparkles,... [Read more]

ptero 30 Apr 2018 08:51

Er, there. And so the best sets were "Young Electronics" :) I had them all, it was fun! :) [Read more]

szeryf3 30 Apr 2018 09:17

Like a colleague pawel1029384756 wrote, this toy is for soldering, to see if it works and to the wardrobe. [Read more]

gulson 30 Apr 2018 14:31

So, apart from the visual effect, there is absolutely nothing that would alarm that the time has expired? There is no smooth time control from 1-6min? It's a real embarrassment and CMS sorry for taking... [Read more]

CMS 30 Apr 2018 17:28

Absolutely nothing. I am disappointed with this gadget. I really hoped it would be useful in some way. You have nothing to apologize for :) [Read more]

rb401 03 May 2018 00:32

Unless: So I looked around and noticed that this controller (STC15W201S) in this toy, maybe an old school one, but it is quite interesting. From the STC website you can download an application that... [Read more]

BLACK HORSE 14 Jun 2018 13:05

https://pl.aliexpress.com/item/DC-5-V-Niebieska-DIODA-LED-Elektroniczny-Klepsydra-DIY-Kit-Pr-dko-Regulowana-mieszne-Elektroniczny-DIY/32848068567.html?spm=a2g0s.8937460.0.0.27602e0eBIdPFF [Read more]

adamGazda 15 Jun 2018 06:31

The hourglass version from the link in the preceding post is different than that presented by the author of the topic. It is based on common CMOS devices: CD 4015 (two shift registers) and CD 4069 (six... [Read more]

FAQ

TL;DR: 57 LEDs for under PLN 11 assemble into a 5 V, 14 mA hourglass; "gadget for learning to solder" [Elektroda, CMS, #17192501; Elektroda, 398216, #17194416].

Why it matters: Cheap, reusable parts and a programmable MCU make this toy a handy practice board.

Quick Facts

• Kit price ≈ PLN 11 (≈ €2.5) [Elektroda, CMS, post #17192501] • 57 × 5 mm blue LEDs, STC15W201S MCU, 84 × 41 mm PCB [Elektroda, CMS, post #17192501] • Runs on 5 V DC; starts at 2.6 V; draws 14 mA max [Elektroda, CMS, post #17192501] • Two display speeds; hold S2 for > 3 s to toggle [Elektroda, CMS, post #17192501] • Avg. part cost ≈ 0.16 PLN each [Elektroda, adamGazda, post #17193956]

What comes in the LED hourglass DIY kit?

The bag holds 57 blue LEDs, one STC15W201S microcontroller, an 84 × 41 mm PCB, DC-jack, power switch, S2 push-button, four-pin ISP header, and assorted passives. A printed schematic and bill of materials are included [Elektroda, CMS, post #17192501]

How much does the kit cost and where can I buy it?

Forum testers paid about PLN 11 (≈ €2.5) via AliExpress links like the one posted in #17275863 [Elektroda, CMS, #17192501; Elektroda, BLACK HORSE, #17275863].

What power supply does the hourglass need?

Feed the board 5 V DC through the DC-jack or ISP header. The circuit starts at 2.6 V and draws roughly 14 mA when all LEDs are lit [Elektroda, CMS, post #17192501]

How do I switch between slow and fast display modes?

Apply power; the slow mode starts automatically. Hold the S2 push-button for a few seconds to enter fast mode. Repeat to return to slow [Elektroda, CMS, post #17192501]

Can I adjust the timing or add an audible alarm?

Stock firmware offers no time adjustment or buzzer trigger, so it cannot time eggs or teeth brushing out-of-the-box [Elektroda, gulson, #17195828; Elektroda, CMS, #17196043]. Custom firmware or external circuitry is required.

Is this kit suitable for beginners learning to solder?

Yes. Multiple users call it a "gadget for learning to solder" and like the dense LED layout for practice [Elektroda, 398216, #17194416; Elektroda, piotr_go, #17194220].

What microcontroller is used and can I reprogram it?

The board uses an STC15W201S, an 8052-core MCU that claims 420 MHz equivalent performance [Elektroda, rb401, post #17199993] It supports in-system programming over 5 V UART. How-To reflash:
  1. Connect a USB-TTL adapter (5 V, TX-RX crossed) to the 4-pin ISP header.
  2. Download STC-ISP utility from stcmcu.com and load .HEX.
  3. Power board, click “Download”; firmware writes in ~5 s.

How does this STC version compare with the CMOS CD4015/CD4069 hourglass?

The STC board uses one MCU and software control. The alternative kit linked in #17275863 employs CD4015 shift registers and CD4069 inverters—pure hardware logic with no programmability [Elektroda, adamGazda, post #17277219]

What reuse ideas exist once the novelty wears off?

Unsolder the 57 LEDs for other projects, salvage the STC MCU for 8052 experiments, or keep the PCB as a UART-programming jig. At 0.16 PLN per part, it is cheaper than buying components separately [Elektroda, adamGazda, post #17193956]

Are there any assembly pitfalls or edge cases?

After soldering, a 33 nF capacitor and three diodes remain unused; novices may worry they missed steps [Elektroda, CMS, post #17192501] Verify LED polarity carefully—misaligned diodes cause rows to stay dark.

How long does assembly typically take?

The reviewer required "a lot of time" despite experience, mainly due to the 57 closely packed LEDs; plan 25–40 minutes for careful soldering [Elektroda, CMS, post #17192501]

Where can I find the schematic and full parts list?

A clear schematic and BOM are printed on the kit’s paper insert and shown in post #17192501. Digital photos of both are still hosted on elektorda.pl image links [Elektroda, CMS, post #17192501]
Generated by the language model.
%}