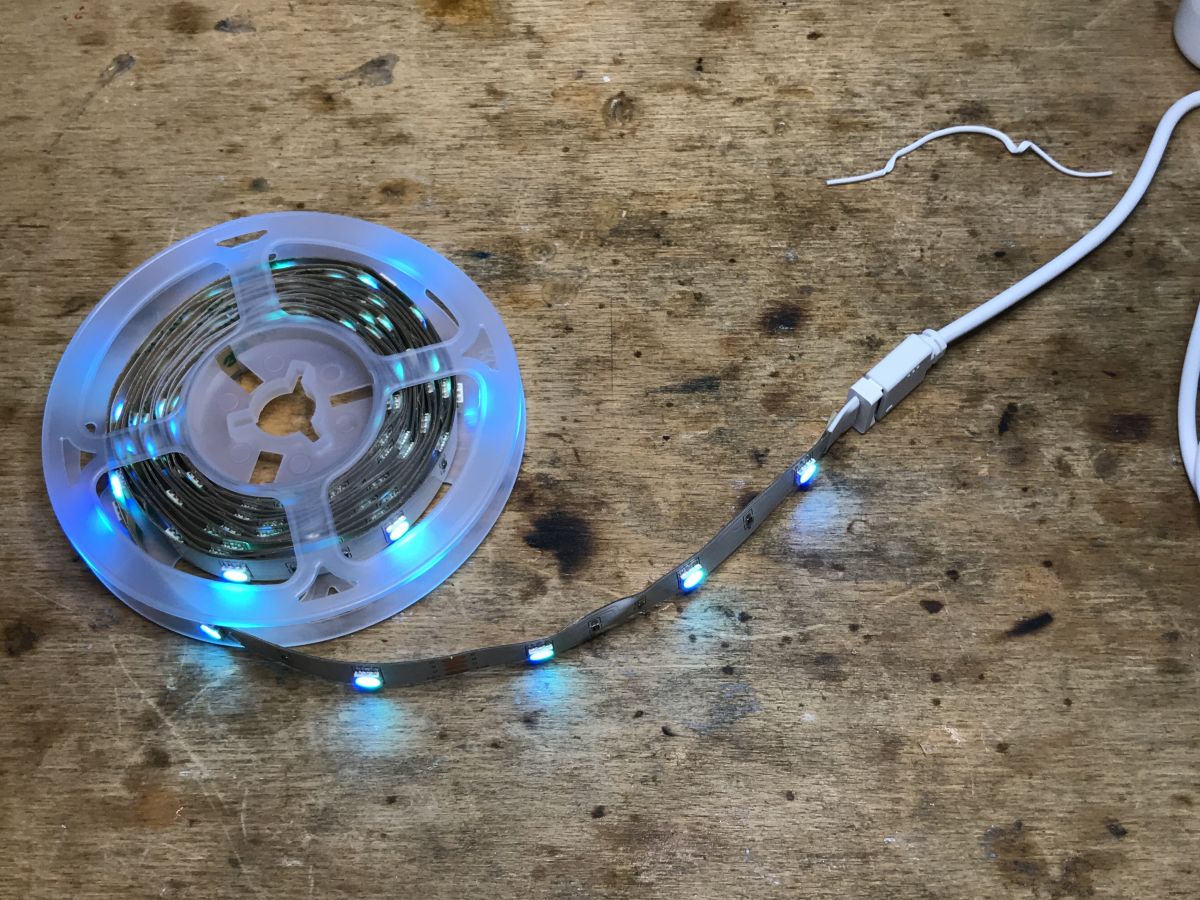
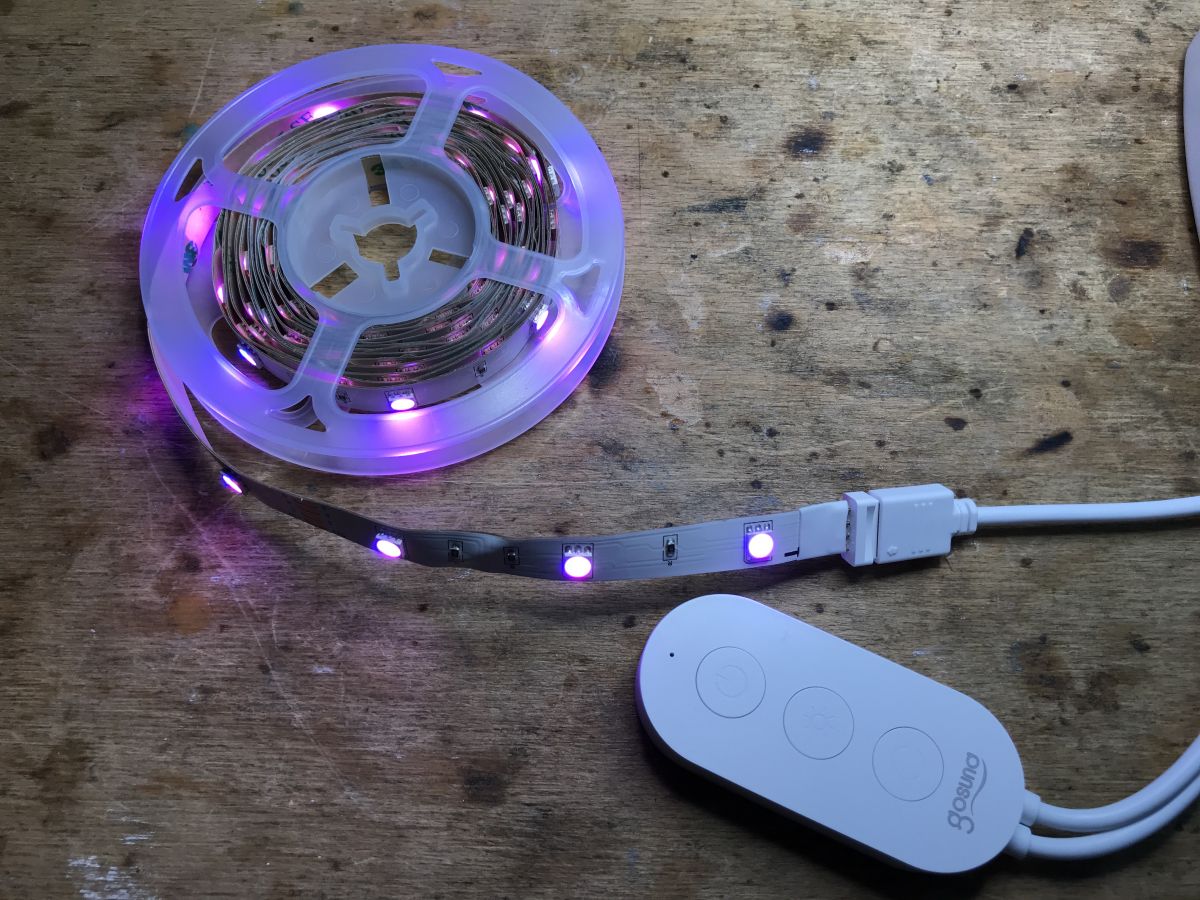
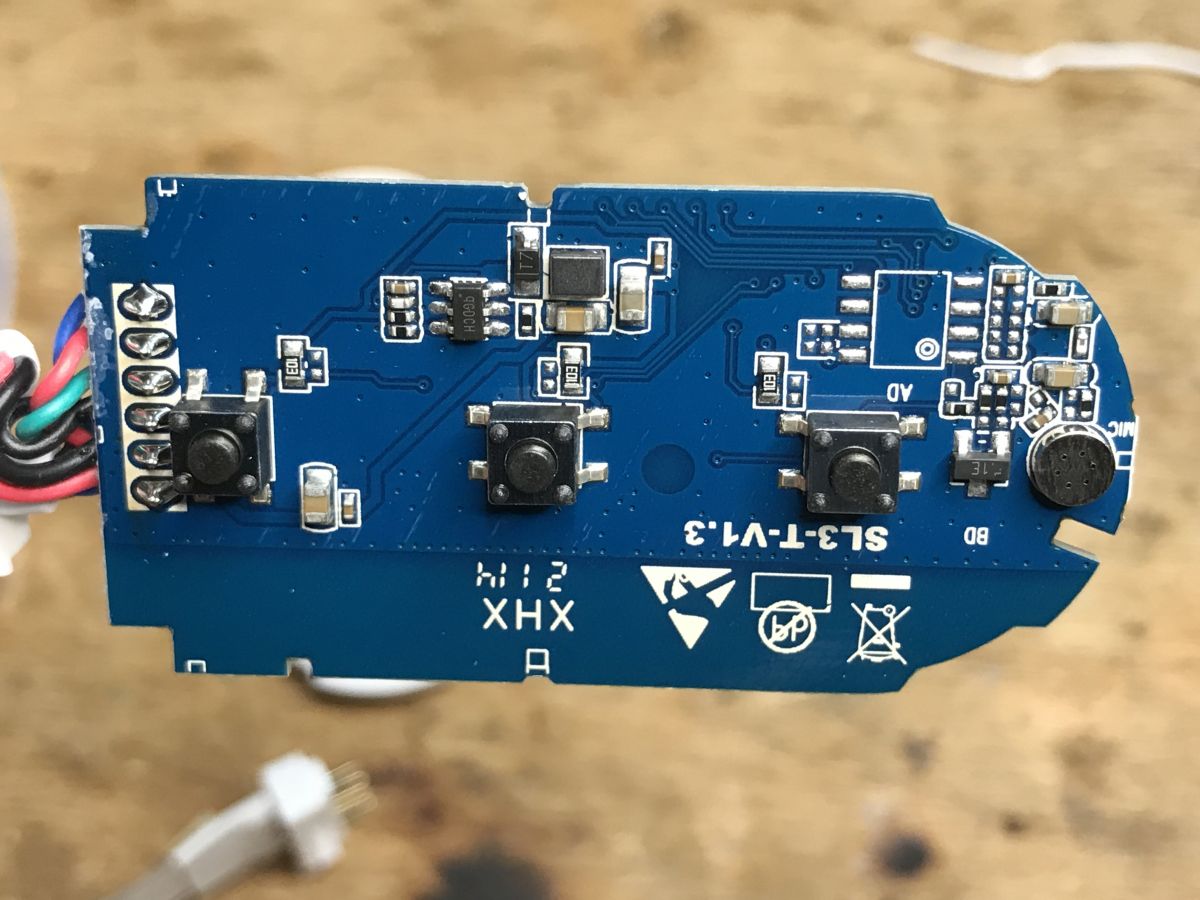
Gosund SL1-B is a USB-powered RGB LED strip with three controller buttons for color, brightness, and animation control without using the phone.
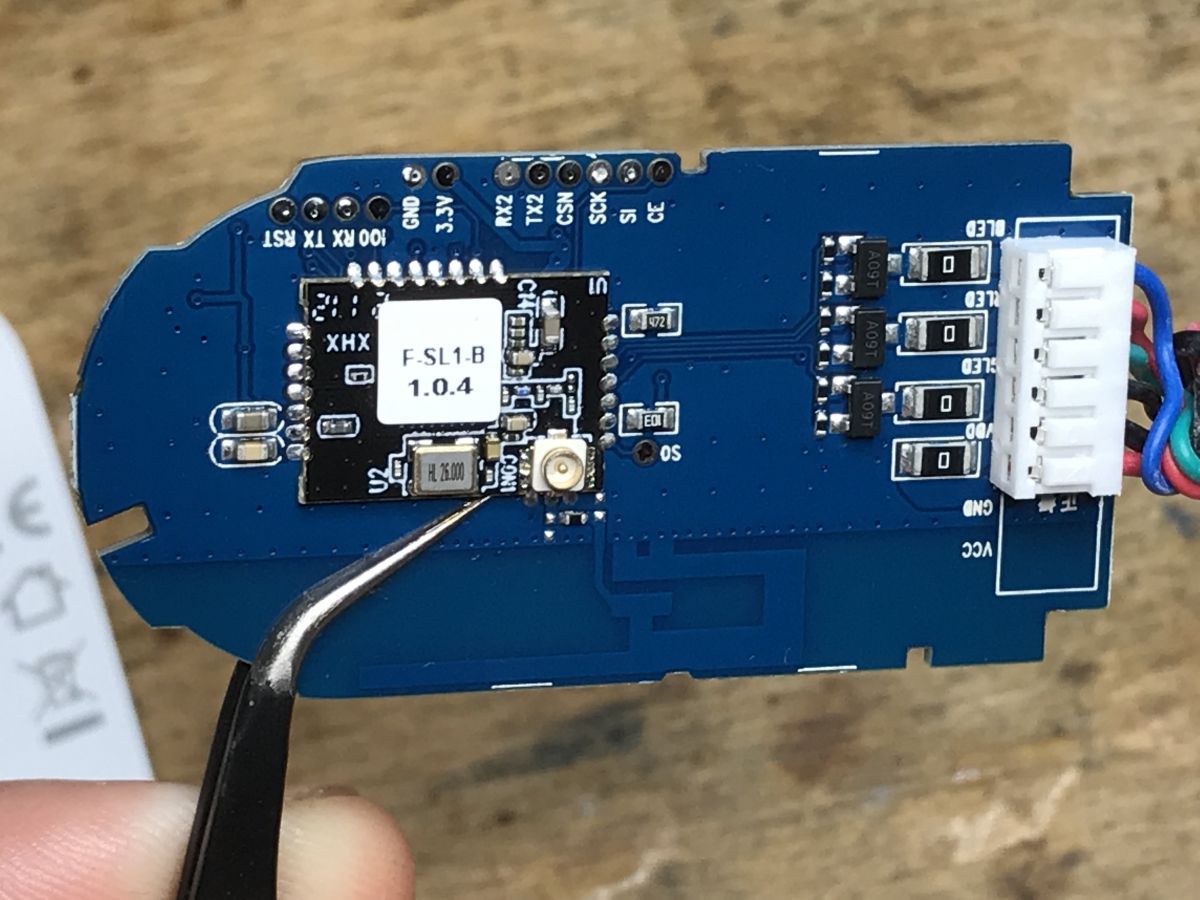
Inside the controller are a BK7231T Wi‑Fi module, three A09T MOSFETs for the color channels, and pads for UART/SPI flashing.
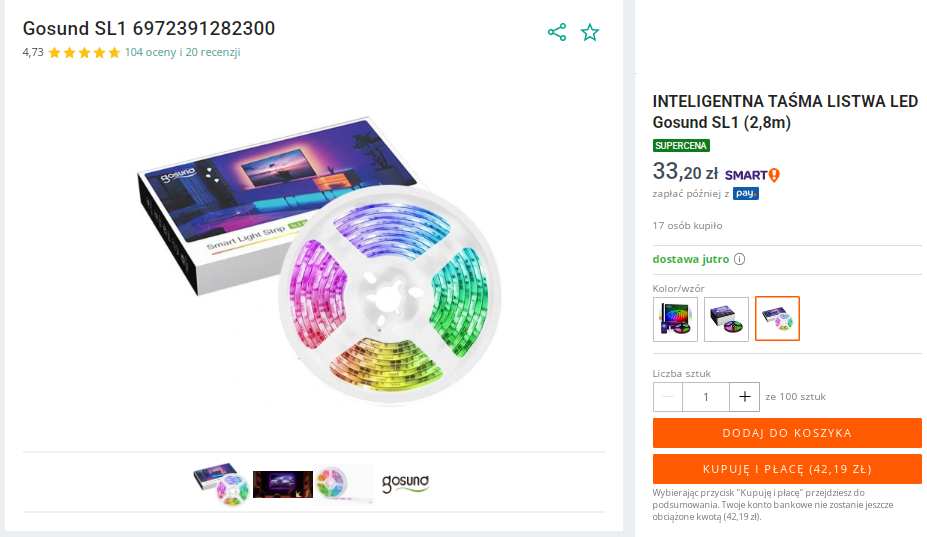
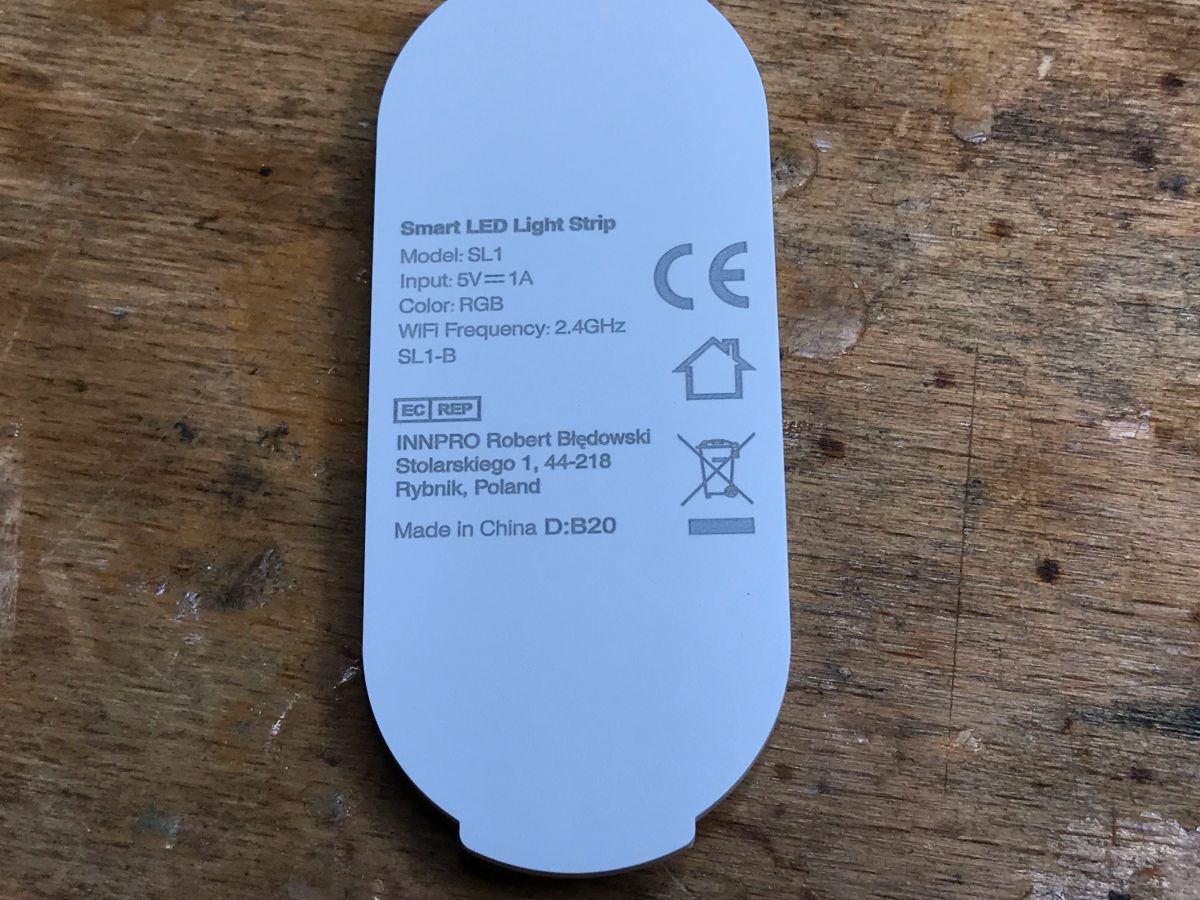
The strip runs on USB 5V/1A, measures 2.8m/11mm, and sells for about 30–40zł.
It pairs with Tuya/Smart Life without problems, and OpenBeken can replace the stock firmware through UART or SPI.
The strip can light only one color at a time, and microphone support is still missing in OpenBeken.
Summary generated by AI based on the discussion content.
.
Today I'm going to show here another colour LED strip that works with the Tuya app. This LED strip stands out because it has up to three buttons on the controller housing. This allows us to change its colours, brightness and animation without reaching for the phone. This is a big plus! Some of the LED strip controllers I reviewed did not have buttons on the casing at all, which condemned us to the phone. Such a thing, on the other hand, I found inconvenient. But perhaps I have too much of an 'old school' attitude.
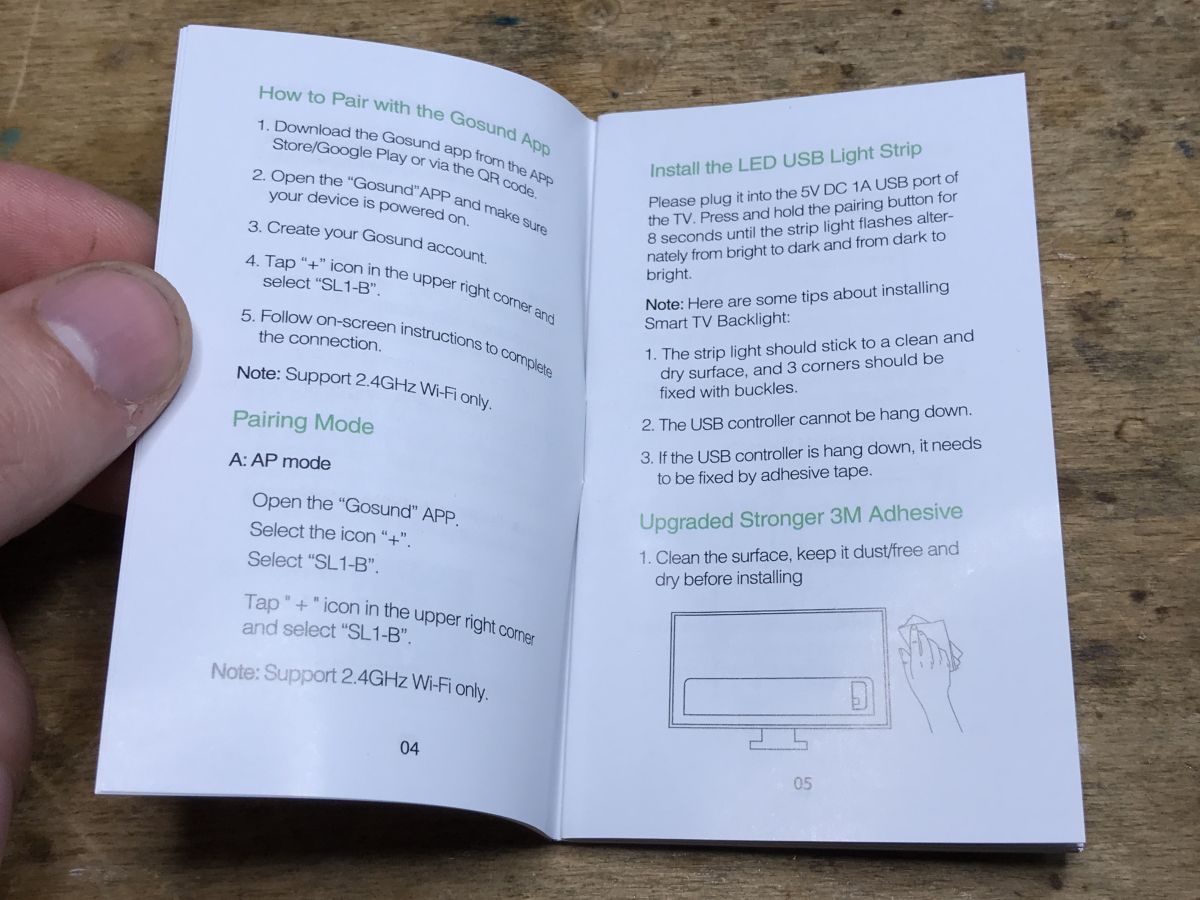
This strip comes under the model name Gosund SL1-B and is powered by USB. This is also a plus. It can be plugged into, for example, a USB socket from the TV, as long as it has sufficient current capacity. Previously reviewed strips were powered from 12V.
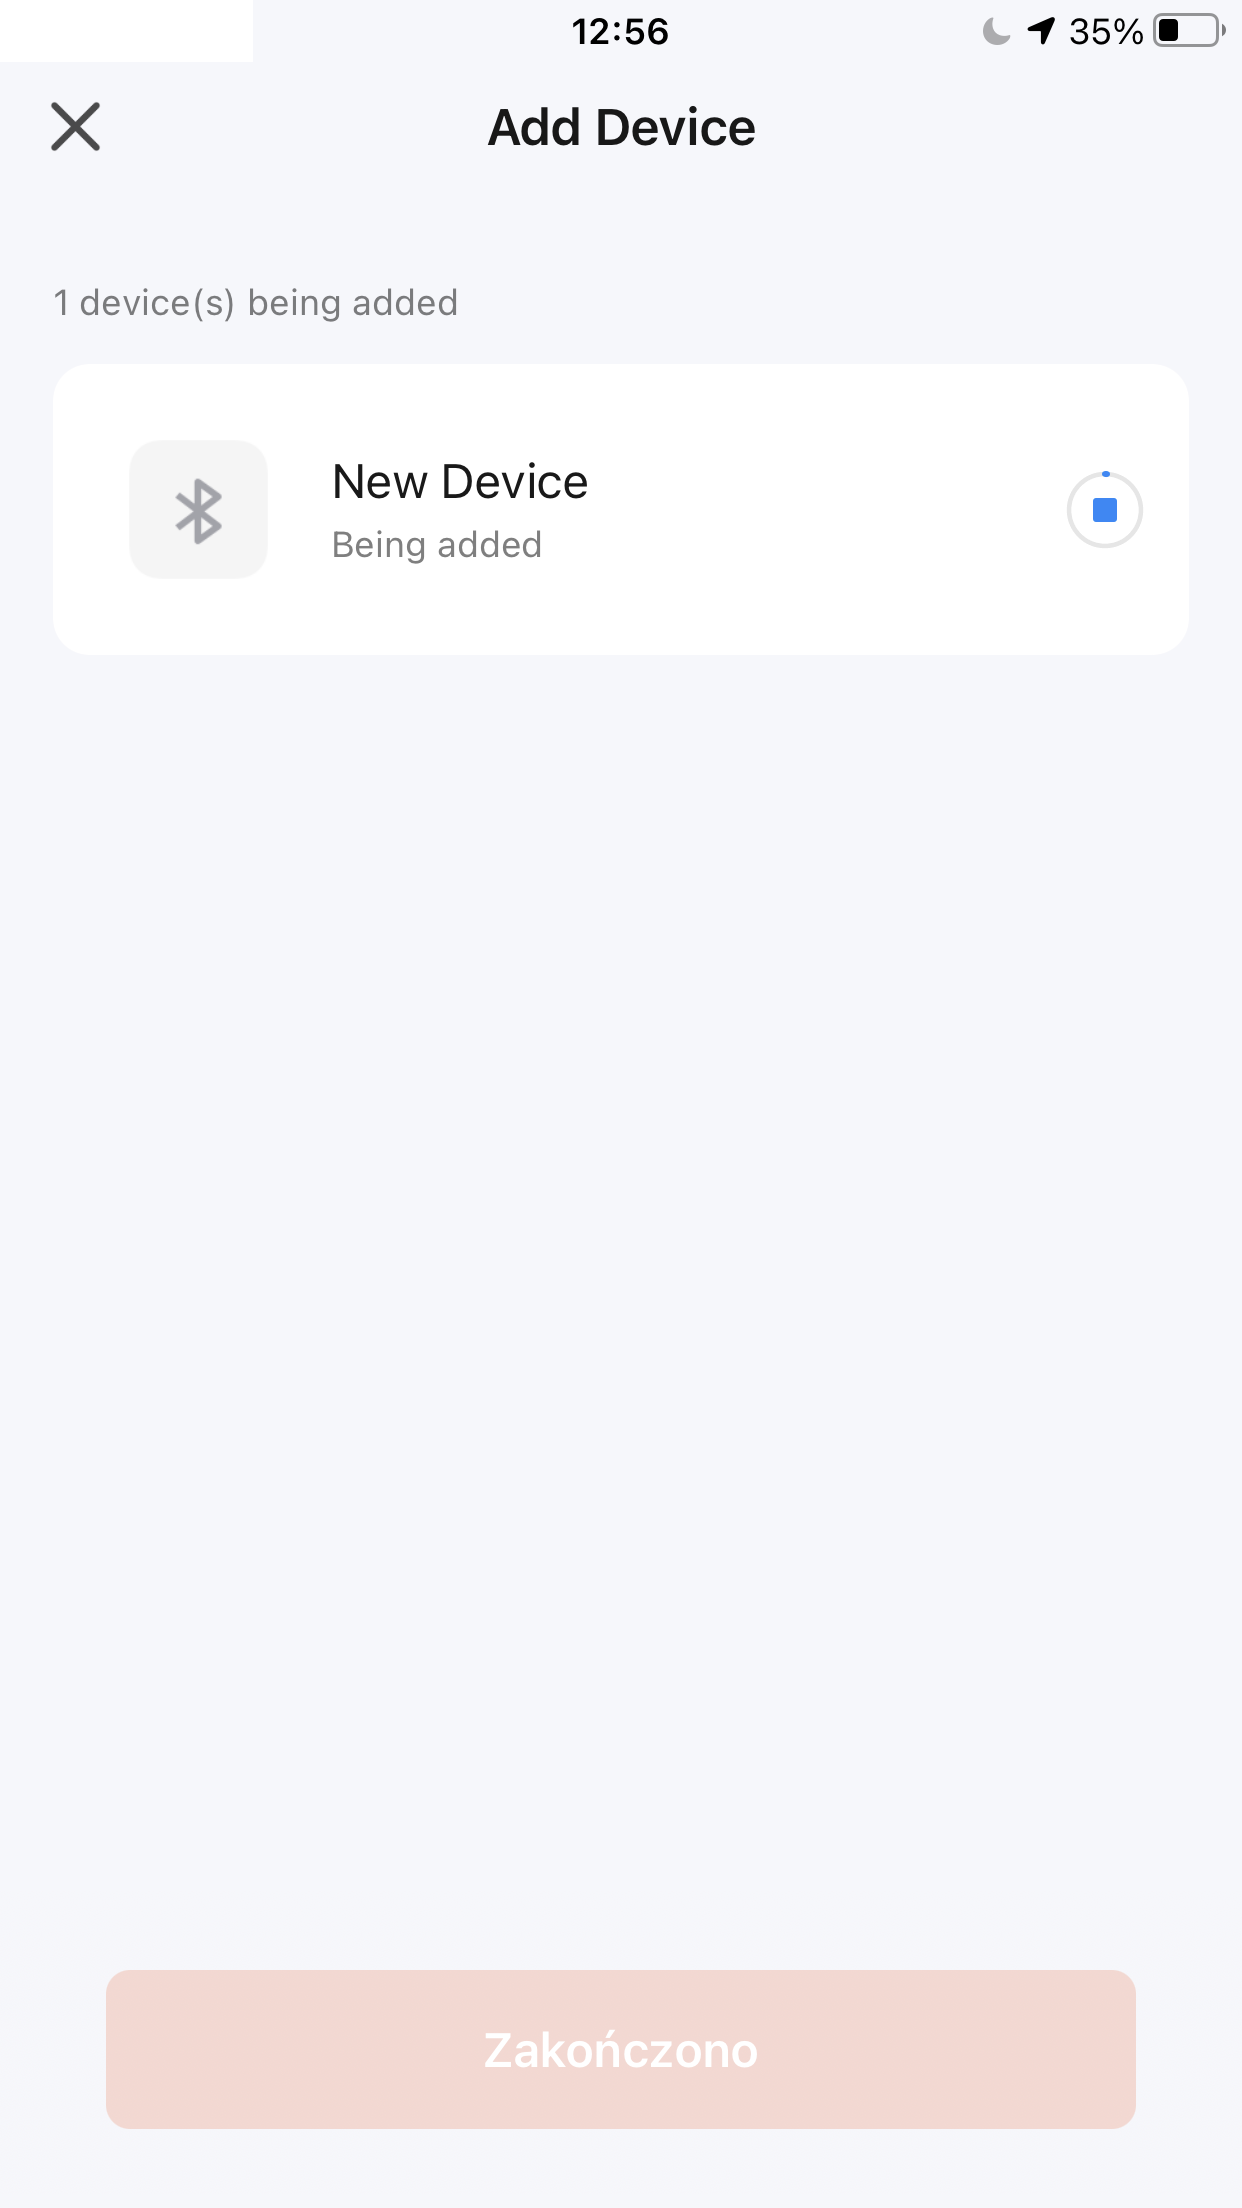
Of course, I will also make a firmware change for this strip - I will upload it OpenBeken .
Purchase Gosund SL1-B .
This belt can be purchased from various mail order shops in our country. There is no need to import from China. You can buy it for about 30-40zł.
.
Specifications:
.
Power supply not included.
Belt can only light one colour at a time! The strip is characterised as such under the TV:
.
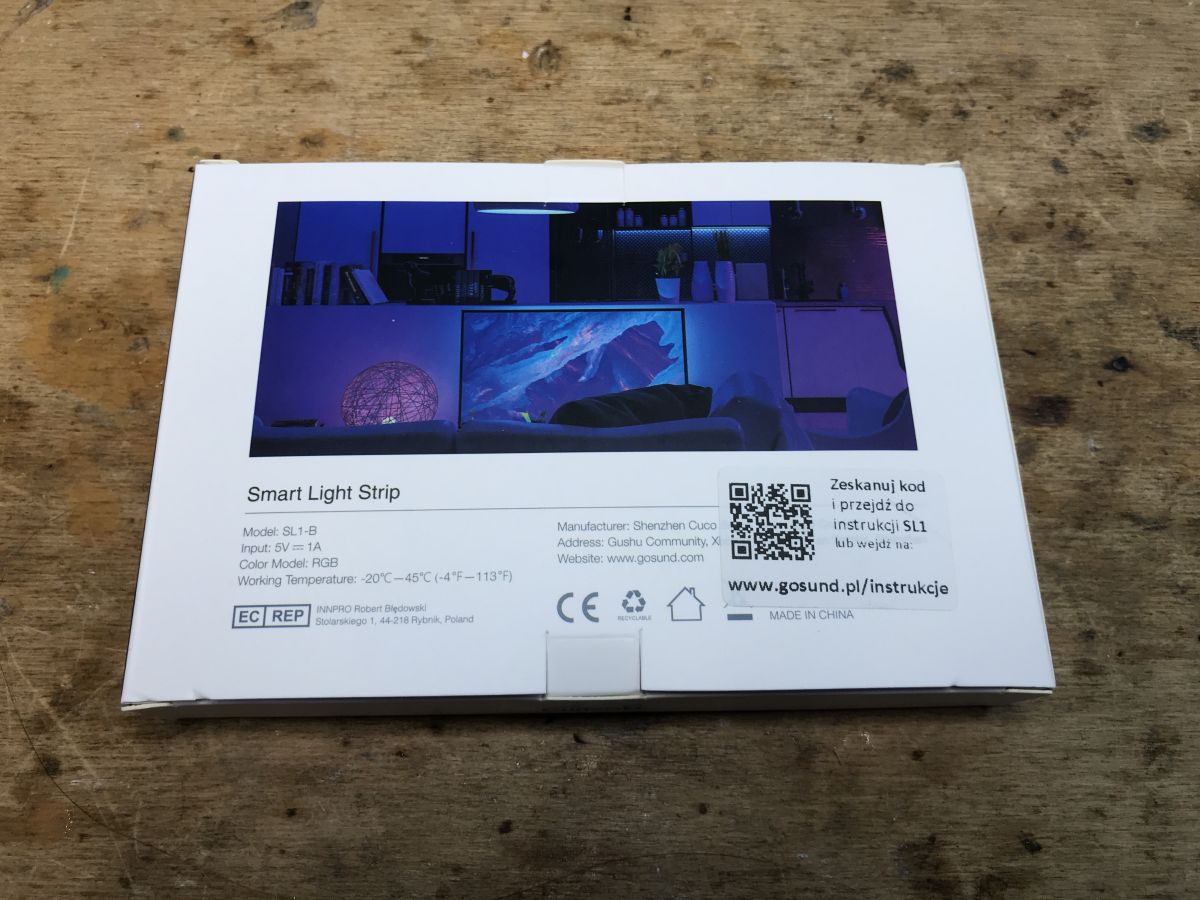
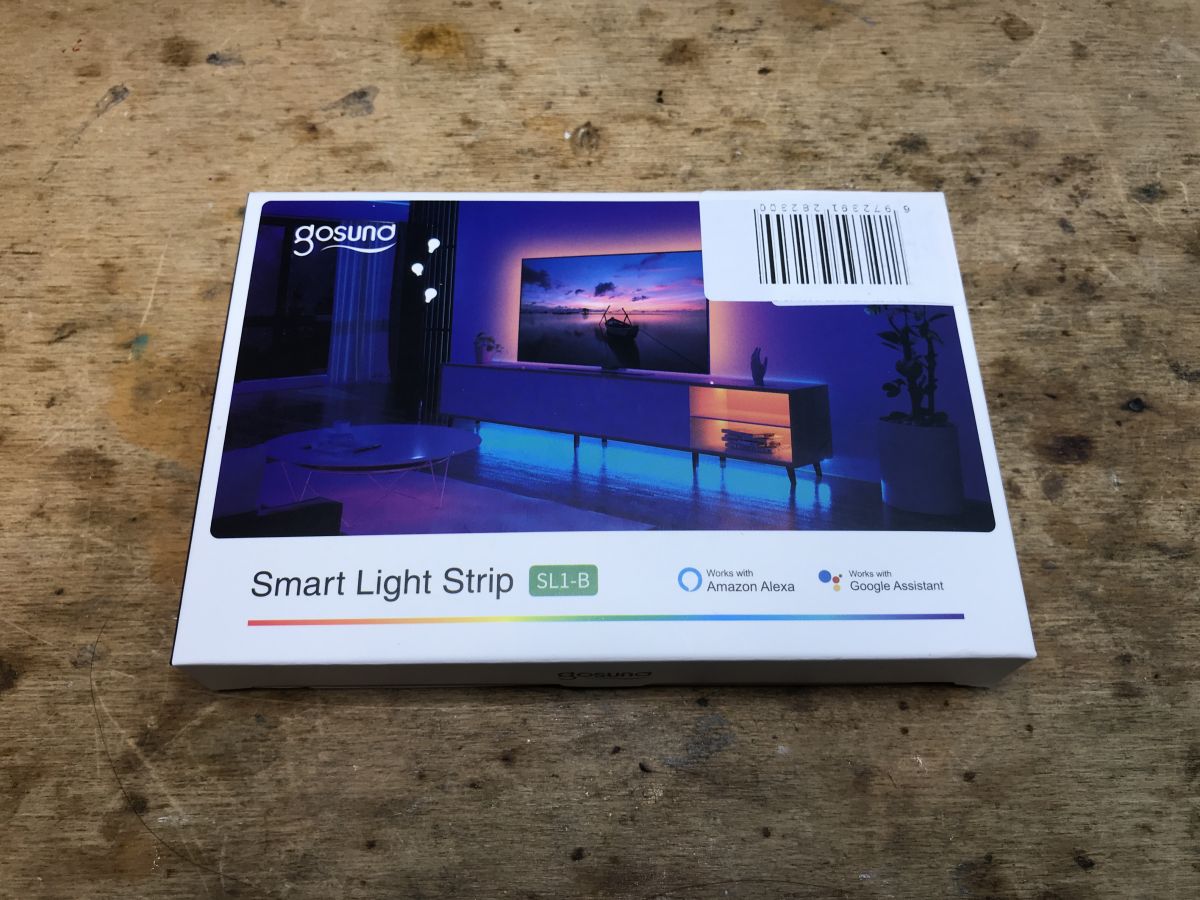
Packaging upon receipt of package:
.
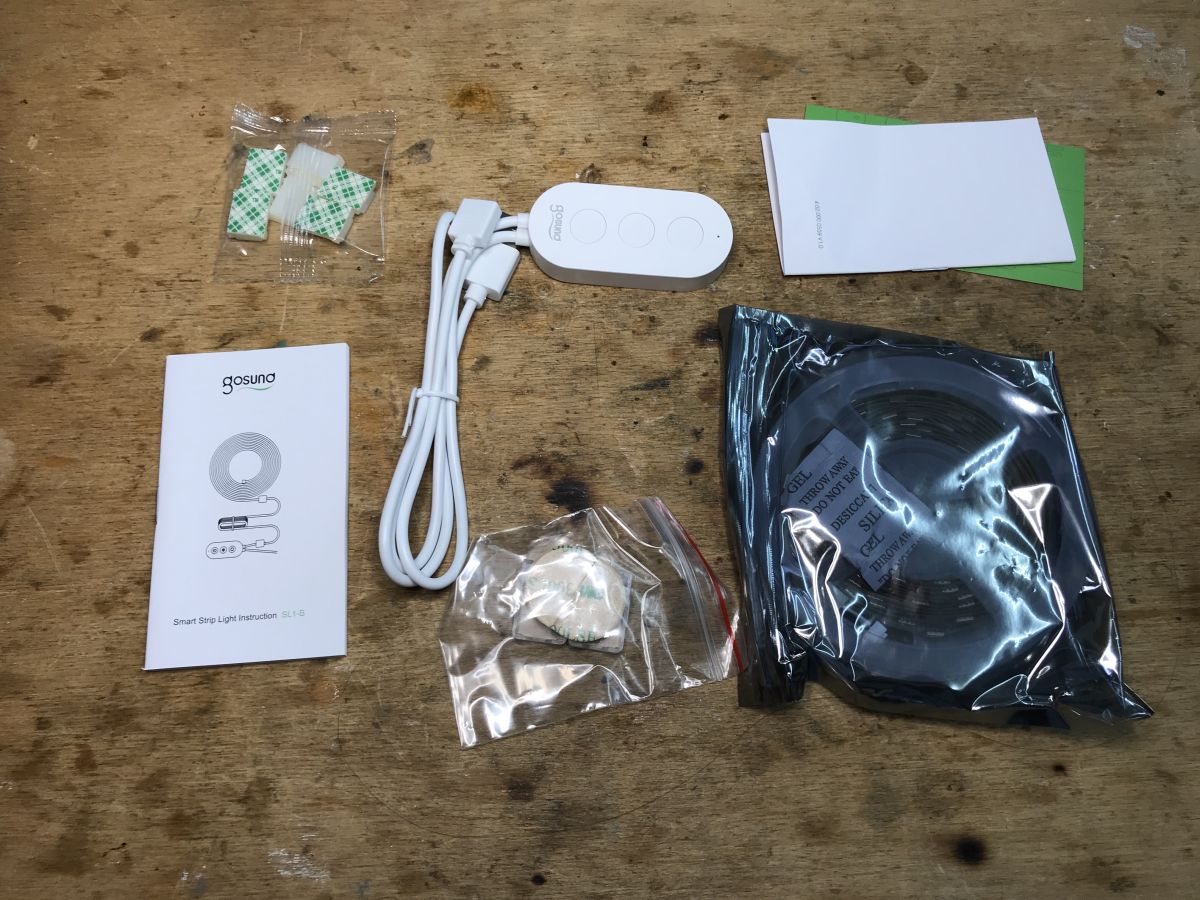
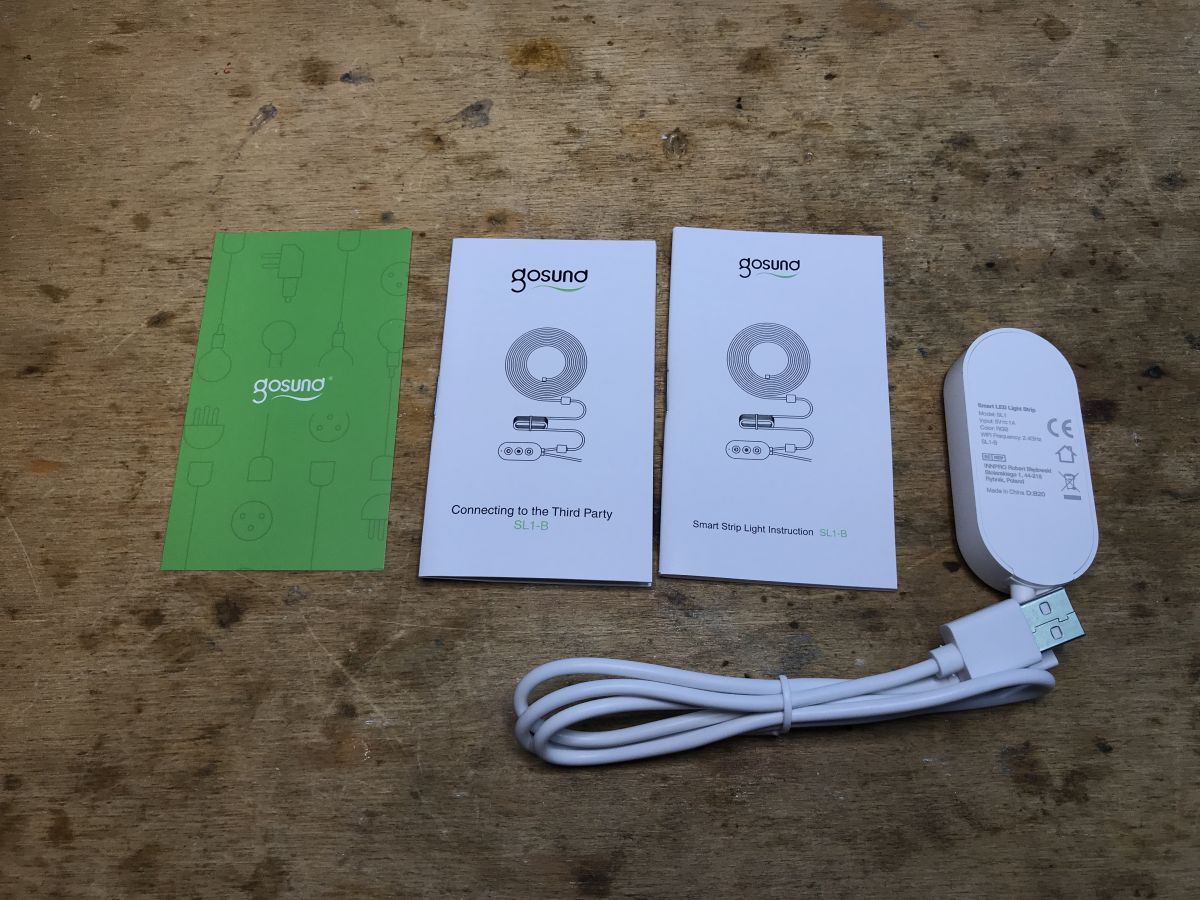
Kit contents:
.
Strap, instructions:
.
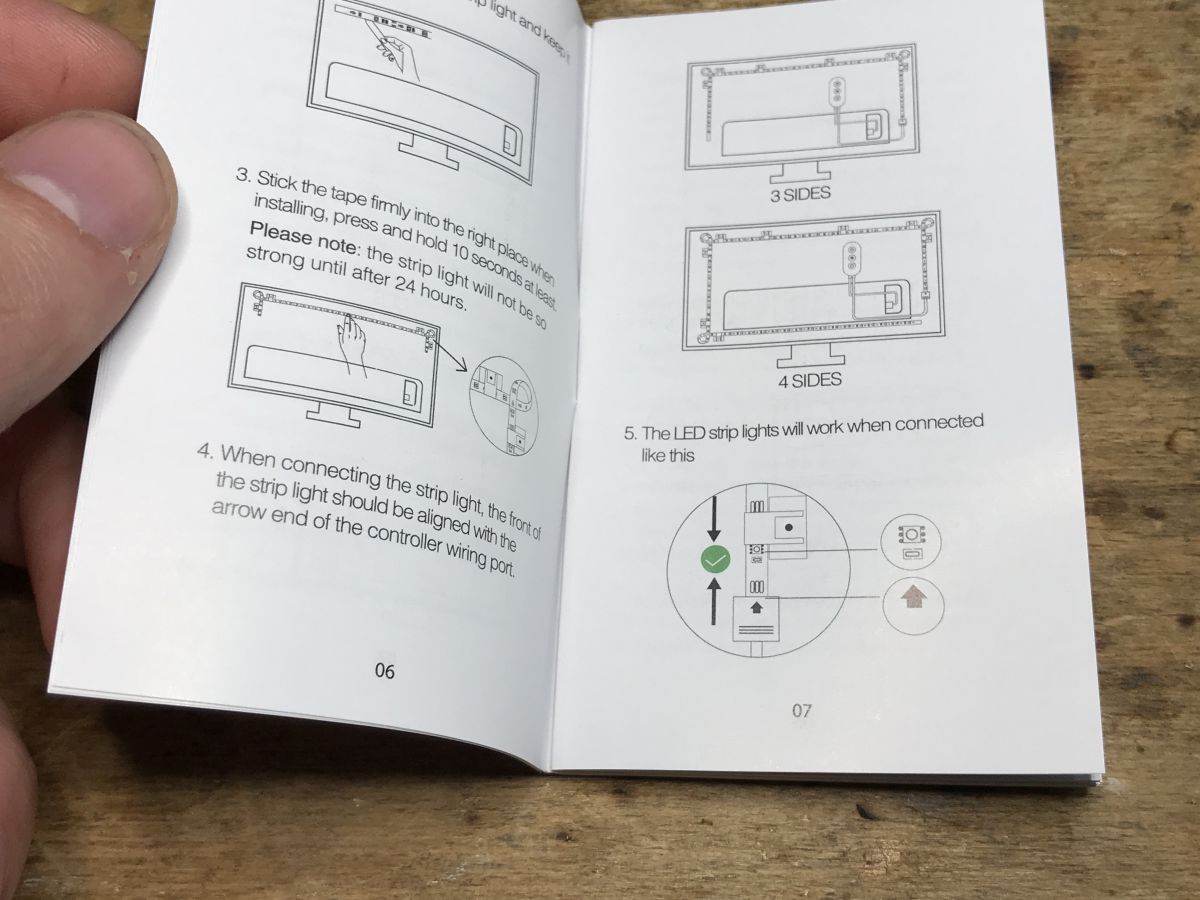
Instructions. To enable pairing, hold power 8 seconds.
.
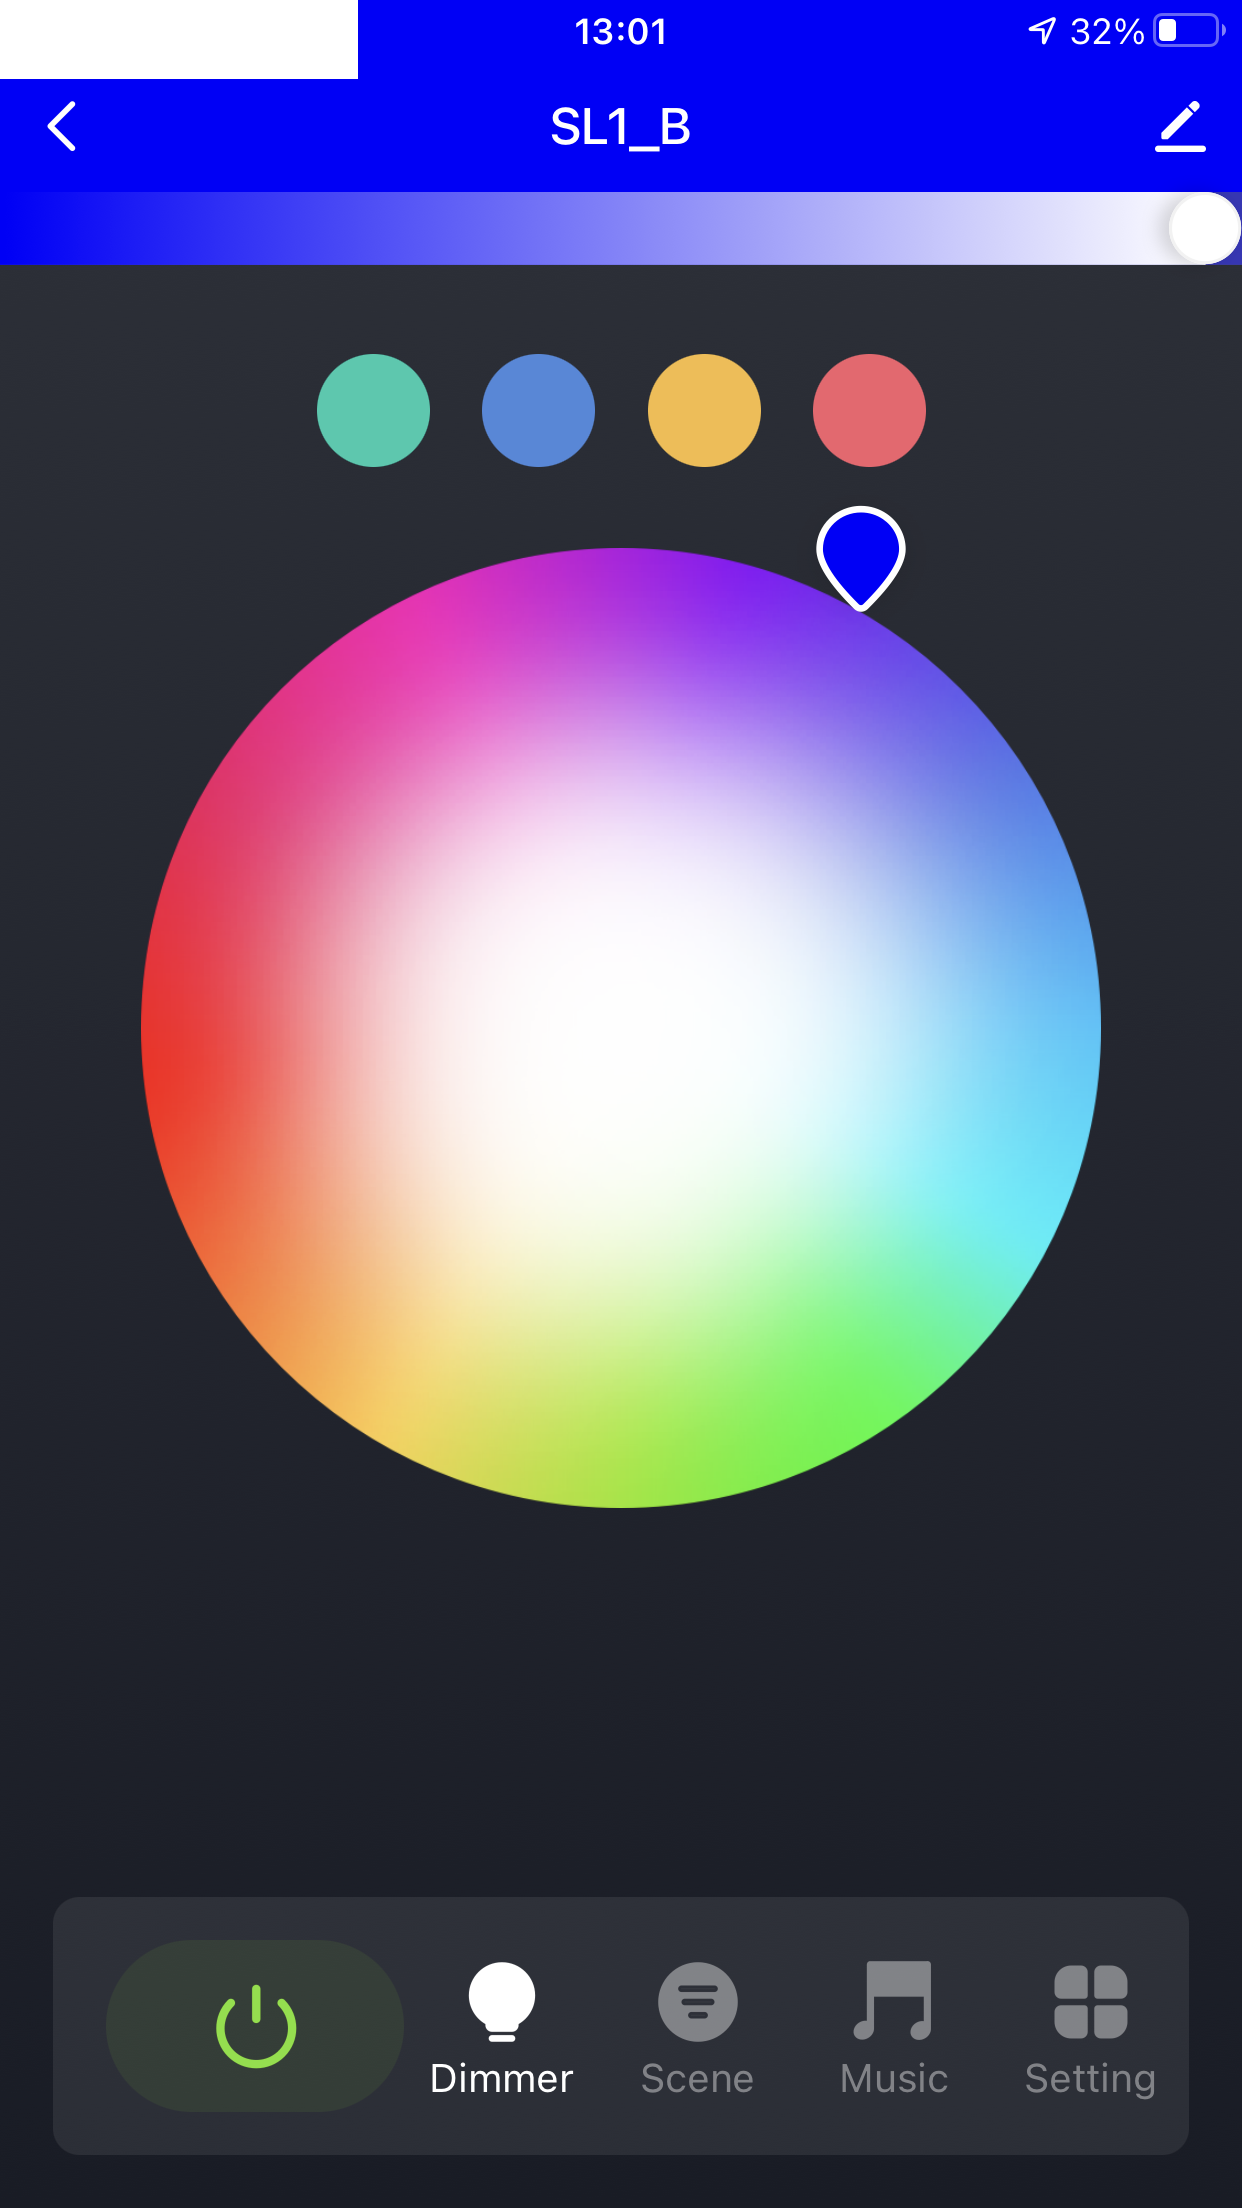
Effect:
.
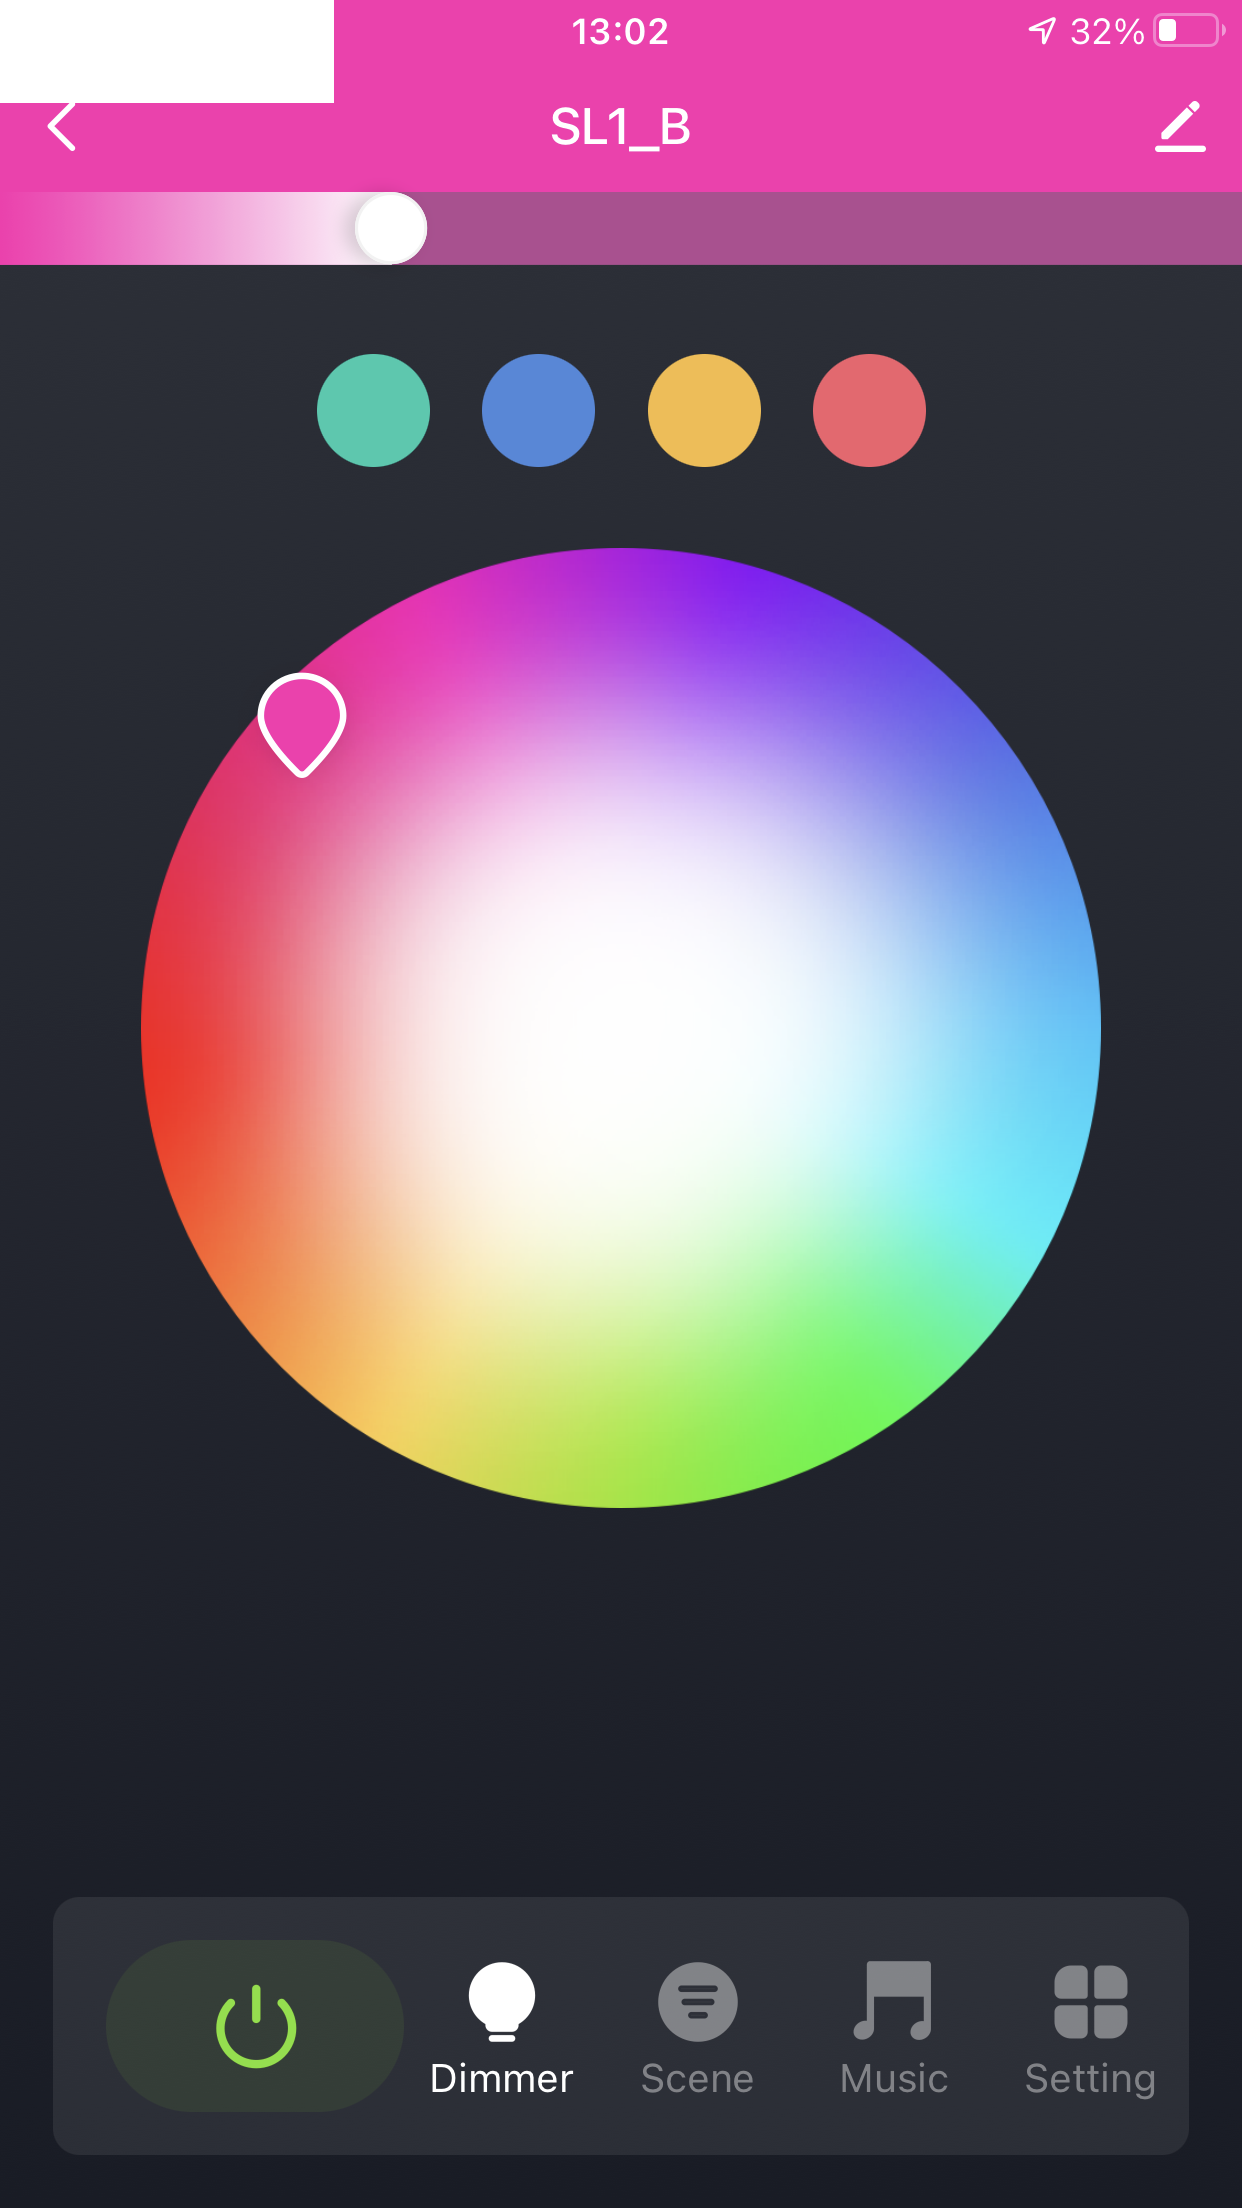
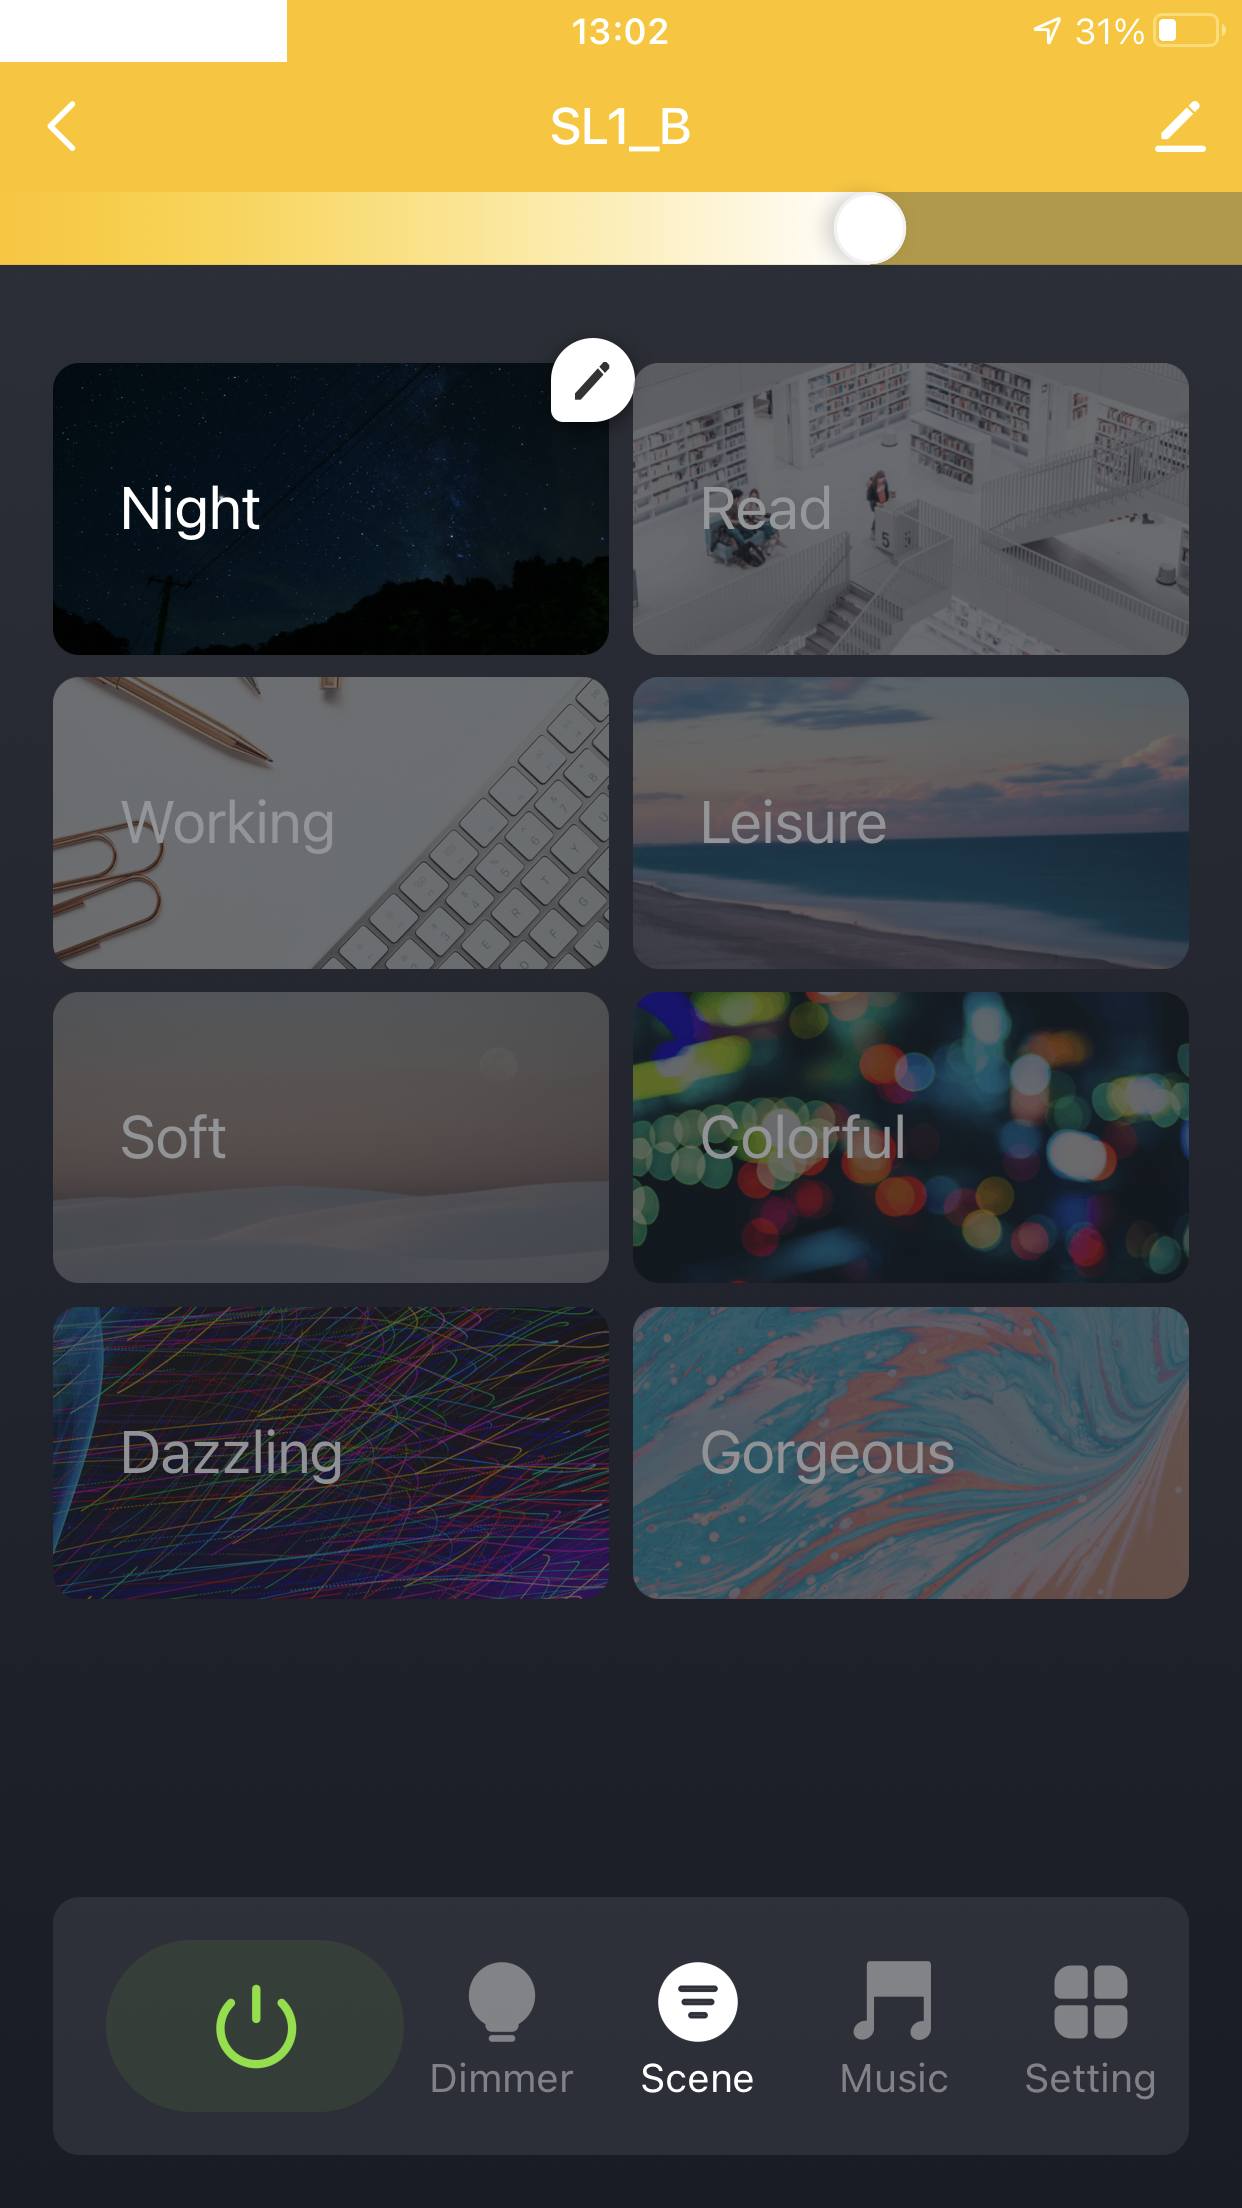
Test with Tuya app .
As usual - just a short test. The belt brand is Gosund, but you can pair it with Tuya. Zero problems.
.
.
.
.
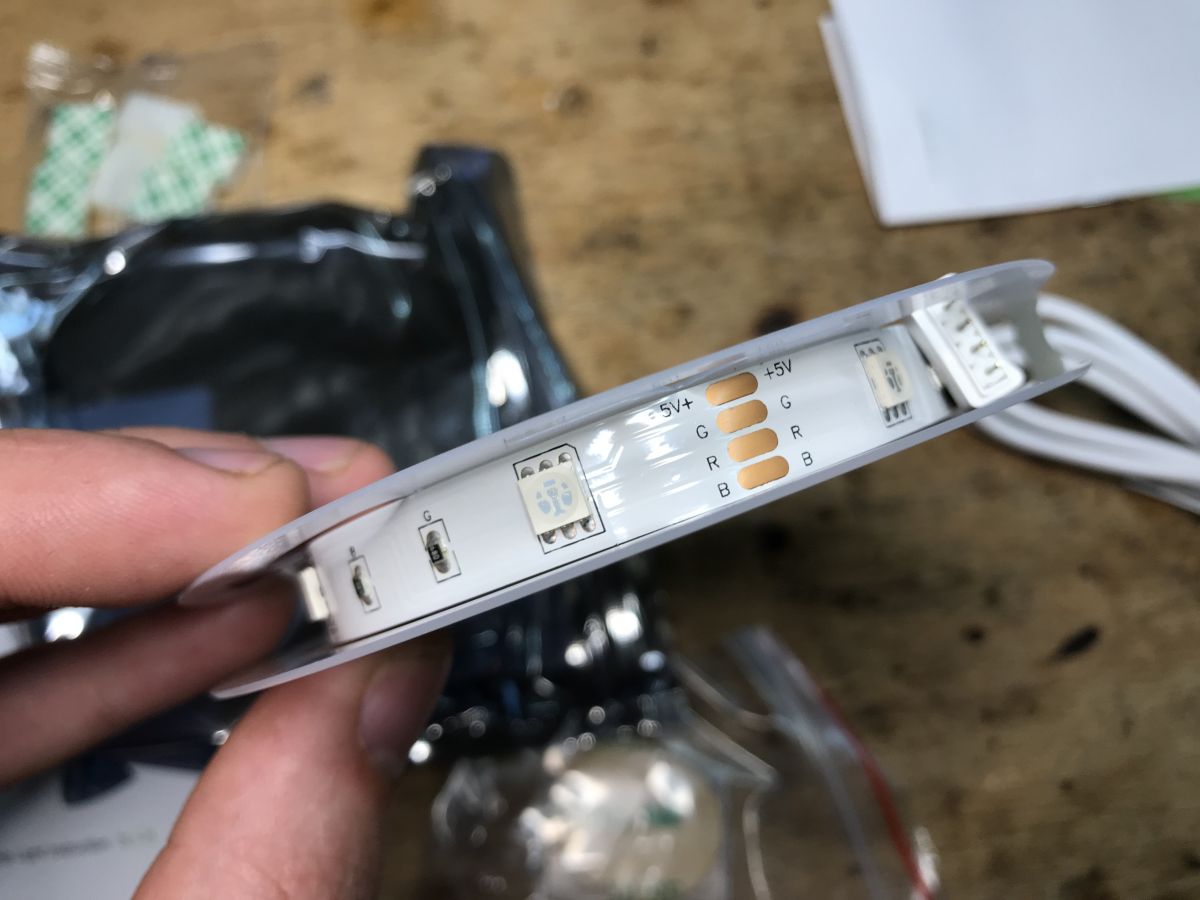
Bar marking on the housing:
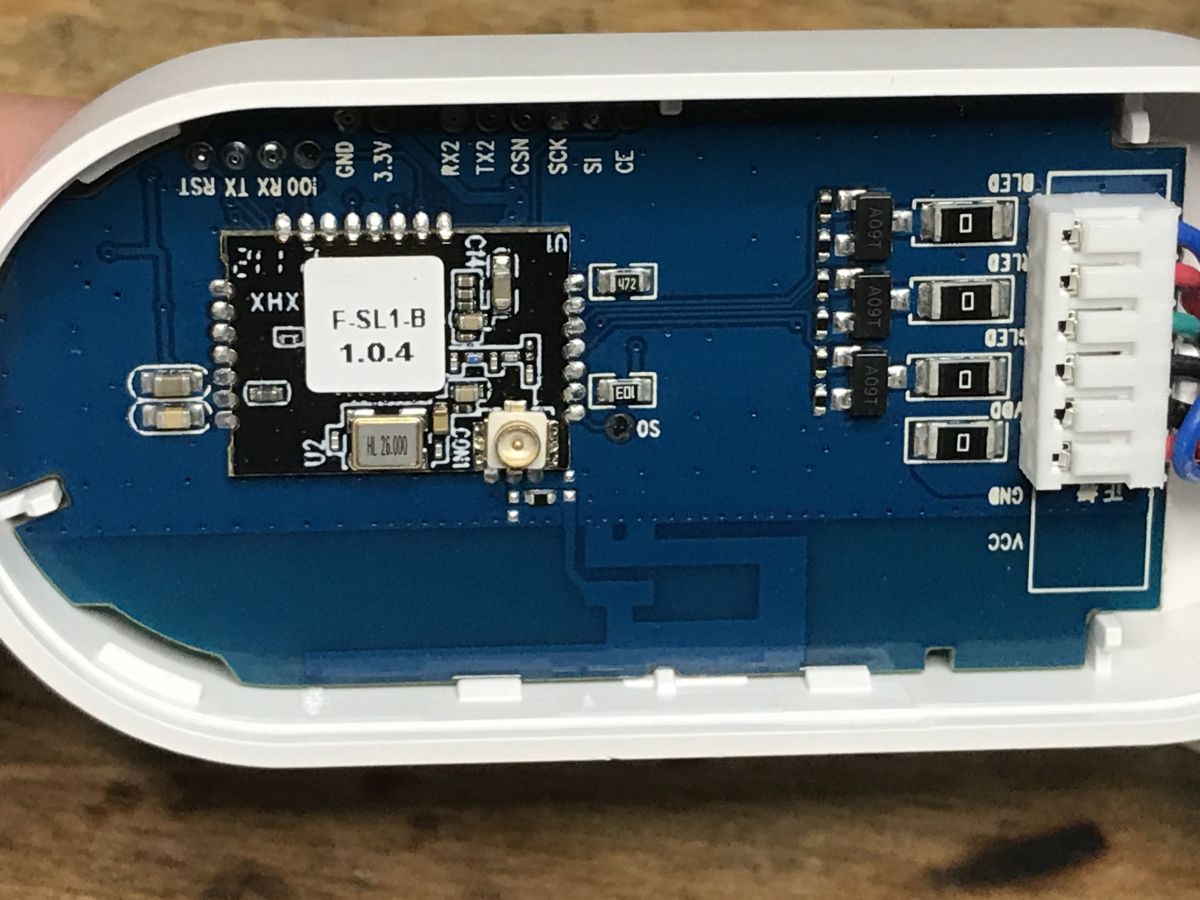
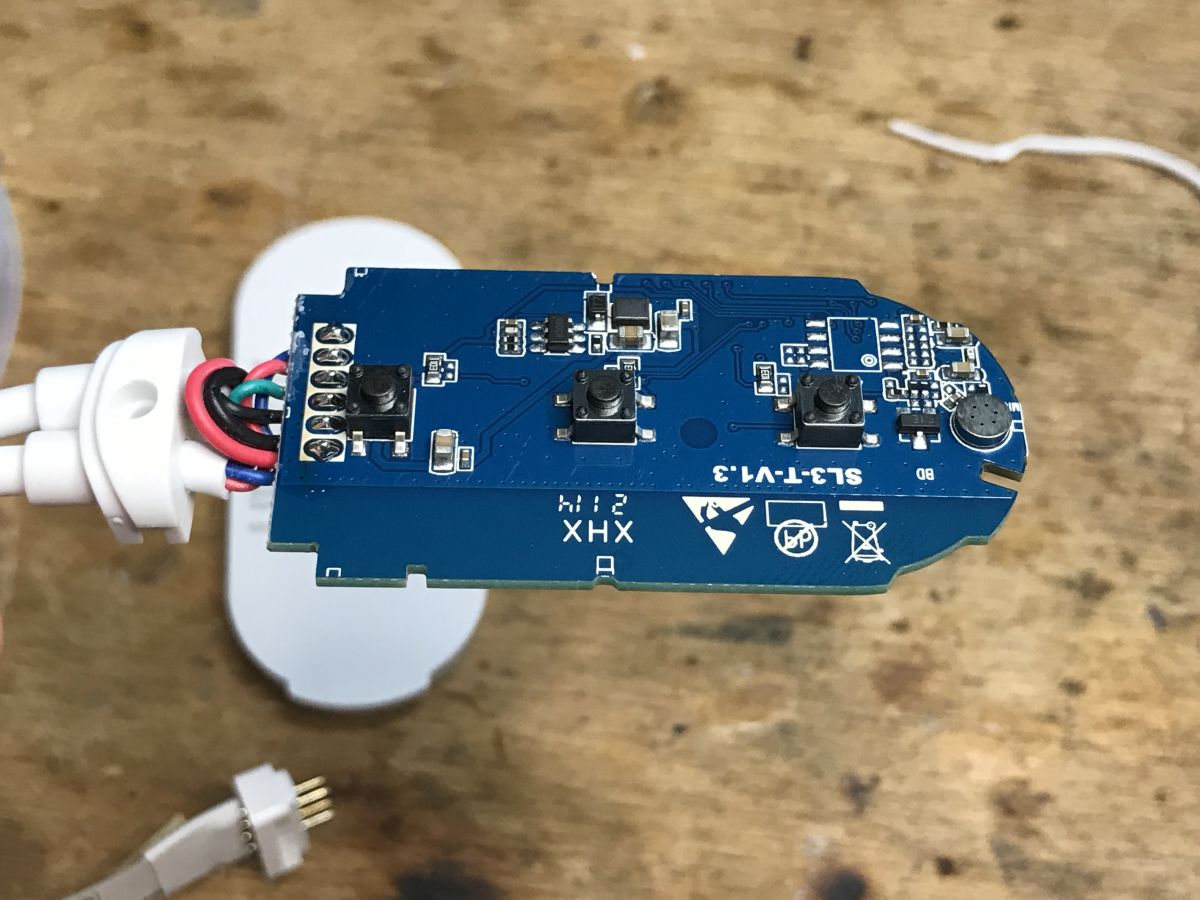
Interior of controller .
The housing simply needs to be levered up. Zero screws.
.
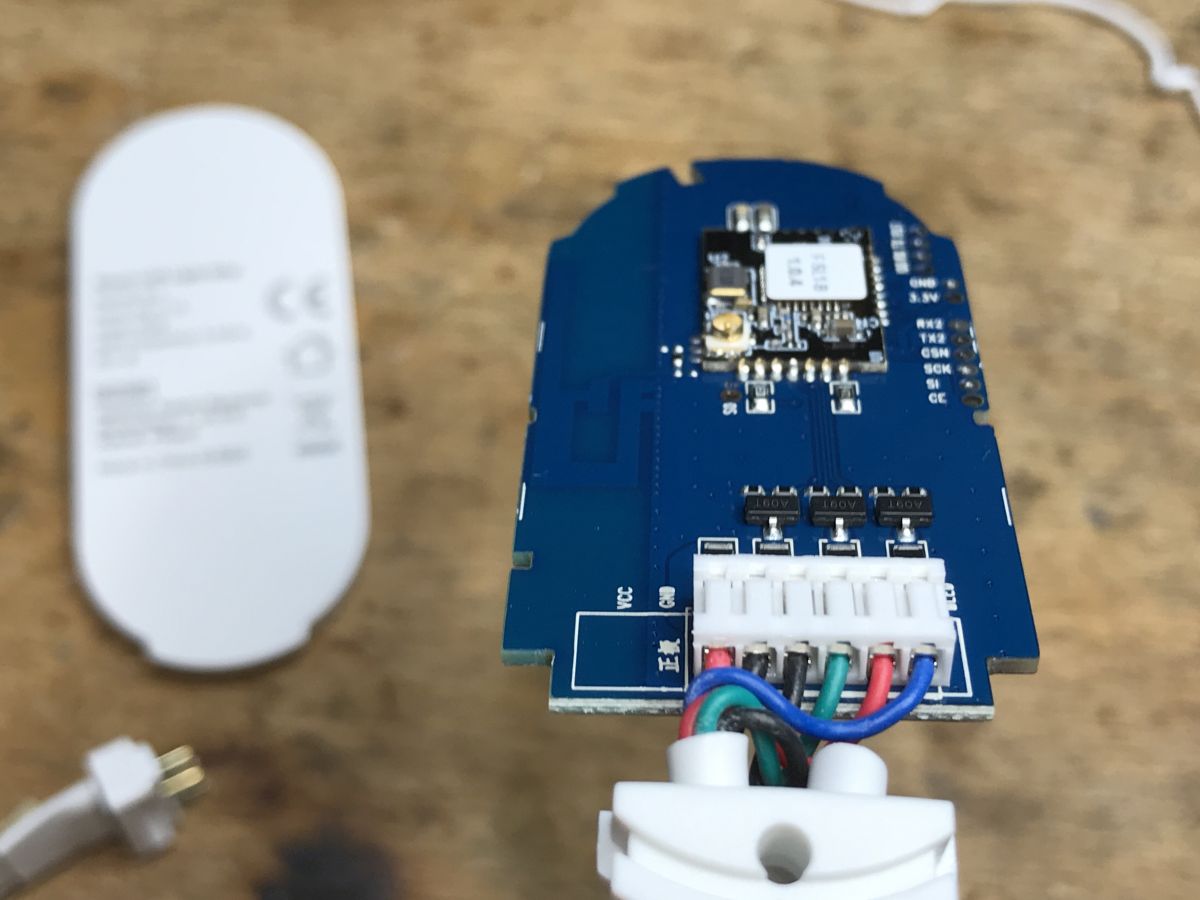
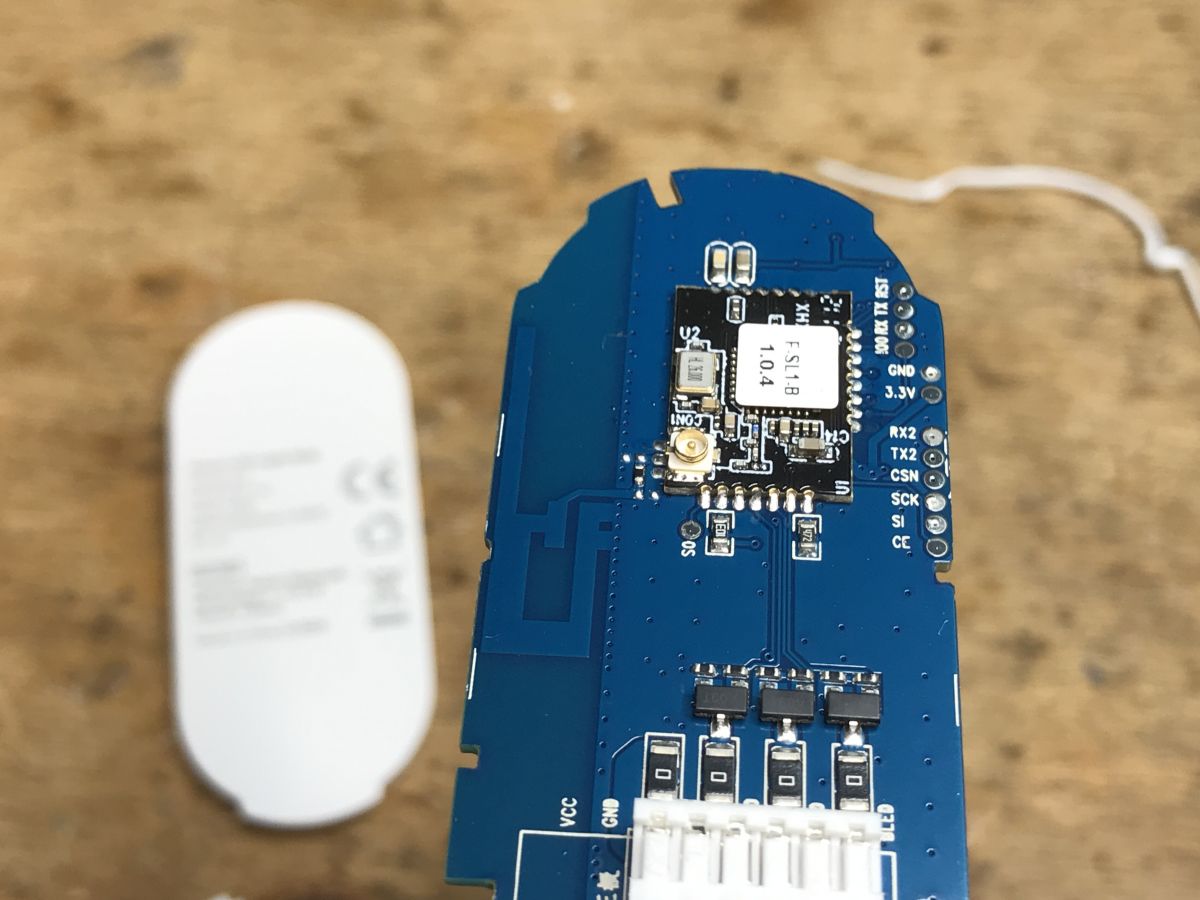
What is the WiFi module? We'll see in a moment. There are also three A09T transistors, one per channel.
.
A09T is an AO3400. N Channel MOSFET:
.
.
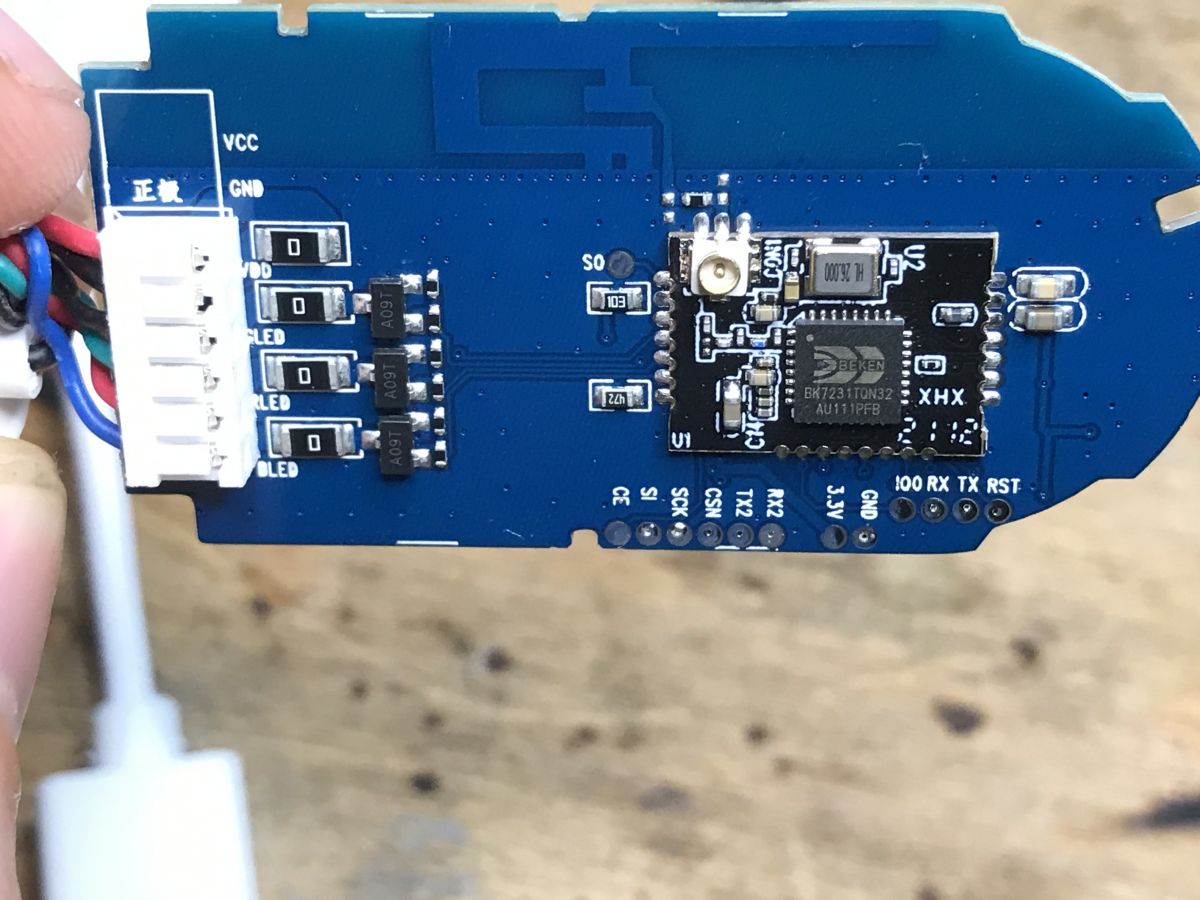
Apparently IO0 is the pin for ESP, but TX2 and RX2 suggest Beken (BK7231 has separately UART 1 for programming and UART 2 with log output - printf).
.
On the bottom is a step down inverter giving 3.3V, a qGDCH (unless it's an LDO? Seemingly at 5V it would make sense... at 12V less so), and a microphone along with a small transistor, probably some amplification. There's also room for a chip in SOIC8 - could it be that another version of this strip supports RF?
Removing the sticker:
.
BK7231T! OpenBeken can be uploaded.
Change batch Change batch.
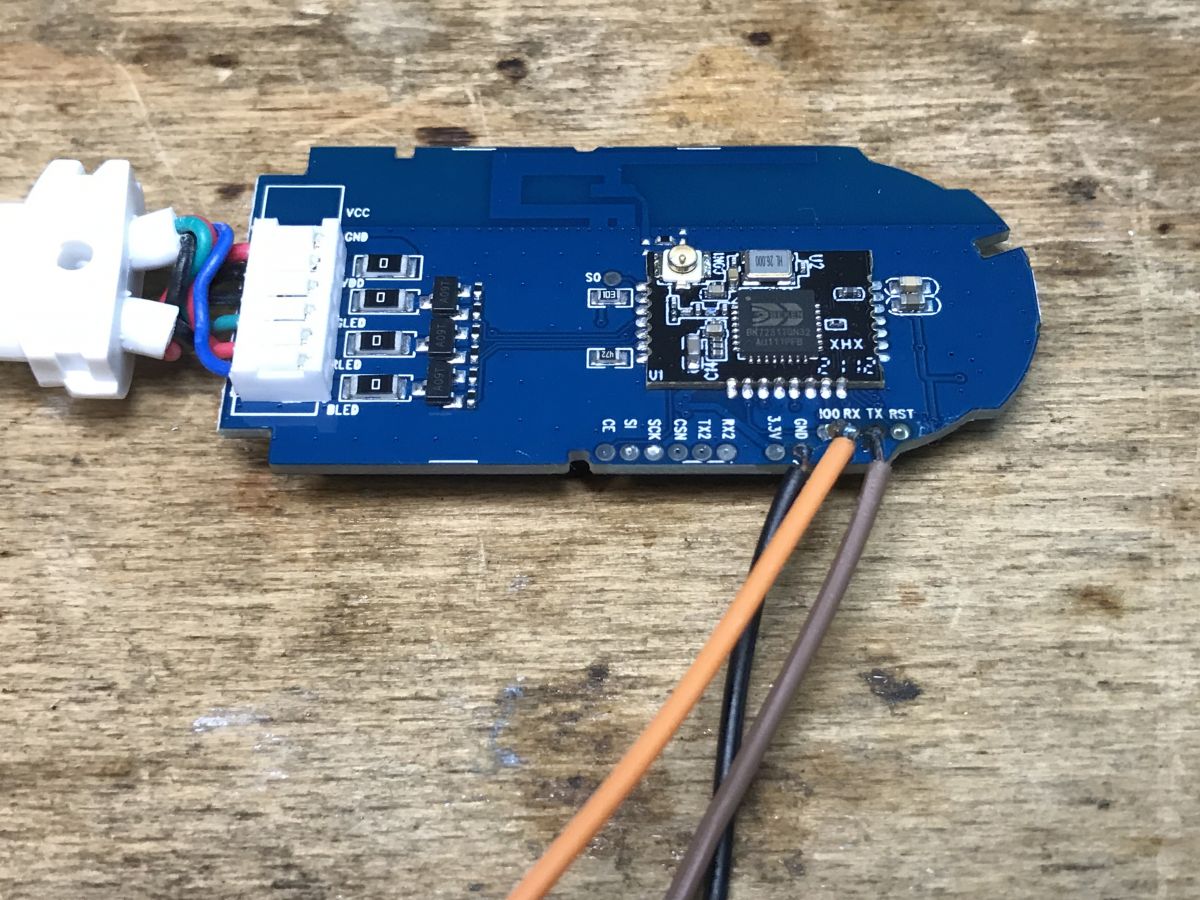
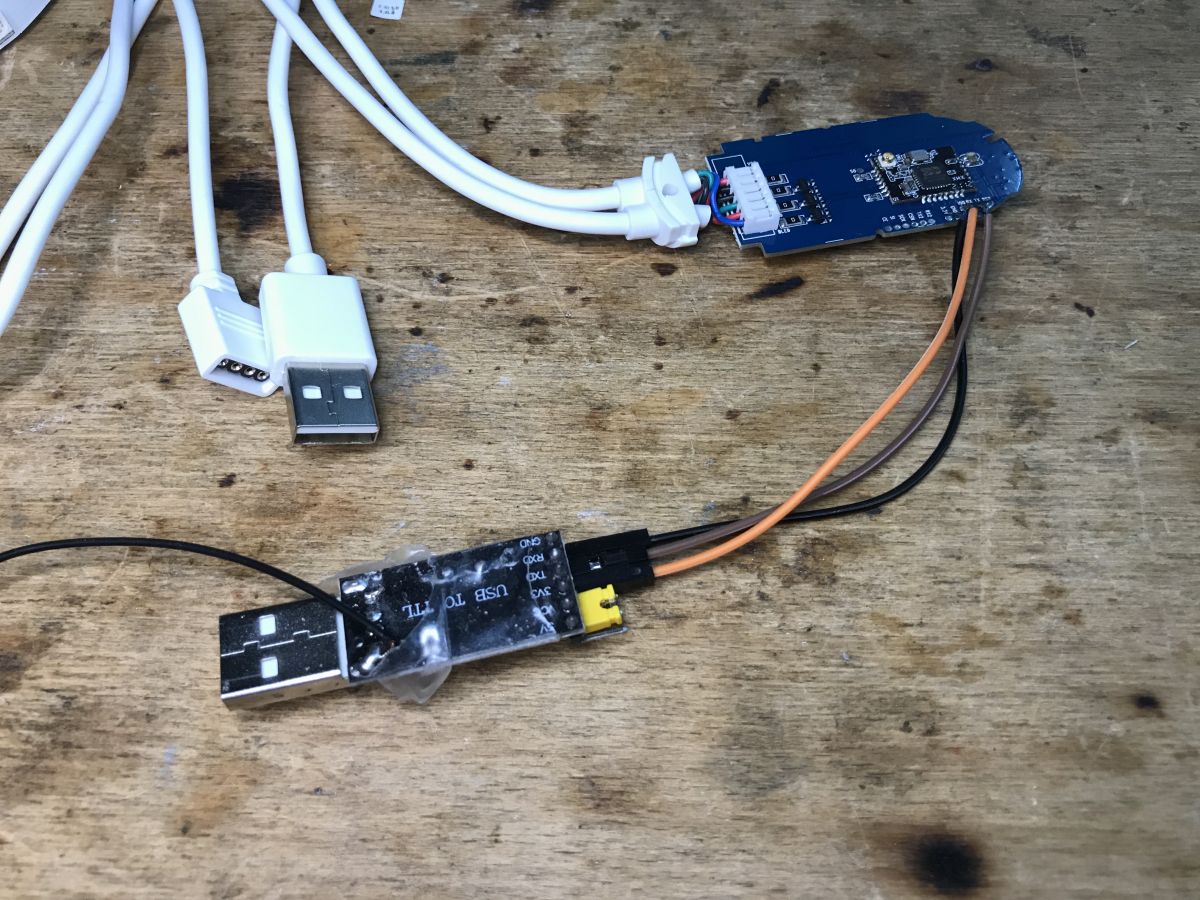
Standard - we only solder RX and TX and ground. We don't even need the power supply, as we can use the USB connector. Then a USB to UART converter in 3.3V mode. Then bkWriter 1.60 and there we upload the batch, doing a RESET by cutting the power (i.e. removing the USB plug from the socket), of course the USB to UART converter must be connected all the time.
.
Interesting fact: In the pictures you can also see the pads from SPI, i.e. those SO, SI, CLK.... because the BK7231 can also be programmed in SPI mode. I have a program on Github for this:
https://github.com/openshwprojects/BK7231_SPI_Flasher I tested the program with this very bar - it works. You can even change the BK batch after losing the bootloader, just in this SPI mode.
But you can read about it here:
BK7231 programming via SPI in flash memory mode - Python and Banana Pi .
OpenBeken configuration .
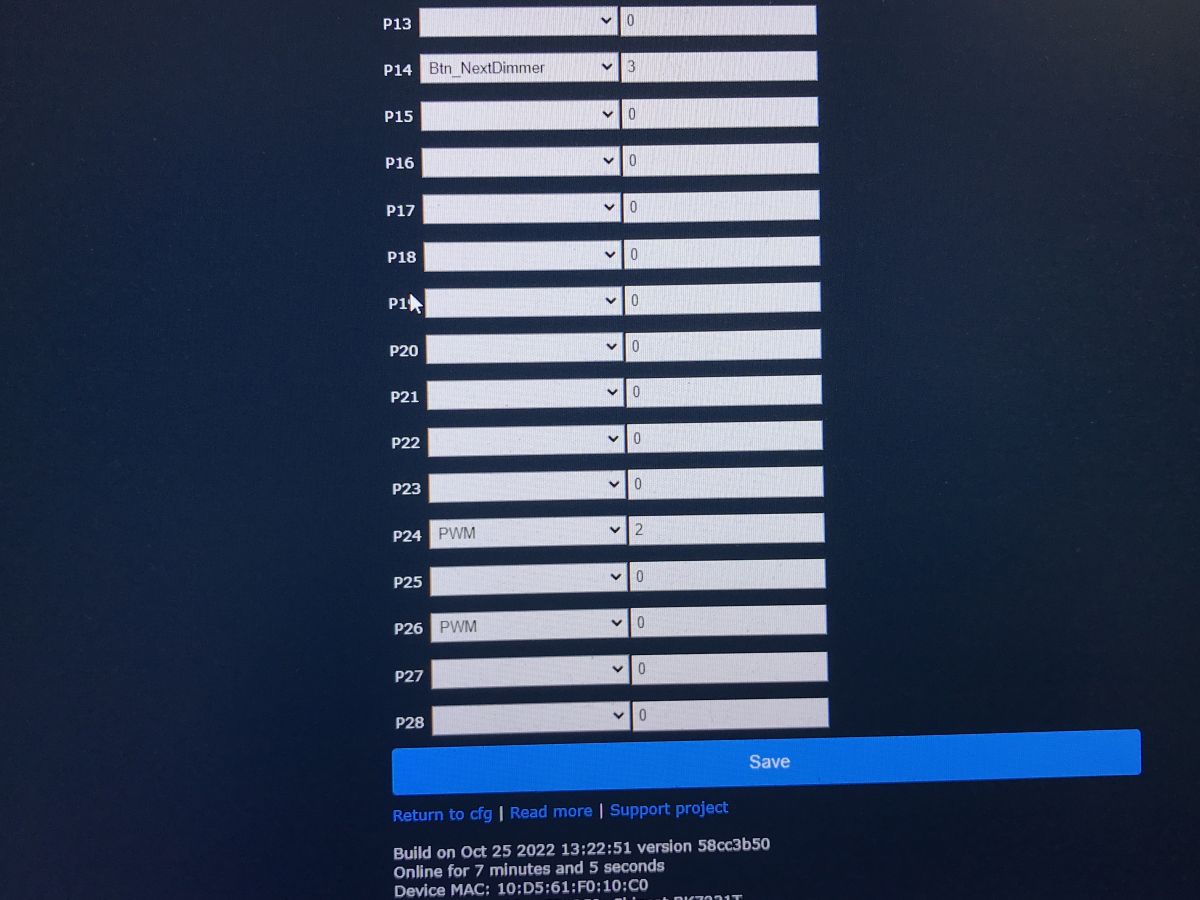
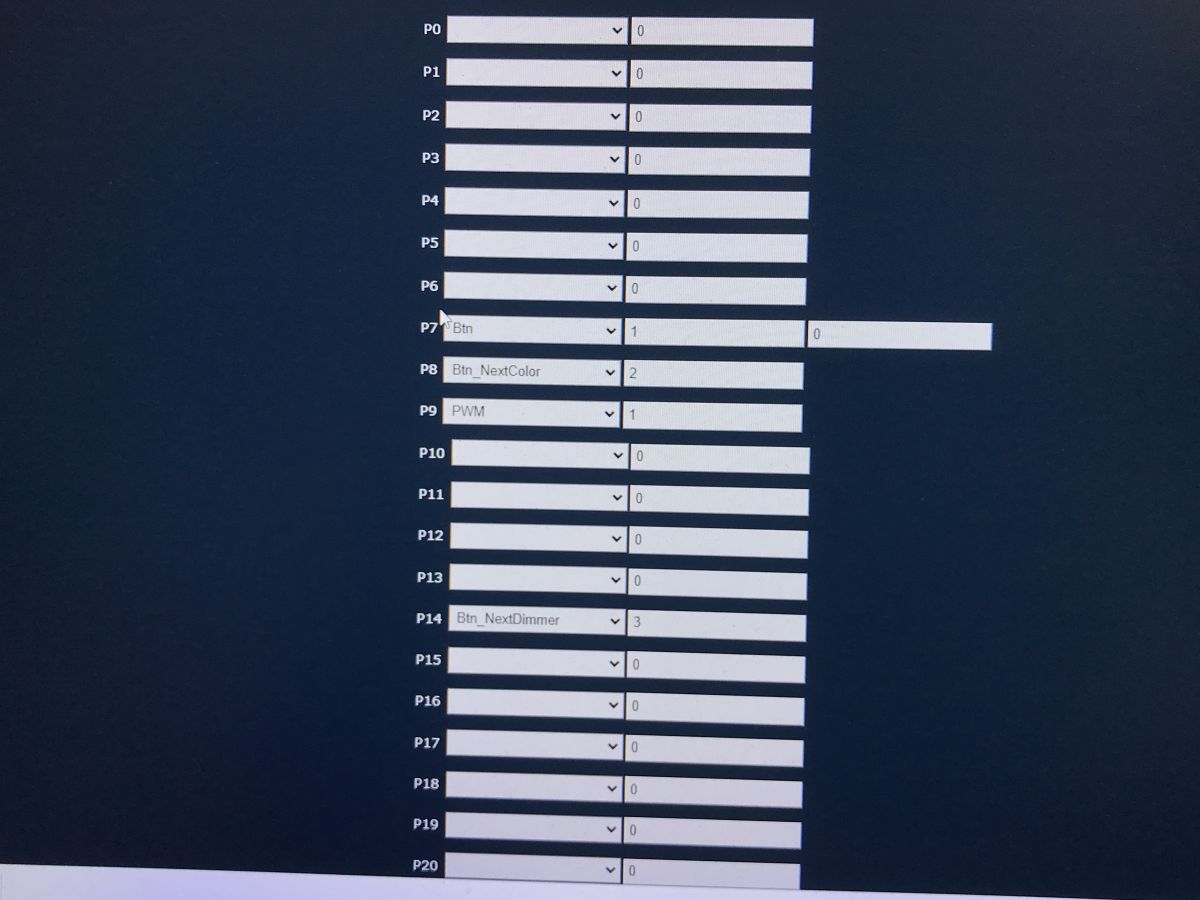
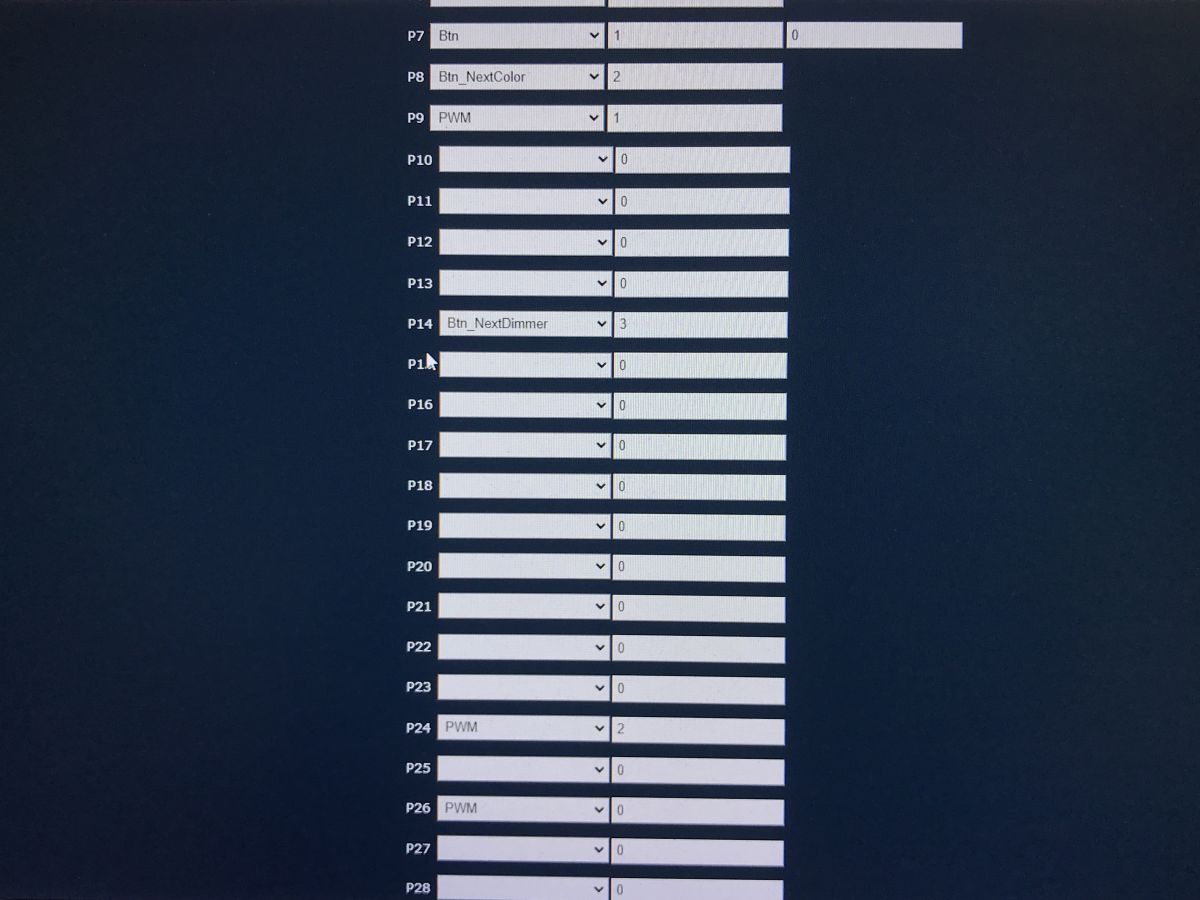
The OpenBeken configuration boils down to setting three PWM pins (because we have three colours) and three pins with Button roles, or more precisely with special Button roles for that.
We will use here:
- Button - a normal button (turns the bar on/off)
- Button_NextColor - a special button that sets the next colour
- Button_NextDimmer - a special button that changes the brightness of the bar when held down
Here is my configuration:
.
That's it. Zero additional scripting.
Configuration of Home Assistant is done as usual - either via Yaml generation or via Discovery.
The effect of the operation in the video:
.
Summary .
Very cool belt. USB power, buttons on the case, and an open source batch that frees you from the manufacturer's servers.... there's everything you need.
The only thing you'll still have to wait for is microphone support - as that's not in OpenBeken yet, but that's probably the least important thing.
It will definitely find its place in my house and will come in very handy - I have already manually modified one bar once so that it has buttons - I simply brought out the free pins of the WiFi module separately for the buttons and configured it accordingly in OBK. Here you don't even have to play around like that - the buttons are ready, you just need to configure them.
About Author
p.kaczmarek2 wrote 14701 posts with
rating 12748 , helped 656 times.
Been with us since 2014 year.
TL;DR: Gosund SL1-B draws 5 V × 1 A (5 W) and gives you "buttons that free you from the phone" [Elektroda, p.kaczmarek2, post #20272246] Flash OpenBeken in under 30 s for full local control. Why it matters: quick, local RGB lighting without cloud lock-in.
You get a 2.8 m RGB strip, a USB-powered controller with three buttons, adhesive tape, and a brief manual. No USB power supply is bundled [Elektroda, p.kaczmarek2, post #20272246]
Can I power the strip directly from a TV USB port?
Only if the port delivers 1 A. Many TV USB 2.0 ports supply 0.5 A max [USB-IF, 2012]. Undersupply causes random resets or dim light — a common failure edge-case [Elektroda, p.kaczmarek2, post #20272246]
How do I pair the strip with the Tuya / Smart Life app?
Hold the power button for 8 s until the LEDs blink rapidly, then add “Lighting (Wi-Fi)” in the Tuya app and follow prompts [Elektroda, p.kaczmarek2, post #20272246]
Connect a 3.3 V USB-UART adapter; keep USB power plugged for 5 V.
Use bkWriter 1.60 to upload the OpenBeken BIN, cycling USB power for reset [Elektroda, p.kaczmarek2, post #20272246]Tip: “The whole flash takes <30 s” [OpenBeken Docs, 2023].
What GPIO roles are needed in OpenBeken?
Assign three PWM pins to Red, Green, Blue and set the buttons as Button, Button_NextColor, and Button_NextDimmer. No scripting required [Elektroda, p.kaczmarek2, post #20272246]
Can this strip display multiple colours simultaneously?
What happens if I open the housing—does it void warranty?
Prying the clip-on shell leaves visible marks and typically cancels retailer warranty, as the unit lacks screws and carries tamper stickers (typical policy) [“Electronics Warranty Guide”].
Is there latent RF support on the PCB?
Pads for an SOIC-8 footprint and SPI lines suggest space for an RF transceiver in other variants, but it is unpopulated here [Elektroda, p.kaczmarek2, post #20272246]
How do the three physical buttons behave after flashing?
 .
.
 .
.
 .
.
 .
.
 .
.

 .
.
 .
.
 .
.
 .
.
 .
.
 .
.
 .
.
 .
.
 .
.
 .
.
 .
.
 .
.
 .
.

Comments