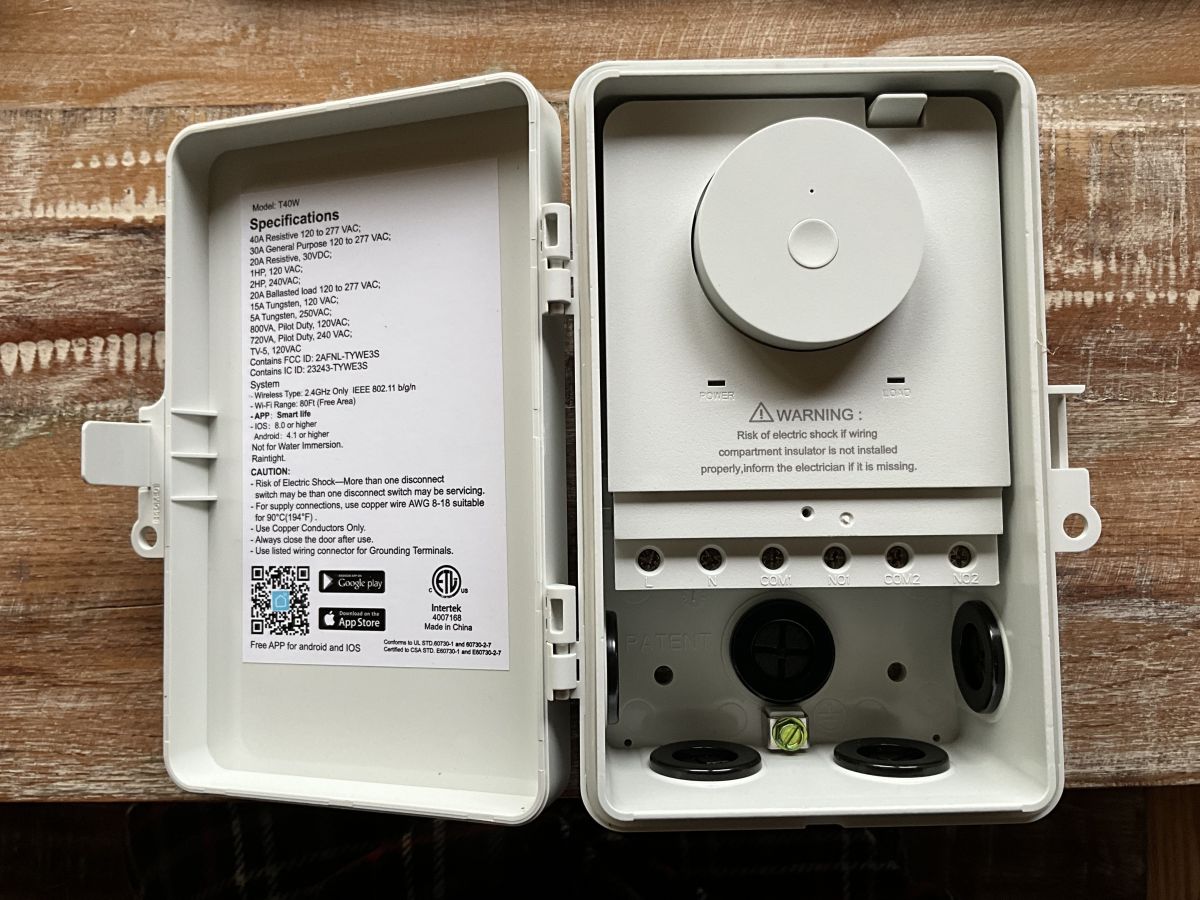
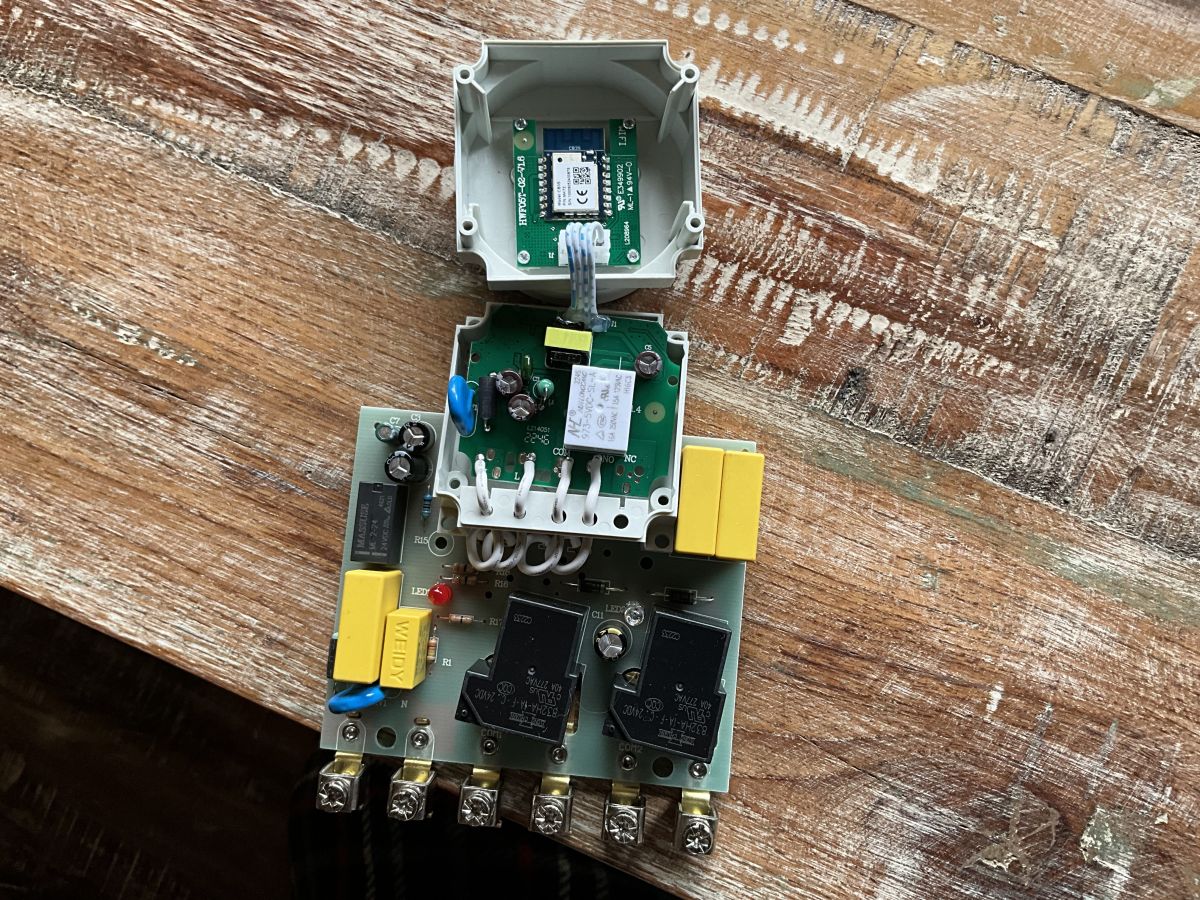
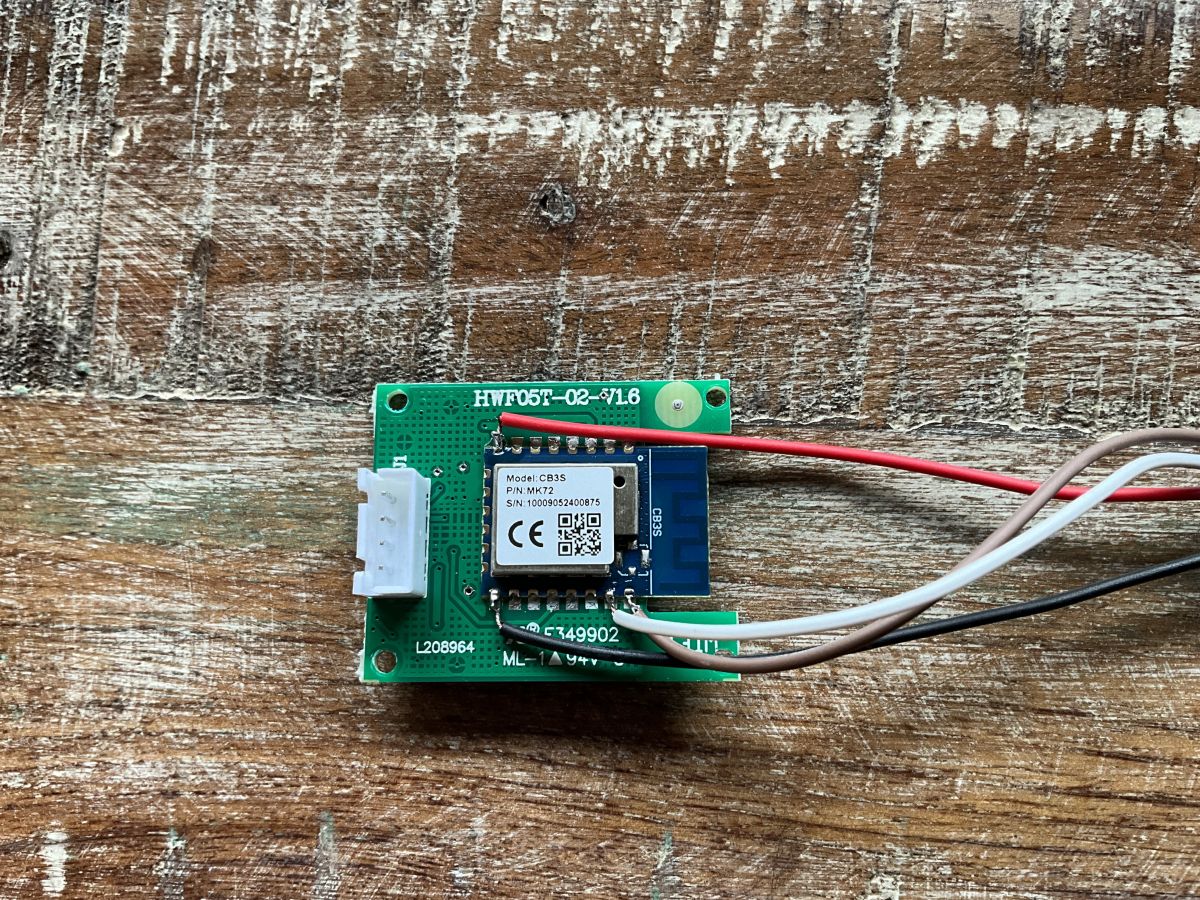
Suraielec UBTW01B 40A outdoor plug arrived with a CB3S/BK7231N module, despite the inside-door specs listing TYWE3S/ESP8266.
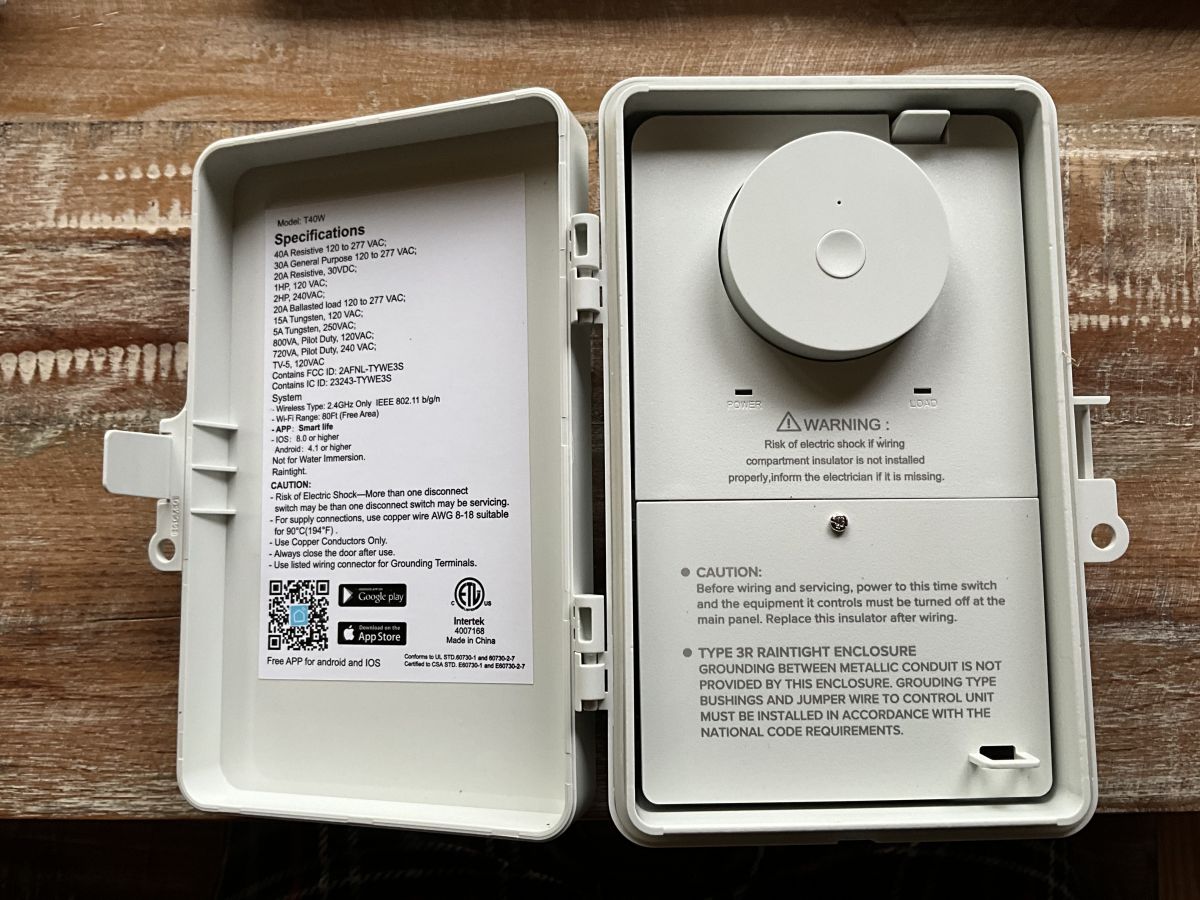
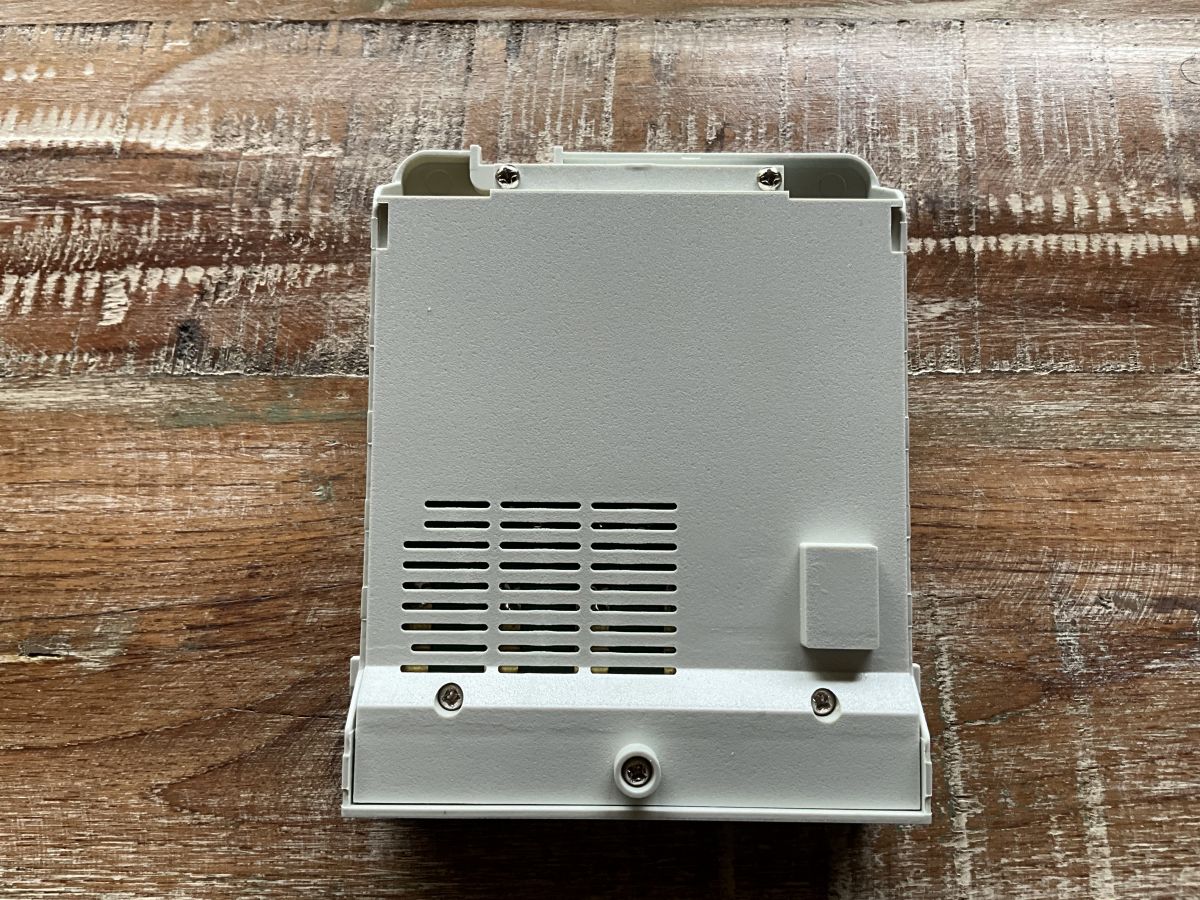
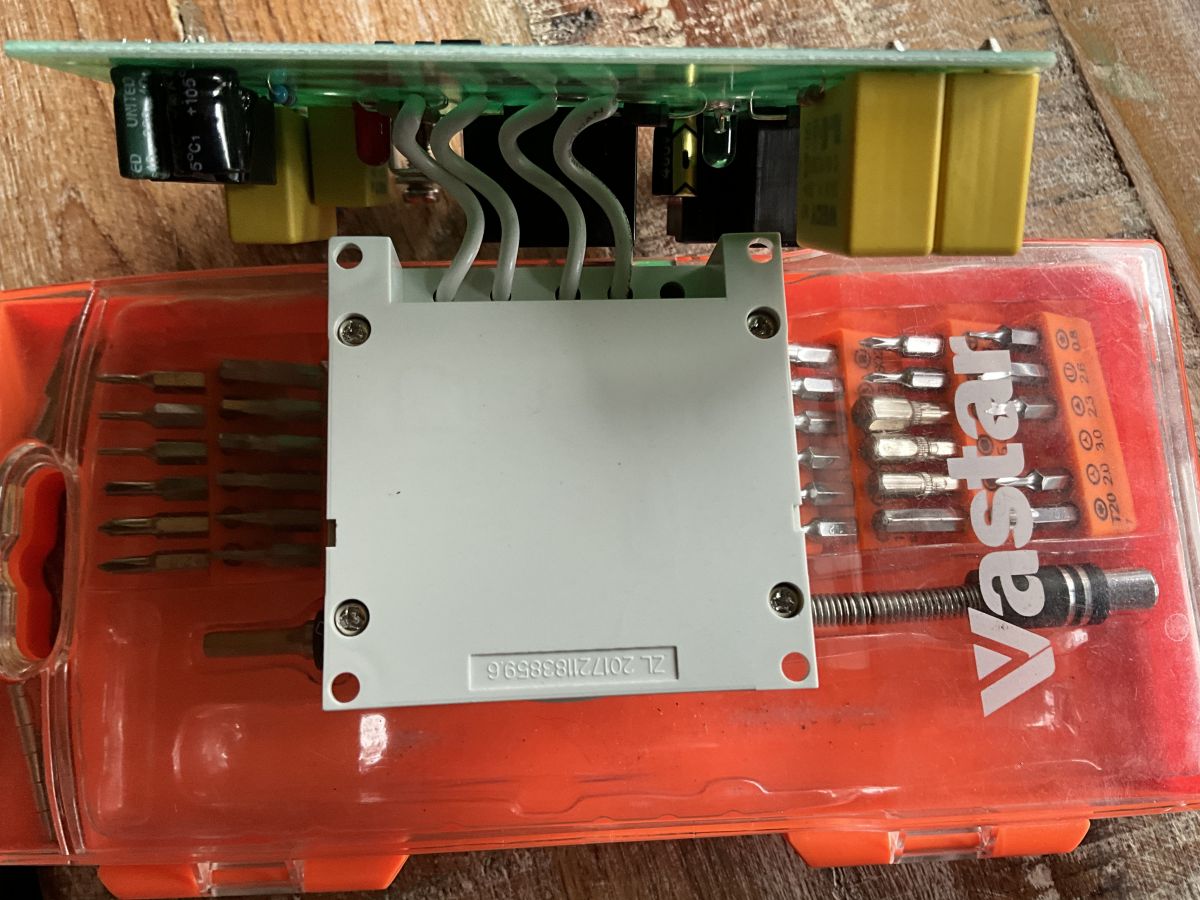
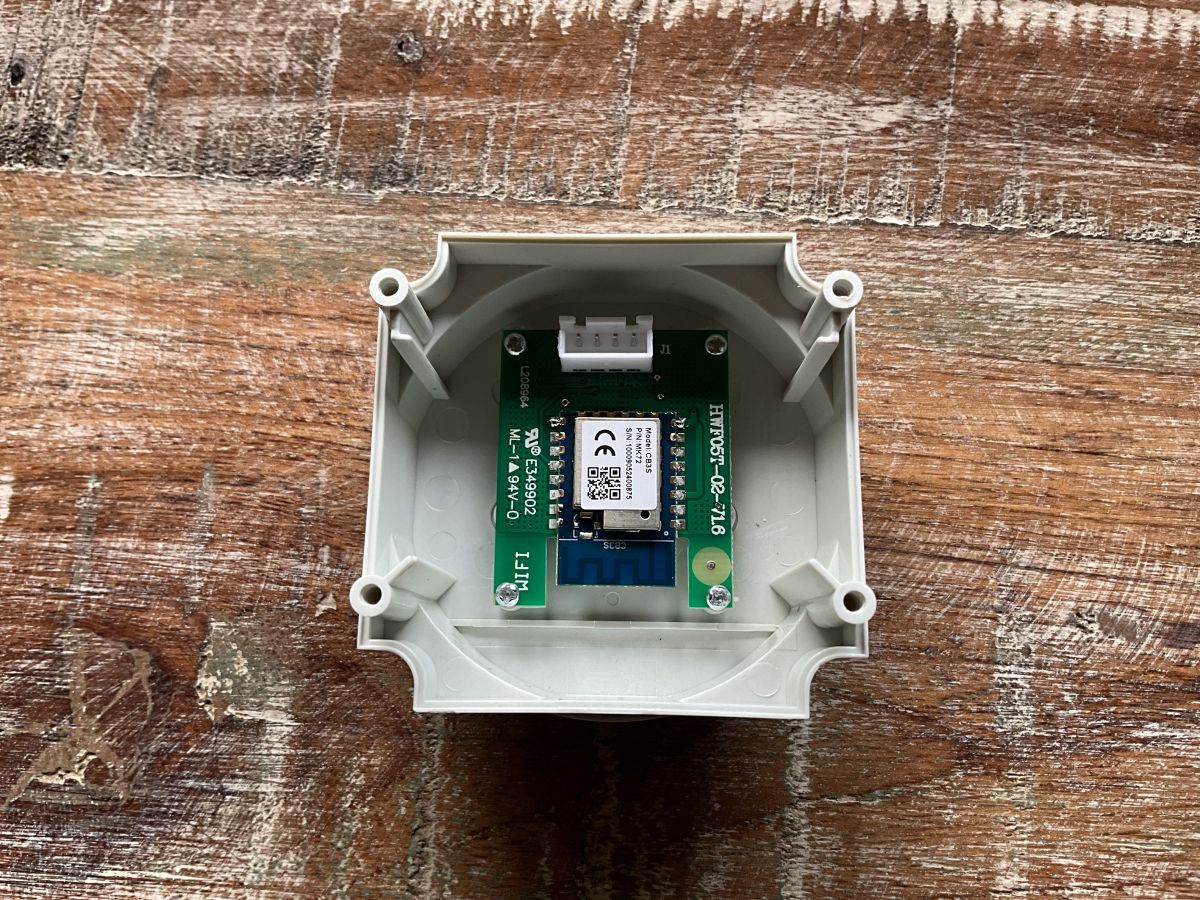
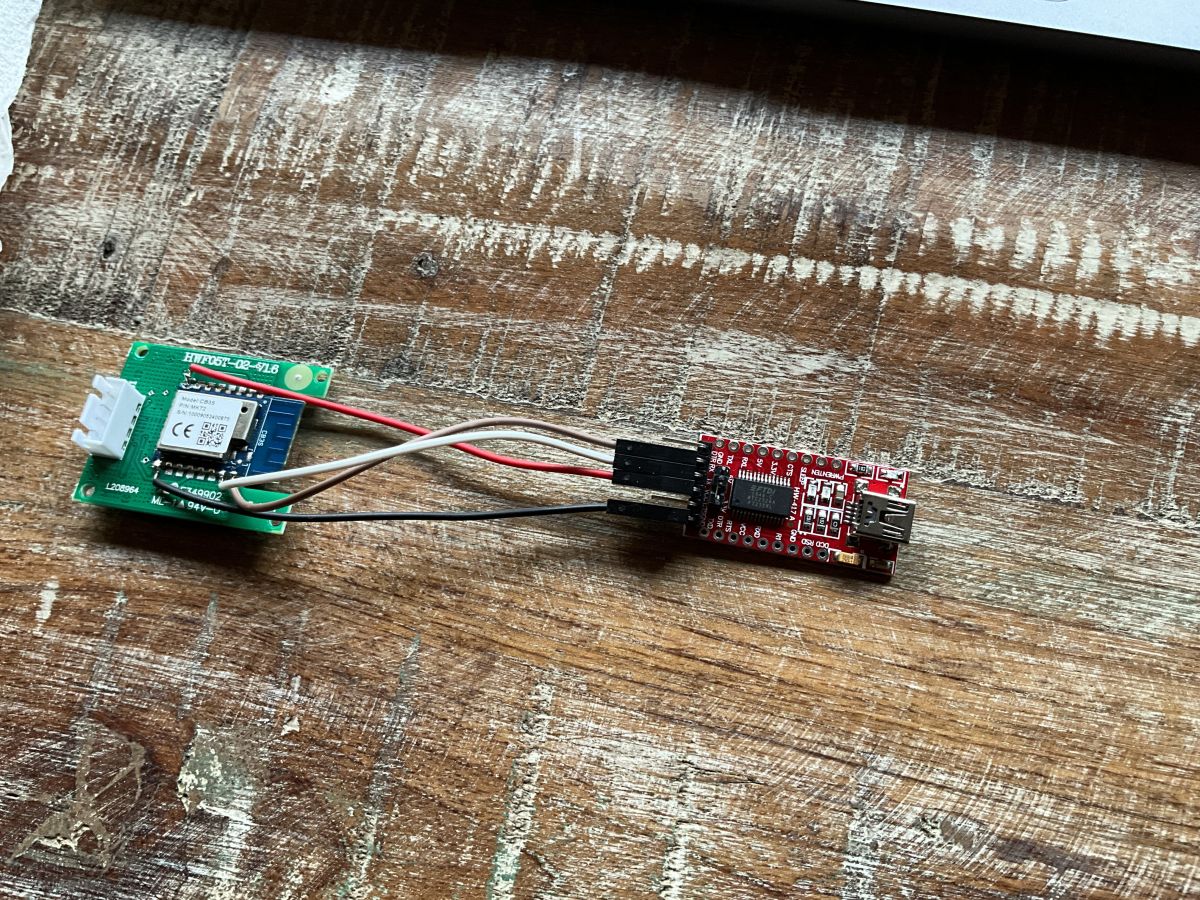
Disassembly exposed the module easily, and TX/RX were unconnected, so flashing did not require removing the board module.
Continuity probing mapped GPIO6 to the button, GPIO8 to the LED, and GPIO24 to the relay.
BK7231GUIFlashTool accepted the write after holding the button for about four seconds during flashing.
Firmware backup failed in the GUI tool, but the device flashed, configured, and appeared in Home Assistant.
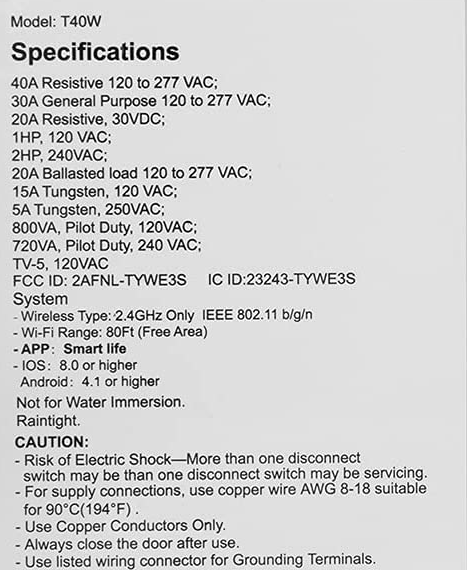
I purchased this device with the impression it included a TYWE3S module (ESP8266), but it instead came with a CB3S module (BK7231N). The specifications on the inside of the door even list this device's module as a TYWE3S, so I was surprised to find something else. I had never worked with a Beken chip, but thankfully found this community and OpenBeken 👍
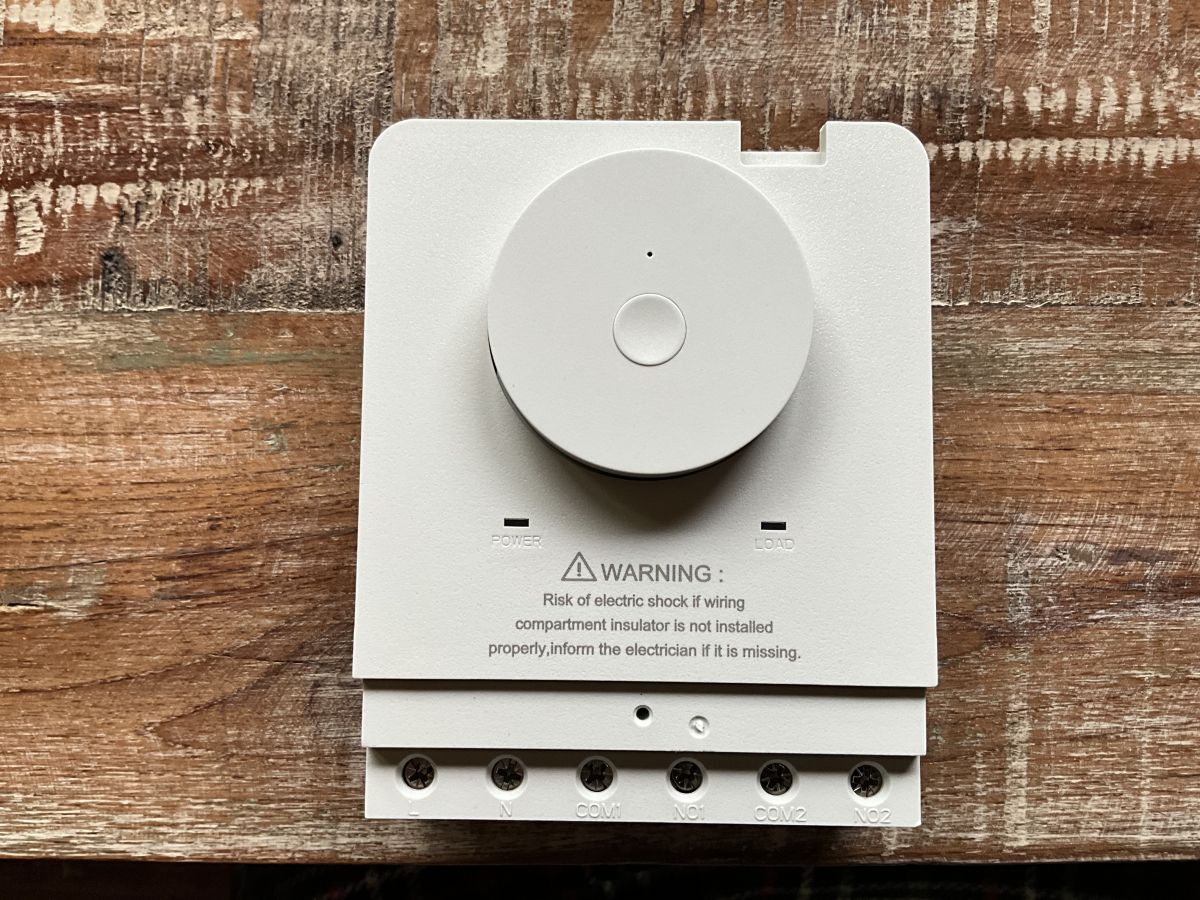
Disassembly is straightforward to reach the module. There are eight phillips head screws, and four 3mm tri wing screws to contend with. Here are pictures of the disassembly:
TX and RX on this device are not connected to anything, so there is no need to remove the module from the board to flash it.
I probed the board with a multimeter in continuity mode to discover the GPIO mapping and found this:
GPIO6 - Button
GPIO8 - LED
GPIO24 - Relay
I was not able to backup the firmware on the module using the GUI tool (https://github.com/openshwprojects/BK7231GUIFlashTool), but the module accepted the write just fine. To place the module into the correct mode to flash it, all I had to do was start the firmware write in the GUI tool, then press and hold the button on the module for about four seconds. That caused the module to reboot and accept the flash.
Here is my JSON template:
Code: JSON
Log in, to see the code
After flashing and configuring, I followed this guide to make the device populate in Home Assistant: https://youtu.be/pkcspey25V4
Please let me know if you have any questions, I'll be happy to answer them!
About Author
ericbarber wrote 2 posts with
rating 2 .
Been with us since 2023 year.
So they changed the chip inside and left the FCC-ID (2AFNL-TYWE3S) the same? Well, that's not the first time! Good job on flashing your device. Now you can also read about SSDP and PowerSave, as they may... [Read more]
ericbarber
10 Jun 2023 18:34
I didn't know about OpenBeken's GPIO interrogator until I had the device flashed and already probed everything out. I will definitely use this next time I come across one of these modules though; it's... [Read more]
p.kaczmarek2
10 Jun 2023 20:26
I was referring to automatic GPIO extraction, and not to the GPIO Doctor, but still, GPIO Doctor is also a very useful tool. [Read more]
FAQ
TL;DR: 3 GPIOs and “TX and RX” access make this Suraielec 40A UBTW01B fix practical for owners who expected TYWE3S/ESP8266 but found CB3S/BK7231N. Flash OpenBeken in-circuit, then set GPIO6 button, GPIO8 LED, and GPIO24 relay. [#20611418]
Why it matters: The same outdoor plug label can describe different Wi-Fi hardware, so firmware guides for ESP8266 may fail on a BK7231N unit.
Item
Expected module
Found module
Module marking
TYWE3S
CB3S
Chip family
ESP8266
BK7231N
Firmware route
ESP8266 tools
OpenBeken with BK7231GUIFlashTool
Label clue
FCC ID: 2AFNL-TYWE3S
Physical module says CB3S
Key insight: Verify the physical module before flashing. This unit can ship with CB3S/BK7231N even when the door specification still lists TYWE3S.
Quick Facts
The Suraielec UBTW01B case uses eight Phillips-head screws plus four 3 mm tri-wing screws before module access. [#20611418]
The discovered OpenBeken pin map is GPIO6 for the button, GPIO8 for the LED, and GPIO24 for the relay. [#20611418]
The CB3S module accepted a firmware write after starting BK7231GUIFlashTool and holding the module button for about 4 seconds. [#20611418]
TX and RX were not connected to other circuitry, so the module did not need removal for flashing. [#20611418]
The device still carried TYWE3S identifiers, including FCC ID 2AFNL-TYWE3S and IC ID 23243-TYWE3S, despite the CB3S/BK7231N module. [#20611418]
How do I flash OpenBeken onto a Suraielec 40A Outdoor Plug UBTW01B with a CB3S BK7231N module?
Flash OpenBeken in-circuit with BK7231GUIFlashTool after exposing the CB3S module. 1. Open the plug by removing eight Phillips screws and four 3 mm tri-wing screws. 2. Connect to the accessible serial pads, since TX and RX are unused by the board. 3. Start the write, then hold the module button about 4 seconds to reboot into flashing mode. Configure GPIO6, GPIO8, and GPIO24 after flashing. [#20611418]
Why might a Suraielec UBTW01B labeled as TYWE3S or ESP8266 actually contain a CB3S BK7231N module?
The manufacturer appears to have changed the internal Wi-Fi module without matching the printed identifiers. The inside-door specification listed TYWE3S, and the keywords included FCC ID 2AFNL-TYWE3S. The opened unit instead contained a CB3S module with a BK7231N chip. An expert reply noted, “that’s not the first time,” meaning such substitutions had been seen before. [#20611464]
What GPIO pin mapping is used for the button, LED, and relay on the Suraielec 40A Outdoor Plug UBTW01B with CB3S?
Use GPIO6 for the button, GPIO8 for the LED, and GPIO24 for the relay. The mapping was found with a multimeter in continuity mode. The JSON template assigns GPIO6 as Btn;1, GPIO8 as LED_n;1, and GPIO24 as Rel;1. The LED uses the inverted LED_n role, not a normal LED role. [#20611418]
How do I put the CB3S BK7231N module into flashing mode using BK7231GUIFlashTool?
Start the firmware write first, then press and hold the module button for about 4 seconds. That button hold reboots the CB3S module into the mode that accepts flashing. The reported unit did not require desoldering or module removal. The write completed even though the backup step failed in the GUI tool. [#20611418]
What should I do if BK7231GUIFlashTool cannot back up the original firmware but can still write OpenBeken?
Treat the failed backup as a real recovery limitation, then continue only if you accept losing the original image. In this case, BK7231GUIFlashTool could not back up the factory firmware. The CB3S module still accepted the OpenBeken write correctly. The edge case is clear: you may flash successfully but lack a vendor firmware backup for rollback. [#20611418]
How can I disassemble the Suraielec 40A Outdoor Plug UBTW01B to access the Wi-Fi module?
Remove eight Phillips-head screws and four 3 mm tri-wing screws to reach the Wi-Fi module. The thread describes the disassembly as straightforward. After opening the enclosure, the CB3S module and serial pads become accessible. Use a 3 mm tri-wing driver for the four security-style screws, not only a Phillips screwdriver. [#20611418]
What is OpenBeken and how is it used with BK7231N smart plugs?
“OpenBeken” is custom firmware that supports Beken-based Tuya devices, replacing cloud firmware with local configuration and smart-home integration. On this UBTW01B, it was flashed to a BK7231N chip on a CB3S board. After flashing, the user configured GPIO6, GPIO8, and GPIO24, then followed a guide to populate the device in Home Assistant. [#20611418]
What is the CB3S module and how does it differ from the TYWE3S module?
“CB3S” is a Tuya-style Wi-Fi module that carries a BK7231N chip, requiring Beken-compatible firmware rather than ESP8266 firmware. TYWE3S, by contrast, was the expected ESP8266-based module listed on the device label. This unit’s physical CB3S board contradicted the TYWE3S marking and the FCC ID 2AFNL-TYWE3S. [#20611418]
BK7231N vs ESP8266: which is better for flashing Tuya-based smart plugs with custom firmware?
Use the firmware path that matches the physical chip, not the product label. For this plug, BK7231N was the correct target because the board contained a CB3S module. ESP8266 tooling would match a TYWE3S unit, but this opened device was not TYWE3S despite its printed identifiers. The winning choice is therefore hardware-specific: OpenBeken for BK7231N. [#20611418]
How can I add an OpenBeken-flashed Suraielec outdoor plug to Home Assistant?
Add it after flashing and configuring OpenBeken, then follow the Home Assistant population guide referenced in the thread. The reported workflow flashed the BK7231N module, applied the GPIO template, and then used the linked guide. The key configuration values were GPIO6 button, GPIO8 LED, and GPIO24 relay. The thread does not provide additional Home Assistant settings beyond that guide reference. [#20611418]
What is OpenBeken automatic GPIO extraction and how does it help identify pins after flashing?
“Automatic GPIO extraction” is an OpenBeken-style method that identifies device pin roles from firmware data, reducing manual probing after OBK flashing. A maintainer suggested it as the modern approach for discovering mappings. It can work even after flashing OpenBeken. In this thread, the user had already mapped GPIO6, GPIO8, and GPIO24 manually with a multimeter. [#20611464]
What is GPIO Doctor in OpenBeken and how is it different from automatic GPIO extraction?
“GPIO Doctor” is an OpenBeken diagnostic tool that helps test and identify GPIO behavior interactively, while automatic GPIO extraction derives mappings through OpenBeken’s extraction workflow. The maintainer clarified that he meant automatic GPIO extraction, not GPIO Doctor. He still called GPIO Doctor useful. This distinction matters when choosing between automated discovery and interactive pin testing. [#20612274]
What are SSDP and PowerSave in OpenBeken, and why would they be useful for a smart plug?
SSDP and PowerSave are OpenBeken features worth reviewing after a successful flash. The maintainer recommended both immediately after confirming the device was flashed. SSDP can help device discovery, while PowerSave can reduce idle behavior on always-powered plugs. The thread does not list exact configuration values, watt savings, or command syntax for either feature. [#20611464]
How can I safely flash a 40A outdoor smart plug without removing the CB3S module from the board?
Flash it through the exposed CB3S serial connection because TX and RX are not tied to other circuitry. That board layout removes the need to desolder the module. Open the enclosure, attach the programmer, start the GUI write, and hold the module button about 4 seconds. Keep the 40A mains device disconnected from line power while working inside it. [#20611418]
What JSON template settings should I use for a Suraielec UBTW01B with BK7231N, CB3S, GPIO6 button, GPIO8 LED, and GPIO24 relay?
Use a Tuya template named “Suraielec 40A Outdoor Plug UBTW01B” with model UBTW01B, chip BK7231N, and board CB3S. Set flags to 1024. Configure pins as 6: Btn;1, 8: LED_n;1, and 24: Rel;1. Include identifiers such as Amazon, FCC ID 2AFNL-TYWE3S, IC ID 23243-TYWE3S, T40W, Intertek, and 4007168. [#20611418]

Comments
So they changed the chip inside and left the FCC-ID (2AFNL-TYWE3S) the same? Well, that's not the first time! Good job on flashing your device. Now you can also read about SSDP and PowerSave, as they may... [Read more]
I didn't know about OpenBeken's GPIO interrogator until I had the device flashed and already probed everything out. I will definitely use this next time I come across one of these modules though; it's... [Read more]
I was referring to automatic GPIO extraction, and not to the GPIO Doctor, but still, GPIO Doctor is also a very useful tool. [Read more]