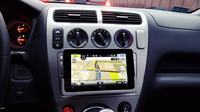
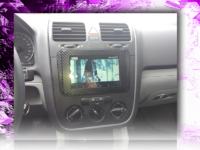
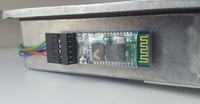
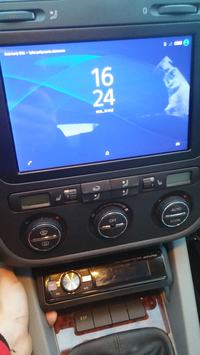
bestler wrote: What is this software on this tablet that can be seen with four windows? I am especially interested in internet radio, could you please share something like that? I have an android multimedia station and I would like to upload some nice radio, because unfortunately these Chinese stations have a poor tuner.
I recommend
http://ai2.appinventor.mit.edu/ 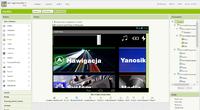
There is a pulley that sips the link to the stream and allows you to play it. I think it is possible to share the entire project if there was such a need. By the way, the interface is inspired by the one that can be seen in the current generation of Jaguars

 Added after 12 [minutes]:
 Ba_rt wrote: How did you "get along" with the original radio? Does it have an aux input?
The radio did not have an aux - let me paste the description that I once published on another forum related to Civic. The description is a bit blatant, but I had in mind the users of that forum - not everyone has to be inclined to the technique.
Pioneer OEM radio, I don't remember the exact version code, but I suspect that all variants have similar guts. There is no problem with the linear input in this equipment, but I will try to present the simplest and cheapest solution. At the beginning I would like to point out that it will not be possible to switch to the line input from the radio panel. The manufacturer used a 3-channel sound selector (only two are used: CD and radio), but the selector is digitally controlled by the main microcontroller. The selection of the 3 unused channel would have to be added to the code and the new soft uploaded to the radio. It remains for us to get to the radio track, the CD falls off for a simple reason - you would have to insert a CD to make the radio play at all. So to the point, we'll need screwdrivers, a soldering iron, side cutters, pliers, some cable, patience and basic soldering skills.
After removing all possible screws, detaching the front panel clips (with them carefully) and removing the plates from the housing, we will see the following view:
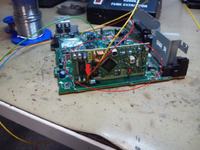
The vertically standing module, marked in red, is a radio tuner, the arrow shows the area of our activities. One small difference - your tuner will still have the shielding plates on it. Desoldering them is not a small feat, but fortunately you won't have to do it - my innate curiosity told me. Nevertheless, side cutters + pliers will be needed to cut a small piece of sheet metal, which will make it difficult to access the place marked with the arrow. Don't worry, you can get rid of a fragment of the shielding, I don't have it at all and the radio is playing as it was. The main board of the radio is connected to the tuner with the help of short pieces of wire.
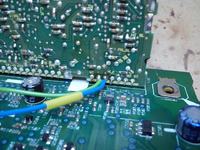
Our task will be to cut and desolder the wires responsible for the right and left sound channels from the tuner. The wires removed above have been replaced with cables, places described on the R and L PCB. In this case, the green and blue wires carry the signal from the tuner.
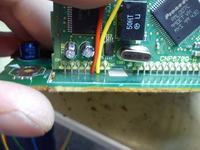
We do the same on the motherboard, the red and yellow wires are our line input. It will depend on us now whether we hook up our device there or connect yellow with green and blue with red and listen to radio stations again.
All that's left is to derive the ground for our signal:
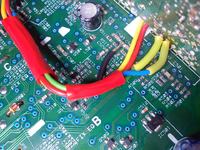
The black wire soldered between the two capacitors is our mass. You cannot see it in the picture, but underneath it there is a fairly thick path in the PCB - each component connected directly to this path is a potential mass donor. However, I would advise you to solder the leg of a large component or, like me, solder several components at once. The pads (legs) of the surface components are quite fragile, soldering a thick cable to a small chick is guaranteed to break the rain with the slightest movement of the cable.
Finally, I would like to add that the easiest way to switch between the radio and auxiliary is on a double switch or on two switches - for the right and left channels.
Regards
Added after 7 [minutes]: Mscichu wrote: I once wondered about a similar solution and came to the conclusion that the tablet display will not withstand high and low temperatures.
That is why it is "extractable". It would be a fear to leave him in the car in the summer in full sun.
