Everyone who came up with the idea of building a NAS based on the HP T5740 (T5745) terminal (thin client) sooner or later wanted to connect a 3.5 '' drive to it. Unfortunately, he was disappointed - the disc did not start. Meanwhile, 2.5 '' drives work flawlessly.
The reason for this is that there is no 12V voltage in the Sata power connectors. Apparently the designers from HP decided that there would be no such need.
Nothing easier, then, how to supply this 12V to the connectors ... but where from?
In the network I once came across an article in which the author shows how he connected a 3.5 '' drive to the T5540 by taking the missing voltage directly from the power supply. Only the T5540 has a 12V power supply and the T5740 has a 19V power supply.
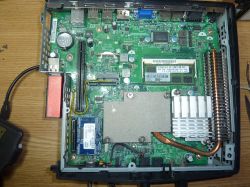
Fortunately, 12V is available in our terminal. It is provided by a tiny converter based on the APW7080 chip. The system is marked U20 and is placed next to the battery supporting the BIOS settings.
It turns out that this baby can do quite a lot datasheet . The manufacturer claims that the system can withstand up to 4A loads. In practice, above 2A it starts to heat up strongly. But it does well when short-term overloads are involved. He does not protest when you need to light a 20W halogen bulb.
It will also handle disks that take 0.55A from the 12V line.
This inverter was intended by HP to supply 12V for cards placed in the PCI slot, but to use this connector you need a housing extension and a "riser" adapter, thanks to which the card can be plugged horizontally (parallel to the motherboard).
I have neither extension nor riser and I'm not going to use PCI, so I stole 12V and powered SATA connectors with it.
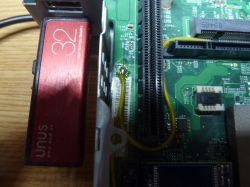
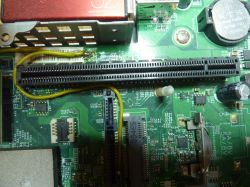
First:
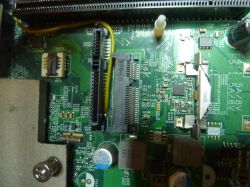
and the second:
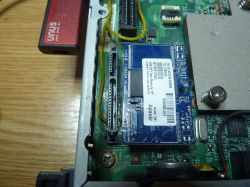
A little explanation should be given here. Well, normally the T5740 has only one SATA connector and a place for soldering the other. It turns out that the interface works, you only need to solder the connector and we have a working port for the second (third, if we include the 44-pin PATA connector) of the disk.
So it only remains to find a place for two 3.5 '' bricks.
For this purpose, I used the housing after the damaged T5740.
The housing required removal of all protrusions and drilling of holes
assembly ... I know, it didn't turn out nice.
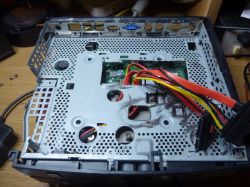
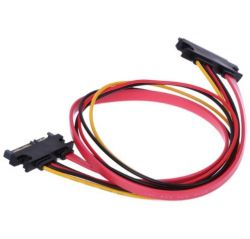
Because the inside is tightly classic SATA cables will not fit,
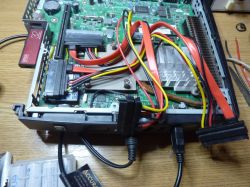
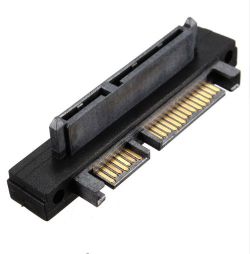
while the angular ones have a bend in the wrong direction, so the appropriate angular adapter was created after soldering the male and female sSat connectors.
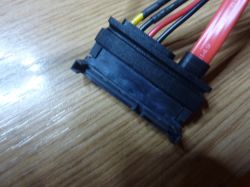
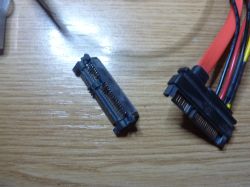
As a result, I got a sandwich from two terminals:
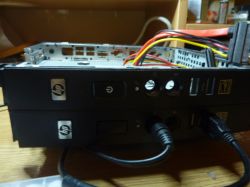
I screwed the disks to the cover through two flat bars, on which I put an insulating spacer.
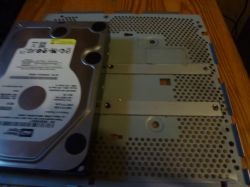
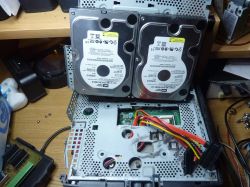
And the whole after twisting looks like this:
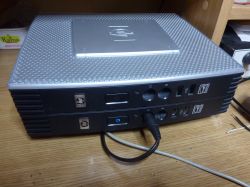
The housing does not have a lower plastic cover and stands on rather thick legs to ensure better air circulation. The drives are not working all the time - they are turned on on demand and turned off after 10 minutes of non-use. After these modifications, the CPU keeps its temperature within 37 ° C when not doing anything special (apache, samba, openvpn etc) and 50 ° C under full load.
The whole thing was slackware 14.1 stuffed on a 4GB IDE flash drive.
This description was created on the occasion of switching off the "server" after over 100 days of continuous operation, so I did not include some details. The purpose of the shutdown was to replace one of the drives with SSDs and give up a tight flash.
Costs:
-About PLN 100 were Sat cables, connectors and similar details
-about PLN 60 apacer ide 44pin 4GB flash drive (originally there was 1GB in the terminal)
-terminals and recovery discs.
What's next?
- using the holes in the front panel of the upper part of the sandwich - inserting a USB hub.
- further learning how to use slackware ... and it's not simple.
Any suggestions and pointing out bugs are welcome.
But I wrote it down.
The reason for this is that there is no 12V voltage in the Sata power connectors. Apparently the designers from HP decided that there would be no such need.
Nothing easier, then, how to supply this 12V to the connectors ... but where from?
In the network I once came across an article in which the author shows how he connected a 3.5 '' drive to the T5540 by taking the missing voltage directly from the power supply. Only the T5540 has a 12V power supply and the T5740 has a 19V power supply.
Fortunately, 12V is available in our terminal. It is provided by a tiny converter based on the APW7080 chip. The system is marked U20 and is placed next to the battery supporting the BIOS settings.
It turns out that this baby can do quite a lot datasheet . The manufacturer claims that the system can withstand up to 4A loads. In practice, above 2A it starts to heat up strongly. But it does well when short-term overloads are involved. He does not protest when you need to light a 20W halogen bulb.
It will also handle disks that take 0.55A from the 12V line.
This inverter was intended by HP to supply 12V for cards placed in the PCI slot, but to use this connector you need a housing extension and a "riser" adapter, thanks to which the card can be plugged horizontally (parallel to the motherboard).
I have neither extension nor riser and I'm not going to use PCI, so I stole 12V and powered SATA connectors with it.


First:

and the second:

A little explanation should be given here. Well, normally the T5740 has only one SATA connector and a place for soldering the other. It turns out that the interface works, you only need to solder the connector and we have a working port for the second (third, if we include the 44-pin PATA connector) of the disk.
So it only remains to find a place for two 3.5 '' bricks.
For this purpose, I used the housing after the damaged T5740.
The housing required removal of all protrusions and drilling of holes
assembly ... I know, it didn't turn out nice.

Because the inside is tightly classic SATA cables will not fit,

while the angular ones have a bend in the wrong direction, so the appropriate angular adapter was created after soldering the male and female sSat connectors.


As a result, I got a sandwich from two terminals:

I screwed the disks to the cover through two flat bars, on which I put an insulating spacer.


And the whole after twisting looks like this:

The housing does not have a lower plastic cover and stands on rather thick legs to ensure better air circulation. The drives are not working all the time - they are turned on on demand and turned off after 10 minutes of non-use. After these modifications, the CPU keeps its temperature within 37 ° C when not doing anything special (apache, samba, openvpn etc) and 50 ° C under full load.
The whole thing was slackware 14.1 stuffed on a 4GB IDE flash drive.
This description was created on the occasion of switching off the "server" after over 100 days of continuous operation, so I did not include some details. The purpose of the shutdown was to replace one of the drives with SSDs and give up a tight flash.
Costs:
-About PLN 100 were Sat cables, connectors and similar details
-about PLN 60 apacer ide 44pin 4GB flash drive (originally there was 1GB in the terminal)
-terminals and recovery discs.
What's next?
- using the holes in the front panel of the upper part of the sandwich - inserting a USB hub.
- further learning how to use slackware ... and it's not simple.
Any suggestions and pointing out bugs are welcome.
But I wrote it down.
Cool? Ranking DIY


