Hello again, everyone.
Today I will try to describe you the Chinese regulated impulse power supply by GOPHERT, model CPS - 3205. Perhaps this description will encourage you to buy this power supply, discourage you or help you make a decision.
I bought my copy on Aliexpress for $ 44.98 with the shipment (Aliexpress additionally gave me a $ 3 discount coupon, which allowed me to lower the price from the one given above - so there is always a few zlotys more in my pocket). After about 16 days, it was already in my possession - quite quickly considering the dimensions of the package.
From what I noticed, such a power supply in Poland is offered by only one company from Wrocław for PLN 300 with shipping.
Below are some details of this switching power supply:
- 115VAC or 230VAC input voltage set with a switch next to the power socket;
- regulation of the output voltage in the range from 0 to 32VAC;
- resolution of the output voltage adjustment 0.01V;
- regulation of the output current in the range from 0 to 5A;
- current regulation resolution 0.001A;
- maximum output power 160W;
- visualization of settings and reading of parameters on two four-digit seven-segment LED displays;
- adjustment of settings via an encoder;
- power supply dimensions, approx. 120x60x195mm;
- weight, approx. 700 g.
The power supply is in a metal, aluminum housing, it is sold with a power cord, and a two-color two-wire cable with banana-crocodile tips and a short instruction manual in English.
The described power supply is managed by the STM8S105K4T6C microprocessor.
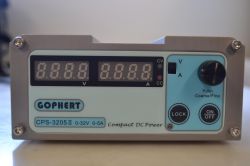
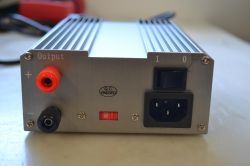
Below is a photo of the front and rear panels.
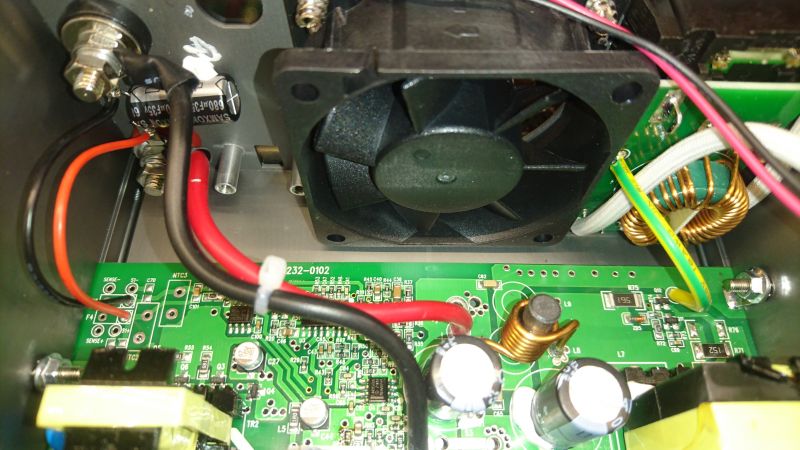
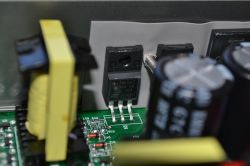
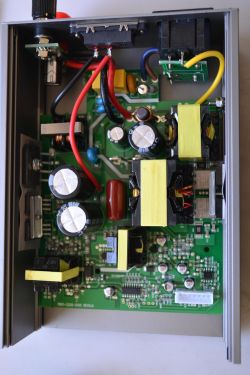
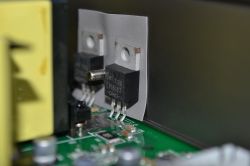
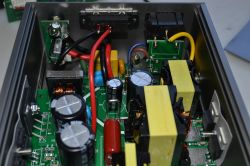
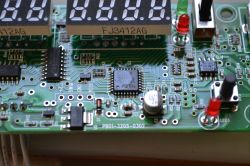
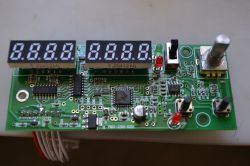
Below are some photos of what we can find inside our device and what is hidden under the front panel.
It's time to describe how we make settings in this small power supply.
The power supply is turned on with the rocker switch located at the back of the housing. After switching it on, the left display shows the current measurement of the output voltage - 00.00V, and the right display shows the word "OFF", because to fully start the power supply, use the "ON / OFF" switch on the front panel. After pressing the "ON / OFF" button, the current voltage will be displayed on the left display and the current output will be displayed on the right display. The PSU remembers the settings used during the previous use of the PSU despite disconnecting it from the mains.
There are two LEDs next to the right display - the green one described as "CV" - voltage limitation, and the red one described as "CC" - current limitation. Usually, the green CV LED is on all the time, because we have an active limitation of the output voltage by entering the output voltage setting value. The red one will add "CC" and it will light up only when the current drawn from the power supply is greater than its setting - at this point the "CV" LED turns off.
On the righton the side of these two LEDs we have a "V / A" switch, thanks to which we choose what we want to set - voltage or current. Further on the right there is an encoder with which we can change the settings.
To set the voltage, select the "V" switch and press the encoder. The unity value after the decimal point is highlighted; by turning the encoder, we change it, another press of the encoder will move the highlighted value to the left - this time to the value of tens after the decimal point, another press of the encoder will again shift the highlighted value to the left and now we can change the voltage unity order on the output, another press of the encoder will cause the highlighting decimal values. After approx. 3 seconds of inactivity, the display changes to the current voltage value at the output.
Here are a few photos to make it clearer.
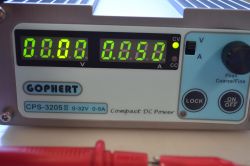
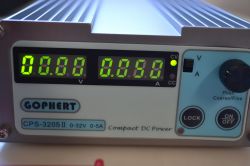
Next pressing of the encoder or turning it will display or change the value of the last set.
Change the current setting in the same way as the voltage setting, but you need to set the switch to the "A" position.
Another photo.
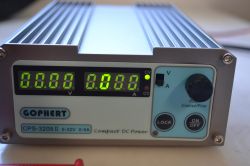
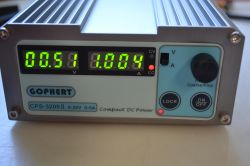
There is also a "LOCK" button on the front panel, it is used to lock the settings. After pressing it, a red LED lights up under this button and from now on, we cannot change the current and voltage settings, even though after turning the encoder the right digit on the current or voltage display lights up, depending on the current or voltage display. which position is the "V / A" switch. Unlocking the settings is done by pressing the "LOCK" button again.
Here is a photo after pressing "LOCK".
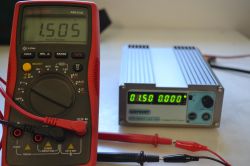
Below are some photos from voltage measurements.
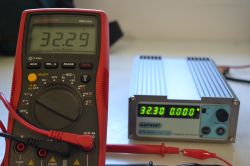
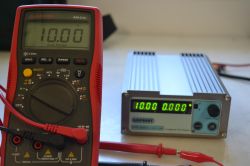
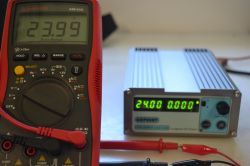
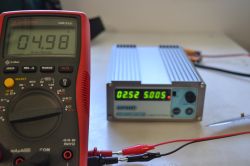
Below are some photos from current measurements.
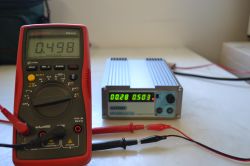
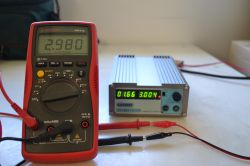
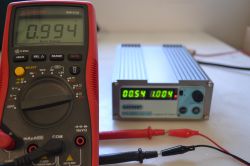
As you can see - the voltage and current measurements on the PSU's displays are quite precise.
We can also notice that sometimes despite the current limit setting, the output current is a bit higher than in the setting. I don't think it will do any damage, because as you can see - the maximum difference is 5mA.
For the test, I decided to load the power supply to the maximum for a few minutes and see if it would survive or die.
Here are some photos.
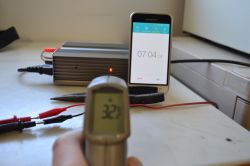
As you can see in the picture above - after more than 7 minutes of maximum load, the maximum temperature of the power supply in the warmest place is 32 ° C, so you can say that nothing at an ambient temperature of around 22 ° C.
The cables got the most in this test. After a few minutes, they became more flexible than silicone tubing, although these are ordinary. This is not surprising as the cross-section of this cable is probably 0.5mm.
Here is a picture of the wires.
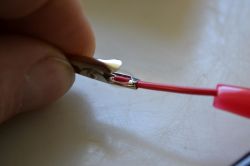
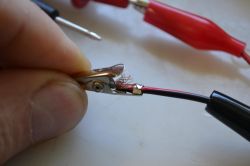
As you can see in the photo below - the "little Chinese hands" did not touch when making these wires, it was a pity for them even to solder the wire to the terminal. I recommend replacing these cables with other ones with banana plugs, because these are also not of the best quality, and sometimes such cables fell apart after a few days of use.
Summarizing the power supply, I can say that the operation of the power supply is very intuitive and can be assimilated in a few minutes without reading the manual, so it will not bring a problem to anyone.
For me, this power supply is very handy, easy to use, has small dimensions and is light, which makes it portable. A big advantage for me is showing the value of the current limit setting, which I missed in other power supplies.
In turn, its disadvantages for me are the location of both the output sockets on the back of the casing and the rocker switch, and the inability to replace the fuse without disassembling the casing. Although I think that if the sockets and the rocker switch were at the front, it would increase the dimensions of the power supply.
The power supply makes sounds, the volume of which depends on the load on it, but it is not bothersome or terribly loud, I would risk saying that the power supply in which the fan starts is louder.
In the manual, we can find information that this device has an efficiency of approx. 88%, that it has protection against overheating and short-circuit. I did not check the efficiency - I did not care about it, I also did not have the opportunity to check the thermal protection and the short-circuit protection is probably the fuse inside the device, which can be seen in one of the photos.
I had no way of checking "how I sow" this power supply.
I had no problems with powering the electronics from it, and with charging the car battery overnight - the electronics did not fail, the power supply did not cause any problems.
I think that the power supply in this amount is worth recommending to other users of this forum, for this money it is worth having it in your small workshop.
GOPHERT's offer also includes other larger models such as: CPS - 1660, CPS - 3220 or CPS - 6003.
Remember that when buying from China, our Customs Office may stop the shipment and charge it or impose VAT - I do not know the current amounts at which the office begins to be interested in our shipment.
Per post # 14 of the user " dive "I corrected the error in the name of the power supply.
Thank you for being vigilant and pointing out the error.
Today I will try to describe you the Chinese regulated impulse power supply by GOPHERT, model CPS - 3205. Perhaps this description will encourage you to buy this power supply, discourage you or help you make a decision.
I bought my copy on Aliexpress for $ 44.98 with the shipment (Aliexpress additionally gave me a $ 3 discount coupon, which allowed me to lower the price from the one given above - so there is always a few zlotys more in my pocket). After about 16 days, it was already in my possession - quite quickly considering the dimensions of the package.
From what I noticed, such a power supply in Poland is offered by only one company from Wrocław for PLN 300 with shipping.
Below are some details of this switching power supply:
- 115VAC or 230VAC input voltage set with a switch next to the power socket;
- regulation of the output voltage in the range from 0 to 32VAC;
- resolution of the output voltage adjustment 0.01V;
- regulation of the output current in the range from 0 to 5A;
- current regulation resolution 0.001A;
- maximum output power 160W;
- visualization of settings and reading of parameters on two four-digit seven-segment LED displays;
- adjustment of settings via an encoder;
- power supply dimensions, approx. 120x60x195mm;
- weight, approx. 700 g.
The power supply is in a metal, aluminum housing, it is sold with a power cord, and a two-color two-wire cable with banana-crocodile tips and a short instruction manual in English.
The described power supply is managed by the STM8S105K4T6C microprocessor.
Below is a photo of the front and rear panels.


Below are some photos of what we can find inside our device and what is hidden under the front panel.


It's time to describe how we make settings in this small power supply.
The power supply is turned on with the rocker switch located at the back of the housing. After switching it on, the left display shows the current measurement of the output voltage - 00.00V, and the right display shows the word "OFF", because to fully start the power supply, use the "ON / OFF" switch on the front panel. After pressing the "ON / OFF" button, the current voltage will be displayed on the left display and the current output will be displayed on the right display. The PSU remembers the settings used during the previous use of the PSU despite disconnecting it from the mains.
There are two LEDs next to the right display - the green one described as "CV" - voltage limitation, and the red one described as "CC" - current limitation. Usually, the green CV LED is on all the time, because we have an active limitation of the output voltage by entering the output voltage setting value. The red one will add "CC" and it will light up only when the current drawn from the power supply is greater than its setting - at this point the "CV" LED turns off.
On the righton the side of these two LEDs we have a "V / A" switch, thanks to which we choose what we want to set - voltage or current. Further on the right there is an encoder with which we can change the settings.
To set the voltage, select the "V" switch and press the encoder. The unity value after the decimal point is highlighted; by turning the encoder, we change it, another press of the encoder will move the highlighted value to the left - this time to the value of tens after the decimal point, another press of the encoder will again shift the highlighted value to the left and now we can change the voltage unity order on the output, another press of the encoder will cause the highlighting decimal values. After approx. 3 seconds of inactivity, the display changes to the current voltage value at the output.
Here are a few photos to make it clearer.


Next pressing of the encoder or turning it will display or change the value of the last set.
Change the current setting in the same way as the voltage setting, but you need to set the switch to the "A" position.
Another photo.

There is also a "LOCK" button on the front panel, it is used to lock the settings. After pressing it, a red LED lights up under this button and from now on, we cannot change the current and voltage settings, even though after turning the encoder the right digit on the current or voltage display lights up, depending on the current or voltage display. which position is the "V / A" switch. Unlocking the settings is done by pressing the "LOCK" button again.
Here is a photo after pressing "LOCK".

Below are some photos from voltage measurements.


Below are some photos from current measurements.


As you can see - the voltage and current measurements on the PSU's displays are quite precise.
We can also notice that sometimes despite the current limit setting, the output current is a bit higher than in the setting. I don't think it will do any damage, because as you can see - the maximum difference is 5mA.
For the test, I decided to load the power supply to the maximum for a few minutes and see if it would survive or die.
Here are some photos.


As you can see in the picture above - after more than 7 minutes of maximum load, the maximum temperature of the power supply in the warmest place is 32 ° C, so you can say that nothing at an ambient temperature of around 22 ° C.
The cables got the most in this test. After a few minutes, they became more flexible than silicone tubing, although these are ordinary. This is not surprising as the cross-section of this cable is probably 0.5mm.
Here is a picture of the wires.


As you can see in the photo below - the "little Chinese hands" did not touch when making these wires, it was a pity for them even to solder the wire to the terminal. I recommend replacing these cables with other ones with banana plugs, because these are also not of the best quality, and sometimes such cables fell apart after a few days of use.
Summarizing the power supply, I can say that the operation of the power supply is very intuitive and can be assimilated in a few minutes without reading the manual, so it will not bring a problem to anyone.
For me, this power supply is very handy, easy to use, has small dimensions and is light, which makes it portable. A big advantage for me is showing the value of the current limit setting, which I missed in other power supplies.
In turn, its disadvantages for me are the location of both the output sockets on the back of the casing and the rocker switch, and the inability to replace the fuse without disassembling the casing. Although I think that if the sockets and the rocker switch were at the front, it would increase the dimensions of the power supply.
The power supply makes sounds, the volume of which depends on the load on it, but it is not bothersome or terribly loud, I would risk saying that the power supply in which the fan starts is louder.
In the manual, we can find information that this device has an efficiency of approx. 88%, that it has protection against overheating and short-circuit. I did not check the efficiency - I did not care about it, I also did not have the opportunity to check the thermal protection and the short-circuit protection is probably the fuse inside the device, which can be seen in one of the photos.
I had no way of checking "how I sow" this power supply.
I had no problems with powering the electronics from it, and with charging the car battery overnight - the electronics did not fail, the power supply did not cause any problems.
I think that the power supply in this amount is worth recommending to other users of this forum, for this money it is worth having it in your small workshop.
GOPHERT's offer also includes other larger models such as: CPS - 1660, CPS - 3220 or CPS - 6003.
Remember that when buying from China, our Customs Office may stop the shipment and charge it or impose VAT - I do not know the current amounts at which the office begins to be interested in our shipment.
Per post # 14 of the user " dive "I corrected the error in the name of the power supply.
Thank you for being vigilant and pointing out the error.
Cool? Ranking DIY


