Hello my dear
Here I will describe in detail how you can easily start your adventure with Home Assistant. I will present its configuration on various platforms (Raspberry Pi, Banana Pi, virtual machine) and demonstrate how to connect the first devices to it via WiFi and Zigbee.
Introduction
Home Assistant is a still developing solution that allows you to connect many different Smart Home devices from different manufacturers, and free us from unwanted and (according to some) tracking servers from their manufacturers.
Normally, when we buy a Smart device (e.g. a socket with WiFi, or a door opening sensor from Zigbee, or a vacuum cleaner), we are doomed to use it with the application of its manufacturer and with the servers of this manufacturer.
When we have devices from two different manufacturers, we often cannot integrate them together (e.g. program the sensor so that a sensor from one company turns on the light on the relay from the other).
In addition, when a given company goes down, it is possible that its servers will go down along with it and the device in our company will also go down.
Home Assistant solves it all - and supports many devices 'on the spot', even without the need to change the firmware.
Of course, everything has its cost - the Home Assistant must be set up by us on a machine in our local network.
We also have to pair the devices with our Home Assistant ourselves.
And it is these processes that I will describe here.
I invite you to read.
Topic content
I will answer the following questions here:
- how to install Home Assistant on a virtual machine?
- how to install Home Assistant on Raspberry Pi (using Balena Etcher, clean install on SD card)?
- how to add Home Assistant on Banana Pi (on an existing server on Banana Pi, without resetting the entire system)?
- how to install Mosquitto MQTT broker for Home Assistant?
- how to connect a Tasmota device (on ESP8266 or similar) via MQTT to Home Assistant?
- how to install zigbee2mqtt on Home Assistant?
- how to use the Zigbee USB dongle CC2531 with Home Assistant?
- how to connect Aqara device to Home Assistant via Zigbee?
- how to create a simple automation scenario on Home Assistant, for example something like "turn on the light when the room is dark"?
- how to set a fixed IP for a device with Home Assistant?
- how to connect Home Assistant to our Tuya / SmartLife account and control their devices without changing the firmware?
- how to enable logging in via SSH to the Home Assistant console?
NOTE: The topic assumes that the reader knows the basics of the basics, for example, with a Raspberry, with a router, how to run a Raspberry, how to log into your router, etc. etc. etc.
What will we need?
What will be needed depends on the installation route we choose.
I will describe two possibilities here:
OPTION 1 - Virtual machine
We put the virtual machine on a normal computer, you can use VMware or VirtualBox for this. For this topic, I will be using VMware. A virtual machine is a very convenient solution, because it can be easily moved if necessary, you can make its backups (and if we have a copy, you can experiment as much as you want, because we will not break anything), but it requires a bit more powerful equipment. It also increases power consumption, but if we have a computer that runs all the time, thanks to the VM, we do not have to buy a special Raspberry.
The virtual machine can also be placed e.g. on an old laptop that is connected to the network all the time.
OPTION 2 - Single board computer
The second solution is to use a Raspberry Pi, preferably Raspberry Pi 3, 3+ and 4. This is a cost but low power consumption pays it back to some extent, although it is not as universal as a virtual machine.
You can also try to use Raspberry clones such as Banana Pi, you can also install Home Assistant on them, although they are not officially supported.
Then you will need an SD card.
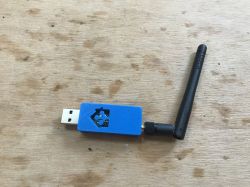
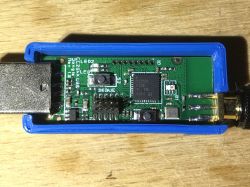
In both cases, if we want to support Zigbee then we need Zigbee Dongle as well, they are different, but here I used CC2531:
And of course, a device to be controlled by Home Assistant will be useful - here is a really wide selection, because the possibilities are very large, Home Assistant supports a lot of devices from different manufacturers, I recommend you to read their list:
https://www.home-assistant.io/integrations/#all
My device collection looks like this:

(but I'm not saying they're all 100% supported by Home Assistant, I'll just check that out)
Home Assistant Home Page and Documentation
For starters, it is worth familiarizing yourself with the documentation of Home Assistant, available on its official website:
https://www.home-assistant.io/
Description of how to get started:
https://www.home-assistant.io/getting-started/
List of supported devices:
https://www.home-assistant.io/integrations/
Documentation:
https://www.home-assistant.io/docs/
Automation examples:
https://www.home-assistant.io/cookbook/
Raspberry Pi - Home Assistant installation clean
Raspberry Pi, and more specifically Raspberry Pi 3, 3+ and 4 are officially supported by Home Assistant and allow for easy and quick installation of the whole with the ready operating system on a clean SD card, which we then put into the 'Raspberry'.
The Raspberry Pi Zero and Pi 2 are also supported, but their use is discouraged due to a performance issue.
First, we download the appropriate image from here:
https://www.home-assistant.io/hassio/installation/
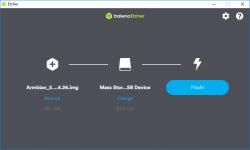
Then we use Balena Etcher, hence:
https://www.balena.io/etcher/
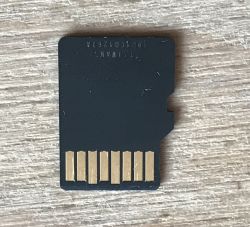
to record this image to an SD card (at least 32GB in size).
I recommend 64GB:

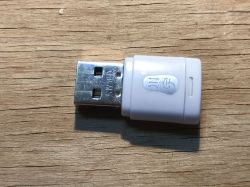
For this USB adapter:
Balena Etcher Image Upload Process:

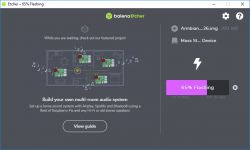

We put the prepared SD card (with a compatible system image) into the Raspberry and then run it. That's enough - then you only need to connect the keyboard and monitor or connect via UART to have access to the command line.
If we do not have a free monitor, etc. and want to immediately connect to the Raspberry via the network, then you will need to know the IP that the Raspberry got, and this IP can be found, for example, in the router logs, which IP was recently assigned by DHCP.
Banana Pi - adding Home Assistant to the finished server
The second method of installation is to add Home Assistant to a ready-made system, for example, Banana Pi. There is nothing in the official documentation about the Banana Pi, but after applying a few small tricks, it can also be easily placed on this platform.
I have a ready server for Banana Pi for some time, this is my OpenMediaVault described here:
Noiseless, energy-saving 480GB file server on Banana Pi - OpenMediaVault
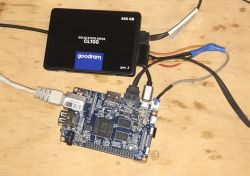
I have been using this server all the time for almost a year, so it is an ideal candidate to enrich it with the control of Smart devices.
I will show here how you can install on such a Home Assistant server.
We perform the operation via SSH, I use Putty for this:
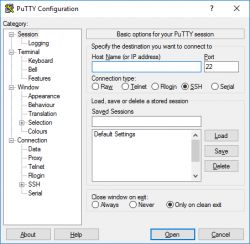
You must log in as root:
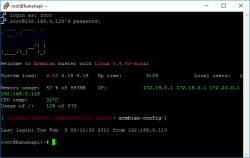
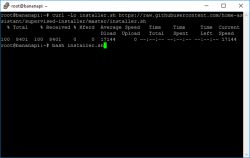
Then we will download the installation script, command:
curl -Lo installer.sh https://raw.githubusercontent.com/home-assistant/supervised-installer/master/installer.sh
I already have Curl installed, if necessary, it needs to be installed via apt-get.
Result:
Then we run the installer (but it probably won't work the first time, more on that in a moment). Command bash installer.sh :
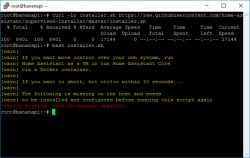
Installation failed - [error] missing: network-manager apparmor . We are missing a package.
You have to install it.
Command apt-get install network-manager apparmor-utils :
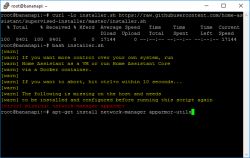
We confirm the execution by entering Y:
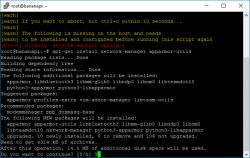
Downloading will take some time:
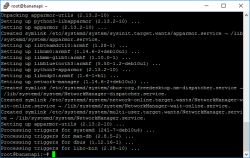
NOTE: depending on what you are installing on, you may be missing other packages, including bash, jq, curl, avahi-daemon, dbus, software-properties-common. We install them in the same way as apparmor-utils, via apt-get.
Then we try to install again, bash installer.sh :
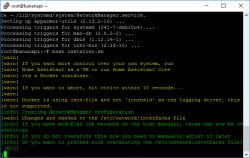
Confirm (if we have something in / etc / network / interfaces, it's worth making a copy).
Now, unfortunately, the error will appear again. [error] Please set machine for armv71 This is because banana pi has a different architecture, armv71, which is officially supported by Home Assistant.
This can also be fixed.
We run the installer like this:
bash installer.sh -m raspberrypi3
then the script will treat our Banana just like a Raspberry.
Installation continues:
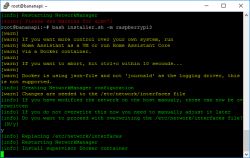
After some time:
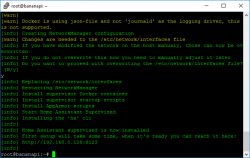
Installation ready, but this is not the end!
At this point, Home Assistant is still installing itself in the background.
His website (our machine's IP address, port 8123, e.g. 192.168.0.128:8123) does not work at all:

At this point, we wait patiently, we do not make any changes. We do not turn off or restart the machine.
After some time, a temporary page will be displayed asking you to wait:
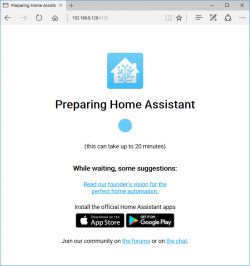
This page may still be disappearing. Only after some time will we receive:
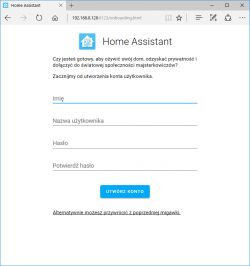
and only then is the installation really ready
Virtual Machine - Home Assistant installation
The third way to get Home Assistant is to run it in a virtual machine, e.g. in VMware, which runs on a normal PC.
I assume we have VMware already installed.
Of course, a similar process can be performed on VirtualBox.
First, we download the appropriate image:
https://www.home-assistant.io/hassio/installation/
In this case hassos_ova-5.10.vmdk.xz .
Remember to unpack the image from the package:

We run VMware (you probably have a different version, but the process will be similar):

We choose Create New, Custom mode:

Hardware compatibility - I chose the newest:
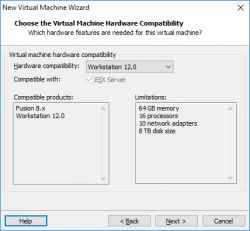
Then select "I will install the operating system later", because it will not install the operating system normally from the media, but we will just attach the already ready VMDK disk image with the system.
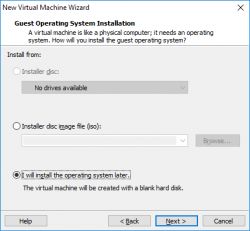
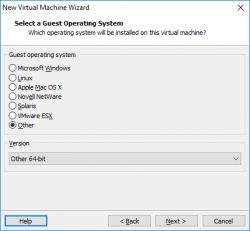
We choose the type of system. Depending on the downloaded version, Other 32-bit or Other 64-bit, but rather 64-bit. Here, too, I chose "Linux" before and it worked as well.
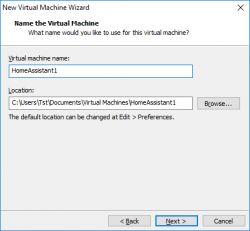
Virtual machine name and location. I recommend putting it on an SSD. For me, the C drive is SSD.
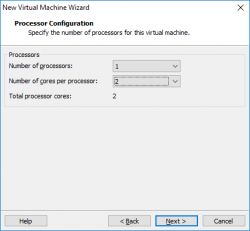
The number of processor cores - it depends on the hardware hosting the VM, but at least 2 cores should be given.
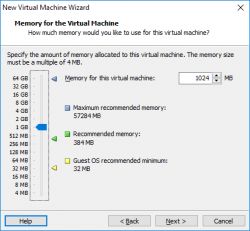
Amount of RAM - as above, it depends on how much we can devote, 1GB is the minimum, I recommend 2GB or more.
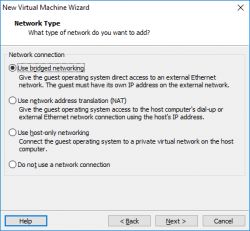
Network configuration - choose 'bridged' so that the VM is connected directly to our LAN.
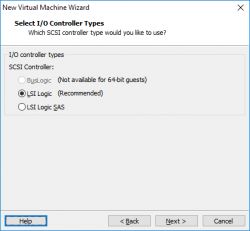
SCSI Controller Type - LSI Logic (Recommended).
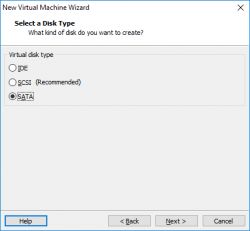
Virtual disk type - we choose SATA.
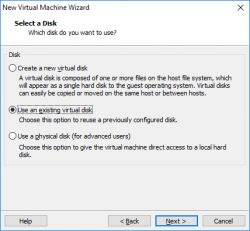
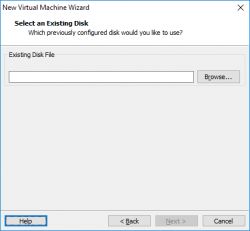
Disk selection - "Use an external virtual disk" - because we already have a disk ready in the form of VMDK.
We provide the path to the downloaded VMDK:
We make Convert (replacing the disk with a new format supported by this version of VMware what we have):

Now, if we want, we can make a few changes, if we click Customize, and if not, the VM will be added:
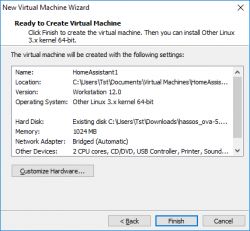
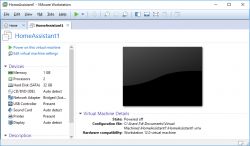
VM ready - but we will go to VM-> Settings to change something:
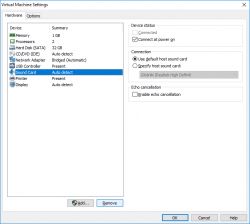
We remove the Sound Card - it is redundant. Select and click Remove.
If the size of the disk here (with 'Hard Disk') is unnaturally small, e.g. 6GB, then we can enlarge it to e.g. 32 or 64GB. I had 32GB right away.
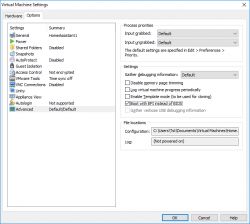
In the Options tab, select Advanced and turn on 'Boot with EFI instead of BIOS' (in other versions, instead of a single checkbox, there may be a radio button checkbox, but we choose EFI anyway).
It's time to start our VM:
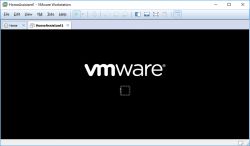
The operating system starts:
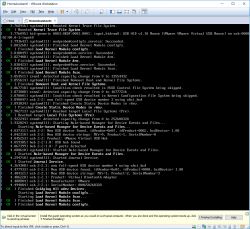
Log in as root (without a password by default, then you should change it). Done - now we are on the Home Assistant command line. You can also leave it by typing 'login'.

Network information from the Home Assistant console
Normally, all operations are performed here via the web panel, but it is worth knowing, for example, how to check the network operation through the Home Assistant console, for example from VMware or after logging in via UART or SSH (if we have them installed).
You may need to enter 'login' beforehand to get to the system command line:
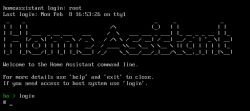
A command is used to display information about the network nmcli :
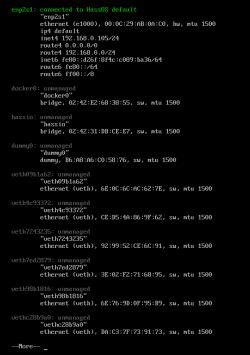
You can also use it for this ip a .
Of course, you can also check if we can ping the network (eg. ping elektroda.pl , or ping 8.8.8.8 or you can have fun nslookup elektroda.pl ):
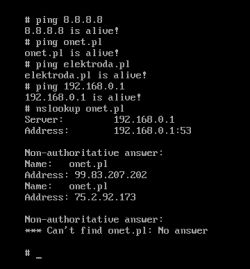
Everything should work.
Virtual machine - IP configuration
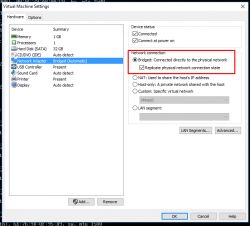
If we put Home Assistant on a virtual machine, it is worth setting its IP configuration in Bridged mode.
This mode makes the virtual machine have a different IP than the host computer, but it is visible in the LAN.
If we omitted this when creating the VM, it changes in Machine Settings, in Network Settings, here:
Below is a screenshot simultaneously from VMware, from a Windows console with IP configuration, and from a browser that sees the Home Assistant page:
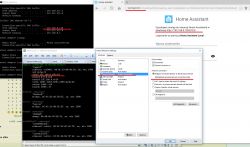
and of course other devices on that LAN see Home Assistant too. Phone screenshot:
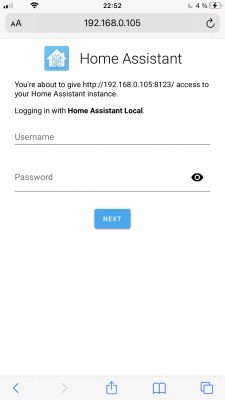
Virtual Machine - IP problem solution
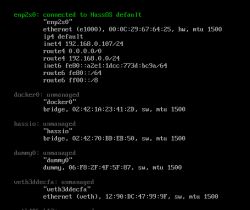
If we are using VMware and we are using the 'Bridged' mode for the network card, and yet we are not connected to the network - ping 8.8.8.8 shows unreachable network , a nmcli shows " connecting (getting IP configuration) to HassOS default " as in the screenshot below:
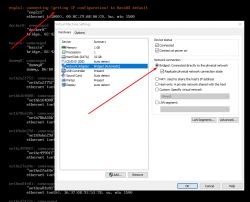
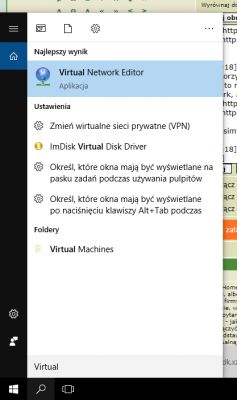
Then we need to improve the network configuration from VMware. We run Virtual Network Editor , you can find it via Start on Windows:
There we turn on the administrator mode (as needed), we find VMnet0:
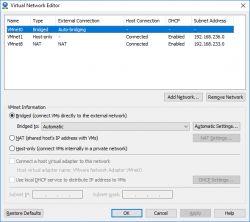
we click "Automatic Settings" and turn off all adapters except the one we use (for me it was WiFi, because I only tested how it works, but I recommend using a wired connection as normal):
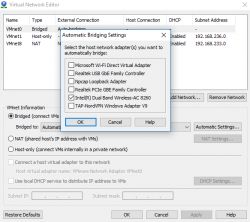
Click Apply, save the changes, and after restarting the VM, we should receive the correct IP. We check with the command nmcli :
Fixed IP - by MAC reservation on the router settings
This step is important no matter where you install Home Assistant - it applies to both Raspberry, Banana and VM.
It is important that the Home Assistant has a fixed IP in the network (although you could also deal with DNS here and refer to it by the hostname).
There are several ways to fix IP, you can set them hard on the machine itself (disable DHCP), and you can also set it in DHCP on the router so that a given MAC will always have the same IP. Normally, DHCP does not guarantee that the same client will always have the same IP address.
Here, I'll show you the latter way.
We enter the router's settings through its web panel, log in (you need to know the password), check the DHCP settings. First, the client list:
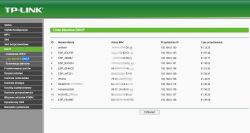
We remember the MAC of our Home Assistant.
Then select 'Address Reservation':

We add a new entry:

And if necessary, restart the router:

From now on, the client with the MAC set by us will always have the one IP chosen by us.
The first launch of Home Assistant
A correctly configured Home Assistant should be visible in our local network under its IP address or (if we cover DNS) with its domain name.
For me it was:
http://192.168.233.183:8123/
We open this address in the browser.
(NOTE: If it does not open, and we are fresh after the installation, it is worth waiting for a quarter of an hour, because in the background the server may still start up)
It's time to do the first configuration:

Without external IP / port forwarding, this site won't be accessible outside of our LAN, but it's a good idea to set a strong password anyway. In the future, we may need to make our Home Assistant available on the Internet.
Next, we need to configure our Home. This is an important step, because Home Assistant is even able to base actions on the weather from the Internet, so the location should be correct:
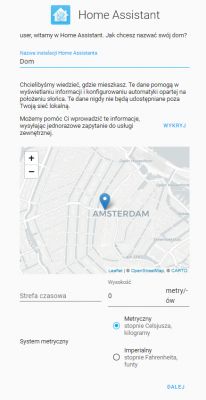
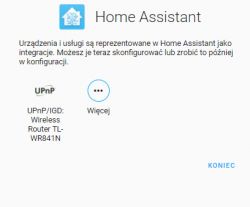
After that, Home Assistant will try to detect devices available on the network. For me, it only detected the router:
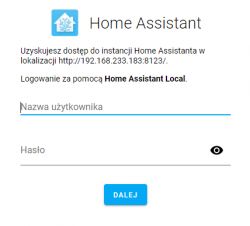
Then the login form appears (although it can also direct us to the panel). We use a predetermined login and password:
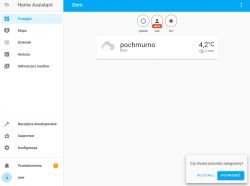
This way we get to the main Home Assistant panel. I recommend that you familiarize yourself with it, because this is where we will perform most of the operations and configurations.
Home Assistant - we are adding the Mosquitto MQTT broker
MQTT Mosquitto broker is not automatically installed with Home Assistant. You have to install it separately via the Addon Store. It is necessary to connect to devices via MQTT, i.e. to connect Tasmota devices.
I will describe step by step how to install it.
On the main Home Assistant website, go to the 'Supervisor' tab, here:

If by some miracle we don't have this tab, it means that we installed a trimmed version of Home Assistant without Hass.IO. In this situation, I recommend that you verify what we did wrong with the installation and reinstall the full version (supervised).
From there we go to the Addon Store, here:

In the Addon Store, we have a wide selection of various Home Assistant add-ons that we can add to our home for free.

We are looking for Mosquitto:
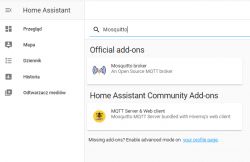
Click on its name and then on Install:

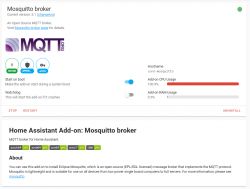
Installation will literally take a minute. Then we get such a view (we make sure that start on boot is enabled - that is, whether it will just turn on with the system startup):

Click Start:
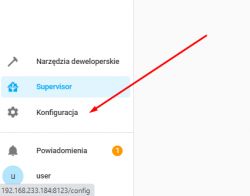
Now you need to configure Mosquitto. Go to configuration from the main menu:
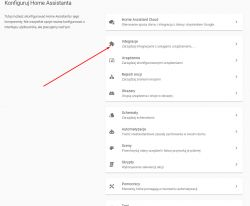
Then select "Integrations" (we will find Mosquitto there):
"Configure" button:

We enable detection of:

We confirm:

The Mosquitto backlight should disappear:

But we click "Configure" again:
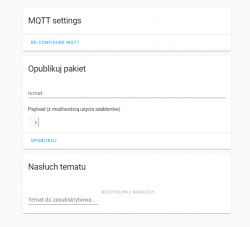
Click on 'Re-configure', then display the MQTT password and copy it:
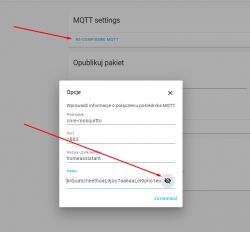
Example data:
Quote:
Broker
core-mosquitto
Harbor
1883
User Name
homeassistant
Password
AiQuahcheethoaL9joo7aa6aaLei9pho1eimee1sel8iewookaijiew3Iechah1n
After 'confirm':
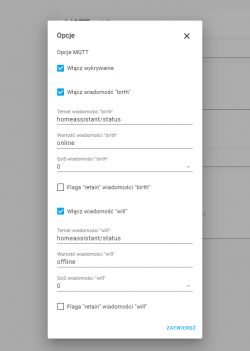
After saving:

Home Assistant - we add a Tasmota device to the MQTT
Now we will add the Tasmota device (with ESP8266, with the Tasmota batch loaded) to the Home Assistant via MQTT.
Tasmota can be easily uploaded to many different devices from different manufacturers, SmartLife, Tuya, BlitzWolf, eWeLinkIt, etc.
I have described the method of uploading Tasmota several times.
Upload via tuya-convert here:
SC3-01 SmartLife switch and uploading ESP firmware via WIFI (tuya-convert / OTA)
Here via UART (and soldering cables):
SmartLife switch - test, interior and WiFi light switch programming
The Tasmota device should already be connected to our WiFi network and we should know its IP.
I also recommend following the process from here:
ESP8266 and Tasmota - step-by-step control of the WiFi relay
(by the way, in the case of many devices, it would be possible to pair them with Home Assistant without changing the firmware at all, but more on that another time)
So, we go to the device page:
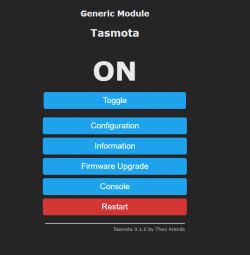
Press 'Configuration' ":
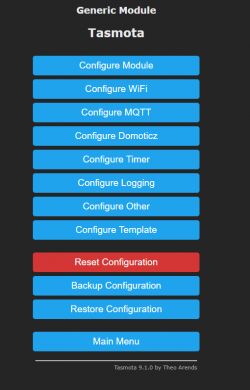
Press 'Configure MQTT':
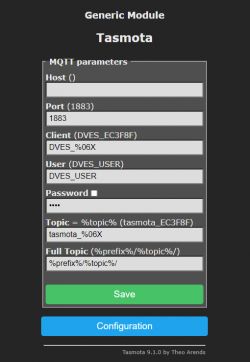
On the screen above, we provide information about the MQTT broker from Home Assistant.
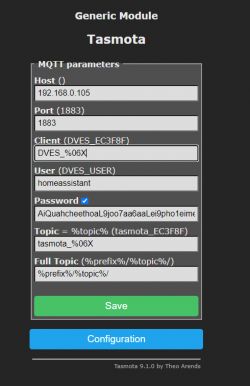
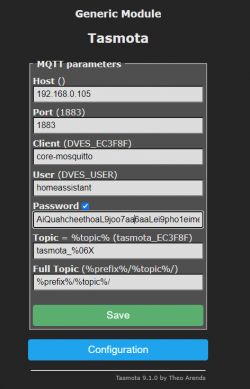
In addition, I recommend that you turn on the SetOption19 1 option in the Tasmota console.

SetOption19 enables the so-called MQTT discovery, i.e. a way of discovering new devices:

Then restart the device again (Restart from the main menu).
Home Assistant - Tasmota device by MQTT
Tasmota's device is rebooting. We wait a moment.
In Home Assistant, in the logs (tab 'Journal') we should already see that something is going on and Tasmota is visible:
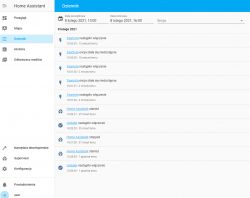
We can then click on the name "Tasmota" and the following window will open:
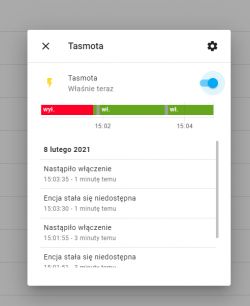
Then it is also worth changing the name from "Tasmota" to something more specific.
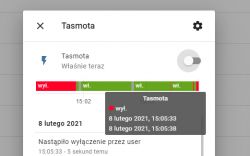
I recommend paying attention to the green-red bar that shows us when the device was turned on and when it was turned off:
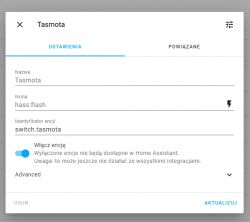
After clicking the 'cog' icon, you can change its name:
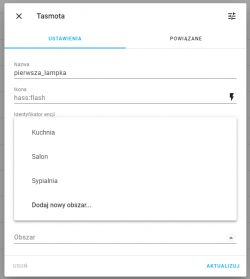
You can also change its area (where it is located - kitchen, bedroom, etc.), create your own area and change the icon:
And from now on it will be visible on our desktop:

Ready. From this desktop, you can already control it - here you turn the light on and off.
Home Assistant - automation through MQTT
To do this, on the main page, click the Configuration button, and then in the MQTT block, click "1 device" (this will display a list of devices):
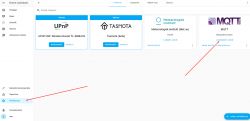
It will show us such a list of devices (but this time filtered according to MQTT):
We click on the line we are interested in (device) and we get all the possibilities of its configuration in one place:

Here you can do automations, i.e. scripts like "when it's dark in the room, turn on the lamp" or "when the temperature drops below 18C, turn on the heater", etc.
It's just that to make a meaningful automation we will need two devices - and I will present it in a moment, but that in the next paragraph.
Zigbee2mqtt - Virtual machine - Zigbee Dongle connection
Now we turn to the topic of Zigbee. We reach for the aforementioned dongle based on CC2531 (although you could try to get a better CC2538 + CC2592, better range):
If we use VMware, we make sure that it is connected to our virtual machine and not to the main computer. This is done in VM -> Removable Devices -> there we find CC2531 and make sure that "Connect" is selected. As below picture:

The presence of a USB device can be checked on Linux with the command lsusb , it lists the id of connected devices. Before connecting:
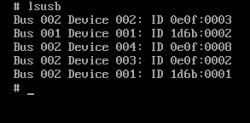
After connecting:
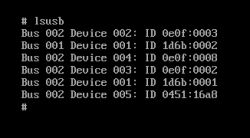

There is a new device in the list, its ID is 0451: 16a8 . Is that a ZigBee dongle? Of course you do - a short search confirms it:

At this point, we are sure that the machine with Home Assistant can see our CC2531 and we can move on to the next step.
Zigbee2mqtt - installation via Addons from Home Assistant
First we need to give Home Assistant a look at the plugin repository from zigbee2mqtt. On the main page, click on Supervisor:

There, click on the 'Addon Store', and then enter the settings by clicking the three dots icon, from where we select the 'Respositories' button:

A dialog box will open:
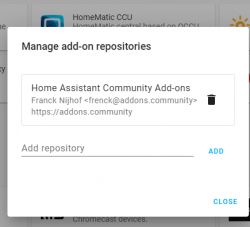
Zigbee2mqtt is on github, here:
https://github.com/danielwelch/hassio-zigbee2mqtt
And we paste this address there.
After adding, new entries should appear in the Store:
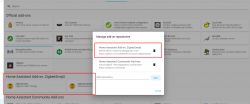
At this point, the Store already knows that an add-on like zigbee2mqtt exists, but we haven't installed it yet.
Click on zigbee2mqtt from the list, install it here:
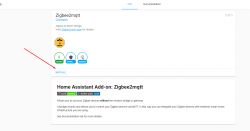
This installation took a long time for me.
After installation, you need to click 'Start':


It is also worth to turn on "Show in sidebar" so that we can conveniently find them. Then zigbee2mqtt will appear in the bar on the left:

Zigbee2mqtt - Zigbee dongle configuration
Now we need to determine what serial port our dongle has. Ports can be viewed in Supervisor -> System -> (three dots) -> Hardware:
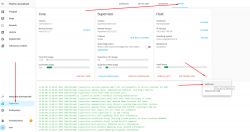
At the very end we have:
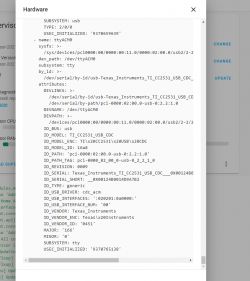
The names and IDs show that these are our dongles:
Quote:
/ dev / serial / by-id / usb-Texas_Instruments_TI_CC2531_USB_CDC ___ 0X00124B0014D9A7B2-if00
attributes:
DEVLINKS:> -
/ dev / serial / by-id / usb-Texas_Instruments_TI_CC2531_USB_CDC ___ 0X00124B0014D9A7B2-if00
/dev/serial/by-path/pci-0000:02:00.0-usb-0:2.2:1.0
DEVNAME: / dev / ttyACM0
DEVPATH:> -
/devices/pci0000:00/0000:00:11.0/0000:02:00.0/usb2/2-2/2-2.2/2-2.2:1.0/tty/ttyACM0
ID_BUS: usb
ID_MODEL: TI_CC2531_USB_CDC
ID_MODEL_ENC: TI \ x20CC2531 \ x20USB \ x20CDC
ID_MODEL_ID: 16a8
ID_PATH: 'pci-0000: 02: 00.0-usb-0: 2.2: 1.0'
ID_PATH_TAG: pci-0000_02_00_0-usb-0_2_2_1_0
ID_REVISION: 0009
ID_SERIAL: Texas_Instruments_TI_CC2531_USB_CDC___0X00124B0014D9A7B2
We remember / dev / ttyACM0. We need to enter this in the zigbee2mqtt configuration. We enter Supervisor, and then in Zigbee2mqtt:
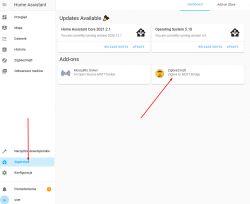
Then 'Configuration':

We have to change a few things here. Everything marked in the picture:
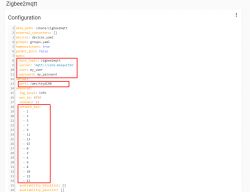
- mqtt group, user and password fields
- serial group, port field (to the port we have, it is possible that you will not need to change anything),
- group advanced field network_key (change the numbers so that we have a different password than the default one)
- permit_join to true
After changes:

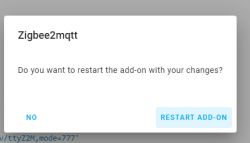
We write down:

We confirm the restart of the add-on:
Zigbee2mqtt - connect the first device
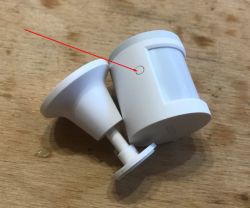
Now we will need something that uses Zigbee. For example, I chose a motion sensor from the Aqara series:

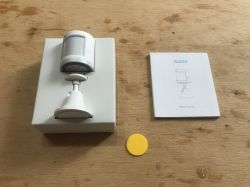
I will provide more information on this sensor in a separate topic.
I pressed its button on the casing (although maybe it was not necessary):
and after a while the sensor was detected in the Configuration -> Integrations -> MQTT tab:

Click on its name to display more information:
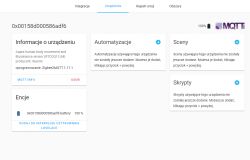
Here you can also create automation (e.g. automatically turn on the lamp when it is dark in the room).
If we have enabled Zigbee2mqtt on the sidebar, it will also be visible here:

After clicking on the name:
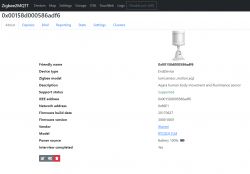
Here, for example, you can check the values of the variables exported by this sensor:
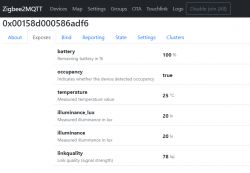
There is a bit of it, the sensor displays its battery level, temperature, light level and even determines whether it has detected movement in the room.
Home Assistant - automations (i.e. scenarios, scripts)
Now we have two devices - a lighting sensor (not only) and a relay.
It's time to connect them in some clever way, i.e. make automation.
No light in the room will light the lamp.
Open Configuration -> Devices -> (select and click for which device we are doing the automation).
For example, for the Aqara sensor we have there:
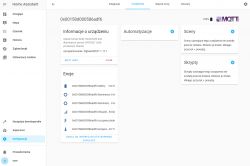
Next to 'Automations', click the plus icon. A window like this will appear:
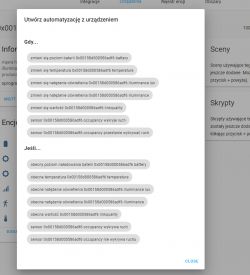
here we choose what will trigger the event. As you can see, the choice is wide.
Let's choose that the event will be triggered by a change in the lighting level. After clicking, we are transferred to a more complex form:
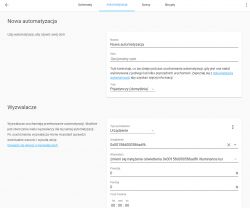
We enter the name and description (optional) of the action, and then set the parameters of the event that will trigger them.
For example, this action will be triggered when the light value from the sensor drops below 5 lux:
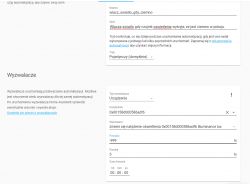
Below we can add the conditions of the action (additional, you do not need to set them) and what the action will result:
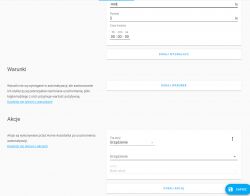
The actions can be of different types, but I will choose the "device" type:

On the "device" list we have devices available in the system (there is also a Tasmota relay that I added earlier):

There are three operations for this relay - on, off and changeover (change of state to its opposite). I chose to turn on here (when it's dark, the light turns on):

Then you have to click 'Save' and the automation will work from then on.
In the same way, I made a second automation that turns off the light when it's bright.
We also have all automation in the Configuration -> Automations tab, here:
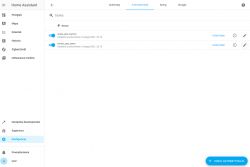
In the video below I present their operation:
[movie: 2c1753af0e] https://filmy.elektroda.pl/32_1612868070.mp4 [/ movie: 2c1753af0e]
(this in the video is my Tasmot relay on ESP8266, DIY version, but it could also be a Smart device from Tuya, or Blitzwolf, etc. etc. etc.)
Everything works, covering the sensor turns on the lamp. It will be worth increasing the frequency of sending the state by the Aqara sensor by MQTT to make everything more responsive, but I will describe it in another topic.
Home Assistant - additional information - automations as Yaml
It is also worth knowing that editing the automation via the Home Assistant's web panel also allows you to edit them as Yaml (this is how they are saved internally).
We switch it here:
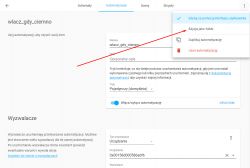
This is what it looks like in Yaml mode:
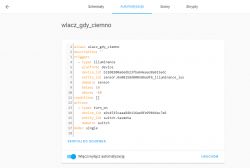
Copy the content as text:
Quote:
alias: power on_when_dark
description: ''
trigger:
- type: illuminance
platform: device
device_id: b3108200a6e6b23fba64eaa38a915edc
entity_id: sensor.0x00158d000586adf6_illuminance_lux
domain: sensor
below: 10
above: -10
condition: []
action:
- type: turn_on
device_id: a9c4515caaa84b116ae8fe99b6dac7e6
entity_id: switch.tasmota
domain: switch
mode: single
Home Assistant - Noteworthy plugin - File Editor
There are many more or less useful plugins in the Addon Store. One of them is File Editor. It allows (as the name suggests) to conveniently edit configuration files from the web panel.
https://github.com/home-assistant/addons/blob/master/configurator/README.md
We install it in a similar way as I discussed earlier for the MQTT plugin. So we open the Store, enter File Editor or Configurator:

Click 'Install' to install:

And then 'Start':
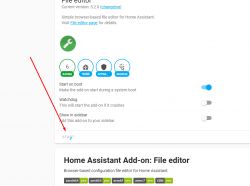
I also recommend selecting 'Show in sidebar' so that the editor is conveniently available on the sidebar:

From now on, in File Editor, we can view files, create and edit them:


In addition, this editor also pre-checks the correctness of writing scripts and, if necessary, informs us in which line the error is:

Home Assistant - Tuya support without changing the firmware
Tuyi devices (i.e. from Tuya, Smart Life, or Jimvoo Smart App) can also be added to Home Assistant directly. You do not need to change their firmware to Tasmota. It is quite convenient, although it also has its downsides, such as the fact that these devices will then also be visible in the manufacturer's cloud, and the Home Assistant will select them through our account at their manufacturer.
This process is described in detail here:
https://www.home-assistant.io/integrations/tuya/
I will now show you how it works.
We need a Tuya device, a Tuya account (confirmed by email) and the Tuya application will also be useful for demonstrations:
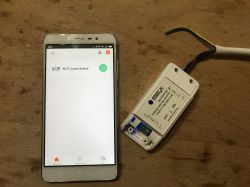
The photo above shows an already paired device that can be controlled by the Tuyi application.
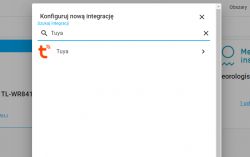
In order to connect our Tuya account to the Home Assistant, open the Configuration-> Integrations tab, click the plus icon:

We find Tuya in the list:
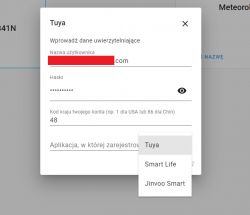
We provide the details of our Tuya account and determine whether we are specifically talking about the Tuya application, or maybe about Smart Life (it is also supported). The country code for Poland is 48.

The application selection looks like this:
If we have provided correct data, then Home Assistant should log in to our account after a while:
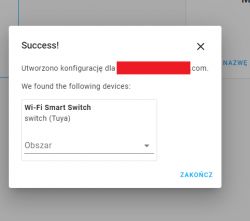
Our Tuya account will appear on integrations:

And all devices from the Tuya account will appear on the main desktop:

And that's it - now you can control them simultaneously from the Tuya application and our Home Assistant.
Demonstration below:
[movie: 2c1753af0e] https://filmy.elektroda.pl/63_1612900096.mp4 [/ movie: 2c1753af0e]
The phone on the right has the Home Assistant page open, and the phone on the left has the original Tuya app. The control works from both phones.
(there is no bulb connected to the relay, but you can see that the blue LED is on, and you can see that the Tuya application is responding to the change by Home Assistant)
Home Assistant - access to the terminal via SSH
The finished system image from Home Assistant does not include SSH support, so it should be installed as well. However, if we installed Home Assistant as an addition to an existing server, via a script (as I did on Banana Pi), we already have SSH.
In any case, SSH installations can be done through the Addon Store:
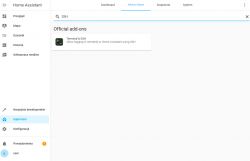
Click 'Install':
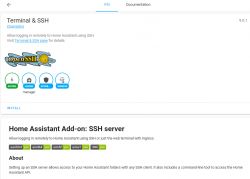
After installing (it's worth to turn on 'Show in sidebar'):
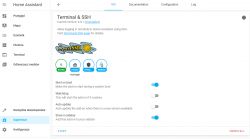
Then we can click 'Start', but it won't work yet. The answer to what can be found in the tab next to it, in 'Logs':
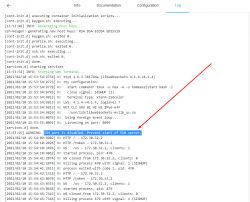
The mistake is WARNING: SSH port is disabled. Prevent start of SSH server ..
For this reason, we have to go to Configuration (the tab next to it) and set the port number in Network there:
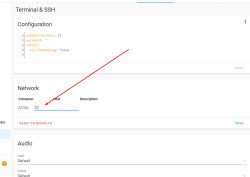
Here you also need to set a login password:

(otherwise we will get the error 'FATAL: You need to setup a login!' in the logs)
Here you have to copy:
Quote:
authorized_keys: []
password: test123
server:
tcp_forwarding: false
Click 'Save' (on the right, you have to do it twice, once for the port and once for the config).
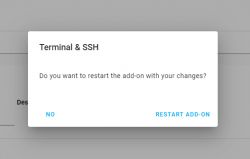
We restart:
We try to connect through Putty:
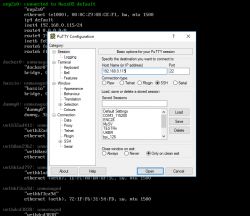
Success:
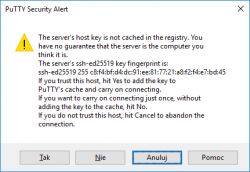
Login (according to agreed data):
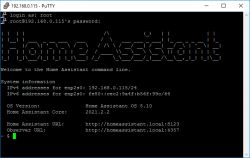
Done, this is how we can get to the Home Assistant console via SSH.
Summary
Of course, this is just the beginning of the Home Assistant adventure. The whole system offers a lot of functionalities and plugins that cannot be described in one topic, and the long list of supported devices is really impressive and shows us that it is possible to make a Smart Home based on equipment from different manufacturers.
I collected some of these devices myself and soon I'm going to present the configuration and interiors of some of them separately. We'll see how Home Assistant can handle it.
In the queue I have, among others:
- Aqara series on Zigbee (I have already presented one of the sensors here; but I also have other devices from this series, e.g. door opening sensor)
- smoke, water, lighting detectors on WiFi by SmartHome / Tuya / eWeLinkIt
- AlfaWise P2 air freshener
And that's it for now, although this topic will still be updated.
Do you have any experience with Home Assistant, what do you think about this platform? Please feel free to discuss.
Cool? Ranking DIY Helpful post? Buy me a coffee.


