FAQ
TL;DR: Treatlife DS01‑Dimmer on WB3S runs OpenBeken via TuyaMCU at 9600 baud; “It’s obviously a 9600‑baud device.” Keep config minimal and avoid 115200. [Elektroda, p.kaczmarek2, post #20760778]
Why it matters: For Treatlife DS01‑Dimmer owners leaving Tuya cloud, this FAQ shows how to map dpIDs, build autoexec.bat, and integrate with Home Assistant fast.
Quick Facts
- Control is TuyaMCU over UART; no GPIO roles are needed for DS01‑Dimmer. [Elektroda, p.kaczmarek2, post #20760747]
- Default baud is 9600; setting 115200 breaks communication. Omit setBaudRate or set it to 9600. [Elektroda, p.kaczmarek2, post #20760778]
- dpId 1 = power (bool), dpId 2 = brightness value (observed up to 1000). [Elektroda, ShellDude, post #20760645]
- dpId 3 = minimum dim level (10–1000), dpId 4 = dimming mode (0–2). [Elektroda, p.kaczmarek2, post #20760828]
- If the device expects cloud, set tuyaMcu_defWiFiState 4 to fake Wi‑Fi state. [Elektroda, p.kaczmarek2, post #20760224]
Does Treatlife DS01‑Dimmer with WB3S work on OpenBeken without GPIO mapping?
Yes. Load the TuyaMCU driver and link dpId 1 to a toggle and dpId 2 to a dimmer. No GPIO roles are required. Users confirmed full control and updates from physical button presses using only TuyaMCU. “I now have full control of the switch / dimmer.” [Elektroda, ShellDude, post #20760726]
What baud rate should I set for TuyaMCU on DS01‑Dimmer?
Use 9600 baud. Do not set 115200, as it breaks communication. “It’s obviously a 9600‑baud device.” You can omit tuyaMcu_setBaudRate entirely because 9600 is the default. This stabilizes UART and avoids buffer errors during startup. [Elektroda, p.kaczmarek2, post #20760778]
How do I map dpIDs for on/off and brightness on this dimmer?
Map dpId 1 to a toggle (bool 0/1) and dpId 2 to a dimmer value. Logs show dpId 1 toggling and dpId 2 reporting values up to 1000. Link these to channels in autoexec for MQTT and UI control. [Elektroda, ShellDude, post #20760645]
How do I set a working dimmer range and link channels?
Set a practical range and link outputs. How‑To: 1) startDriver TuyaMCU. 2) setChannelType 1 toggle; linkTuyaMCUOutputToChannel 1 1 1. 3) setChannelType 2 dimmer; tuyaMcu_setDimmerRange 14 1000; linkTuyaMCUOutputToChannel 2 2 2. This delivers smooth control and proper updates. [Elektroda, ShellDude, post #20760726]
What do dpId 3 and dpId 4 control on Treatlife dimmers?
dpId 3 sets the minimum dimming level with a range of 10–1000. dpId 4 controls the dimming mode, with valid values 0, 1, or 2. “It may be possible to access them from OBK if that’s needed.” Use these only if you need advanced tuning. [Elektroda, p.kaczmarek2, post #20760828]
Do I need GPIO roles for DS01‑Dimmer, or is it TuyaMCU‑only?
It’s TuyaMCU‑only for control. “Everything is controlled by TuyaMCU protocol on the UART line.” Skip GPIO role assignment unless your specific hardware variant proves otherwise. This simplifies configuration and reduces errors. [Elektroda, p.kaczmarek2, post #20760747]
My GPIO extractor says “Sorry, no meaningful pins data found.” What does that imply?
That output indicates a TuyaMCU or custom design without a useful Tuya GPIO table. The DS01‑Dimmer variant discussed operates via TuyaMCU on UART, so the extractor will show no meaningful pin data. Continue with TuyaMCU mapping. [Elektroda, ShellDude, post #20760645]
Why did a DS02S template or 115200 baud make my DS01‑Dimmer misbehave?
The DS01 variant uses 9600 baud, and 115200 “breaks the communication.” Extra sendState lines from other templates are unnecessary here. Keep config minimal, keep 9600, and link only the needed dpIDs. [Elektroda, p.kaczmarek2, post #20760778]
Should I force Wi‑Fi state 0x04 on this device?
Some TuyaMCU devices require Wi‑Fi state 0x04 to operate normally off‑cloud. Add tuyaMcu_defWiFiState 4 in autoexec if the device seems unresponsive until “cloud‑connected.” This helps pass device self‑checks. [Elektroda, p.kaczmarek2, post #20760224]
What’s a minimal autoexec.bat for the DS01‑Dimmer?
Minimal lines: startDriver TuyaMCU; setChannelType 1 toggle; linkTuyaMCUOutputToChannel 1 1 1; setChannelType 2 dimmer; tuyaMcu_setDimmerRange 14 1000; linkTuyaMCUOutputToChannel 2 2 2. This works at default 9600 baud without extra sendState commands. [Elektroda, ShellDude, post #20760726]
How do I integrate OpenBeken with Home Assistant quickly?
Enable MQTT in OpenBeken and provide broker details. OpenBeken publishes Home Assistant Discovery topics automatically, so entities appear without custom YAML. Users reported fast, smooth setup using this path. [Elektroda, ShellDude, post #20762194]
Is OpenBeken more responsive than Tasmota for these dimmers?
A user found OpenBeken “much more responsive.” He also noted the OBK web interface offers more options and direct Home Assistant Discovery. This can speed testing and onboarding. [Elektroda, ShellDude, post #20762194]
What if my Treatlife unit has an ESP8266EX instead of WB3S?
Some Treatlife units ship with ESP8266EX. The user flashed those with Tasmota, while WB3S models ran OpenBeken. Check your module before flashing to choose the correct firmware path. [Elektroda, ShellDude, post #20762194]
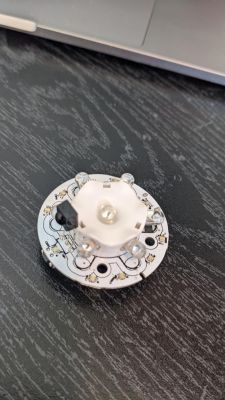
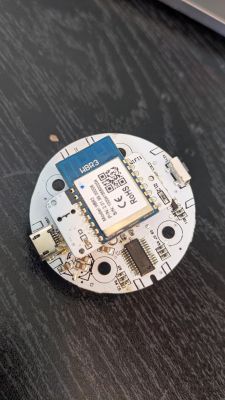
Does OpenBeken support Realtek WBR3‑based IR blasters now?
Yes. A new guide covers WBR2, WBR3, WBRU, and W701‑VA2‑CG pinout, datasheet, and flashing for Home Assistant. Follow that reference for onboarding steps. [Elektroda, p.kaczmarek2, post #21379248]
Can I prototype configurations without hardware using a simulator?
Yes. There is an OpenBeken Windows port with a simulator. Use it to draft autoexec settings and explore features before hardware flashing. [Elektroda, p.kaczmarek2, post #20765233]
How can I verify TuyaMCU traffic is alive after boot?
OpenBeken logs show Tuya frames. Heartbeat frames appear as 55 AA 03 00..., while State frames appear as 55 AA 03 07.... If logs flood with odd bytes, recheck baud and config. [Elektroda, ShellDude, post #20760645]


