Description
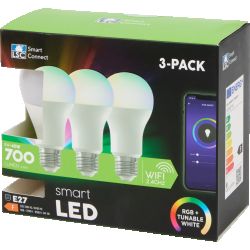
I bought several Feit Electric Smart Bulbs from Costco around Summer 2021 (BPA800/RGBW/2), item 1528975. This year I finally had time to set them up for the upcoming Halloween.
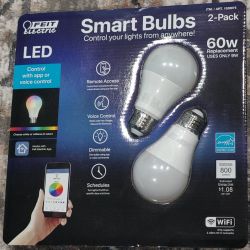
Turns out there are two types of light bulbs, even though item numbers are identical:
- 228-21-17 (type A)
- 228A-21-30 (type B)


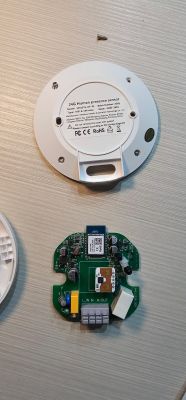
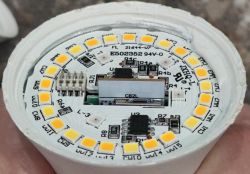
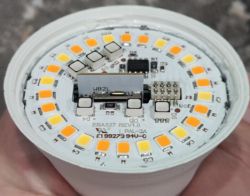
Light bulbs can be opened using a utility knife, cutting and prying around the diffuser base.
I could not remove the module, but the model can be clearly seen. It's WB2L (BK7231T) for type A, and CB2L (BK7231N) for type B.
Flash OpenBeken
The best way to flash OpenBeken without worrying about software issues is to use live CD. In this guide, Ubuntu 22.04 is used.
Pair the light bulbs
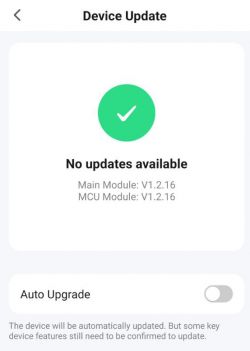
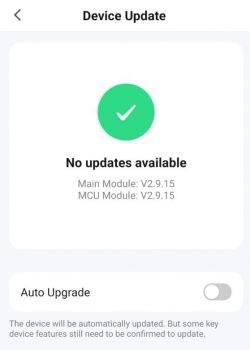
After pairing with Tuya Android app, it can be seen (see screenshots) that type A uses firmware version 2.9.15, type B uses version 1.2.16.
Prepare Ubuntu
- Flash Ubuntu 22.04 to USB stick or other storage media;
- Boot a live CD system and open terminal;
- Install Docker using the official guide;
- Install git using:
- Clone cloudcutter and change to the new folder:
Flash new firmware
- Download the latest OpenBK UG firmware bin files from the releases page, like OpenBK7231T_UG_<version>.bin and OpenBK7231N_UG_<version>.bin and place them into custom-firmware subfolder, rename adding _bk7231t.ug.bin and _bk7231n.ug.bin to the end, correspondingly;
- From the opened terminal, call:
- Select Flash 3rd Party Firmware;
- Select From firmware version and name;
- Select 2.9.15 - BK7231T for type A and 1.2.16 - BK7231N for type B;
- Select the latest firmware bin file you put into custom-firmware subfolder earler;
- Follow the instructions to finish the process.
Connect light bulb to home WiFi network
- Connect to the light bulb using its WiFi network (after the flashing, you might need to restart WiFi on the linux machine), it's named like OpenBK7231X_XXXXXXXX;
- Open the browser and go to 192.168.4.1;
- Go to Config, Configure WiFi and change SSID and password (double check that this information is correct, you won't be able to connect and need to reset the settings otherwise);
- Wait until the light bulb connects to the home network, find its IP address (e.g., from the router settings), and open it in the browser.
Configure the light bulb
Since no predefined config is available for those light bulbs, we can follow the guide.
- Click on Launch Web Application and go to Flash tab;
- Click Download Tuya GPIO Config from 0x1EE000. This will start download of a config binary file, which can then be found in the downloading folder;
- Config can be extracted from the binary using BK7231 GUI Flash Tool. Download the zip file from GitHub releases page and extract it;
- Since by default Mono is not installed in Ubuntu, install it using the official guide;
- Run mono BK7231Flasher.exe;
- Go to Extract Config from Tuya binary tab and mouse drop the extracted config binary file there;
- There are two views of the extracted configuration - json and text description. Copy json and past it to light bulb's web application, Import tab;
- Check the generated script and click Clear OBK and apply new script from above to apply the settings;
- Check if the light bulb can be controlled via its web interface.
Now the light bulb is flashed with the new firmware and independent from the cloud.
I bought several Feit Electric Smart Bulbs from Costco around Summer 2021 (BPA800/RGBW/2), item 1528975. This year I finally had time to set them up for the upcoming Halloween.

Turns out there are two types of light bulbs, even though item numbers are identical:
- 228-21-17 (type A)
- 228A-21-30 (type B)


Light bulbs can be opened using a utility knife, cutting and prying around the diffuser base.
I could not remove the module, but the model can be clearly seen. It's WB2L (BK7231T) for type A, and CB2L (BK7231N) for type B.


Flash OpenBeken
The best way to flash OpenBeken without worrying about software issues is to use live CD. In this guide, Ubuntu 22.04 is used.
Pair the light bulbs
After pairing with Tuya Android app, it can be seen (see screenshots) that type A uses firmware version 2.9.15, type B uses version 1.2.16.


Prepare Ubuntu
- Flash Ubuntu 22.04 to USB stick or other storage media;
- Boot a live CD system and open terminal;
- Install Docker using the official guide;
- Install git using:
Code: Bash
- Clone cloudcutter and change to the new folder:
Code: Bash
Flash new firmware
- Download the latest OpenBK UG firmware bin files from the releases page, like OpenBK7231T_UG_<version>.bin and OpenBK7231N_UG_<version>.bin and place them into custom-firmware subfolder, rename adding _bk7231t.ug.bin and _bk7231n.ug.bin to the end, correspondingly;
- From the opened terminal, call:
Code: Bash
- Select Flash 3rd Party Firmware;
- Select From firmware version and name;
- Select 2.9.15 - BK7231T for type A and 1.2.16 - BK7231N for type B;
- Select the latest firmware bin file you put into custom-firmware subfolder earler;
- Follow the instructions to finish the process.
Connect light bulb to home WiFi network
- Connect to the light bulb using its WiFi network (after the flashing, you might need to restart WiFi on the linux machine), it's named like OpenBK7231X_XXXXXXXX;
- Open the browser and go to 192.168.4.1;
- Go to Config, Configure WiFi and change SSID and password (double check that this information is correct, you won't be able to connect and need to reset the settings otherwise);
- Wait until the light bulb connects to the home network, find its IP address (e.g., from the router settings), and open it in the browser.
Configure the light bulb
Since no predefined config is available for those light bulbs, we can follow the guide.
- Click on Launch Web Application and go to Flash tab;
- Click Download Tuya GPIO Config from 0x1EE000. This will start download of a config binary file, which can then be found in the downloading folder;
- Config can be extracted from the binary using BK7231 GUI Flash Tool. Download the zip file from GitHub releases page and extract it;
- Since by default Mono is not installed in Ubuntu, install it using the official guide;
- Run mono BK7231Flasher.exe;
- Go to Extract Config from Tuya binary tab and mouse drop the extracted config binary file there;
- There are two views of the extracted configuration - json and text description. Copy json and past it to light bulb's web application, Import tab;
- Check the generated script and click Clear OBK and apply new script from above to apply the settings;
- Check if the light bulb can be controlled via its web interface.
Now the light bulb is flashed with the new firmware and independent from the cloud.
Cool? Ranking DIY


