Hi all,
Yesterday, I was surprised by a local action of "Dirk van den Broek" supermarkets. They are selling Tuya smart home devices, which are almost certainly LEDVACE-based. Especially the filament one, which shares many similarities. The printing and type set is the same, as is the coloring of the print.
Let me start with an overview of the devices.
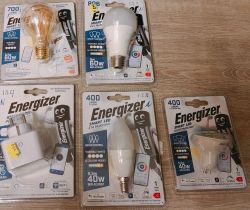
All of them were € 3,99, which meant I bought 40 of them . They are 4 euros cheaper than the ACTION LSC ones, which go around € 7,95. So, I took the risk of just purchasing them. Which, at the end of the evening, turned out to be an excellent pick.
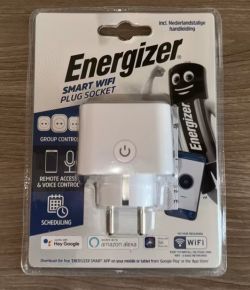
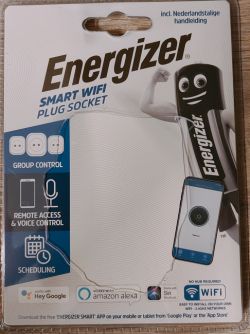
The Energizer Smart Wifi Socket.
Front Package
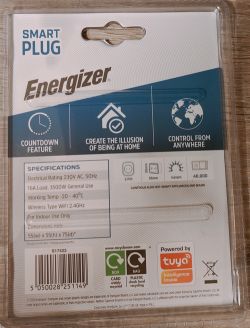
Rear Package
Firmware detection
Well, I needed to install the Tuya App to find the firmware. As always, it is quite easy, just run the app as guest mode, connect the device, and recover the firmware information.
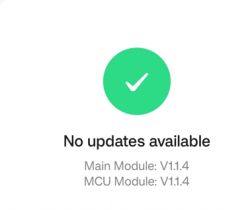
In this case, the main module and MCE are running version 1.1.4
As we all know by now, no physical dismantling is needed anymore, thanks to the beautiful work from the creators of "tuya-cloudcutter", but being me and curious as always, I opened the smart socket. This is quite easy, just pry around the casing going to each corner, and pop out the cover. It should go without damaging the socket.
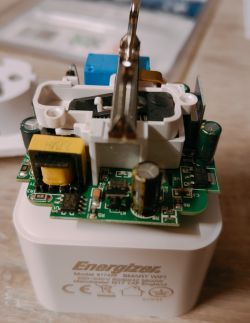
Once opened, this is what you get:
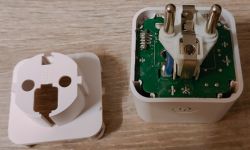
Here are a few more close-ups:
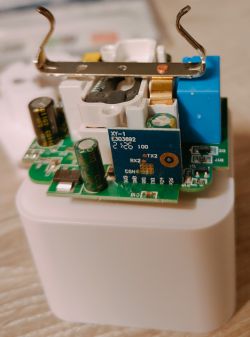
The final close-up showing the board marking
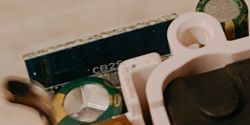
In this case, a CB2S, meaning a BK7231N-based device.
So, with all the collected information, I could flash the Plug using cloud-cutter.
For flashing, I used the following information:
Flash-based on the firmware version, and I selected V1.1.4
Choose OpenBeken firmware 308 (latest from: https://github.com/openshwprojects/OpenBK7231T_App/releases)
And did the power off/power on magic (For which I, incidentally, built a smartplug rig, including automation in HomeAssistant, so the process is fully automated and I can lean back and enjoy my tea).
Once finished, I could connect to the OpenBeken_MAC Wifi AP and configure my local wifi network.
From there, it was no problem configuring the Smart Plug. It only has one LED and one relay, so no "Wifi LED"
Very basic, but what would you expect for just € 3,99
P7=LED_n (depending on you preference)
P24=Relay
P6=BTN
Happy switching and this one will come to my to Costa Teguise!
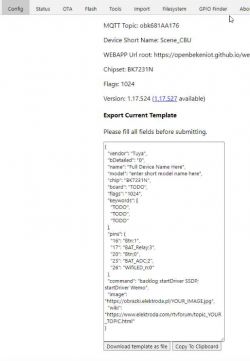
Template:
{
"vendor": "Tuya",
"bDetailed": "0",
"name": "Full Device Name Here",
"model": "enter short model name here",
"chip": "BK7231N",
"board": "TODO",
"flags": "1024",
"keywords": [
"TODO",
"TODO",
"TODO"
],
"pins": {
"7": "LED_n;0",
"24": "Rel;0",
"26": "Btn;0"
},
"command": "",
"image": "https://obrazki.elektroda.pl/YOUR_IMAGE.jpg",
"wiki": "https://www.elektroda.com/rtvforum/topic_YOUR_TOPIC.html"
}
And now, number two is the filament E27 smart LED.
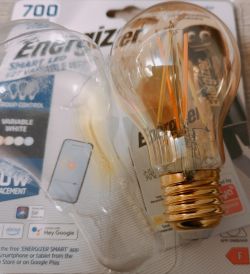
Front package:
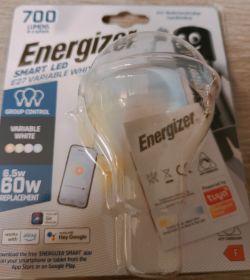
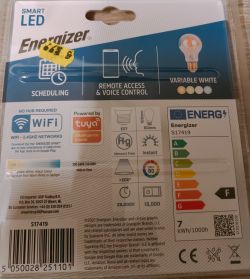
Rear package:
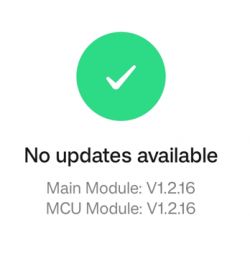
Firmware:
I added this blub and retrieved the firmware version, in this case, V1.2.16. Spoiler alert: so did all the other lights.
And again, happy flashing here, fired up the rig, started HA automation, and waited for the result.
I connected to the OpenBeken_MAC wifi address and successfully attached it to my wifi.
There was a small issue that I unintentionally flashed ESPHome Kickstarter. As such, I needed to flash back to OpenBeken. With the help of Crossid from the CloudCutter team, I could do this in no time. THe good thing is that my little ESPHome trip learned me that the filaments are connected to P24 and P26.
If your warm/cool lights are mixed up, swap the channels. If memory serves me well, P24 is Channel 1, and P26 is Channel 2.
And another one finished!
Well, time for the third one:
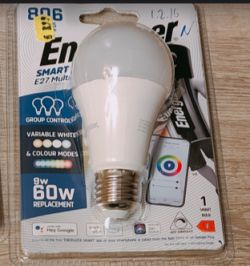
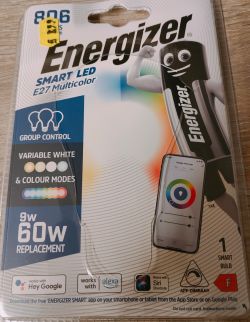
This is the E27 Smart LED / Multi Light
Front package:
Rear package:
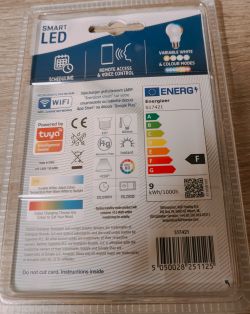
As we already know, the firmware was version 1.2.16, and I did not bother connecting it to the Tuya App.
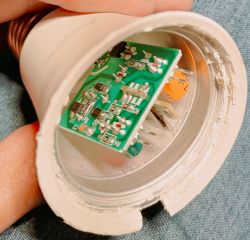
Again, the flashing went like a breeze. No problems at all. But here comes the fun part. I didn't know which electronics were used on the inside. So now, it was time to dismantle the device. I could have fiddled around with the pins, but for a 3,99 euro device, I concluded I could sacrifice one. Ultimately, the casing opened easily, and the damage was not too bad. So, put a hobby knife between the socket and the plastic dome space and go round and round. It should pop off, and there is some caulking you can take off.
Hood popped off:
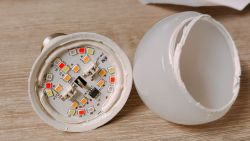
You must pry a screwdriver on the side (for me, there was a tiny indent where I could pry the screwdriver in) and carefully try to pop the circuit board out. The more caulking you remove, the easier it will pop out.
Inside electronics:
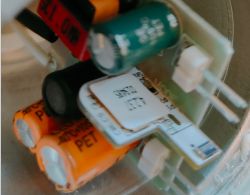
Another angle (you can see the damage on the top):
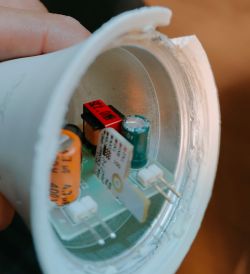
Another closeup reveals that only four pins are soldered (3,3V, GND, and two PWM's)
The final one, revealing the BP5758, is the controlling chip and the last info I needed:
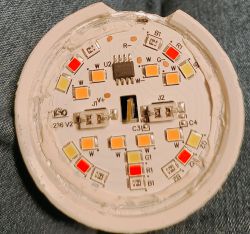
So, I put everything back together and put some superglue between the casing and the hood.
No damage is visible besides the little piece of plastic that broke off.
Now, back to the configuration:
The pins are connected in the following way:
P6 -> BP5758D_DAT, Channel 0
P9 -> BP5758D_CLK, Channel 1
LED ordering
R=2
G=0
B=1
C=3
W=4
Spoiler alert: The same goes for the GU10 and E14 lights.
We are almost there. Just two devices left:
Smart LED E14 Multicoller bulb:
Front package:
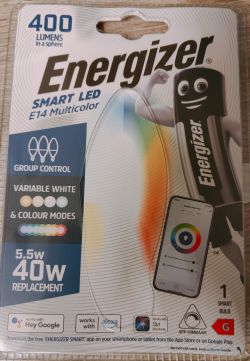
Read the package (indicating the € 3,99):
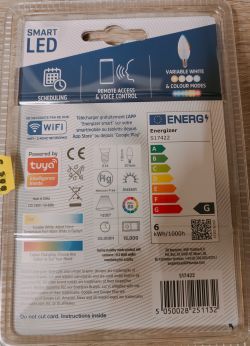
Flashing was no issue. Configuring the pins was a breeze.
The pins are connected in the following way:
P6 -> BP5758D_DAT, Channel 0
P9 -> BP5758D_CLK, Channel 1
LED ordering
R=2
G=0
B=1
C=3
W=4
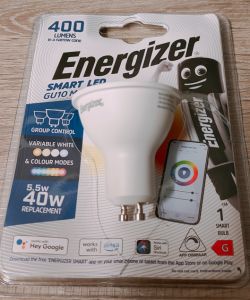
And to sum it up, the Energizer GU10 Smart LED:
Front package:
Rear package:
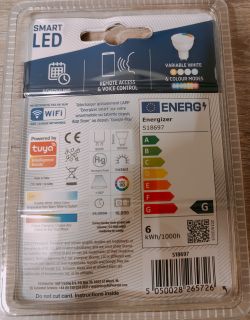
It handled the same as the E14 and E27
Flashing was no issue. Configuring the pins was a breeze.
The pins are connected in the following way:
P6 -> BP5758D_DAT, Channel 0
P9 -> BP5758D_CLK, Channel 1
LED ordering
R=2
G=0
B=1
C=3
W=4
The plugs and lights are not better or worse than the ACTION LSC or LEDVANCE models. They are 50% cheaper, so I can recommend them for now.
So, to summarize my experience, 5 out of 5! I got all devices working; none are damaged beyond repair, and they interact perfectly with Home Assistant.
I'll create a template later on and do some mass provisioning, which is always nice if you have that many devices.
Niels
Yesterday, I was surprised by a local action of "Dirk van den Broek" supermarkets. They are selling Tuya smart home devices, which are almost certainly LEDVACE-based. Especially the filament one, which shares many similarities. The printing and type set is the same, as is the coloring of the print.
Let me start with an overview of the devices.

All of them were € 3,99, which meant I bought 40 of them
The Energizer Smart Wifi Socket.
Front Package

Rear Package

Firmware detection
Well, I needed to install the Tuya App to find the firmware. As always, it is quite easy, just run the app as guest mode, connect the device, and recover the firmware information.

In this case, the main module and MCE are running version 1.1.4
As we all know by now, no physical dismantling is needed anymore, thanks to the beautiful work from the creators of "tuya-cloudcutter", but being me and curious as always, I opened the smart socket. This is quite easy, just pry around the casing going to each corner, and pop out the cover. It should go without damaging the socket.
Once opened, this is what you get:

Here are a few more close-ups:


The final close-up showing the board marking

In this case, a CB2S, meaning a BK7231N-based device.
So, with all the collected information, I could flash the Plug using cloud-cutter.
For flashing, I used the following information:
Flash-based on the firmware version, and I selected V1.1.4
Choose OpenBeken firmware 308 (latest from: https://github.com/openshwprojects/OpenBK7231T_App/releases)
And did the power off/power on magic (For which I, incidentally, built a smartplug rig, including automation in HomeAssistant, so the process is fully automated and I can lean back and enjoy my tea).
Once finished, I could connect to the OpenBeken_MAC Wifi AP and configure my local wifi network.
From there, it was no problem configuring the Smart Plug. It only has one LED and one relay, so no "Wifi LED"
Very basic, but what would you expect for just € 3,99
P7=LED_n (depending on you preference)
P24=Relay
P6=BTN
Happy switching and this one will come to my to Costa Teguise!
Template:
{
"vendor": "Tuya",
"bDetailed": "0",
"name": "Full Device Name Here",
"model": "enter short model name here",
"chip": "BK7231N",
"board": "TODO",
"flags": "1024",
"keywords": [
"TODO",
"TODO",
"TODO"
],
"pins": {
"7": "LED_n;0",
"24": "Rel;0",
"26": "Btn;0"
},
"command": "",
"image": "https://obrazki.elektroda.pl/YOUR_IMAGE.jpg",
"wiki": "https://www.elektroda.com/rtvforum/topic_YOUR_TOPIC.html"
}
And now, number two is the filament E27 smart LED.

Front package:

Rear package:

Firmware:
I added this blub and retrieved the firmware version, in this case, V1.2.16. Spoiler alert: so did all the other lights.

And again, happy flashing here, fired up the rig, started HA automation, and waited for the result.
I connected to the OpenBeken_MAC wifi address and successfully attached it to my wifi.
There was a small issue that I unintentionally flashed ESPHome Kickstarter. As such, I needed to flash back to OpenBeken. With the help of Crossid from the CloudCutter team, I could do this in no time. THe good thing is that my little ESPHome trip learned me that the filaments are connected to P24 and P26.
If your warm/cool lights are mixed up, swap the channels. If memory serves me well, P24 is Channel 1, and P26 is Channel 2.
And another one finished!
Well, time for the third one:
This is the E27 Smart LED / Multi Light
Front package:

Rear package:

As we already know, the firmware was version 1.2.16, and I did not bother connecting it to the Tuya App.
Again, the flashing went like a breeze. No problems at all. But here comes the fun part. I didn't know which electronics were used on the inside. So now, it was time to dismantle the device. I could have fiddled around with the pins, but for a 3,99 euro device, I concluded I could sacrifice one. Ultimately, the casing opened easily, and the damage was not too bad. So, put a hobby knife between the socket and the plastic dome space and go round and round. It should pop off, and there is some caulking you can take off.
Hood popped off:

You must pry a screwdriver on the side (for me, there was a tiny indent where I could pry the screwdriver in) and carefully try to pop the circuit board out. The more caulking you remove, the easier it will pop out.
Inside electronics:

Another angle (you can see the damage on the top):

Another closeup reveals that only four pins are soldered (3,3V, GND, and two PWM's)

The final one, revealing the BP5758, is the controlling chip and the last info I needed:

So, I put everything back together and put some superglue between the casing and the hood.
No damage is visible besides the little piece of plastic that broke off.
Now, back to the configuration:
The pins are connected in the following way:
P6 -> BP5758D_DAT, Channel 0
P9 -> BP5758D_CLK, Channel 1
LED ordering
R=2
G=0
B=1
C=3
W=4
Spoiler alert: The same goes for the GU10 and E14 lights.
We are almost there. Just two devices left:
Smart LED E14 Multicoller bulb:
Front package:

Read the package (indicating the € 3,99):

Flashing was no issue. Configuring the pins was a breeze.
The pins are connected in the following way:
P6 -> BP5758D_DAT, Channel 0
P9 -> BP5758D_CLK, Channel 1
LED ordering
R=2
G=0
B=1
C=3
W=4
And to sum it up, the Energizer GU10 Smart LED:
Front package:

Rear package:

It handled the same as the E14 and E27
Flashing was no issue. Configuring the pins was a breeze.
The pins are connected in the following way:
P6 -> BP5758D_DAT, Channel 0
P9 -> BP5758D_CLK, Channel 1
LED ordering
R=2
G=0
B=1
C=3
W=4
The plugs and lights are not better or worse than the ACTION LSC or LEDVANCE models. They are 50% cheaper, so I can recommend them for now.
So, to summarize my experience, 5 out of 5! I got all devices working; none are damaged beyond repair, and they interact perfectly with Home Assistant.
I'll create a template later on and do some mass provisioning, which is always nice if you have that many devices.
Niels


