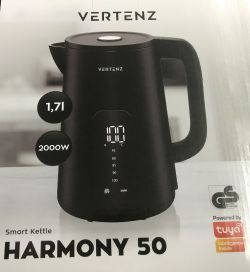
https://pt.aliexpress.com/item/1005005862715843.html


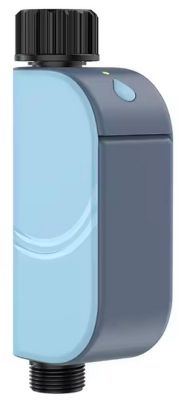
I wasn't able to find anything in the database, so I'm posting here. Also looking into what I should do to flash it.


I wasn't able to find anything in the database, so I'm posting here. Also looking into what I should do to flash it.

