logo elektroda
logo elektroda
X
logo elektroda

Videotests, measurements and teardown of Yato YT-82457 hot air station bought for 35$ - a better 858

p.kaczmarek2 2352 6
ADVERTISEMENT
Treść została przetłumaczona polish » english Zobacz oryginalną wersję tematu
  • Yato YT-82457 hot air soldering station on a workbench. .
    Is the Yato YT-82457 750W hot air soldering station capable of desoldering components from a computer motherboard? Is its performance comparable to that of more expensive stations available for 100-250$? How is such a station constructed inside? I will try to check this here and present the results in the form of videos and graphs.

    This is going to be another hot air test by me, I recommend reading the previous tests:
    Hot air station 858 for 150 zł (35$ or so) - what cheap hot air to fly out of laptop boards, computer? .
    Budget soldering station JCD 8908 2 in 1 (soldering tips + hot air) for 200 zł (50$), VGA HDMI soldering etc
    Which hot air to buy? Comparison, measurements, graphs - JCD 8908, SP-1011DLR and QUICK 861DW
    Comparison of QUICK 861DW and SUGON 8630 Pro hot air stations - 1kW vs 1.3kW heater
    Test and measurements of the Preciva 995D 810W hot air soldering station - a good choice on a small budget? .

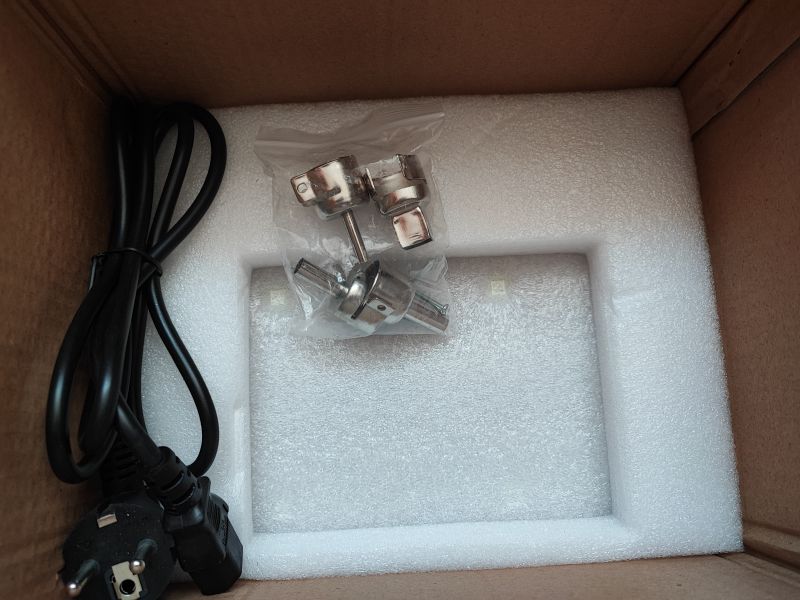
    We start as usual with a presentation of the packaging and kit:
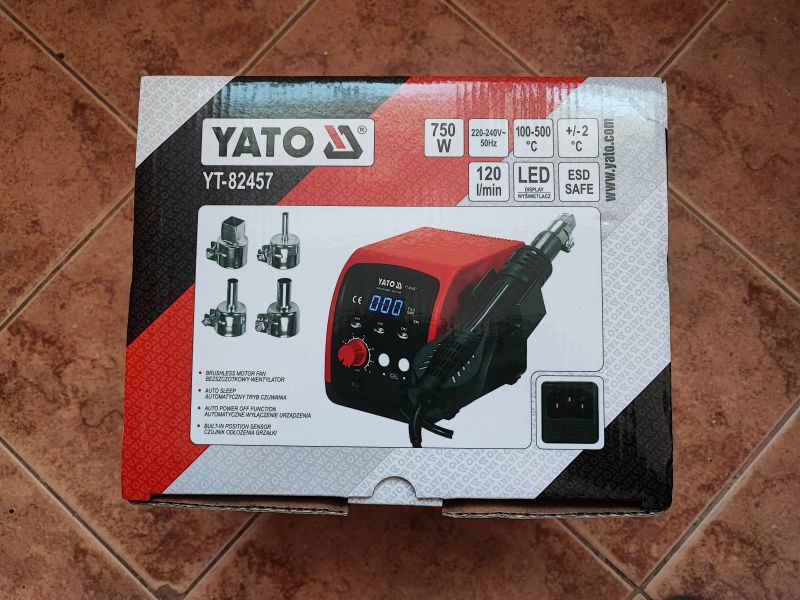
    Packaging of Yato YT-82457 hot air soldering station. .
    Maximum air flow power is as usual 120l/min, similar to the other stations. I think of those I have tested so far only the Sugon 8630 PRO offered 200l/min.
    The kit comes with instructions and additional nozzles:
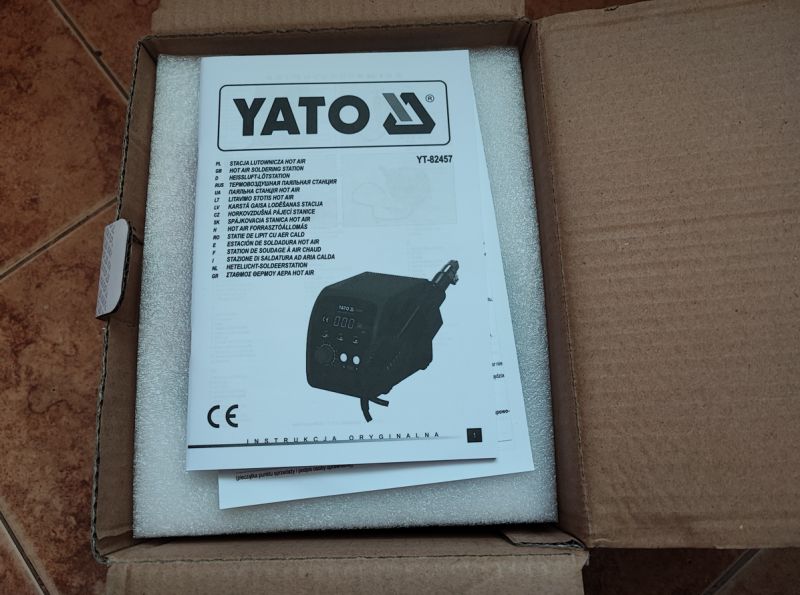
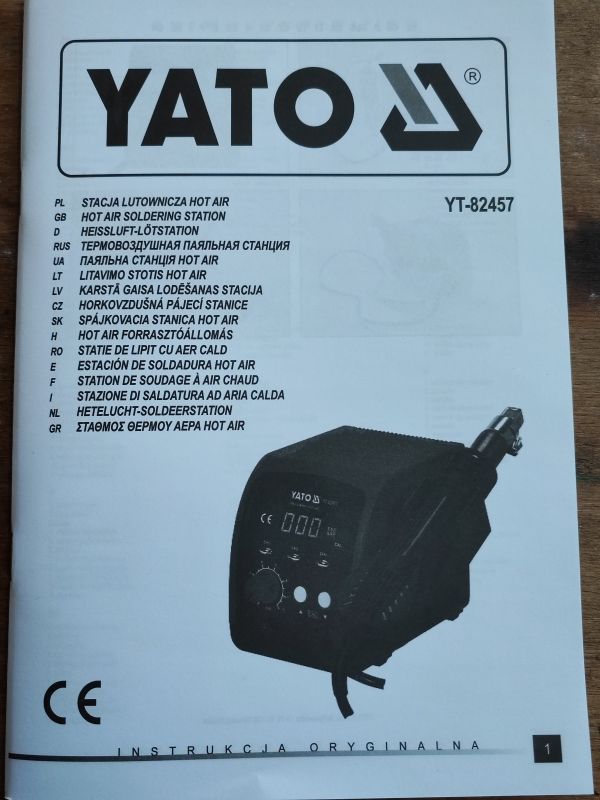
    User manual of Yato YT-82457 soldering station in a box Soldering station packaging with accessories .
    And then there is the station itself:
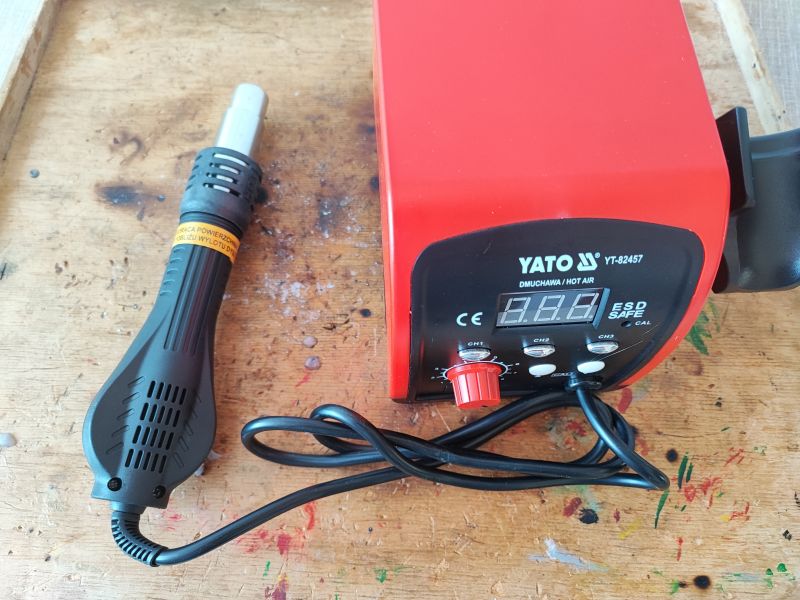
    Yato YT-82457 hot air soldering station with blower. .
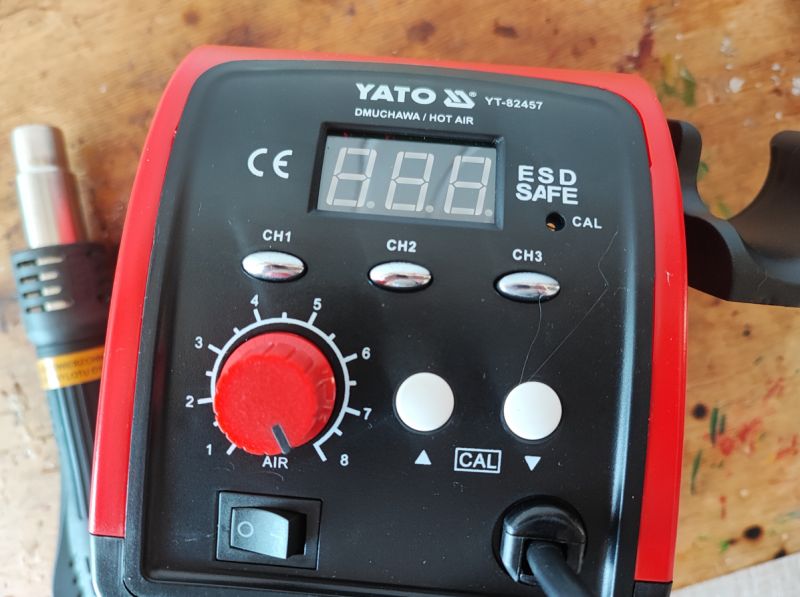
    Here is the first remark - this station has the possibility of setting three programmes which can make our work a little easier. The 858 discussed earlier did not offer this.
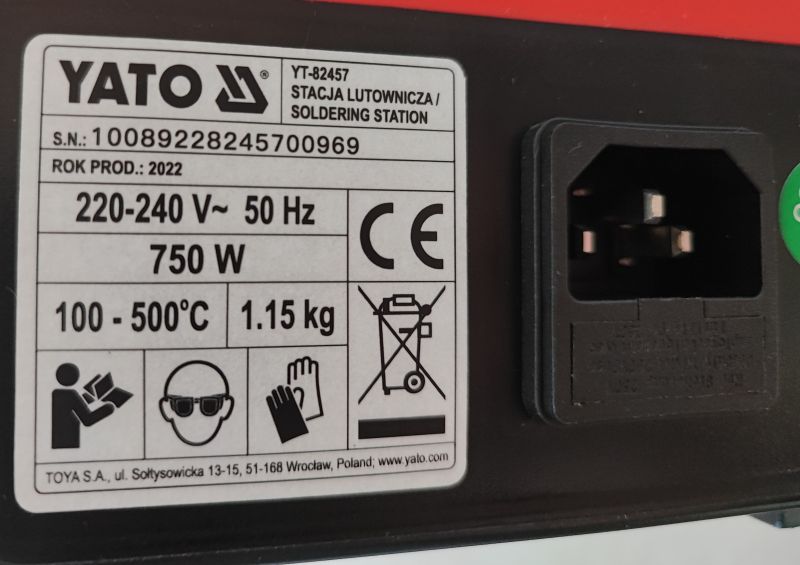
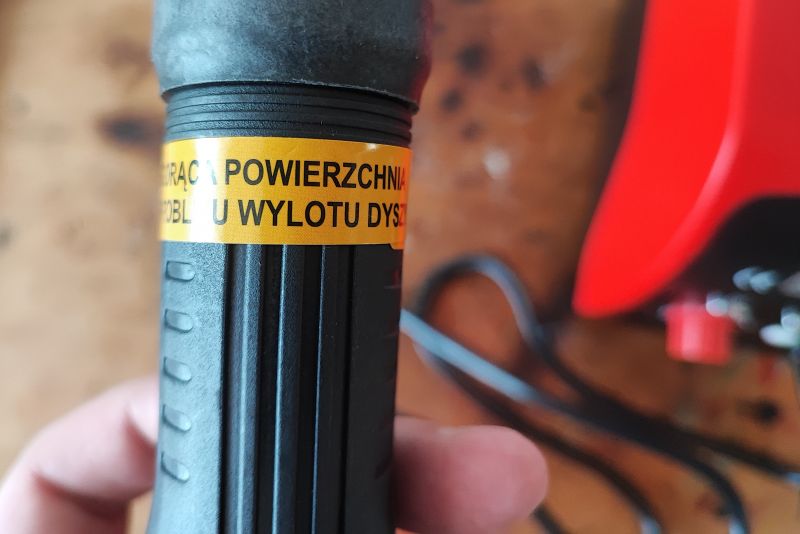
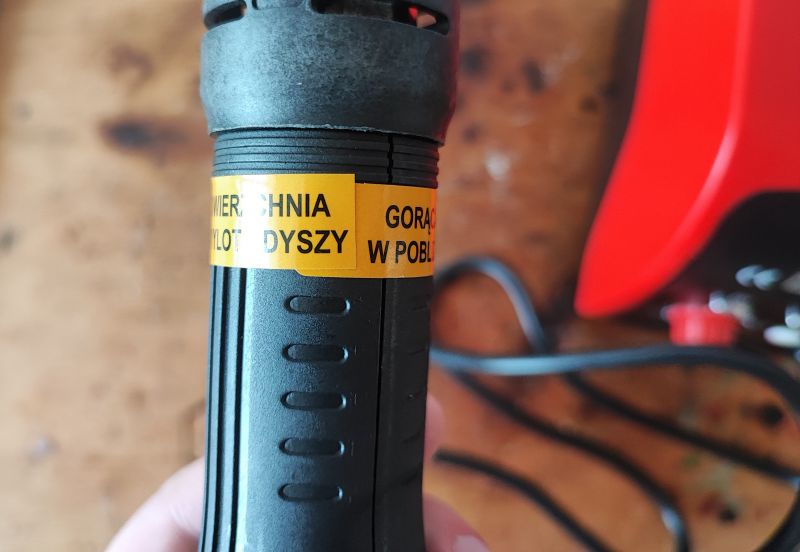
    Interior of the Yato YT-82457 soldering station showing wiring and a transformer. Control panel of the Yato YT-82457 soldering station with LED display and adjustment knob. Nameplate of the Yato YT-82457 soldering station Nozzle of soldering station with Polish warning label Close-up of the nozzle part of a Yato soldering station with a warning label. .
    The display is quite clear, while the casing seems to be quite cheap plastic.
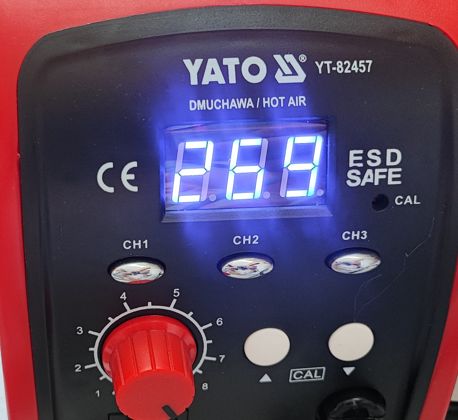
    Control panel of the Yato YT-82457 soldering station with digital display. .
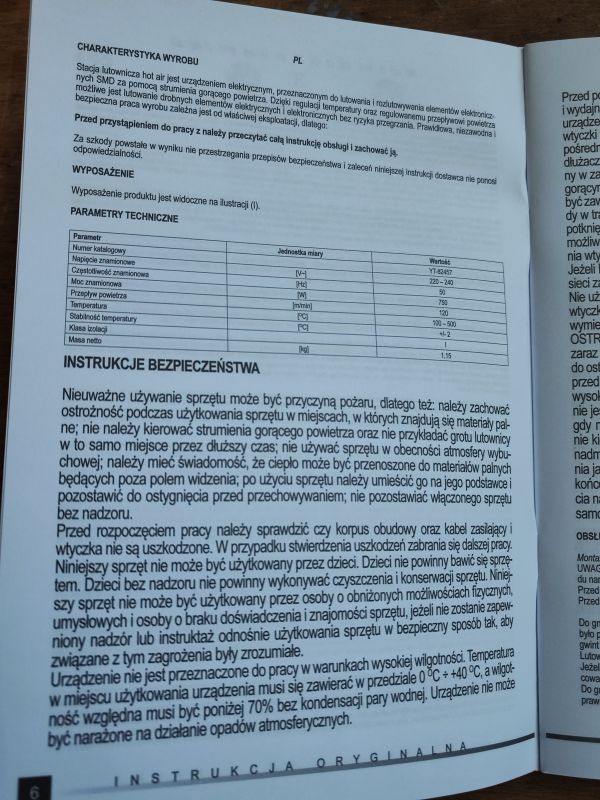
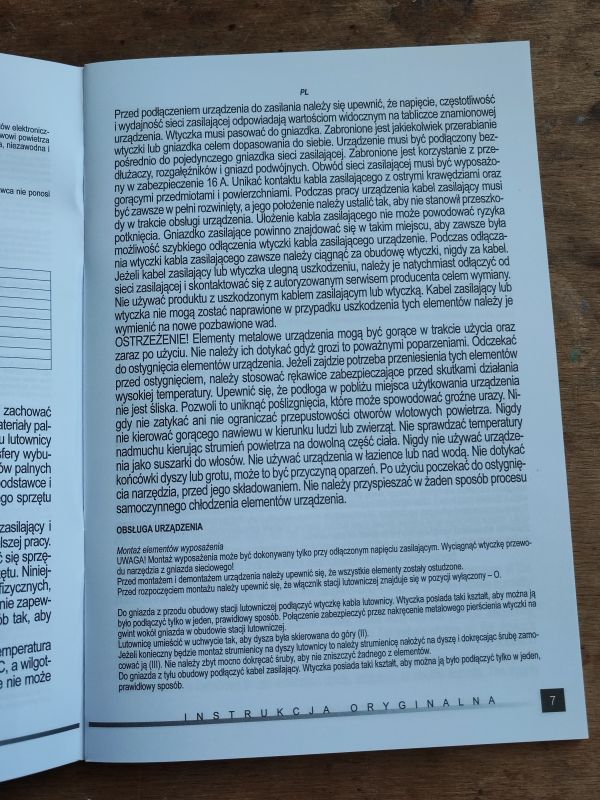
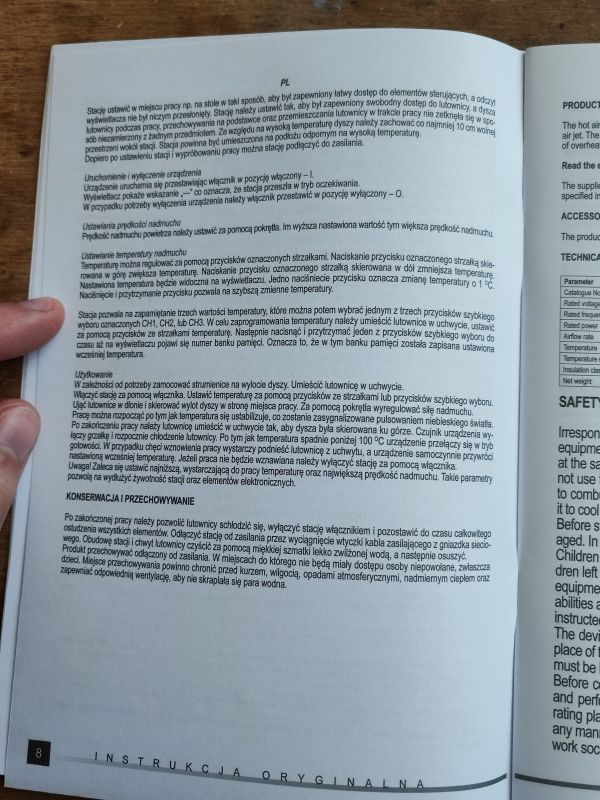
    Instructions in Polish:
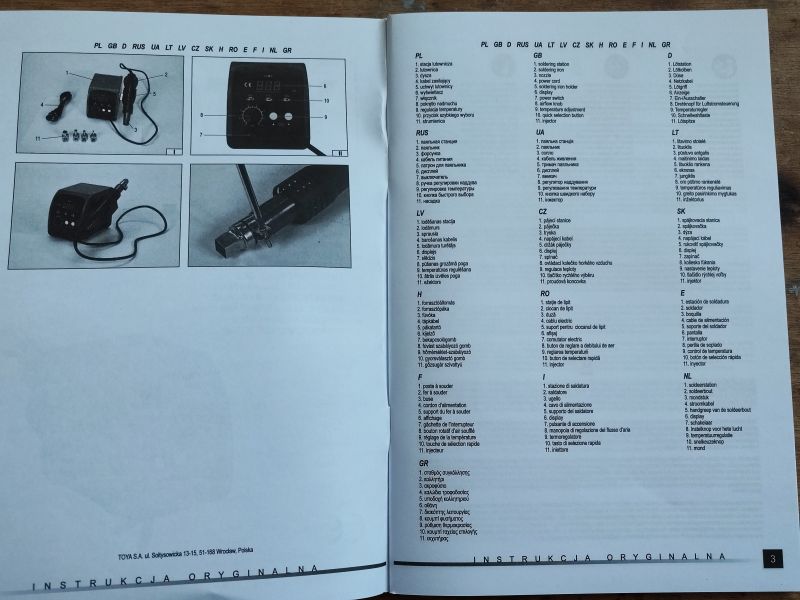
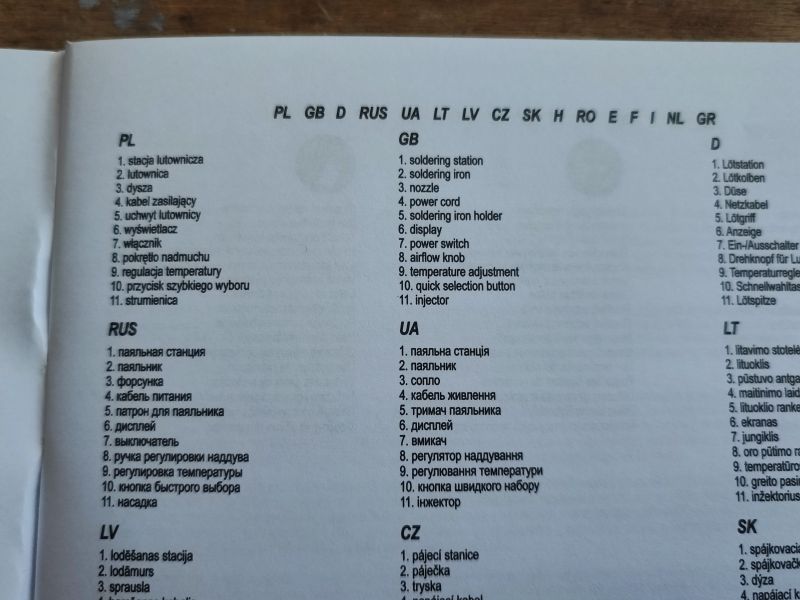
    Instruction manual for Yato YT-82457 hot air soldering station User manual of the Yato YT-82457 soldering station with illustrations. User manual for Yato YT-82457 soldering station in various languages. User manual for Yato YT-82457 soldering station in various languages. Page from the user manual of the Yato YT-82457 soldering station with technical specifications. User manual of the Yato YT-82457 soldering station in Polish. Operating manual for the Yato YT-82457 soldering station.
    Specifications and description in Polish:
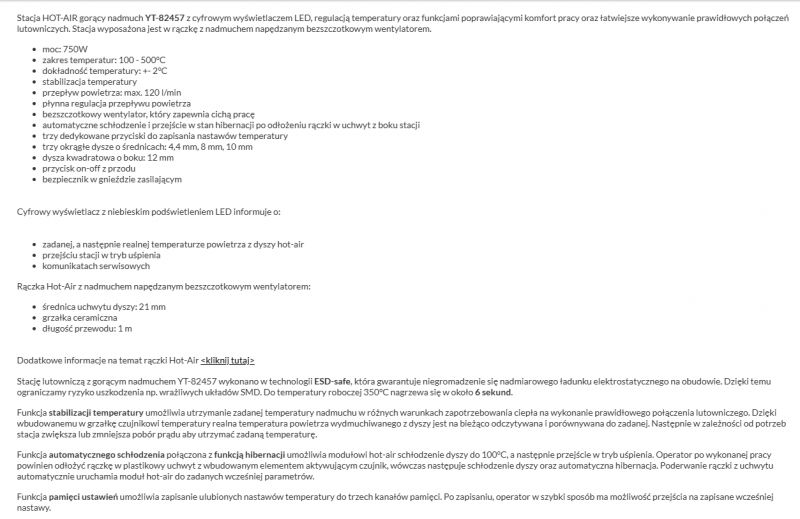
    Specifications of the Yato YT-82457 soldering station. .


    Organisational issues .
    Before we move on to the tests proper, I would like to highlight a few things here:
    - all tests were performed on discs made from electro-waste
    - the video clips do not show the correct methods of desoldering
    - therefore in the videos I do not use kapton tape to protect adjacent components
    - I do not ensure that the component does not "fly away" when blown by hot air
    - the boards on the videos may not be thoroughly washed of flux
    - in the videos I am "impatient" and move parts that should be left alone during the casting process, because if we use force we may break the pads
    - etc. etc.
    The topic "how to replace the MOSFET correctly and wash the board" will be covered separately. Here I am just testing hot air.

    Videotests Yato YT-82457 .
    Time for some experiments. For all the videos below I have made the following assumptions:
    - at the beginning of the video the station is switched off, it is completely cooled down to room temperature, the board similarly
    - 8.4mm nozzle or no nozzle (you can see in the video; yes, that's my nozzle, not any of the kit)
    - highest blow rate, if the specification is to be believed, 120l/m
    - films are not processed

    Let's start with lower temperatures. 350°C, full blow, motherboard from a laptop, chip soldering in an SO8 or similar enclosure:


    .
    90 seconds to remove, but this is without flux.

    350°C, attempting to remove the coil from a large copper spout:


    .
    Unsuccessful, I gave up after 2 minutes. I then let the plate cool down. Test at 400°C:


    .
    Success in just over a minute.

    400°C, soldering of the standing HDMI socket by heating on the other side of the PCB:
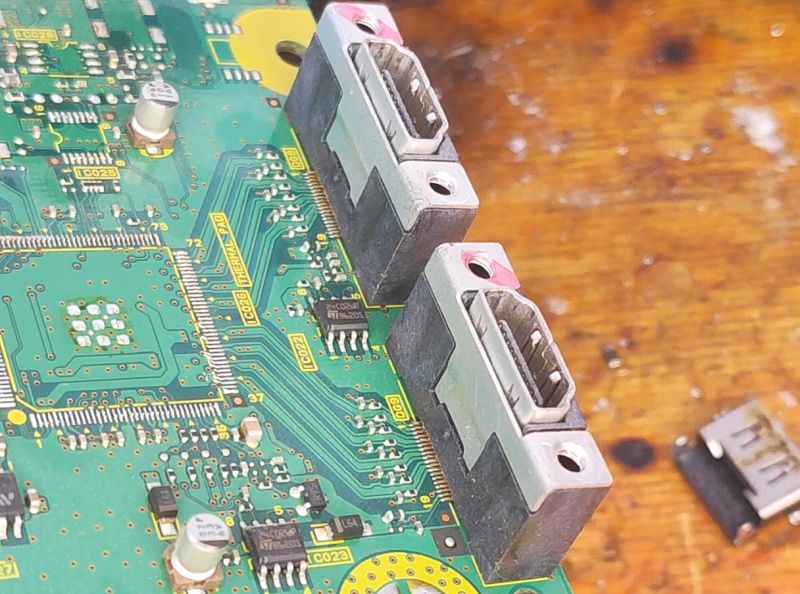
    Close-up of a motherboard with two HDMI ports. .


    .
    It was possible to remove the socket without tearing the tracks or melting the socket itself.

    450°C, MOSFET transistor soldering from a computer motherboard:


    .


    .
    Soldered out in less than a minute.


    Drawings [/size]
    Such games of soldering a component out of scrap in time may be fun, but it's also better to measure something. The standard assumption here is to use the largest overblow, although in many cases it could be reduced (then it could also heat a bit harder), but that's the assumption I started with and it's hard to change anymore.
    I made the graphs based on my set up with a thermocouple:
    OpenBeken configuration for hot air testing - MAX6675, temperature and power logging .
    First a graph at 350°C:
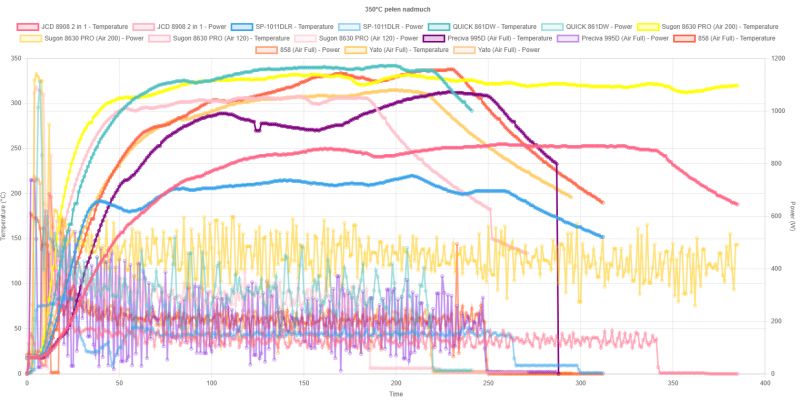
    Comparison chart of temperature and power for hot air soldering stations at 350°C. .
    After about 100 seconds, the probe actually recorded over 300°C.
    Interactive version:
    https://openshwprojects.github.io/hotair/version5/350c.html

    Now the graph at 450°C:
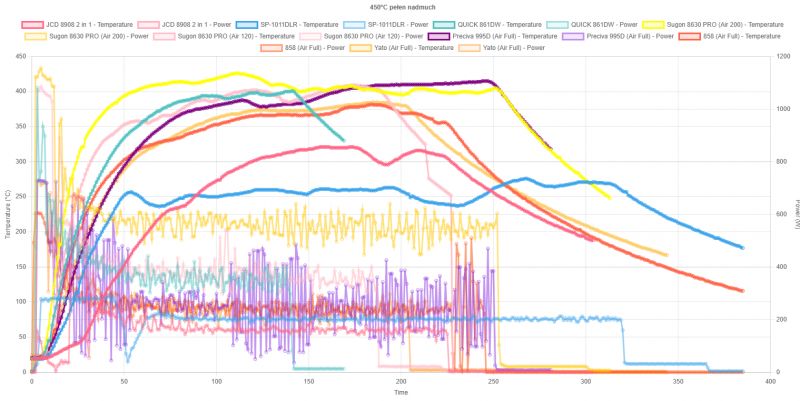
    Graph comparing temperature and power of different hot air stations at 450°C. .
    After about 90 seconds, the probe actually recorded over 350°C, then the temperature already rose more slowly and approached 375°C in 200 seconds.
    Interactive version of the graph:
    https://openshwprojects.github.io/hotair/version5/450c.html
    The final evaluation will be in the last paragraph.

    Interior .
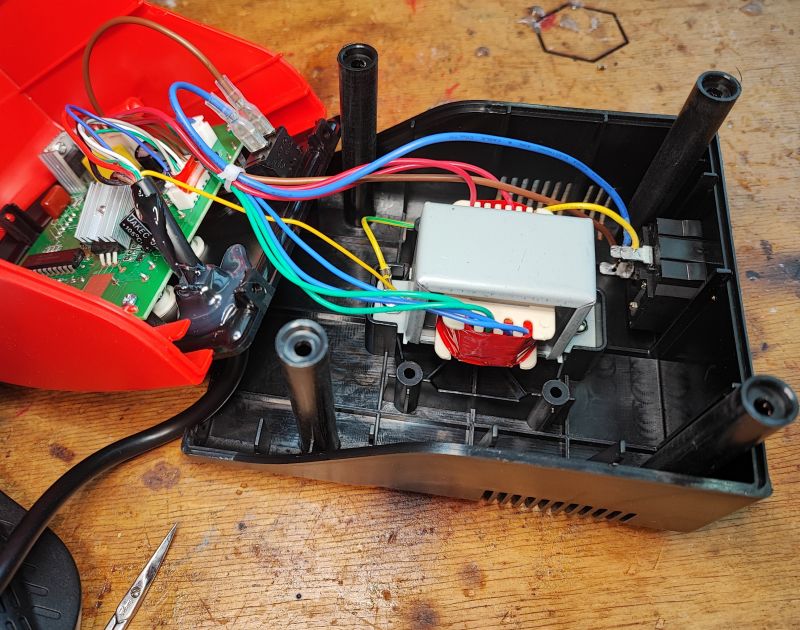
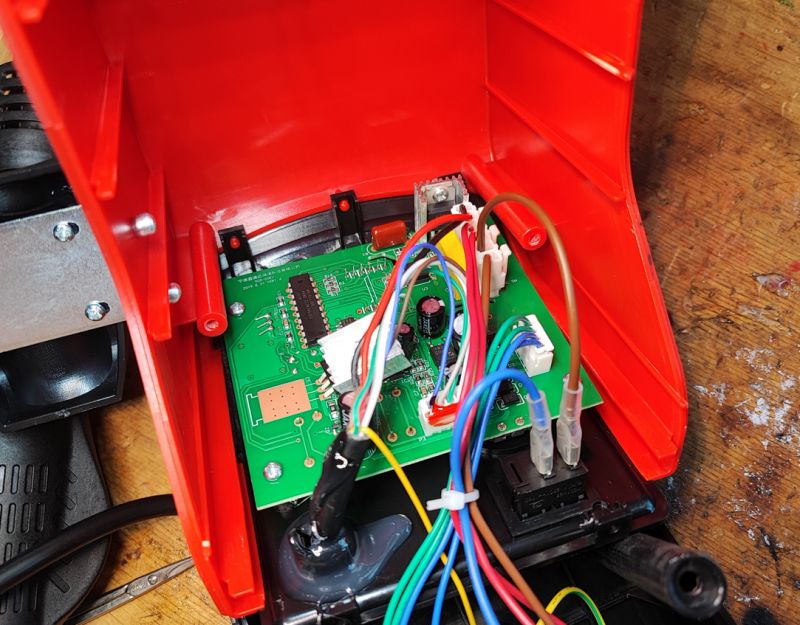
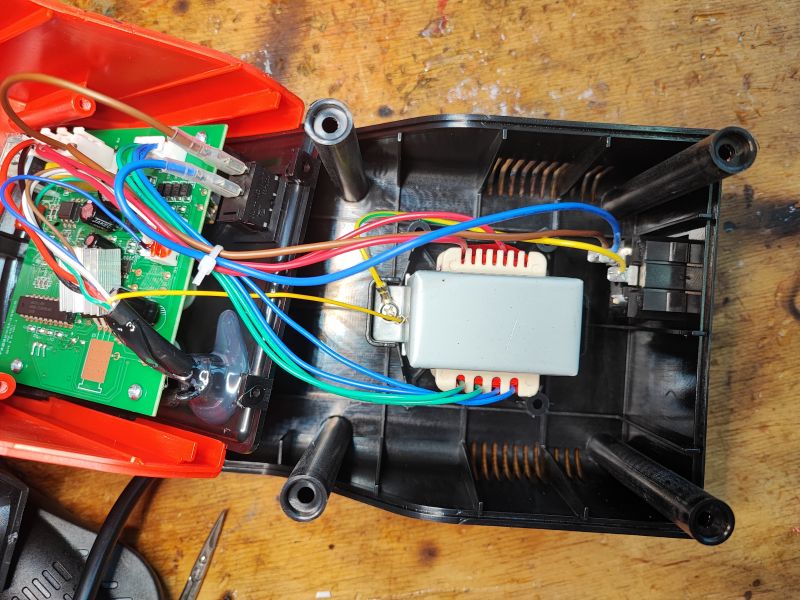
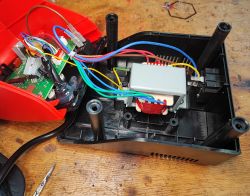
    We take a look inside:
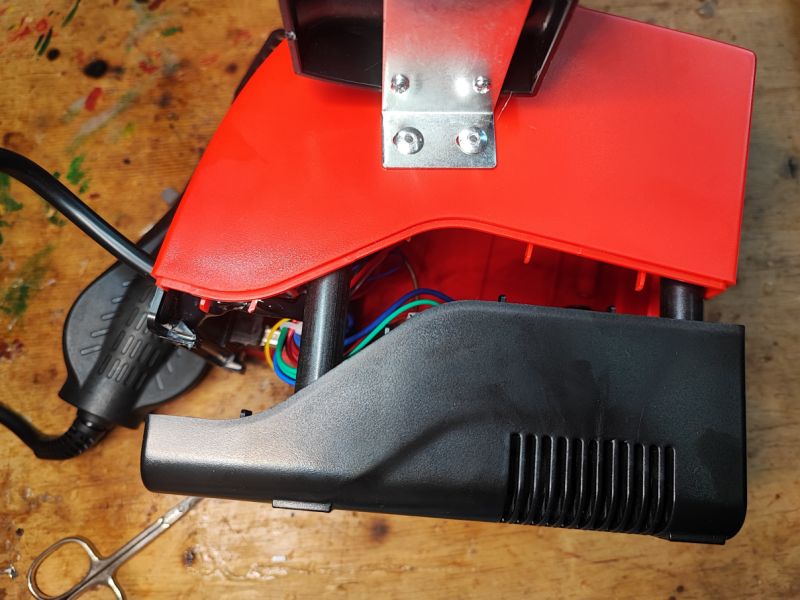
    Yato YT-82457 soldering station undergoing technical tests on a workshop table. .
    The first thing that catches the eye is the 50/60Hz mains transformer. The 858 had a boost converter.
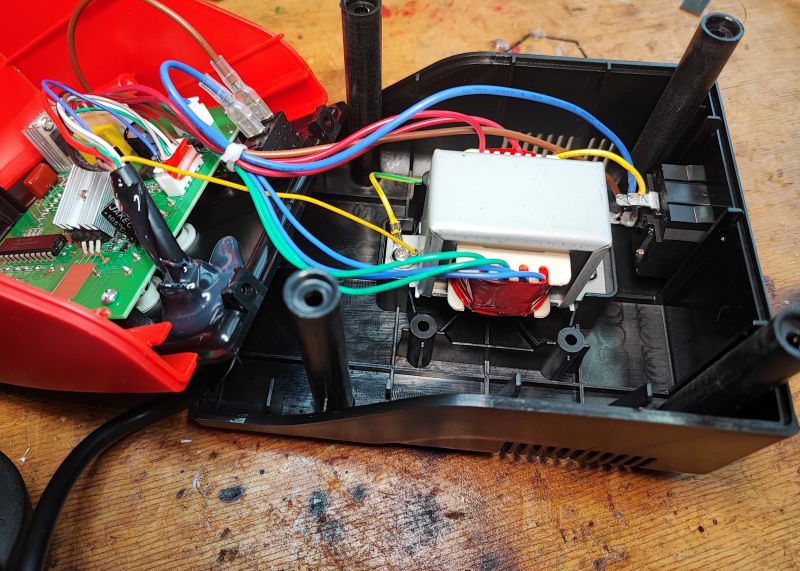
    Interior of the Yato YT-82457 soldering station. Inside of the Yato YT-82457 soldering station with visible wires and components. .
    Inside of the Yato YT-82457 soldering station .
    The ground is connected...
    Close-up of the interior of a soldering station showing electronic components. Close-up of the printed circuit board of the Yato YT-82457 soldering station.
    Close-up of the interior of the Yato YT-82457 soldering station showing the electronic circuitry. .
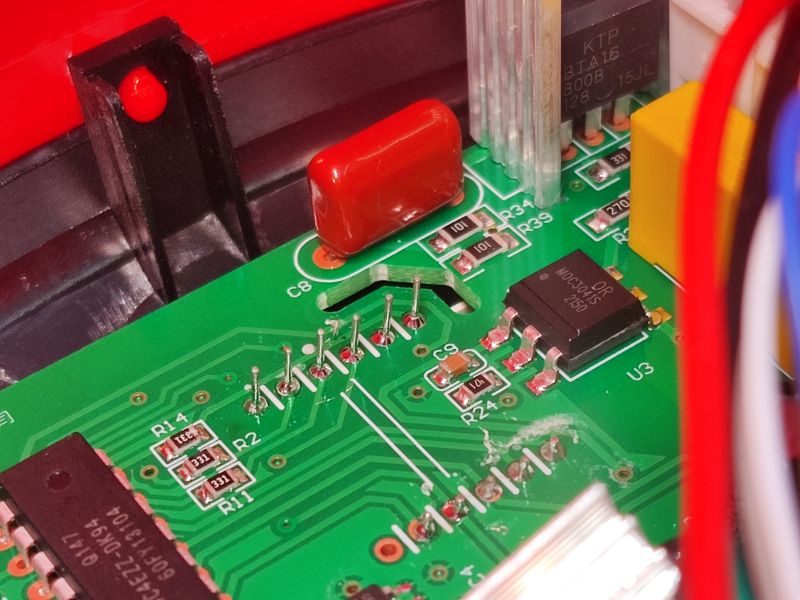
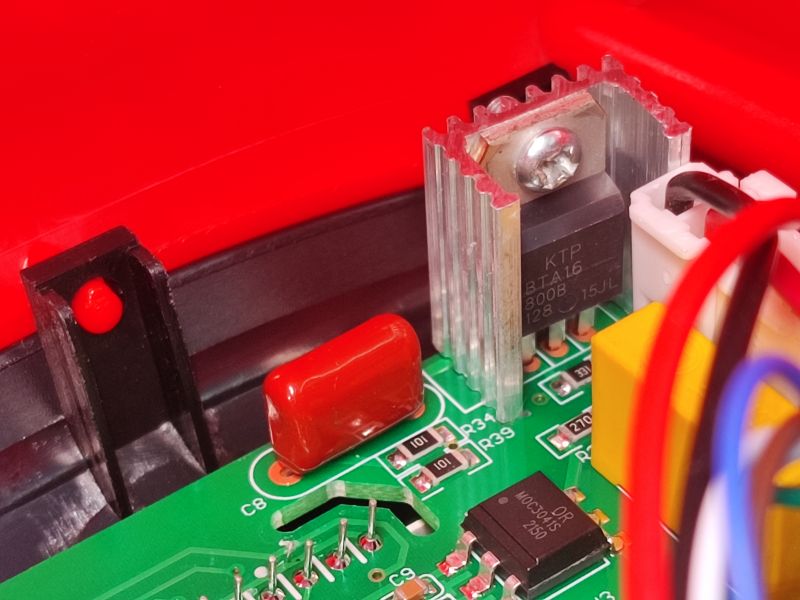
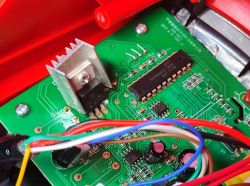
    Inside, the regulation is again on a BTA16-800B triac (in the 858 there was a BTA12), controlled by a MOC3041S.
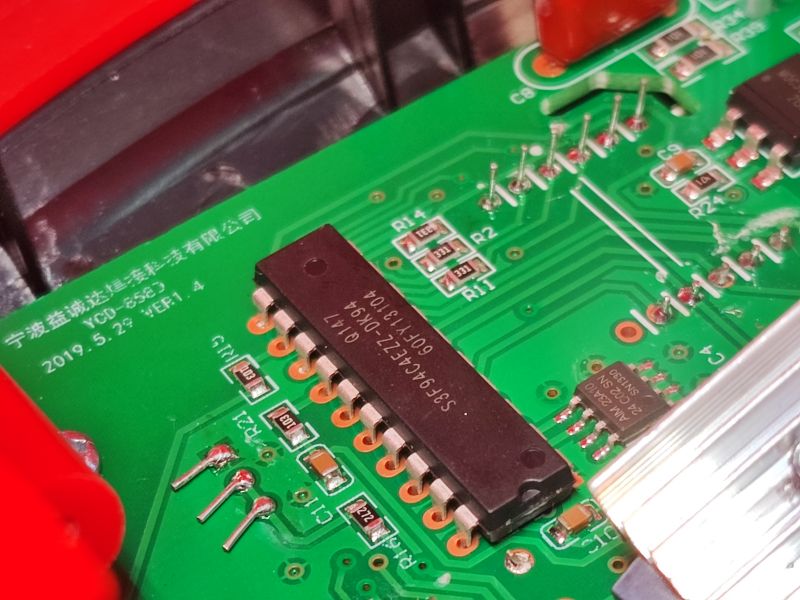
    The PCB designation is. YCD-858D. Well rather unsurprisingly, this is a very popular design.
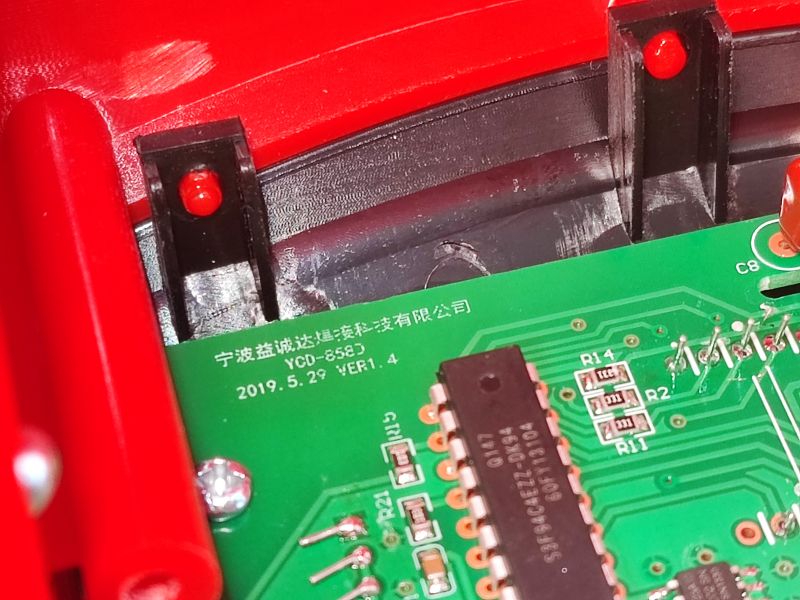
    Close-up of the interior of a soldering station with a visible PCB and model markings YCD-858D. Soldering station mainboard with visible electronic components .
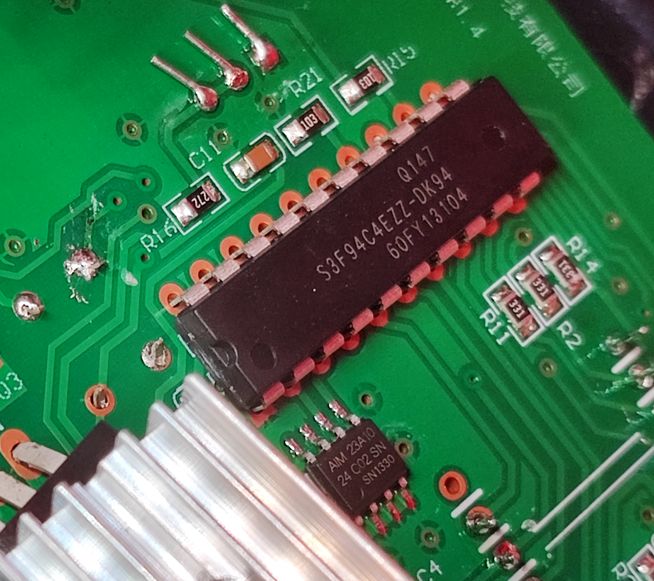
    The whole design is based on the S3F94C4EZZ-DK94 MCU. The microcontroller is manufactured by Zilog. Next to it I also see an EEPROM - 24C02SN, I wonder what they hold there, calibration, settings?
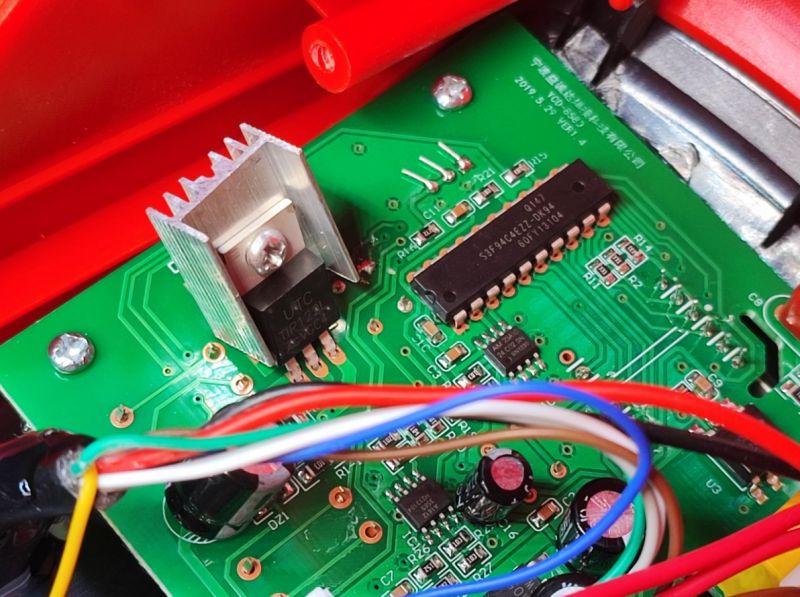
    Close-up of the internal components of the Yato YT-82457 soldering station.. Close-up of the interior of a Yato YT-82457 soldering station with visible electronic components .
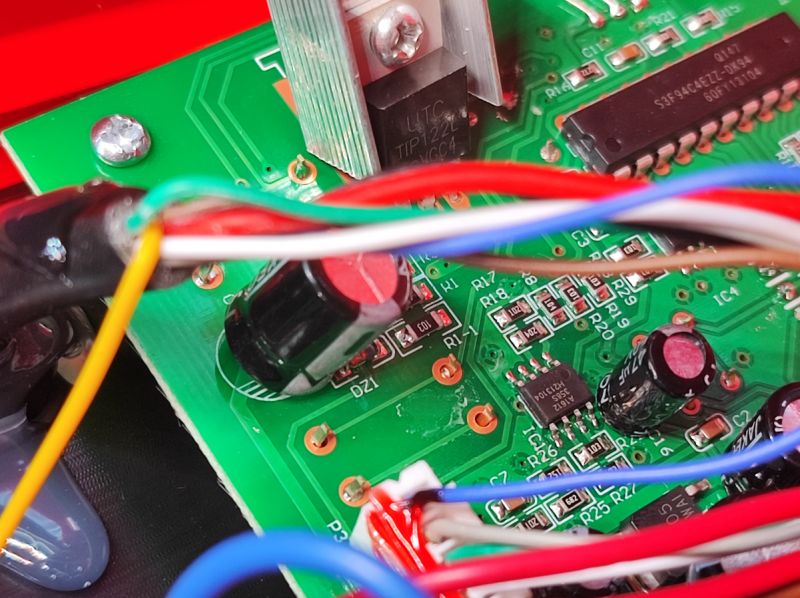
    I was still interested in this transistor - it's a TIP122L, maybe from the air supply control? Interesting that it's mounted on an extra heatsink, although there's room on the PCB to solder it on. Maybe it was overheating in the previous version, hence the change?

    Summary .
    My first impression of this station is quite positive. I don't feel here the problem I wrote about with the JCD 8902 that the station lacks heating power at all, which meant that with the 8902 I wasn't able to remove the MOSFET transistor from the computer board without helping myself with a mainsheet or heater.
    The measurements are not bad either, although here it should be borne in mind that I do not verify in my tests whether the airflow is really that 120l/min. In any case, comparing the performance of the stations I tested at the full blow setting, I see a lot of similarity between the Yato YT-82457 and the 858, the construction is also quite similar. The Preciva 995D is still slightly better than both of these stations, while all of them are further outperformed by the Sugon 8630 PRO and Quick 861DW. The JCD 8902 2 in 1 and the SP-1011DLR fall far behind.
    I also tested the side functions such as the memory of three programmes (remembered when the power is switched off) and the detection of the flask being put down, I have no complaints here.
    So the only question left is, what is a good buy on a budget of 35$? The previously tested Hot Air Station 858 was also good, but it did not have the possibility to set three programmes, so in terms of budget products, this one probably comes out on top. I wonder what its failure rate is after prolonged use, but I have no way of checking this "on the spot"....
    And what is your opinion? Which hot air station do you use? Feel free to discuss. .

    Cool? Ranking DIY
    Helpful post? Buy me a coffee.
    About Author
    p.kaczmarek2
    Moderator Smart Home
    Offline 
    p.kaczmarek2 wrote 11833 posts with rating 9930, helped 566 times. Been with us since 2014 year.
  • ADVERTISEMENT
  • #2 21298870
    Karaczan
    Level 42  
    I have a 2in1 WER 898D+, i.e. flask + Hotair.
    I stopped using the flask a long time ago because the system is a bit of a failure. High inertia of the mainsail, not all heaters want to work, on top of that they are faulty. And the mainsail can only be replaced after it has cooled down for quite a while.

    All in all, this is my first station so after switching from ordinary cheap cobs to 230V it was a WOW for me.

    Later with the flask I switched to a Kseger T12 and here there is nothing to complain about anymore.

    The Hotair itself works nicely in it, although the blower is of a slightly different design to yours, but also a turbine.
    I've had it for about 5 years and it hasn't died yet, but I solder as a hobby.
    360-370st and blow with the knob on 4. Mosfets from the plates let go elegantly.
    But it also went to the maximum a couple of times because otherwise the heatsink mount from the PCB cannot be pulled out.

    But I changed those damn heating elements for the grotto probably 5 times.
    Sometimes I use it for welding plastics, because T12 is a pity ;) .
  • ADVERTISEMENT
  • #3 21298888
    p.kaczmarek2
    Moderator Smart Home
    Ksger T12 in smaller form (for external power supply) I tested, it is quite good:
    Test of KSGER STM32 V3.1S OLED T12 soldering ministation and Fubarino SD soldering .
    Supposedly, in its case, you can change the arrowheads quickly if I don't turn the nut....
    But for quick change arrowheads I have also tested dedicated ones:
    Yato YT-82462 quick-change soldering station for T12 arrowheads - test and interior .
    The 926 was the most powerful in terms of heating power:
    Test of YIHUA 926 LED II 120W soldering iron compatible with 900M soldering tips, motherboard outlet .
    Helpful post? Buy me a coffee.
  • ADVERTISEMENT
  • #4 21299223
    Mateusz_konstruktor
    Level 36  
    A. The pictures don't do it justice, so I'm asking. What colour is the display?
    B. What's the deal with the heatsink and the bent transistor? How is the whole thing mounted?
    p.kaczmarek2 wrote:
    Inside of the Yato YT-82457 soldering station with visible wires and components. Close-up of the internal components of the Yato YT-82457 soldering station.
    .
  • ADVERTISEMENT
  • #5 21299264
    p.kaczmarek2
    Moderator Smart Home
    The heatsink is hanging in the air, I was a bit concerned about that. It looks as if this transistor was originally supposed to be soldered to the PCB (and the copper spout was supposed to dissipate heat) but then it was decided to give a heat sink after all....
    I only gently bent the transistor to see its marking.

    The display is, in my opinion, light blue, although indeed I think I would have preferred it to be red, maybe then it would have been a bit clearer, but I don't pick on such details in a review.
    Helpful post? Buy me a coffee.
  • #6 21299372
    ZbeeGin
    Level 39  
    Well. a transistor that only miraculously does not break off during transport. Microswitches soldered on "in order to". And a solderless IEC socket...
  • #7 21300794
    Karaczan
    Level 42  
    p.kaczmarek2 wrote:
    Ksger T12 in smaller form (for external power supply) I tested, it's pretty good
    .
    Well that's what I have. Powered by a laptop power supply after a modification to increase the voltage (23.5V, 4.8A, can't remember from what)

    As for your station, how does it react to putting the blower down? Because I, at mine, had to add some strong neodymium magnets in the stand, because otherwise it had to be put down quite accurately, in the only one right position.
    Now I can put it down however I want, carelessly, and it detects the putting down and starts to cool down. Mine has a reed switch inside

Topic summary

The discussion revolves around the Yato YT-82457 hot air soldering station, specifically its capability to desolder components from a computer motherboard and its performance compared to more expensive models priced between $100 and $250. Users share their experiences with various soldering stations, including the WER 898D+ and Kseger T12, highlighting issues such as high inertia, heating element failures, and the design of the blower. Concerns are raised about the construction quality of the Yato station, including the mounting of the heatsink and the display color. Users also discuss modifications made to their stations for improved functionality, such as using neodymium magnets for better blower placement detection.
Summary generated by the language model.
ADVERTISEMENT