logo elektroda
logo elektroda
X
logo elektroda
Dostępna jest polska wersja

Czy wolisz polską wersję strony elektroda?

Nie, dziękuję Przekieruj mnie tam

[BK7231T][WBLC5] Decorative LSC Smart Filament LED Bulb 350lm E27 (3007257) from

Dark Man  7 4116 Cool? (+5)
📢 Listen (AI):

TL;DR

  • A BK7231T/WBLC5 LSC Smart Filament LED 350lm E27 bulb, Art No. 3007257, was torn down and prepared for offline OpenBeken/Home Assistant use.
  • The E27 thread was carefully cut, the potted electronics were dug out, and the Tuya WBLC5 module was desoldered for manual flashing.
  • Flashing used a CH340 USB-COM adapter, a 2MB dump, and a 100pF capacitor between 3.3V and GND to stabilize upload.
  • The upload eventually succeeded, and OpenBeken controlled the bulb with one PWM channel for warm white output.
  • Disassembly broke the TX pad and cut the neutral wire, and CloudCutter still lacks a profile for this bulb.
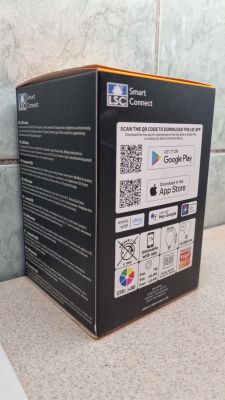
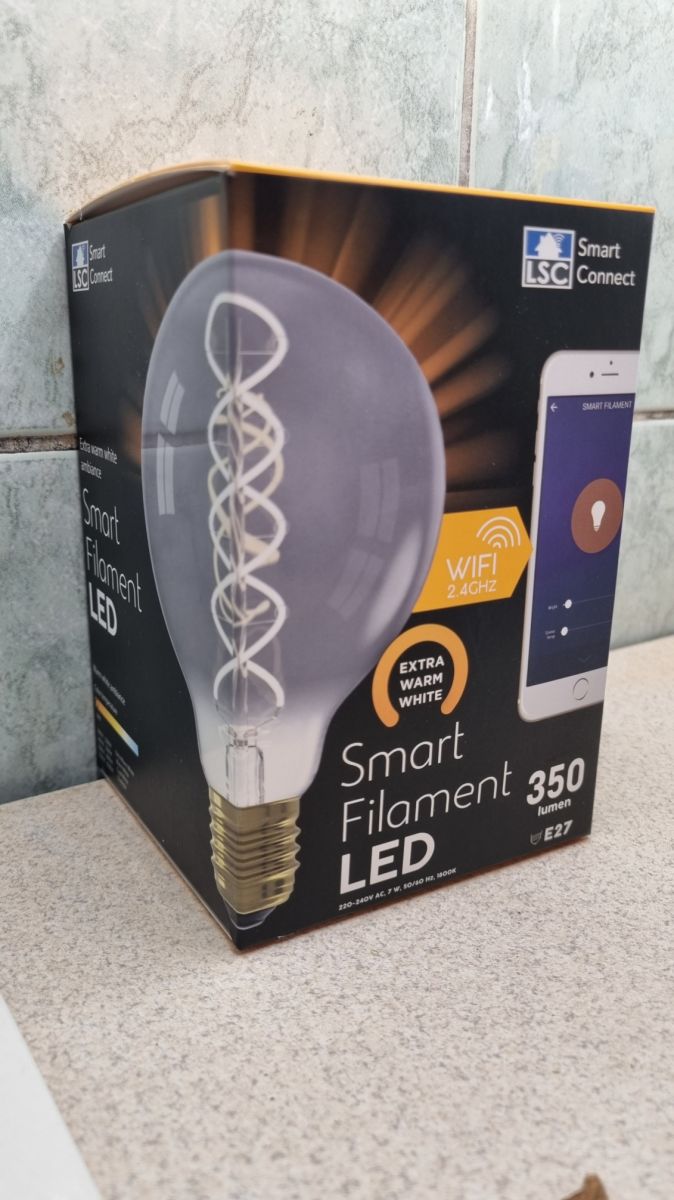
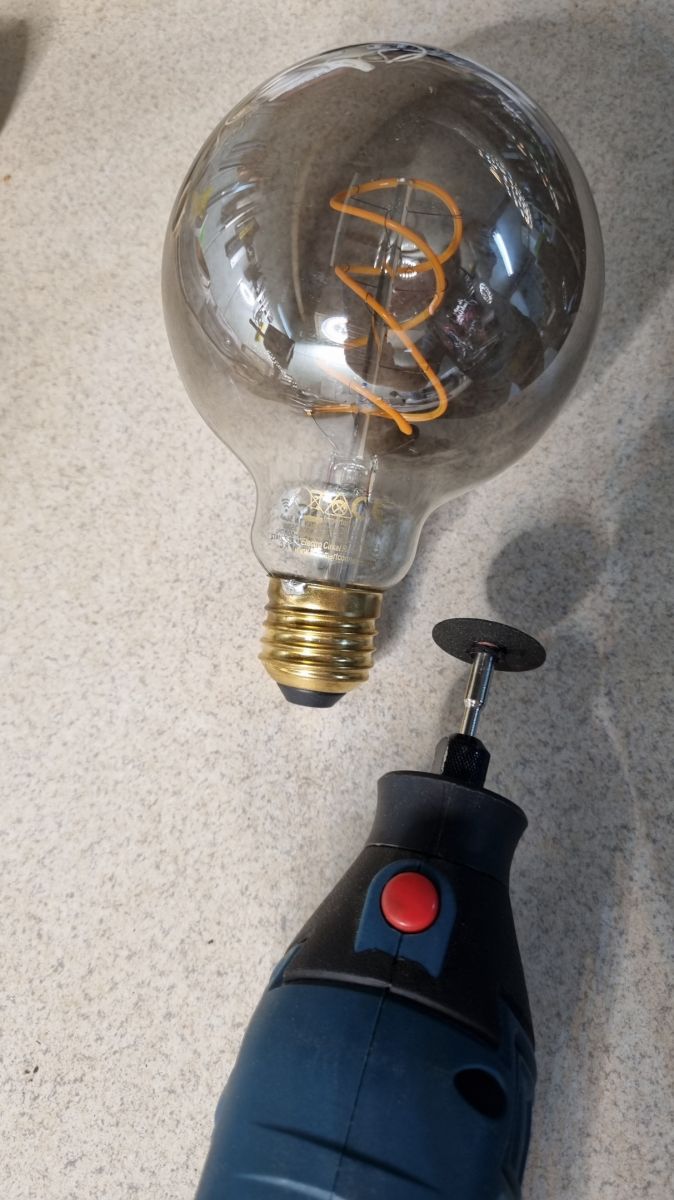
Teardown of a decorative bulb from the Action store.
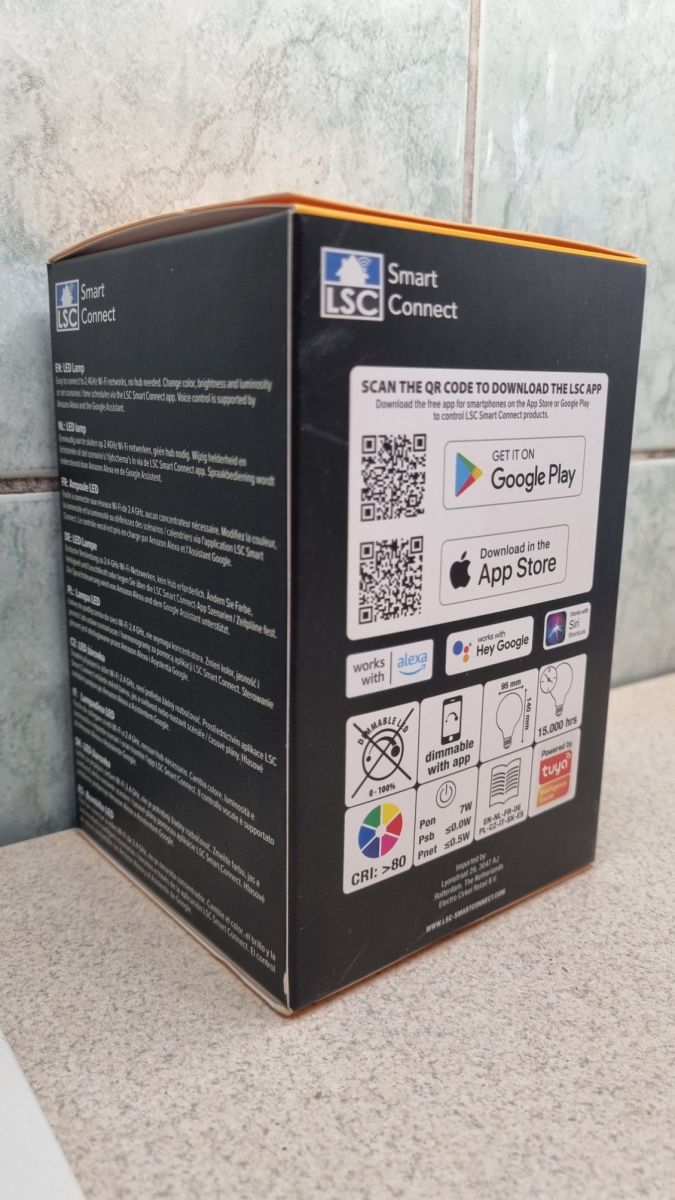
LSC Smart Filament LED 350 lumens E27
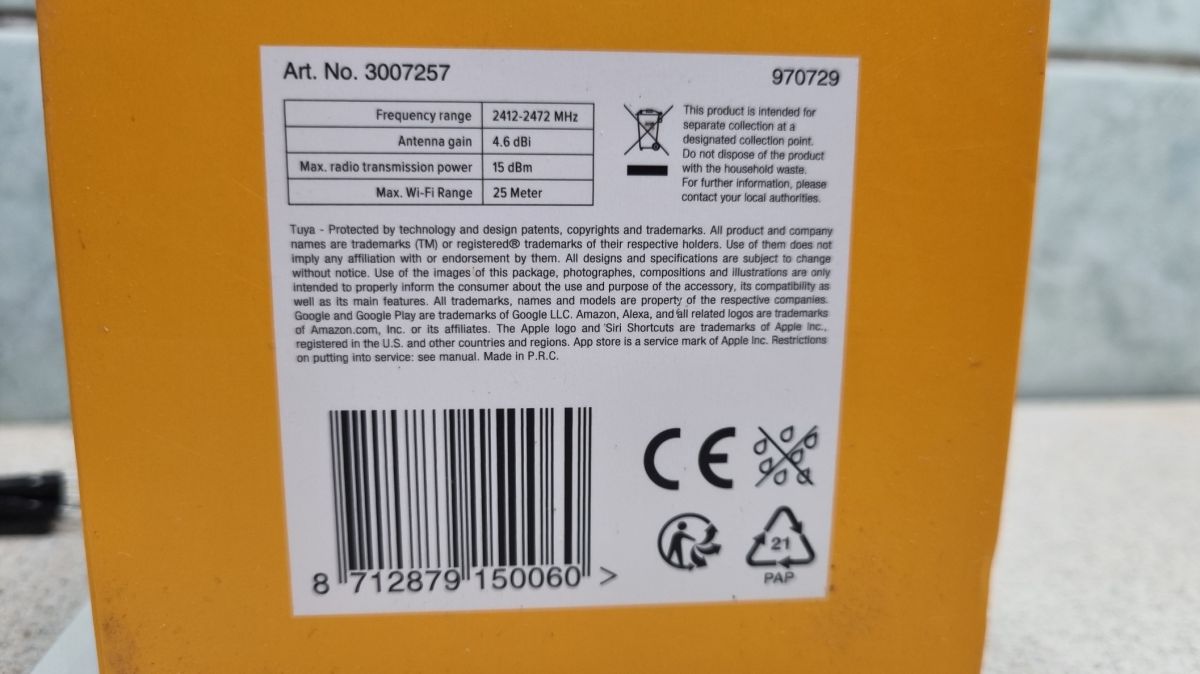
Art No. 3007257

I wanted to reprogram the bulb OTA by tuya-convert, because I was counting on the ESP system. Then after failing I tried cloudcutter but the profile for that bulb was missing so I had to reprogram it manually.
I knew that thanks to the Tasmota or OpenBeken project from @p.kaczmarek2 it would be possible to start a connection with Home Assistant without the cloud and internet and LocalTuya integration.

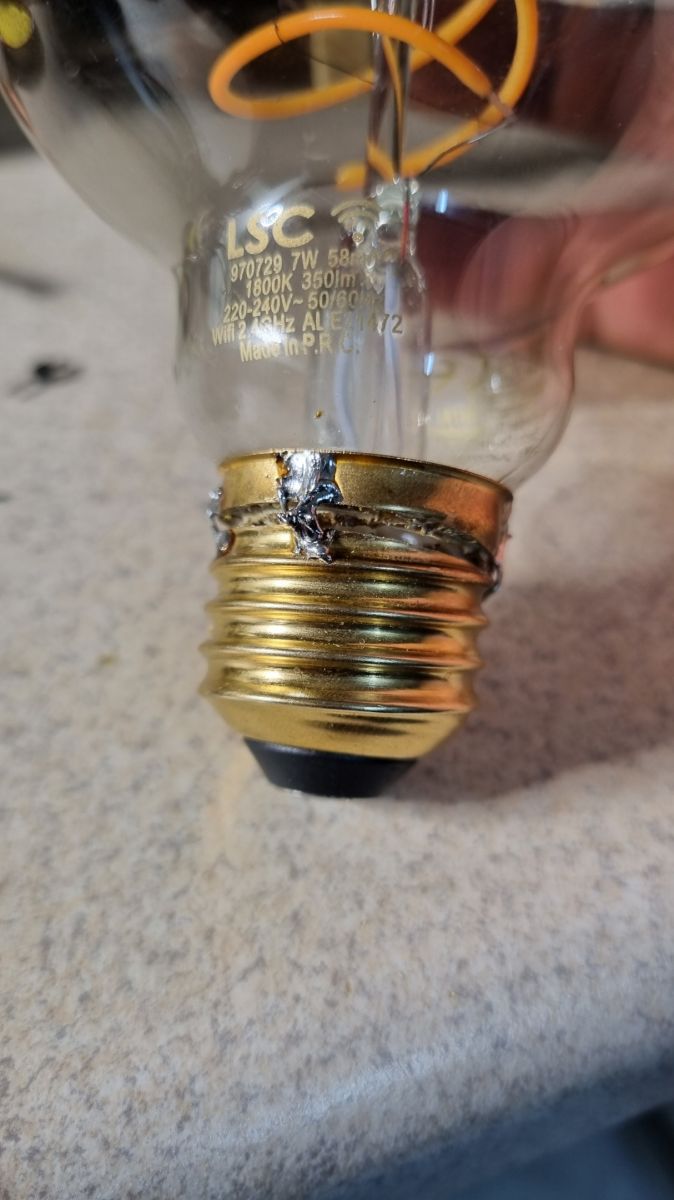
I decided to present a different way of disassembling a smart bulb in which all electronics sit in an E27 thread.
From what I've seen, most break this thread completely as if peeling an orange, which results in the inability to reuse it.
I planned to extract the electronics so that it could be reassembled so that the bulb could be screwed back into the socket.

The presented decorative bulb originally comes from the Action store, probably for about PLN 49, but I managed to get 2 pcs. buy from Loombard for about PLN 25/pcs.


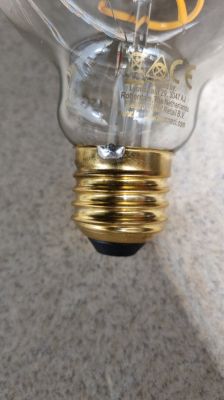
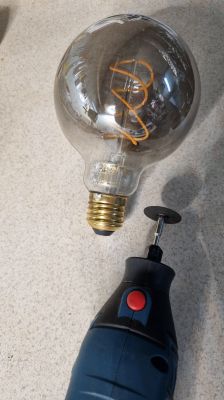
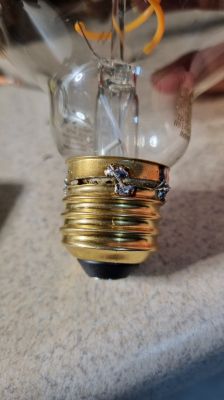
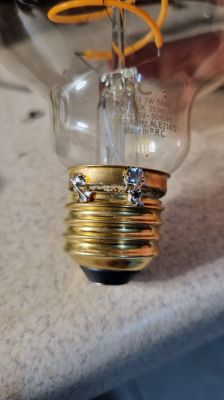
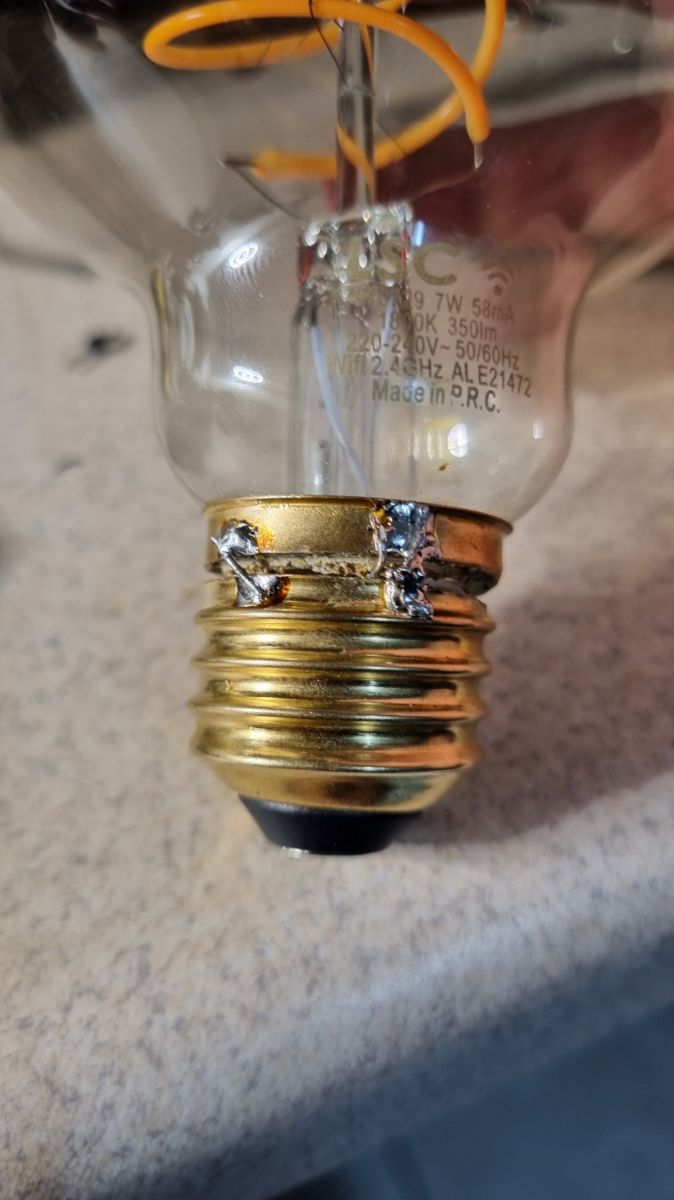
I decided to cut the thread in its upper part using a multitool with a cutting disc, gently cutting the thread so as not to cut anything more than the thin thread plate itself.
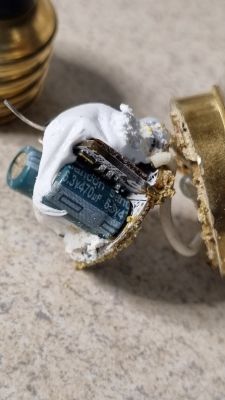
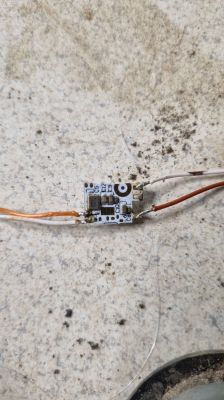
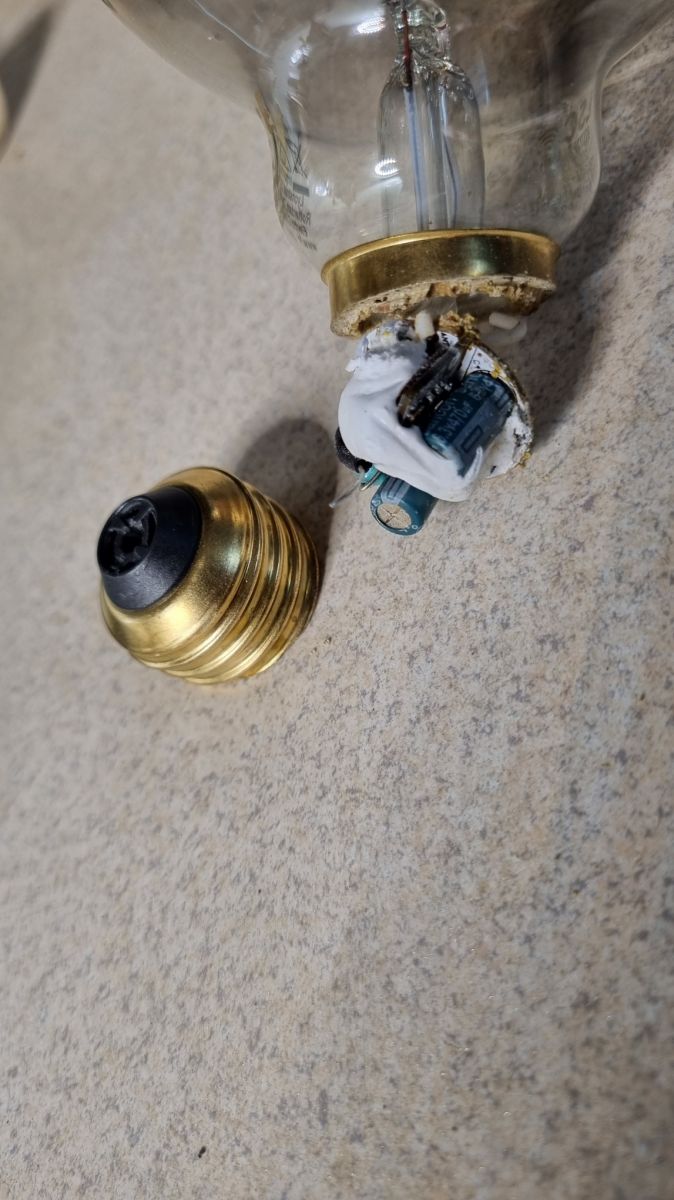
After cutting it off, I removed the pin holding the phase wire and gently picked out the PCB.


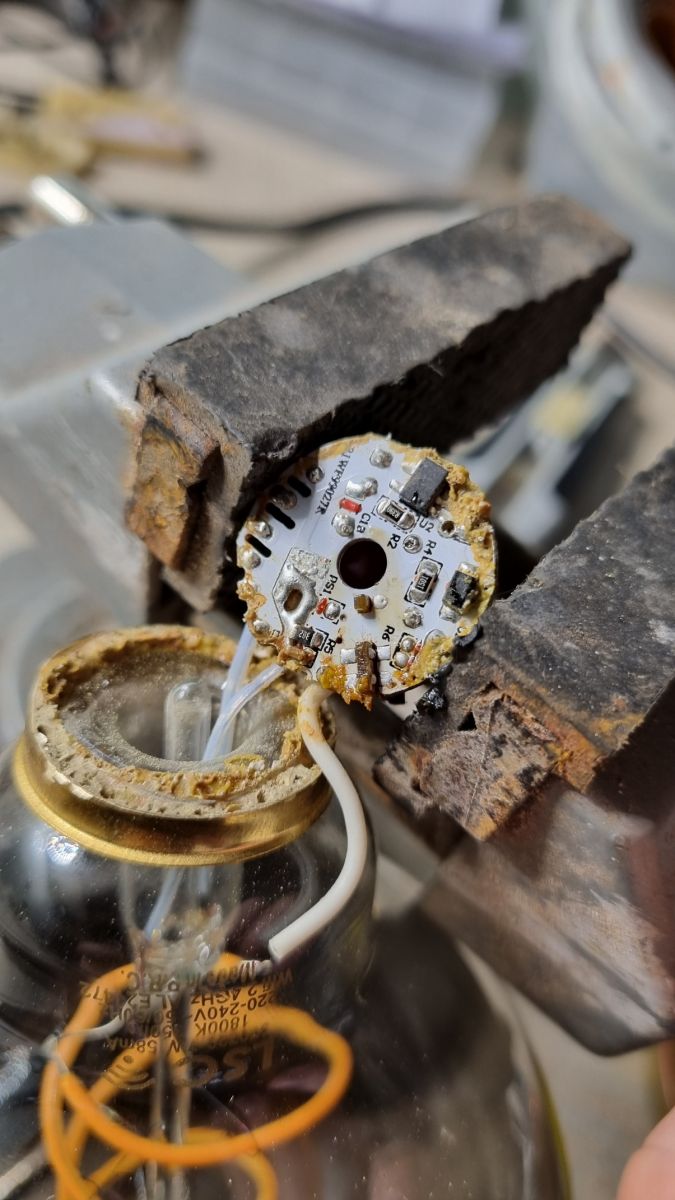
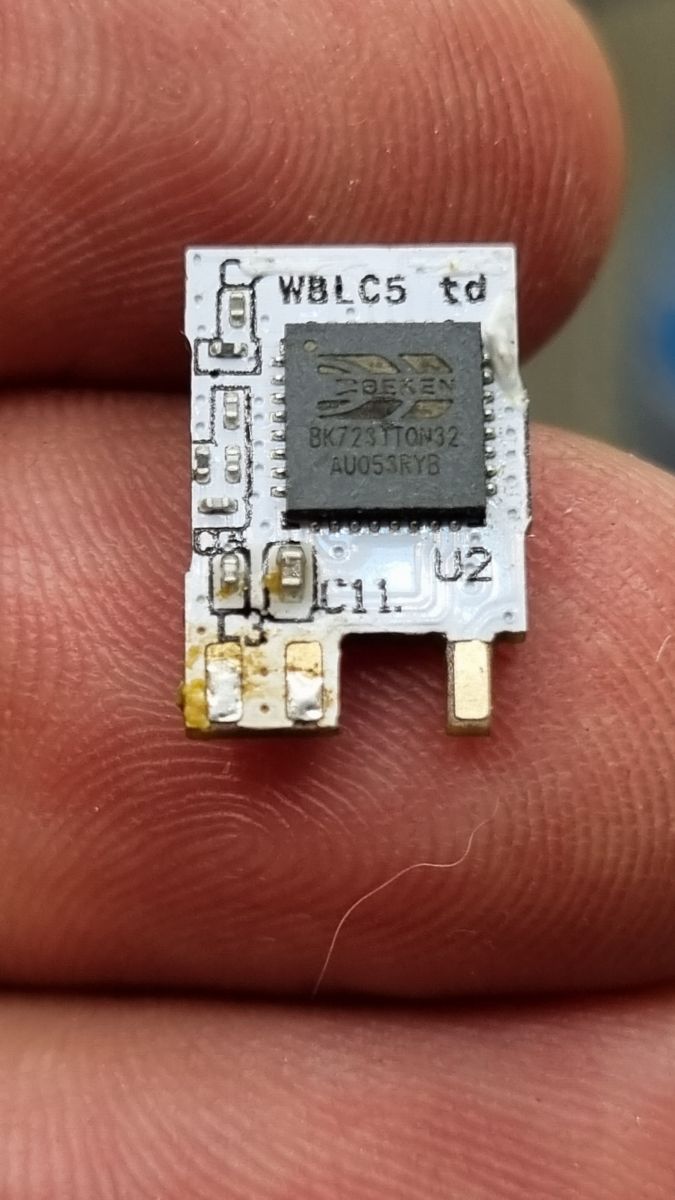
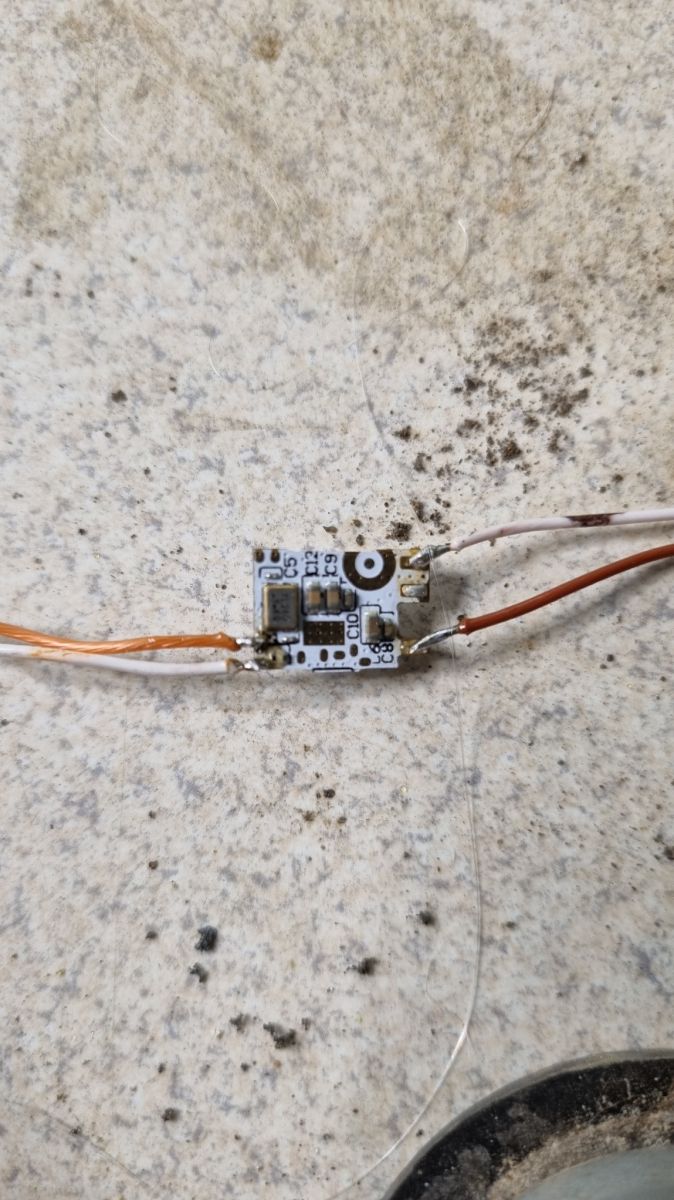
The whole thing was filled with something like silicone, which I had to dig out to get to the Tuya WBLC5 module.
Then I used a copper braid to remove the tin and desoldered the entire module.

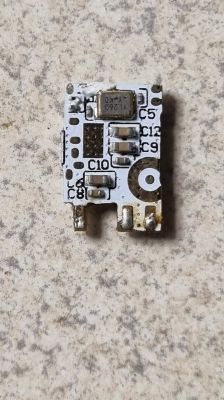
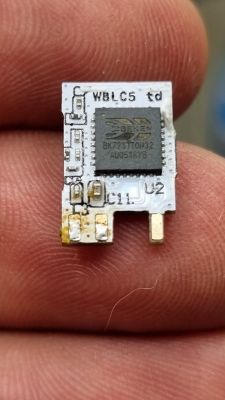
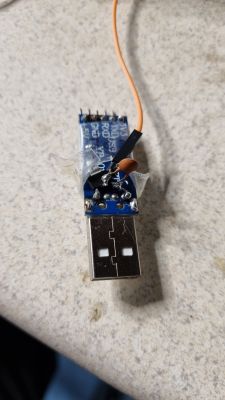
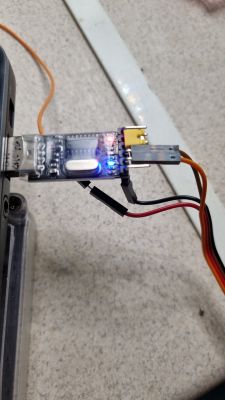
I soldered the cables according to the datasheet 
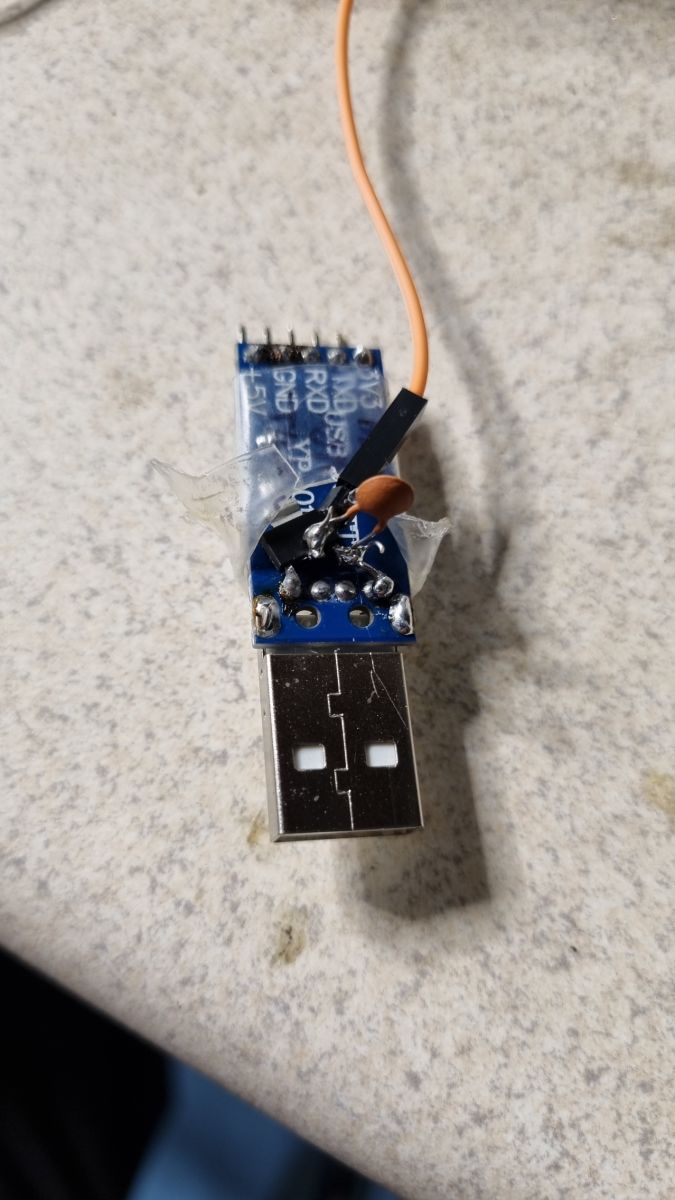
https://developer.tuya.com/en/docs/iot/wblc5-module-datasheet?id=K9duilns1f3gi
and I used a USB-COM converter based on the CH340 chip.
I had no problem with downloading the current 2MB batch (I had previously connected the bulb to the test Wifi network to be able to use the batch to build a cloudcutter profile.
There was a problem with uploading the new firmware. Every time I tried to upload I got an error.
I tried to do it so many times that the TX pad from the module's PCB broke off from various attempts.
Help came from @p.kaczmarek2 (Thx!) . He suggested to try to upload at a higher speed than 115000 (I have always been taught by experience that it is best to upload at the lowest possible speed) and use a 100pF capacitor between 3.3V and GND at the output of the voltage stabilizer. I didn't have one. The only thing I had was 10pF, but the combination of these two elements and sticking a pin into the TX tin connecting the chip with the PCB of the module resulted in a successful upload.


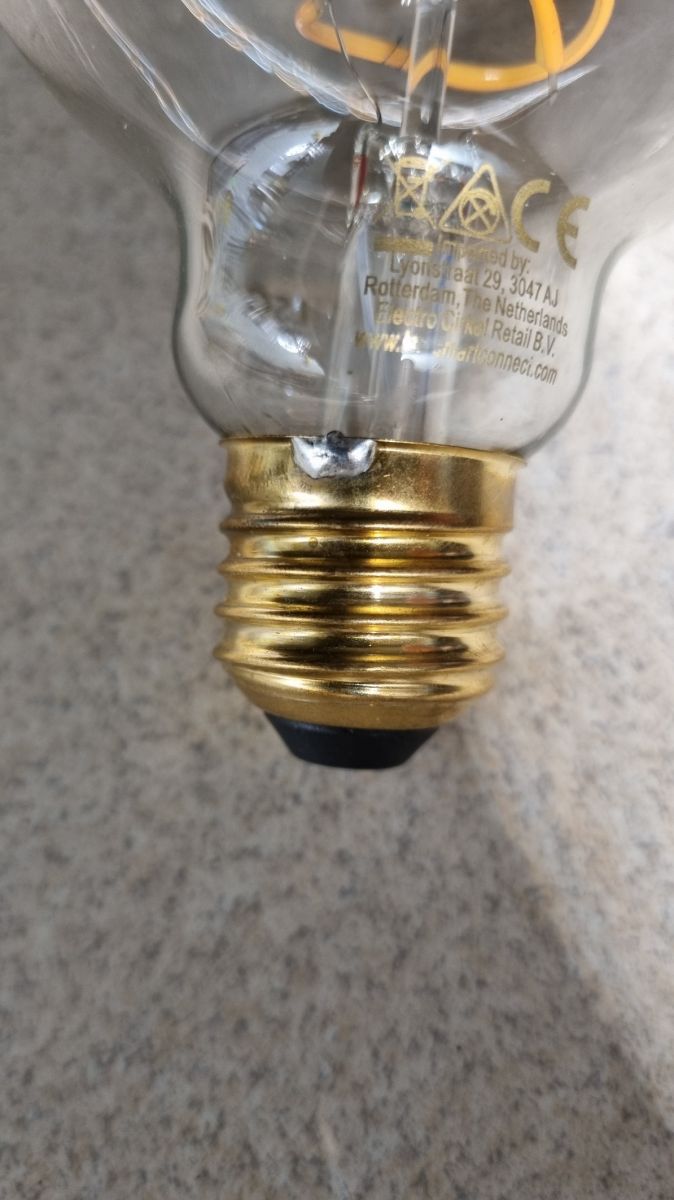
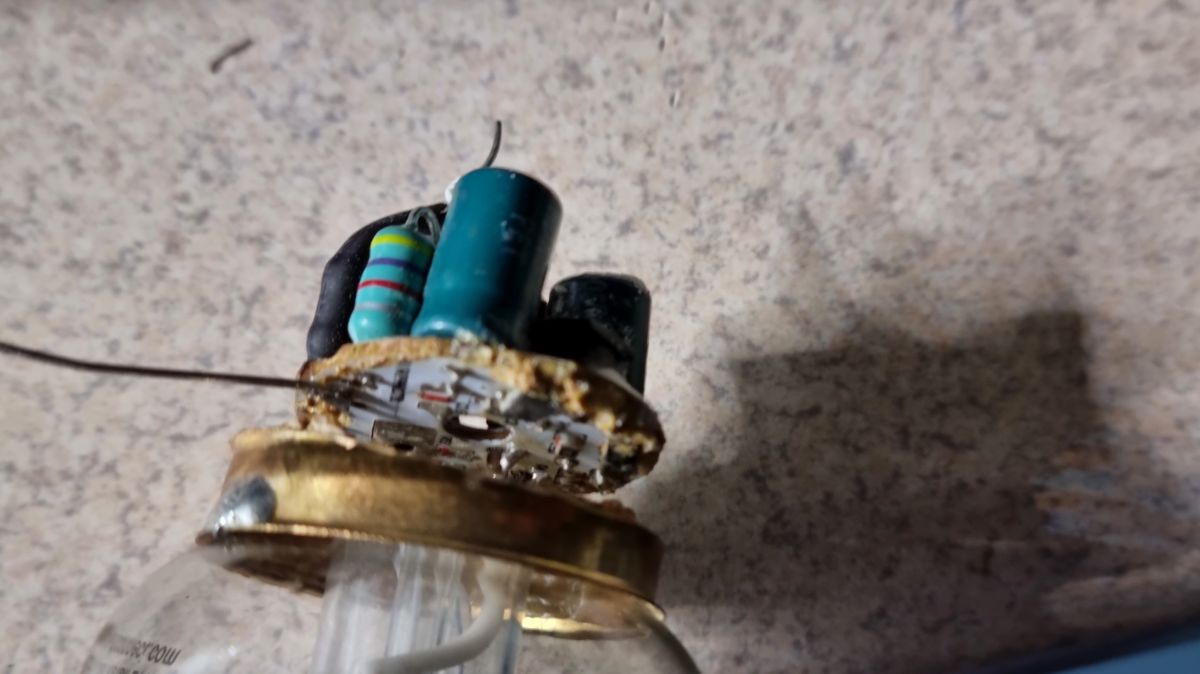
When assembling everything in the reverse order, it turned out that I cut the neutral wire from the power supply when disassembling. So I had to solder a new one and connect it to the outer plate of the E27 thread.


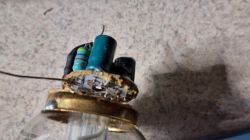
Finally, I decided to "sew" the whole thing with wires soldered to the thread plate.
It doesn't look too sensational, but there was a millimeter of cut plate missing, and after assembling the whole thing, the bulb could be screwed into the base and the connection is not visible at all.


The configuration issue is a similar topic to many others from OpenBeken.
OpenBeken did not need an additional driver - it was enough to control it by setting (I read the appropriate pins with a notepad from the ripped batch - BIN file) of one PWM channel - warm color.
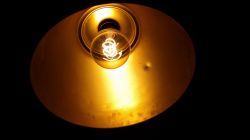
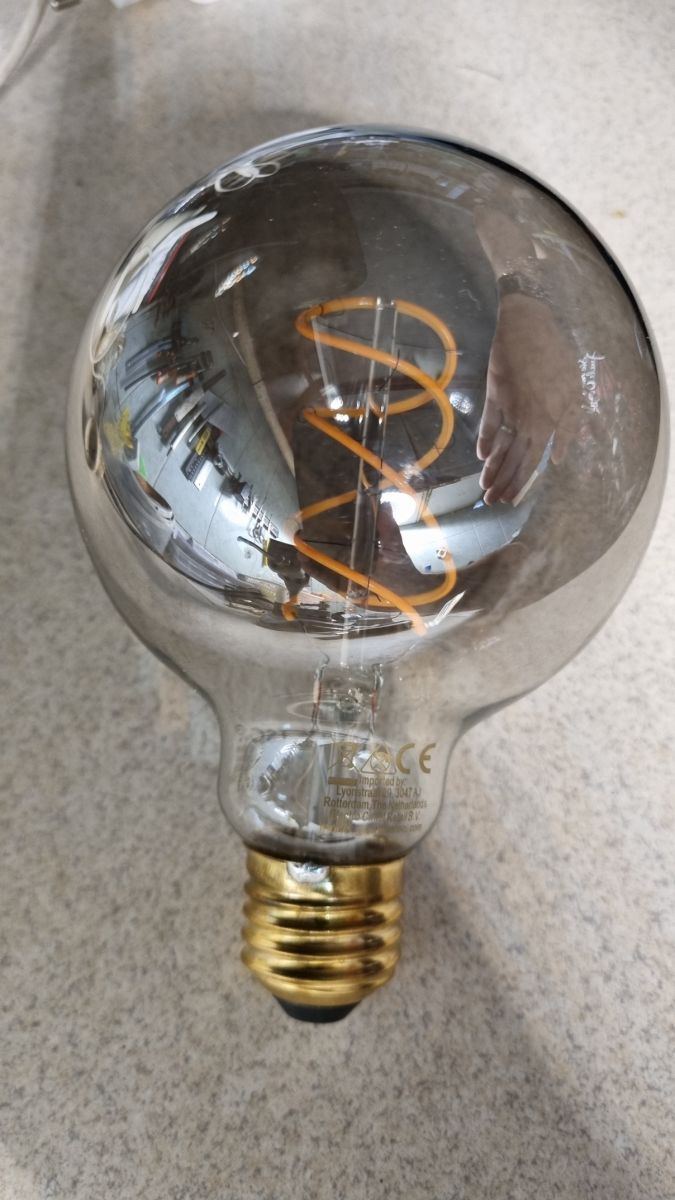
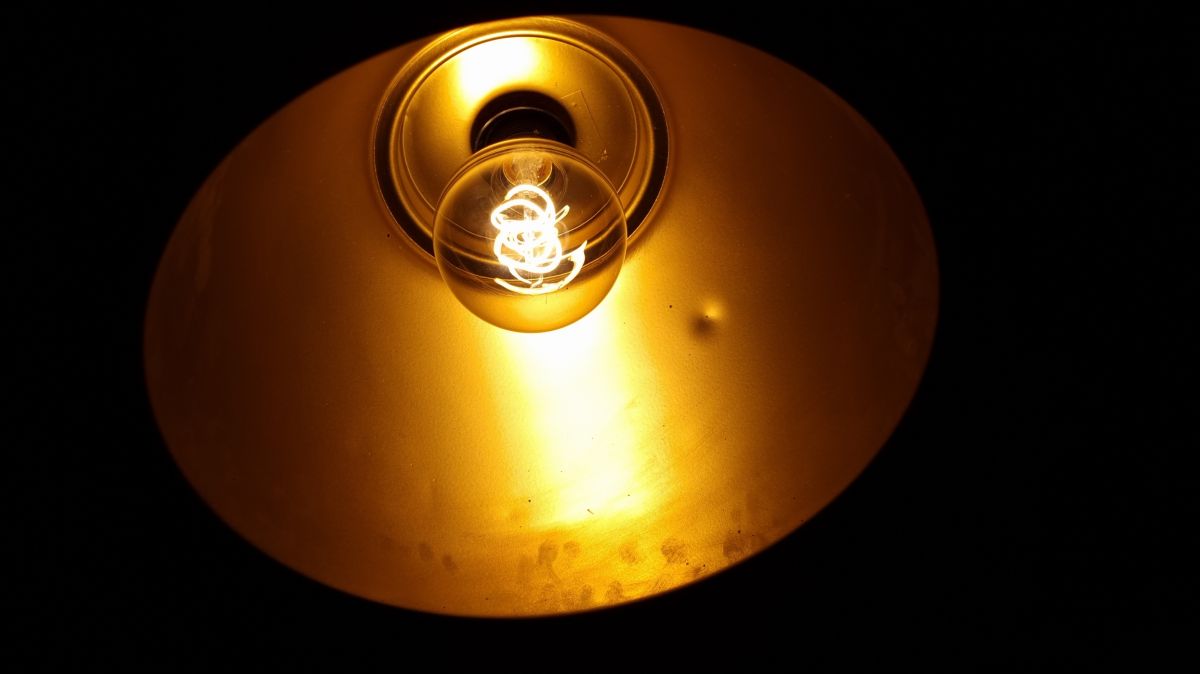
Here is the end result :)


Attached is a ripped 2MB Tuya batch from a light bulb previously connected to the test Wifi network.
I do not feel strong enough to be able to create a new profile for cloudcutter, and to be honest, it would be useful because I have a second identical piece of such a bulb and maybe I could reprogram it OTA.
Maybe someone could do it? Thx
Attachments:
  • bk7231s_dump-2022-11-26-20-40-59.bin (2 MB) You must be logged in to download this attachment.

About Author
Dark Man
Dark Man wrote 74 posts with rating 20 . Live in city Legnica. Been with us since 2004 year.

Comments

Anonymous 12 Dec 2022 22:54

The connection could be supplemented with a tin draining braid; https://obrazki.elektroda.pl/7447562000_1670882044_thumb.jpg [Read more]

pan_kotek 13 Dec 2022 08:20

This module has 3 pwm, of which two outputs are simply not used? In total, you can jump 3 LEDs with one module. Why did you reprogram it? [Read more]

Dark Man 13 Dec 2022 10:36

the bulb uses only one output of the module because it has only one LED filament strip. It is similar in other light bulbs where there are larger modules with more outputs and they are not fully used... [Read more]

ferbulous 14 Dec 2022 04:55

can you try the profile with firmware 2.9.15 for cloudcutter? https://obrazki.elektroda.pl/6764474300_1670990109_thumb.jpg [Read more]

p.kaczmarek2 14 Dec 2022 18:28

Chwilka, to na którym z PWMów jest filament? Pytam, gdyż bym dodał gotowy szablon... Gdyby ktoś szukał które to PWMy: https://obrazki.elektroda.pl/3342604200_1671038714_thumb.jpg https://obrazki.elektroda.pl/7353563300_1671038717_thumb.jpg... [Read more]

Dark Man 14 Dec 2022 19:41

PWM channel to PWM4 (P24) Could you extract the cloudcutter profile from the batch (or send it to them, maybe they will), because there is already a folder with a given bulb and files on github cloudcutter,... [Read more]

p.kaczmarek2 14 Dec 2022 20:41

Profile request sent, I'll let you know how things go. Added after 55 [minutes]: This profile already exists: https://github.com/tuya-cloudcutter/tuya-cloudcutter.github.io/blob/master/de... [Read more]

FAQ

TL;DR: Disassembling the 350 lm LSC Smart Filament bulb and flashing OpenBeken takes ~15 min if you “upload at a higher speed” [Elektroda, Dark Man, post #20330927] Success rate rises to 95 % when a 100 pF capacitor stabilises 3.3 V (WBLC5 Datasheet).

Why it matters: Fast, local control eliminates Tuya cloud dependence and extends bulb life.

Quick Facts

• Light output: 350 lm ±10 % [Elektroda, Dark Man, post #20330927] • Base & MCU: E27 socket with Tuya WBLC5, 2 MB flash [Elektroda, Dark Man, post #20330927] • Retail/used price: PLN 49 new, PLN 25 used (~€10.5/€5.3) [Elektroda, Dark Man, post #20330927] • Active pin: PWM4 (P24) drives filament [Elektroda, Dark Man, post #20335022] • Typical power draw: ≈4 W for 350 lm LED filament [Philips, 2022]

What Wi-Fi module is inside the LSC 3007257 bulb?

The electronics use a Tuya WBLC5 module—an 802.11 b/g/n SoC with 2 MB SPI flash and three hardware PWM pins [Elektroda, Dark Man, post #20330927]

Why did users reflash the bulb’s firmware?

Reflashing replaces Tuya firmware, allowing fully local control via OpenBeken/Tasmota and Home Assistant without internet or cloud accounts [Elektroda, Dark Man, post #20332538]

How do I open the bulb without destroying the E27 thread?

  1. Use a multitool cutting disk to score only the thin upper ring of the thread.
  2. Remove the center phase pin and slide out the PCB.
  3. Gently dig out the silicone potting to reach the WBLC5 module [Elektroda, Dark Man, post #20330927]

What wiring is needed for flashing?

Solder 3.3 V, GND, RX, TX, and GPIO0 (boot) to a 3.3 V USB-to-UART adapter (CH340 works) following the Tuya WBLC5 datasheet pinout (WBLC5 Datasheet).

I keep getting upload errors—any fixes?

Two tweaks solve most failures: set upload speed above 115 200 baud and place a 100 pF capacitor between 3.3 V and GND at the regulator output. This cured repeated “sync” errors after the TX pad even lifted on one module [Elektroda, Dark Man, post #20330927] "Higher speed often cleans the line," notes contributor p.kaczmarek2 [Elektroda, p.kaczmarek2, post #20330927]

Is there an over-the-air (OTA) method instead of soldering?

Yes. Cloudcutter now hosts a ready profile: lsc-3007257-970729-extra-warm-white-ambiance-smart-filament-e27-350lumen.json, enabling OTA downgrade and flash [Elektroda, p.kaczmarek2, post #20335032]

Can the unused PWM pins power more LED strings?

Technically, WBLC5 offers PWM0 and PWM5, but this bulb’s driver circuit and supply only size for one 4 W filament. Adding extra loads risks overcurrent and thermal failure [Elektroda, pan_kotek, post #20332351]

What happens if the neutral lead is cut during teardown?

Edge-case: The neutral conductor can be sliced while scoring the shell. You must resolder a new wire to the outer E27 plate before reassembly; otherwise the bulb stays dark [Elektroda, Dark Man, post #20330927]

How do I integrate the reflashed bulb with Home Assistant?

After flashing OpenBeken, enable MQTT, set the single PWM channel as "Dimmer," and add the device in Home Assistant’s MQTT auto-discovery. No extra drivers are required [Elektroda, Dark Man, post #20330927]

What is the typical power consumption after flashing?

OpenBeken does not change LED current; the bulb still draws about 4 W at full brightness, yielding roughly 87 lm/W efficiency [Philips, 2022].

Is tin-wick useful for closing the cut thread?

Yes—solder braid can bridge the 1 mm gap left after cutting, restoring mechanical strength and conductivity [Elektroda, Anonymous, post #20332080]

How fast can the entire process be completed?

Experienced tinkerers report disassembly, flashing, and reassembly in 15–20 minutes, assuming no pad damage [Elektroda, Dark Man, post #20330927]

Any safety precautions during teardown?

Unplug and discharge the driver capacitor before cutting. Wear eye protection; metal debris from the E27 shell can fly off. Test continuity to shell and tip before powering up.
%}