[BK7231N/CBLC5] RGBCW GY E14 Smart Led Alexa Lamp 6W (Immax) with BP5758D LED driver
This is a short teardown and flashing guide for C37 6wE14 Smart bulb RGBCW 230V / 50Hz from Amazon.de.
Wenkman - 07.01.2023
Brand: Immax
Model: C37 6wE14 Smart bulb RGBCW 230V / 50Hz
Chip: BK7231N [CBLC5]
Shop: Amazon
I discovered Tasmota some time ago and immediately, without reading through it much, ordered the lamps described above, then did a bit of tinkering and tried to flash the ESP8266, but then had to realize that these lamps are not compatible with Tasmota. They have now BK7231 inside.
Have then further researched, am then on this Instructions encountered, since I didn't know exactly which chips are installed, I quickly dismantled a lamp.

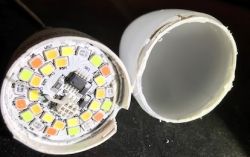
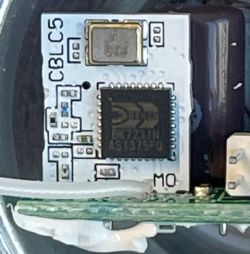
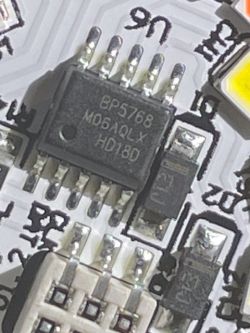
I didn't have to flash by wires, I used a WiFi flashing - tuya-cloudcutter.
With the information I got to work, exactly according to the instructions, Raspberry Pi 4 set up, software installed, I only had to adapt the command to run it:
sudo ./tuya-cloudcutter.sh -w wlan0
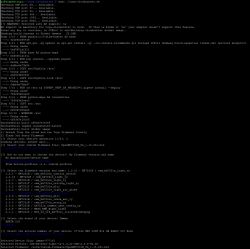
and BÄM, all 6 lamps flashed with the firmware.
now I only had to figure the pins and the lamps worked
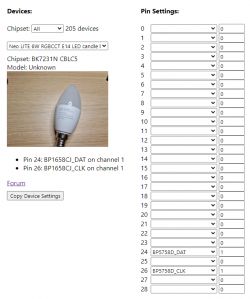
Now there was only one problem, the colors were not correct, BGR instead of RGB, but I solved that with the software control.
I hope I could help someone with this. Kind regards
With the help of p.kaczmarek2 I solved the problem with the twisted channels, simply create an /autoexec.bat in the web application under file system
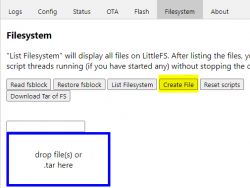
and there I pasted this code
after that i clicked the Button "Save, Reset SVM and run file as script thread", now restart and all was clear.

many thanks @p.kaczmarek2
Wenkman - 07.01.2023
Brand: Immax
Model: C37 6wE14 Smart bulb RGBCW 230V / 50Hz
Chip: BK7231N [CBLC5]
Shop: Amazon
I discovered Tasmota some time ago and immediately, without reading through it much, ordered the lamps described above, then did a bit of tinkering and tried to flash the ESP8266, but then had to realize that these lamps are not compatible with Tasmota. They have now BK7231 inside.
Have then further researched, am then on this Instructions encountered, since I didn't know exactly which chips are installed, I quickly dismantled a lamp.


I didn't have to flash by wires, I used a WiFi flashing - tuya-cloudcutter.
With the information I got to work, exactly according to the instructions, Raspberry Pi 4 set up, software installed, I only had to adapt the command to run it:
sudo ./tuya-cloudcutter.sh -w wlan0

and BÄM, all 6 lamps flashed with the firmware.
now I only had to figure the pins and the lamps worked

P24: BP5758D_DAT

P26: BP5758D_CLK
I hope I could help someone with this. Kind regards
With the help of p.kaczmarek2 I solved the problem with the twisted channels, simply create an /autoexec.bat in the web application under file system

and there I pasted this code
BP5758D_Map 2 1 0 3 4after that i clicked the Button "Save, Reset SVM and run file as script thread", now restart and all was clear.

many thanks @p.kaczmarek2


Comments
Thank you for your teardown. I will just add that in order to remap the RGBCW channels in case of BP5758D chip you are supposed to use this command: BP5758D_Map [Ch0][Ch1][Ch2][Ch3][Ch4] ... [Read more]
I've found that, but i don't know how to use this, i try'd it like this https://obrazki.elektroda.pl/3092451300_1673199487_bigthumb.jpg and https://obrazki.elektroda.pl/6998005500_1673199536_bigthumb.jpg... [Read more]
Autoexec is applied after reboot. If you want to test quickly, do it in console. The syntax is: BP5758D_Map 0 1 2 3 4 This is normal - you entered wrong values and they all got parsed to... [Read more]
Many thanks for that, now it work's very well. [Read more]
I will update the documentation to include example usage of this command. Thanks. [Read more]