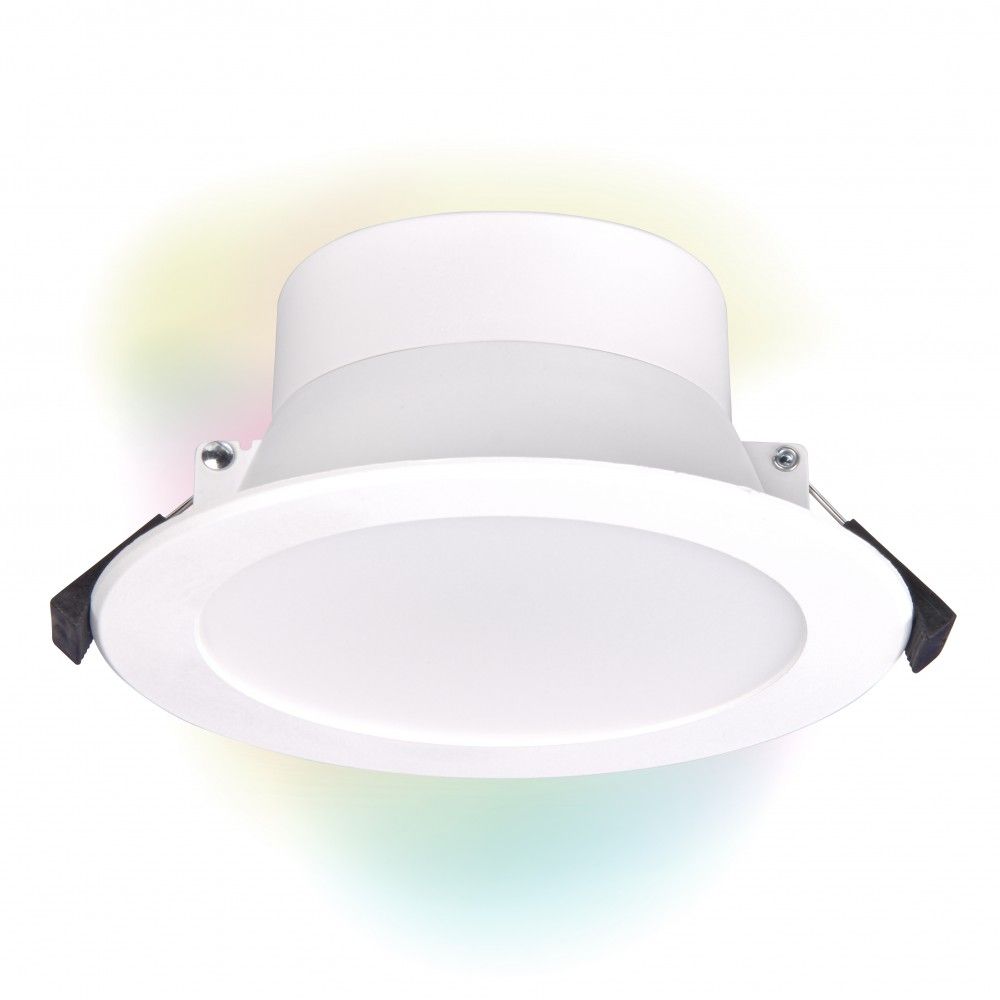
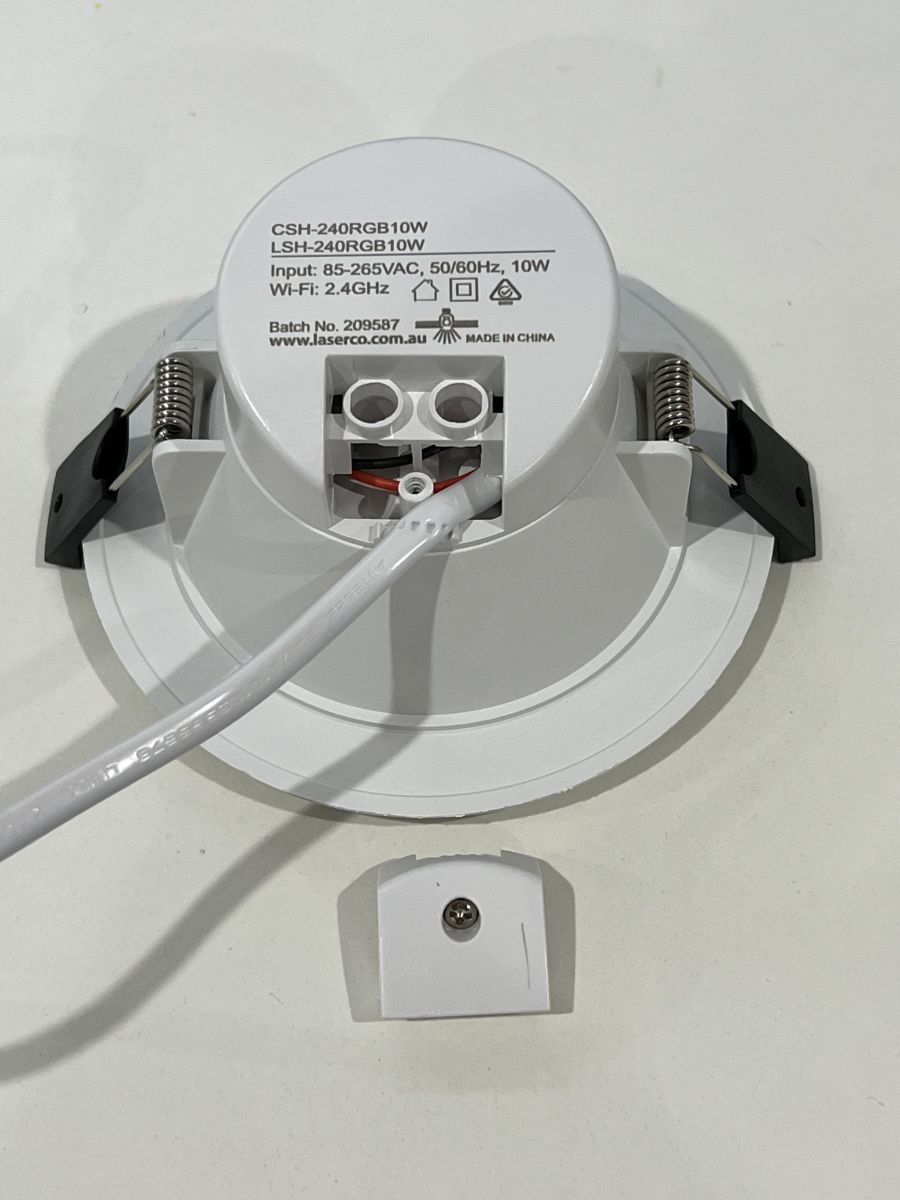
Teardown covers a Laser LSH-240RGB10W, also marked CSH-240RGB10W, RGB CW/WW downlight bought from Laser on eBay Australia.
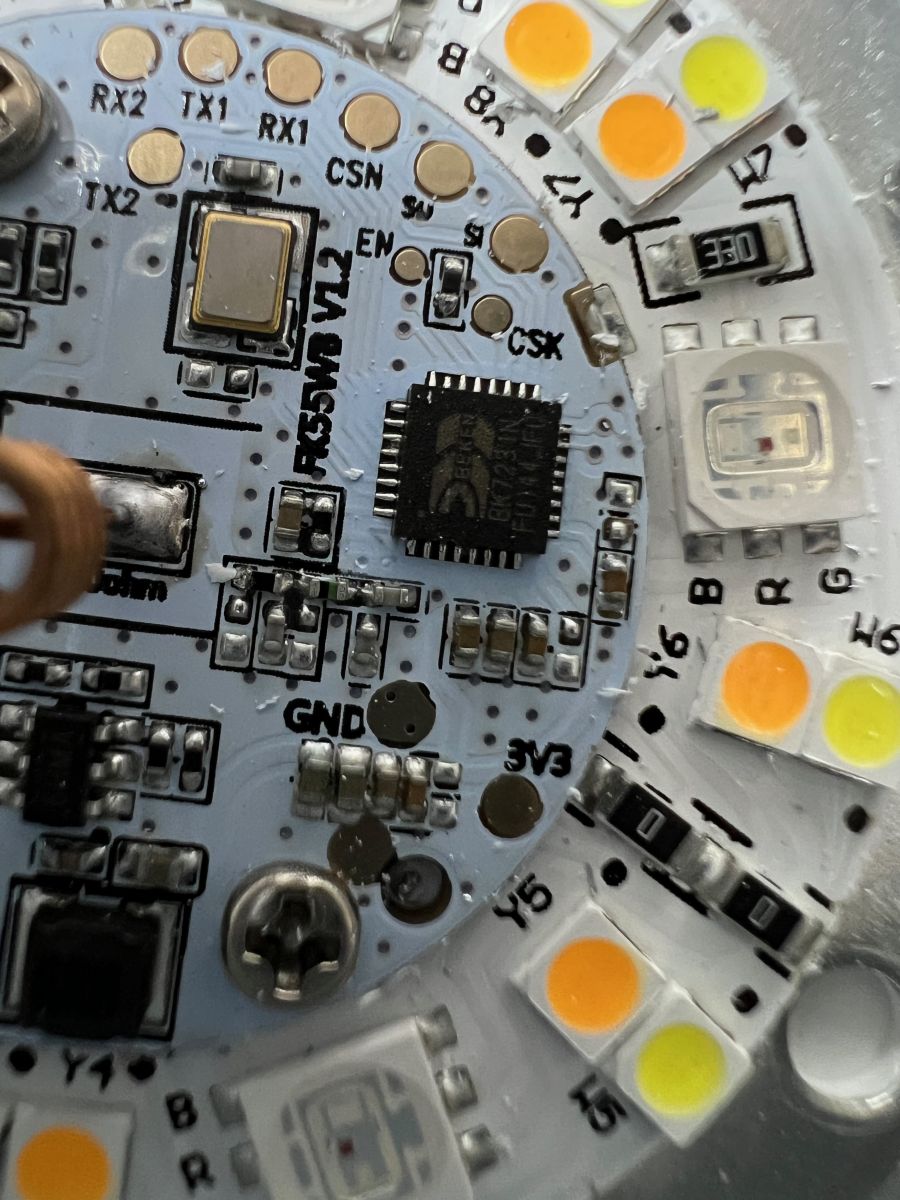
The lamp uses a BK7231N Tuya board, and a full image dump makes tuya-cloudcutter flashing the easiest path.
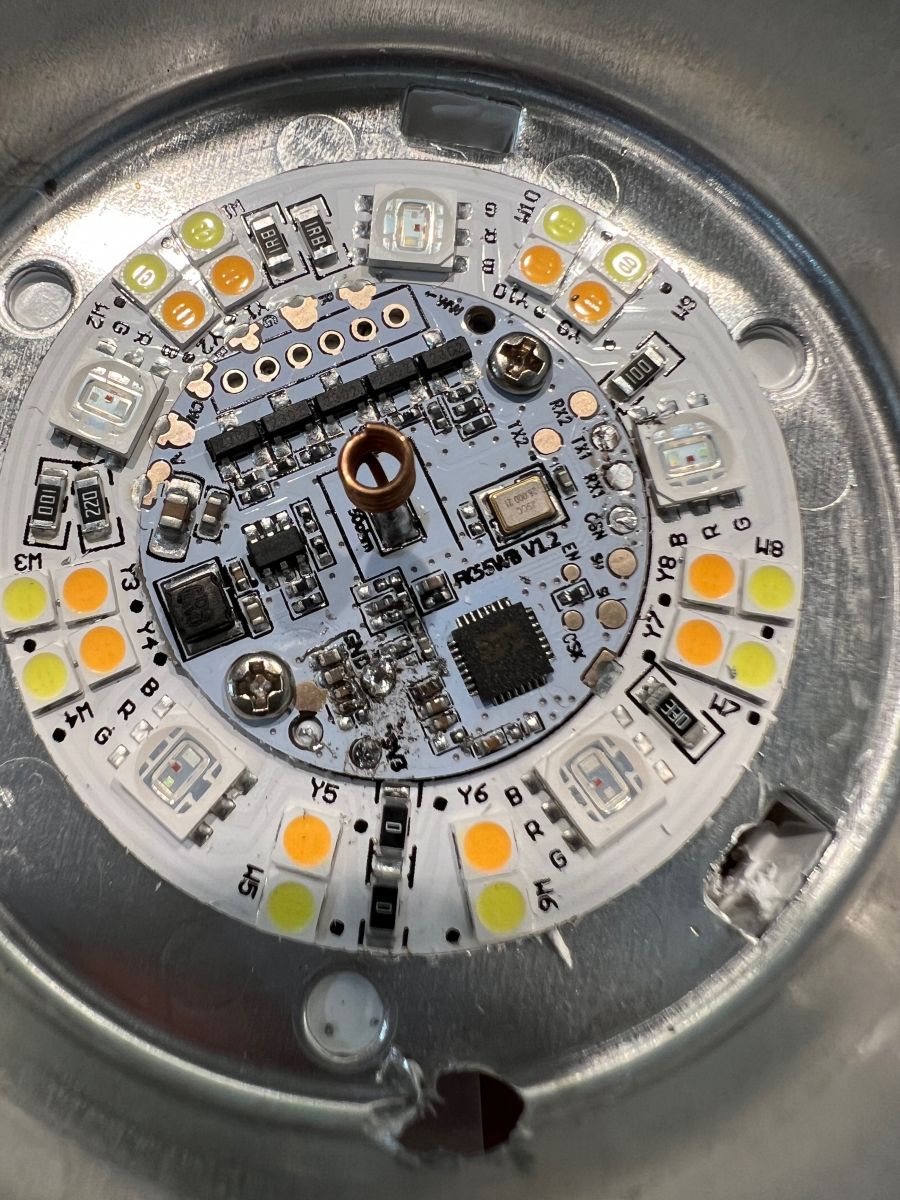
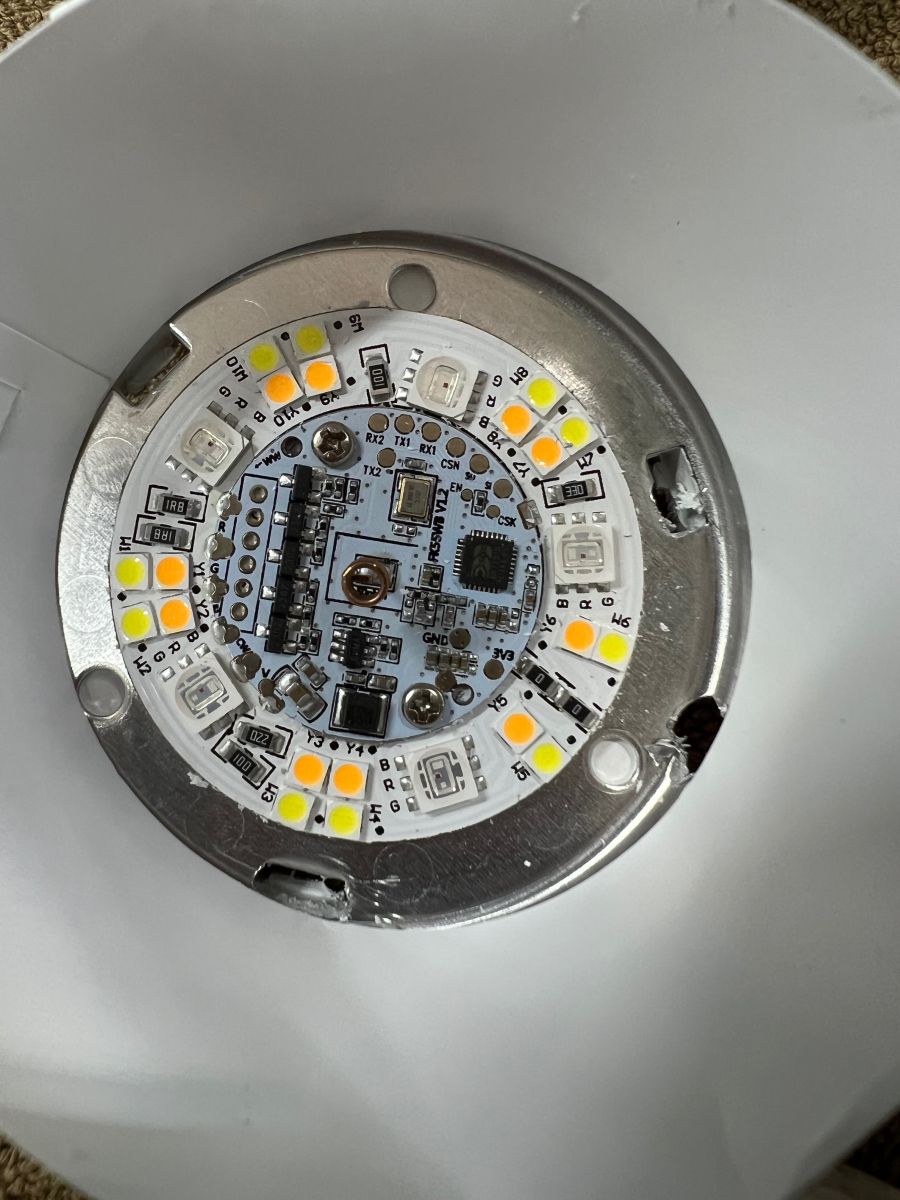
Inside, the board exposes RX1, TX1, 3V3 and GND pads, plus PWM outputs on pins 6, 8, 9, 24 and 26.
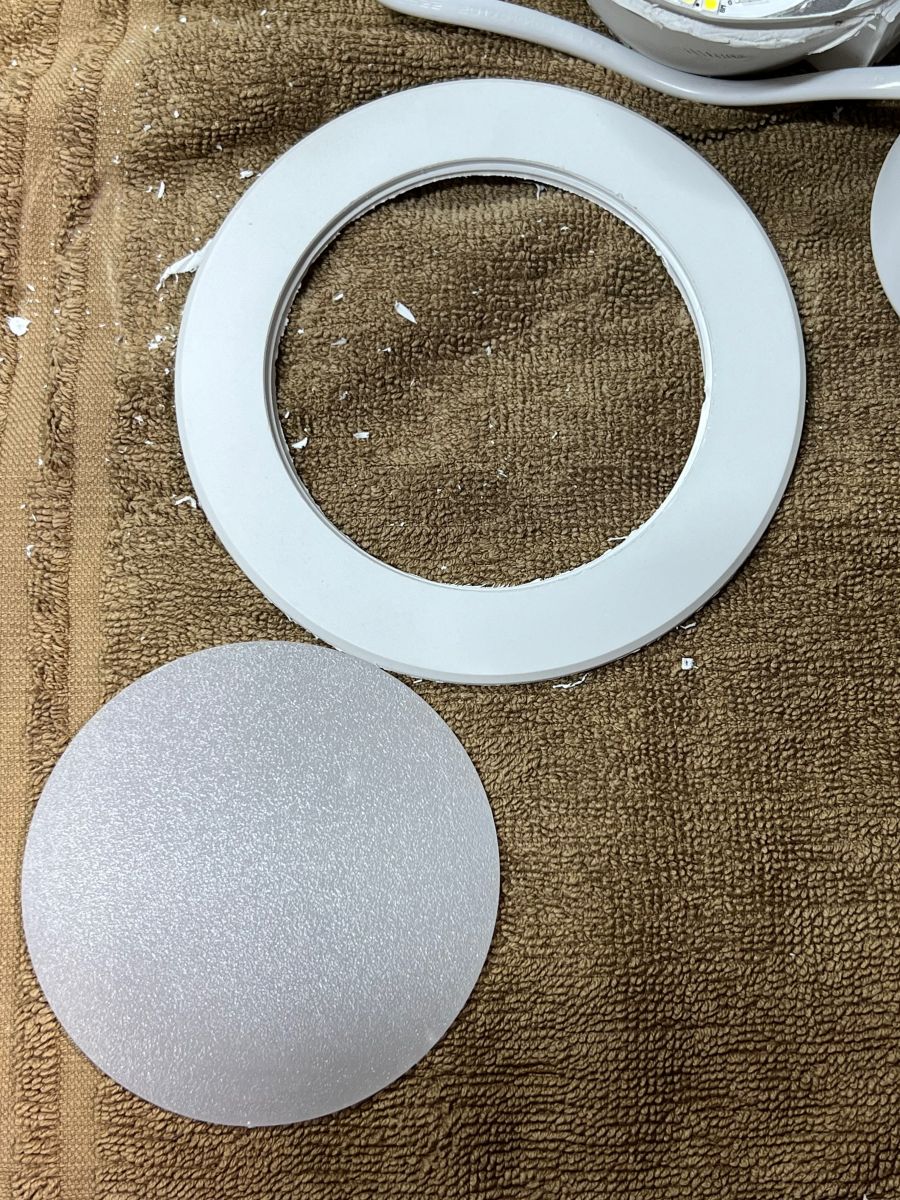
Opening requires removing the rear screw, unhooking the clips, then pushing the diffuser out from one edge; reassembly clicks back together easily.
A front-first approach failed, and the housing was slowly destroyed before access was gained, so the diffuser-side method is the practical route.
Summary generated by AI based on the discussion content.
Below is how to open up a Laser LSH-240RGB10W (also has CSH-240RGB10W on the back) RGB CW/WW downlight. I purchased this from Laser on eBay in Australia.
I have taken a full image dump and uploaded tuya-cloudcutter can be used. I highly recommend this approach as it's a lot easier overall.
The configuration JSON is as follows (manually updated):
To get inside, I (eventually) figured out you need to remove the diffuser cover, as follows:
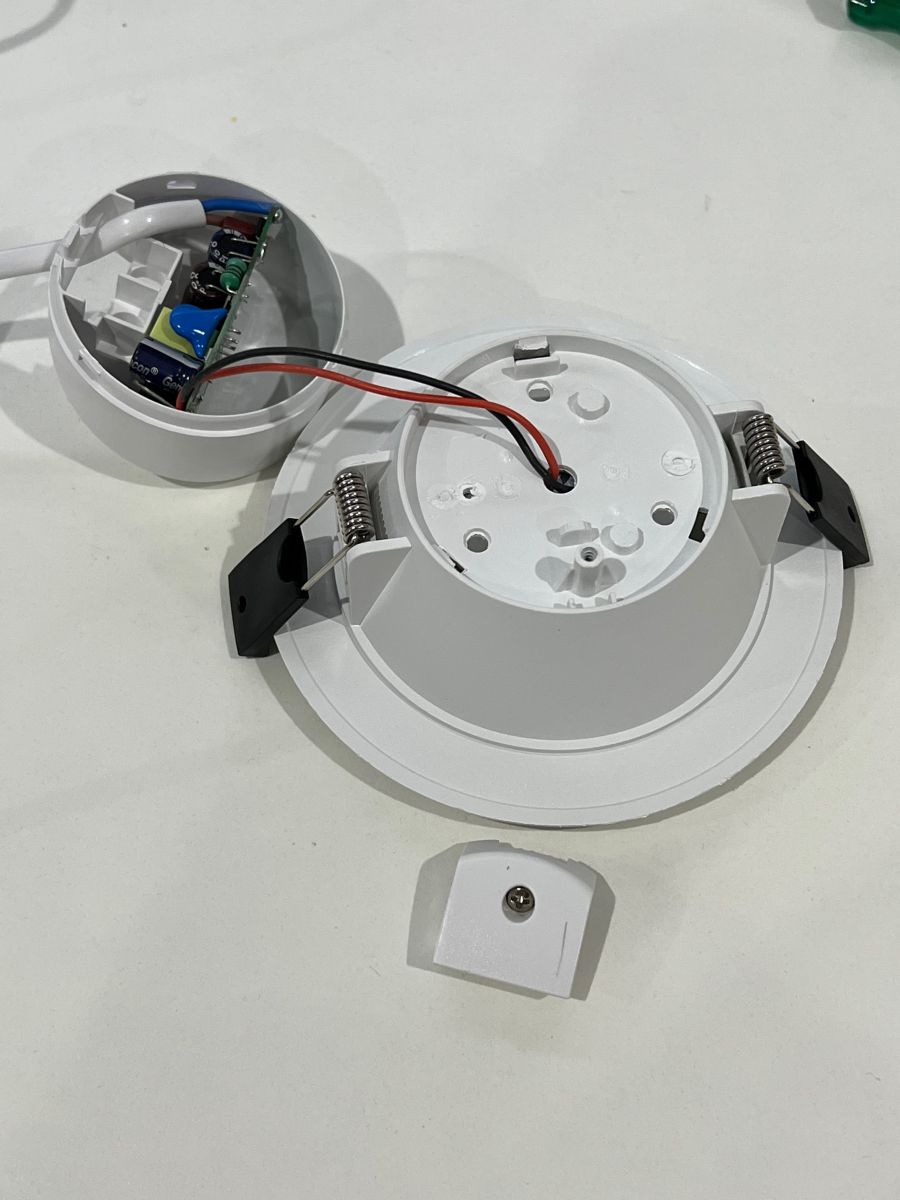
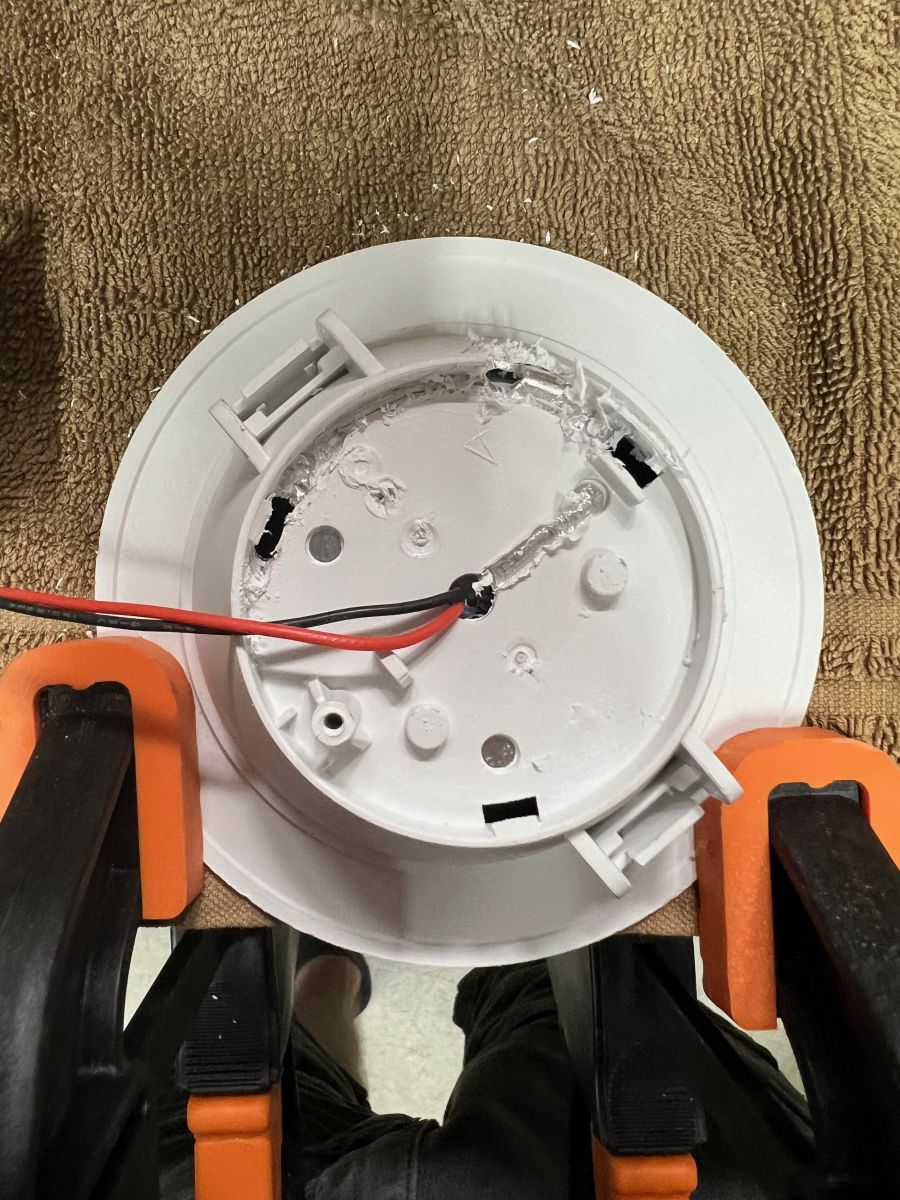
- Undo the screw on the back and remove the wire cover
- The main cover can then come off by pushing near the clip (see photos) and hinging on the opposite side to get past the clip
- Do the same for the rest of the clips until its come off completely
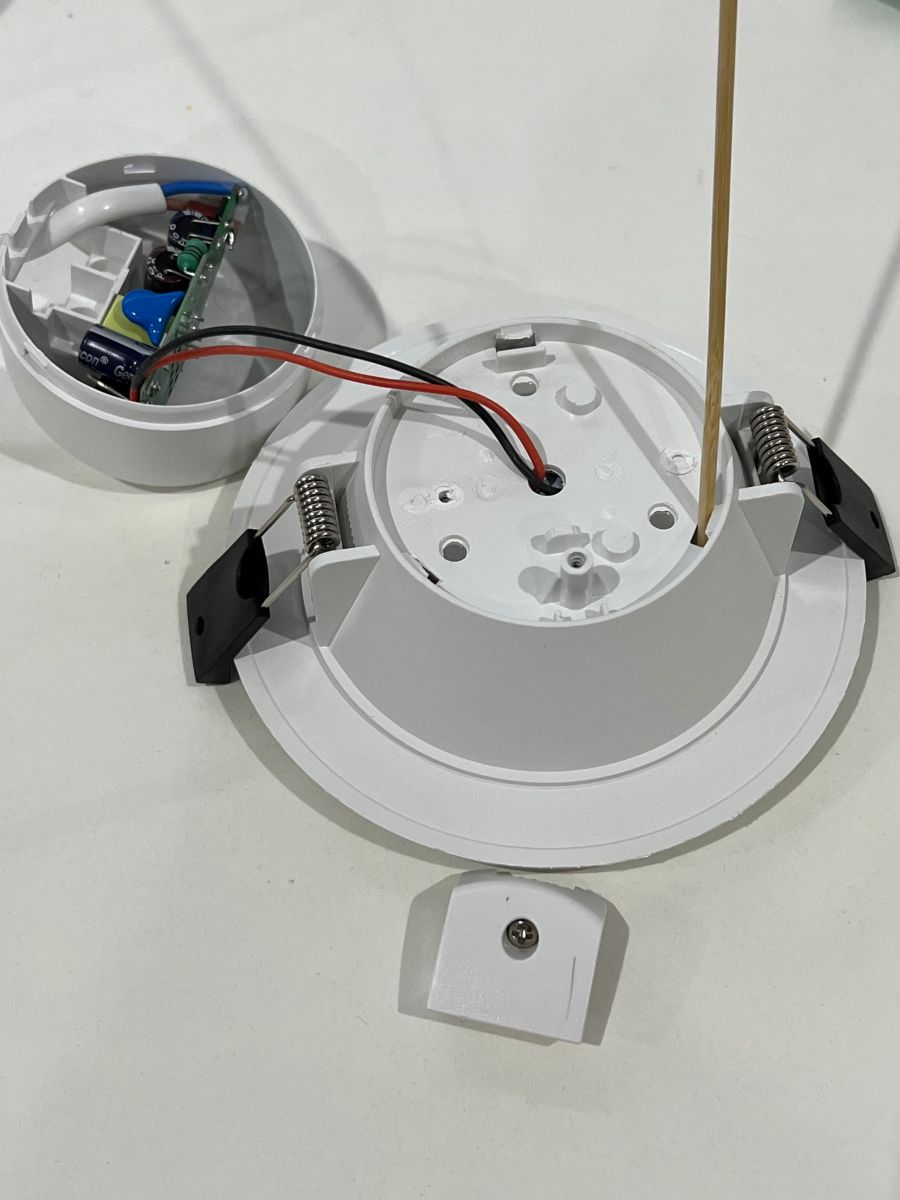
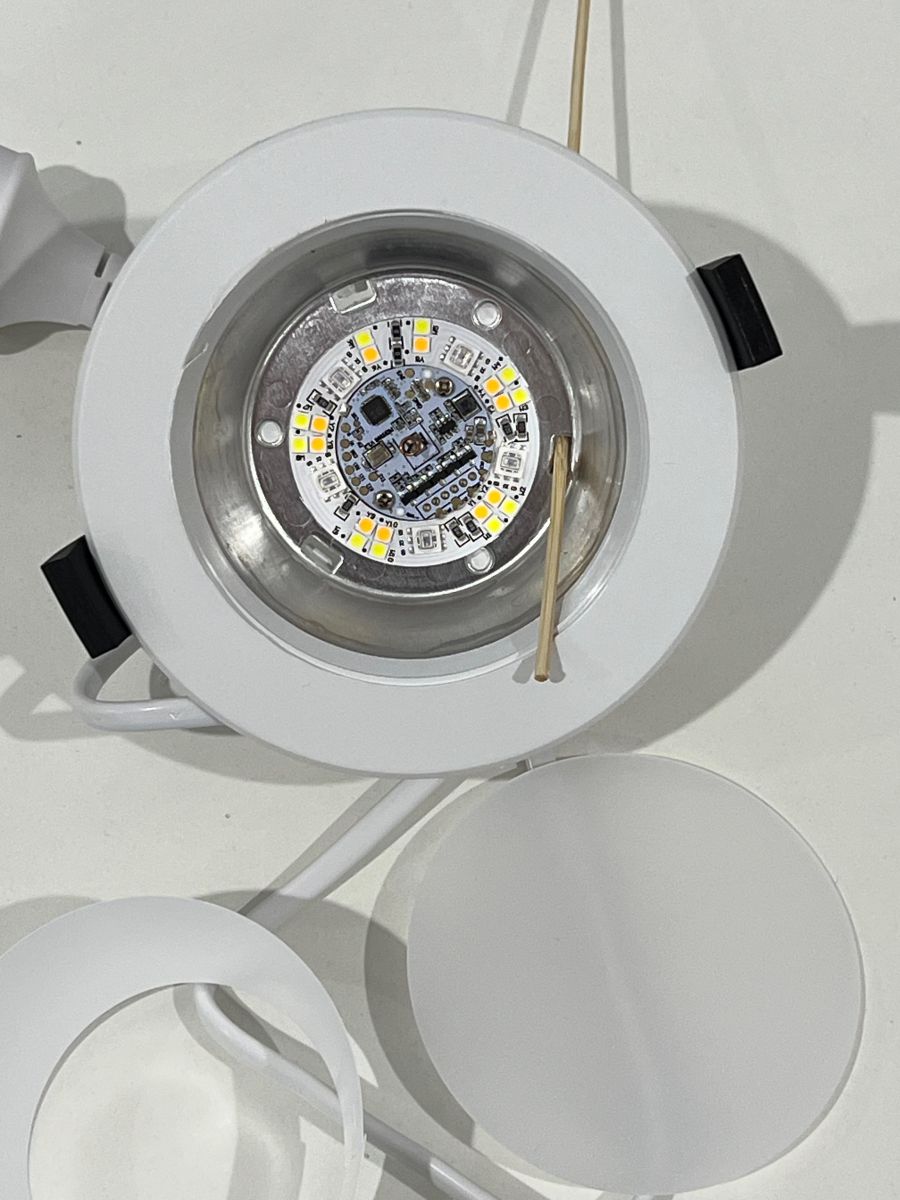
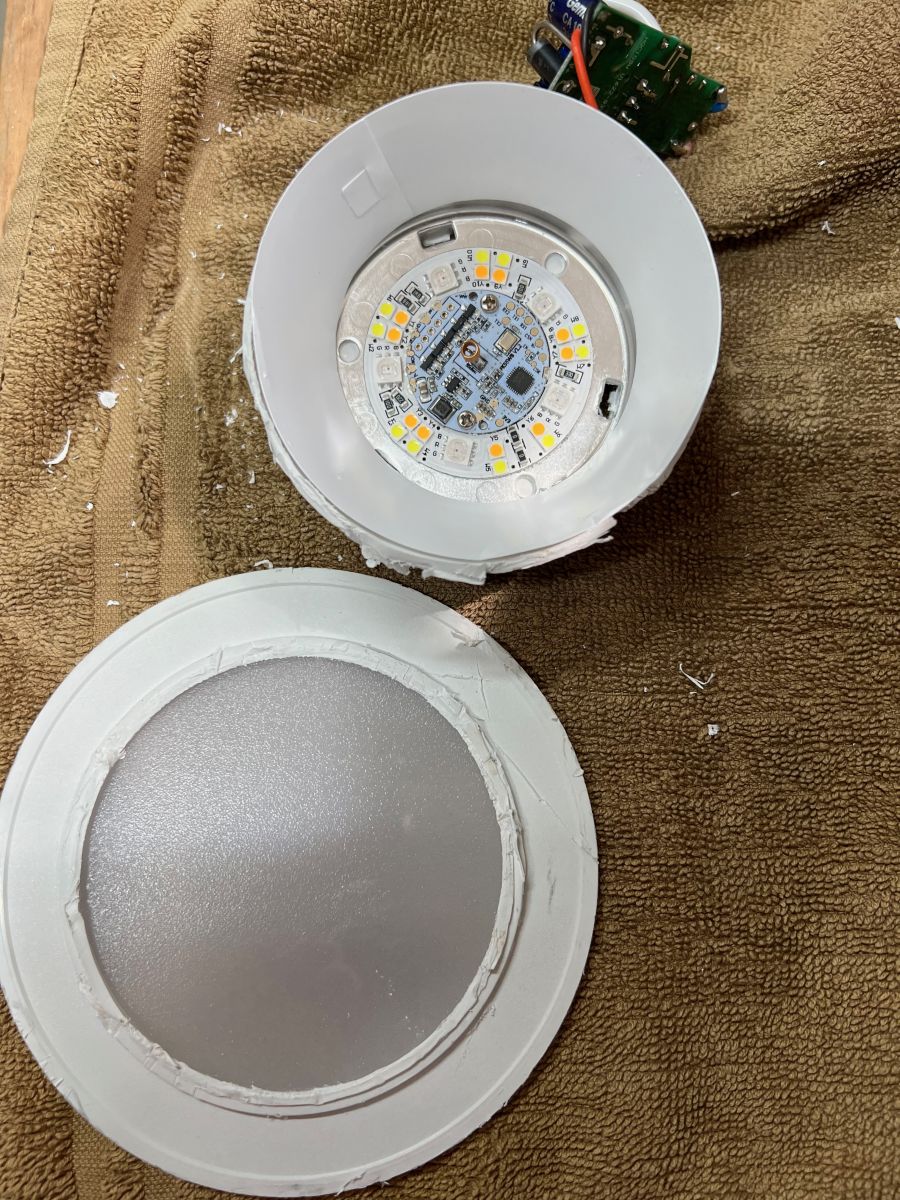
- Using some long, strong and thin (I used the blunt end of a bamboo skewer), you can carefully push the diffuser out at one edge
- Once the first part is out, use a pry tool or similar to carefully go around until the diffuser pops out
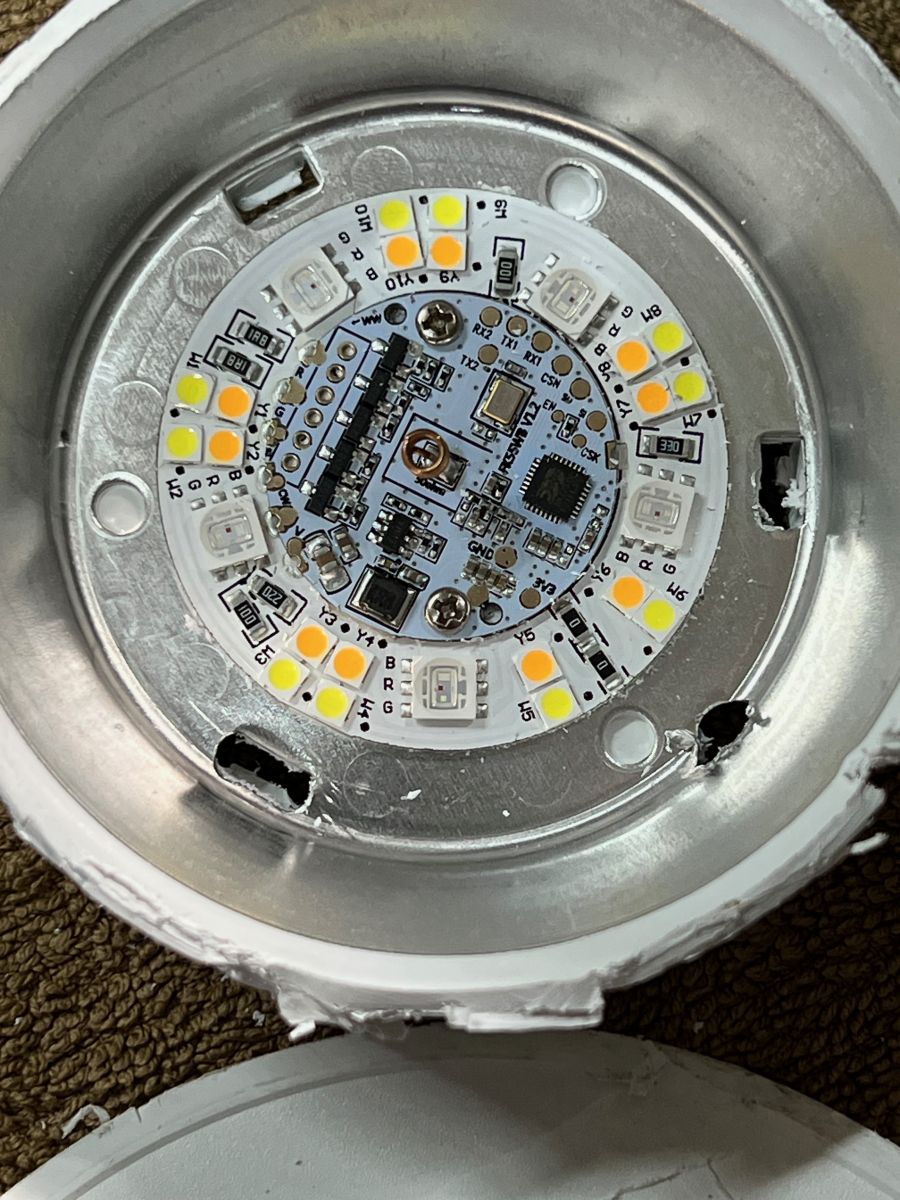
You can then access the full circuit board, and see the RX1/TX1/3V3/GND pads.
Putting it back together is much easier, by clicking everything back into place, and screwing the cable cover back on.
For laughs, this is how NOT to do it. I couldn't get the cover off from the front, and wanted to do about 20 of these, so slowly destroyed it until I got inside, as follows...
About Author
sillyfrog wrote 12 posts with
rating 12 , helped 2 times.
Been with us since 2023 year.
Thanks. I can see how accessing inside of this device can be difficult. I have also destroyed few devices in my time just to get configuration and flash dump.
With 20 of these, you could use our basic... [Read more]
Mortallitas
11 Jun 2023 18:29
I've seen this enclosure used for a few different smart downlights, and the fact that this one isn't even using the holes meant to access cage terminal screws really makes me think it's a generic off-the-shelf... [Read more]
ferbulous
12 Jun 2023 06:58
Is the led cover flexible enough to push it down?
Mine was hard plastic and I cracked it [Read more]
FAQ
TL;DR: This FAQ helps Laser LSH-240RGB10W owners open 1 RGB CW/WW downlight safely; the key expert warning is “NOT” to pry destructively from the front. Remove the rear screw, unclip the cover, then push the diffuser edge out to reach RX1, TX1, 3V3, and GND pads. [#20524048]
Why it matters: A careful teardown preserves the enclosure, diffuser, and wiring cover when flashing or documenting multiple mains-powered downlights.
Method
Access path
Risk
Best use
Tuya-cloudcutter
Firmware image and cloud-based profile
Lower physical risk
Recommended flashing route
Serial access
RX1, TX1, 3V3, GND pads after opening
Higher disassembly risk
Hardware recovery or direct flashing
Destructive teardown
Breaking the case to expose the board
Device damage
Avoid
Key insight: The diffuser is the real access point, but it only comes out cleanly after the rear wire cover and clipped main cover are removed. Treat the diffuser edge gently, because hard plastic versions can crack.
Quick Facts
Model identifiers in the thread are Laser LSH-240RGB10W and rear-label CSH-240RGB10W, described as an RGB CW/WW downlight bought from Laser on eBay in Australia. [#20524048]
The configuration names the chip as BK7231N, the board as onboard, and the device as Laser RGB CW+WW Downlight. [#20524048]
The JSON maps 5 PWM outputs to pins 6, 8, 9, 24, and 26, covering the RGB plus cold-white and warm-white channels. [#20524048]
The accessible pads are labeled RX1, TX1, 3V3, and GND after the diffuser and cover are removed. [#20524048]
With about 20 downlights, DDP support and xLights were suggested for animation, while PowerSave 1 was suggested to reduce heating and energy use. [#20524130]
How do I open a Laser LSH-240RGB10W or CSH-240RGB10W RGB CW/WW downlight without destroying the enclosure?
Open it from the rear and diffuser side, not by breaking the front. 1. Undo the rear screw and remove the wire cover. 2. Push near each clip, hinge the cover past the opposite side, and release all clips. 3. Push one diffuser edge out with a long, strong, thin tool, then work around with a pry tool. This method preserved access to the full circuit board on the 10W Laser unit. [#20524048]
What is the correct way to remove the diffuser cover on a Laser LSH-240RGB10W downlight?
Remove the diffuser by pushing one edge out from inside the opened enclosure. Use a long, strong, thin tool; the thread used the blunt end of a bamboo skewer. Once the first section lifts, move around the diffuser with a pry tool until it pops out. Do not force the front cover directly, because one failed attempt destroyed the enclosure. [#20524048]
Where are the RX1, TX1, 3V3, and GND pads located inside the Laser LSH-240RGB10W downlight?
The RX1, TX1, 3V3, and GND pads sit on the full circuit board under the diffuser. You can see them only after removing the wire cover, unclipping the main cover, and popping out the diffuser. The pad set provides serial access points, including the 3.3 V power reference marked 3V3. [#20524048]
What is tuya-cloudcutter and how is it used with the Laser LSH-240RGB10W downlight?
Tuya-cloudcutter is the recommended flashing route for this Laser BK7231N downlight after using the uploaded full image dump. "tuya-cloudcutter is a firmware replacement workflow that uses a compatible Tuya device dump, avoiding most serial disassembly work when the device profile matches." The thread states that tuya-cloudcutter can be used and is “a lot easier overall.” [#20524048]
Tuya-cloudcutter vs serial flashing: which method is better for flashing a BK7231N smart downlight?
Tuya-cloudcutter is better for this device when the supplied image dump and profile work. It avoids repeated physical access to RX1, TX1, 3V3, and GND pads. Serial flashing still helps when direct board access is needed. For about 20 lights, avoiding repeated teardown saves time and reduces cracked-diffuser risk. [#20524048]
What does the BK7231N chip do in a Tuya-based RGB CW/WW downlight?
The BK7231N is the Tuya smart-control chip identified in the configuration for this downlight. It connects the firmware profile to the onboard PWM outputs used by the RGB, cold-white, and warm-white channels. The thread’s JSON assigns 5 PWM channels to the BK7231N-based board. [#20524048]
What PWM pin configuration is used for the Laser LSH-240RGB10W RGB CW/WW downlight?
The JSON uses five PWM mappings: pin 6 to PWM 5, pin 8 to PWM 4, pin 9 to PWM 1, pin 24 to PWM 2, and pin 26 to PWM 3. These five outputs match an RGB CW/WW downlight layout. The profile also sets flags to 1024 and names the board as onboard. [#20524048]
How do I use the provided JSON configuration for the Laser RGB CW+WW Downlight in OpenBeken or a Tuya firmware replacement?
Use the JSON as the device template for the Laser RGB CW+WW Downlight profile. Keep the model as LSH-240RGB10W, chip as BK7231N, board as onboard, and the five PWM pin mappings unchanged. The configuration was manually updated and links the device image to the Elektroda-hosted photo. [#20524048]
What is PowerSave 1 and how does it reduce heating and energy use on OpenBeken smart lights?
PowerSave 1 is a dynamic sleep setting suggested for these smart lights. "PowerSave 1 is an OpenBeken command that enables dynamic sleep, reducing power use and heating while keeping the device online." The thread says it should work well in most cases, but recommends testing one light first. [#20524130]
How can I test PowerSave 1 safely on one Laser downlight before applying it to multiple lights?
Test PowerSave 1 on a single downlight before enabling it across all units. Enable the command, confirm the light stays online, and check that switching and color control still work. The thread explicitly recommends trying one light first before applying it to a larger group such as 20 units. [#20524130]
What is DDP support and how can it be used with xLights for animations on multiple RGB downlights?
DDP support can drive lighting animation data from xLights to multiple compatible smart lights. "DDP support is a network lighting-control feature that sends animation data to devices, useful for synchronized effects across several RGB fixtures." The thread suggests combining basic DDP support with xLights when using about 20 downlights. [#20524130]
How can I control around 20 Laser LSH-240RGB10W downlights together for lighting animations?
Use the firmware’s basic DDP support with xLights to coordinate animations across the group. The thread specifically mentions about 20 of these downlights as a suitable case. First confirm each light has the correct BK7231N profile and five PWM channels mapped. Then test animation timing on a small subset. [#20524130]
Where can I find an empty generic downlight enclosure like the one used by Laser for custom electronics projects?
The thread does not identify a supplier for the empty enclosure. One participant observed that the enclosure appears generic and used across several smart downlights. They also noted unused holes for cage-terminal screws, suggesting Laser may use an off-the-shelf shell. No part number, vendor, or price was provided. [#20613309]
How flexible is the LED diffuser cover on these generic smart downlight enclosures, and how can I avoid cracking it?
The diffuser can be rigid enough to crack on some versions. One participant reported a hard plastic LED cover that cracked when pushed down. Avoid pressing the center hard. Instead, release the enclosure clips first, then lift one diffuser edge gradually with a thin blunt tool and work around the perimeter. [#20613828]
What safety precautions should I take when disassembling and reassembling a mains-powered smart downlight?
Disconnect power before opening the mains-powered downlight and reinstall the wire cover after reassembly. The teardown removes one rear screw, exposes the cable cover, and then opens the enclosure to reach the circuit board. Keep the diffuser, clips, and cable cover intact, because reassembly depends on clicking parts back into place and tightening the screw. [#20524048]
Summary generated by AI based on the discussion content.
Comments
Thanks. I can see how accessing inside of this device can be difficult. I have also destroyed few devices in my time just to get configuration and flash dump. With 20 of these, you could use our basic... [Read more]
I've seen this enclosure used for a few different smart downlights, and the fact that this one isn't even using the holes meant to access cage terminal screws really makes me think it's a generic off-the-shelf... [Read more]
Is the led cover flexible enough to push it down? Mine was hard plastic and I cracked it [Read more]