Avatto DMS16-W1 CBU Dimmer + Puya PY32F002A MCU: OpenBeken Flashing and Autoexec Setup
Hello. It's me again with another device. This is the Avatto DMS16-W1 1-channel dimmer smart switch with CBU talking to a Puya PY32F002A (TSSOP-20) MCU.
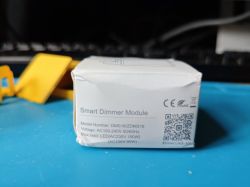
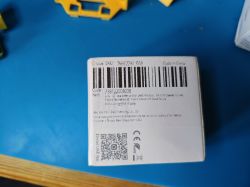
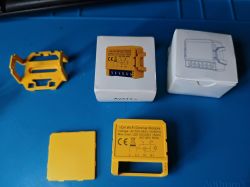
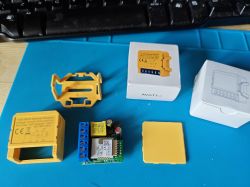
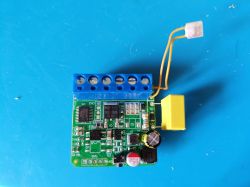
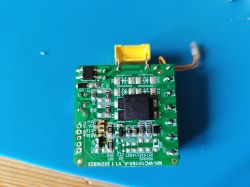
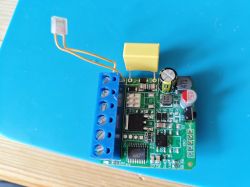
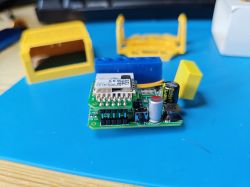
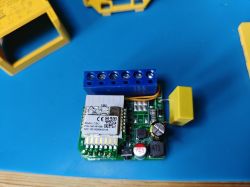
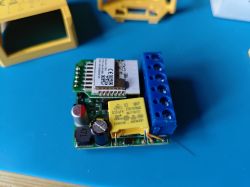
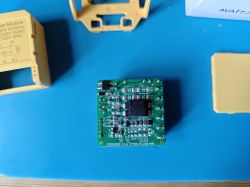
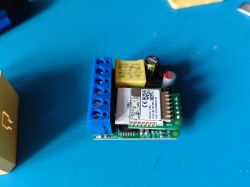
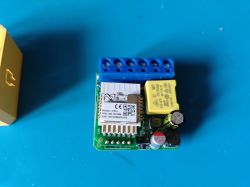
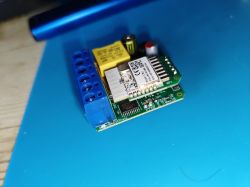
The Puya MCU is well documented and has had some interesting followings on Elektroda https://www.elektroda.com/rtvforum/topic3946116.html
CBU log out from power-on
After de-soldering the CBU riser the factory firmware was dumped using Easy Flasher, attached. The extracted config was "baud":"115200".
With a multimeter I determine the following traces
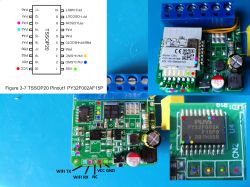
so I have everything I need to capture communications between the Puya and the CBU and potentially to use J-Link to read the flash of the Puya. Sadly I was not able to get a connection from J-Link to the MCU despite my best efforts. Even with NRST-reset pulled low.
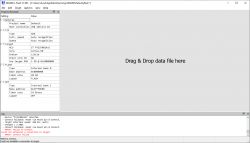
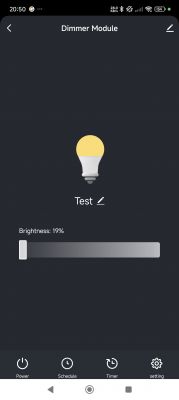
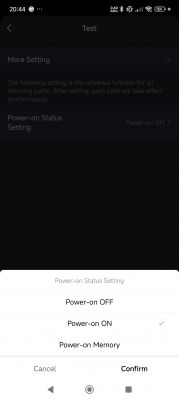
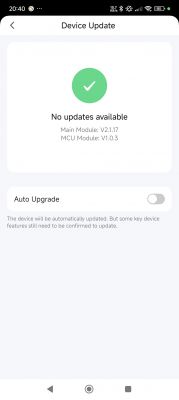
Moving onto the communication between the CBU and the Puya, TuycaMCU Analyser was a winner for capturing all I could toggle and set within the official Tuya app. Those features being:
And with the CBU rise de-soldered we can easily switch between OpenBeken and the factory firmware to recheck default behaviour by removing the Puya from the equation in this setup:
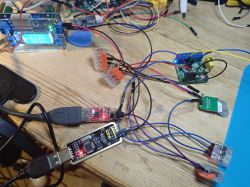
And with two USB-TTL adaptors in the mix we can capture communications in real-time when setting up OBK autoexec.
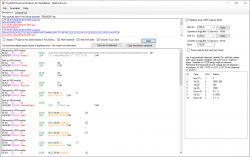
The full extent of the dpIDs being
I did not see dpIDs 13 and 47 in all my fiddling in the Tuya app trying every function, boot communication or tuyaMcu_sendQueryState.
Fast-forward to the current state of the autoexec
which gives us
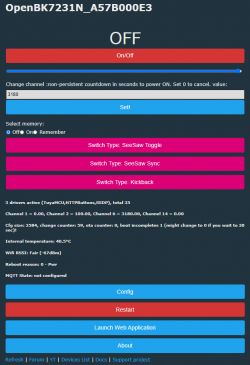
The countdown to power-on timer field numerical value will change every ~30s as the CBU receives an update from the MCU on time remaining.
This is as far as I have gone for now. Most functions appear to be working in OpenBeken, though I've not yet tested with mains power and an incandescent bulb. Certainly the communications I'm watching in the MCU analyser mirror what was seen in factory firmware.
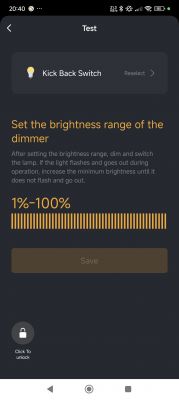
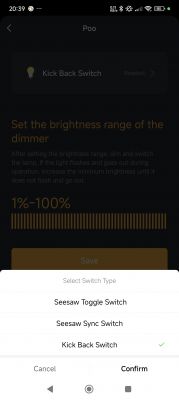
There is one thing I don't yet know how to replicate. The brightness range, dpID3, allows you to customise the range from both ends. This is this screen in the Tuya app
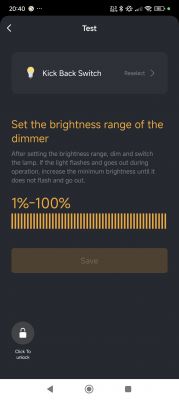
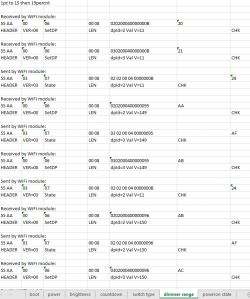
The yellow indicator can be toggled from the left to right to reduce the minimum, as well as from right to left to reduce maximum. This can be seen in factory with these comms. It also involves dpID 2, I'm not sure how this can be replicated in OBK.
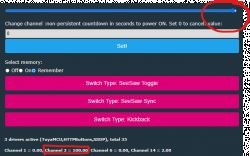
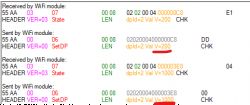
One thing I did notice was that although I've set the dimmer range to tuyaMcu_setDimmerRange 200 1000, same as factory, OpenBeken only displays a fixed 0-100 value range in the GUI for that channel when using the slider. It does however communicate the right values to the MCU.
suggestions for improvement welcome!


The Puya MCU is well documented and has had some interesting followings on Elektroda https://www.elektroda.com/rtvforum/topic3946116.html
Code: Text
CBU log out from power-on
Code: Text
After de-soldering the CBU riser the factory firmware was dumped using Easy Flasher, attached. The extracted config was "baud":"115200".
With a multimeter I determine the following traces

so I have everything I need to capture communications between the Puya and the CBU and potentially to use J-Link to read the flash of the Puya. Sadly I was not able to get a connection from J-Link to the MCU despite my best efforts. Even with NRST-reset pulled low.

Moving onto the communication between the CBU and the Puya, TuycaMCU Analyser was a winner for capturing all I could toggle and set within the official Tuya app. Those features being:


And with the CBU rise de-soldered we can easily switch between OpenBeken and the factory firmware to recheck default behaviour by removing the Puya from the equation in this setup:

And with two USB-TTL adaptors in the mix we can capture communications in real-time when setting up OBK autoexec.

The full extent of the dpIDs being
Code: Text
Code: Text
I did not see dpIDs 13 and 47 in all my fiddling in the Tuya app trying every function, boot communication or tuyaMcu_sendQueryState.
Fast-forward to the current state of the autoexec
Code: Text
which gives us

The countdown to power-on timer field numerical value will change every ~30s as the CBU receives an update from the MCU on time remaining.
This is as far as I have gone for now. Most functions appear to be working in OpenBeken, though I've not yet tested with mains power and an incandescent bulb. Certainly the communications I'm watching in the MCU analyser mirror what was seen in factory firmware.
There is one thing I don't yet know how to replicate. The brightness range, dpID3, allows you to customise the range from both ends. This is this screen in the Tuya app

The yellow indicator can be toggled from the left to right to reduce the minimum, as well as from right to left to reduce maximum. This can be seen in factory with these comms. It also involves dpID 2, I'm not sure how this can be replicated in OBK.

One thing I did notice was that although I've set the dimmer range to tuyaMcu_setDimmerRange 200 1000, same as factory, OpenBeken only displays a fixed 0-100 value range in the GUI for that channel when using the slider. It does however communicate the right values to the MCU.


suggestions for improvement welcome!


Comments
Thank you for detailed presentation. This min/max (range) control seems like a very custom component, we don't have such channel type in firmware yet, especially that it would need to handle two dpIDs...... [Read more]
I recently received an identical AVATTO dimmer with the designation DMS 16-Y1 instead of W1. An interesting feature of this version is a timer that counts down the time until the light is switched off. I... [Read more]
I have the same dimmer switch, only it's the 2CH model. So I see mostly things are working fine with the 1CH unit, I will try out flashing my unit and report my findings. Seems like just the right dpIDs... [Read more]
you could sniff out the additional dpID(s) https://www.elektroda.com/rtvforum/topic3970199.html https://www.elektroda.com/rtvforum/topic4038151.html https://github.com/openshwprojects/OpenBK7231T_App?tab=readme-ov-file#features or... [Read more]
I already flashed it. Here is the full 2MB dump of Tuya FW. I had it connected to WiFi if it matters. Anyways it seems that things are very similar, because when using your autoexec.bat: *both physical... [Read more]
Good job TuyaMCU is a great tool. I found another CBU and restore original tuya firmware for testing. My 2 channel wifi avatto dimmer software version https://obrazki.elektroda.pl/8674940200_1746889358_thumb.jpg... [Read more]
thanks for your autoexec.bat files. I recently bought the 1CH and 2CH version of this dimmer. Both basically work. https://obrazki.elektroda.pl/1528888000_1759296745_thumb.jpg What I don't... [Read more]
Did you check them with factory firmware first? I didn't have this particular model on my side, but the physical switch is connected to the MCU and not to the WiFi module, so I would assume that functionality... [Read more]
That's what I think even the behavior is strange though.. After unpacking, I went straight to the flashing :-) So I unfortunately have no comparison to the factory firmware [Read more]
I don't remember seeing dimmers controllable with brightness via toggle switch. I only saw them with buttons. So: 9. **DP 47:** - **Code:** switch_type (开关类型 [switch type]) ... [Read more]
that's what I already tried. It took me a while to figure out what 'sync' should mean in this context. But finally all 3 worked. But none was suitable to dim the light. Just switch on/off. [Read more]
Well, what are your DIY skills? Maybe we could try to connect button directly to WiFi module and then program it to change brightness? [Read more]
ah, good idea directly connecting the switch/button to the WiFi module is easy for this hardware. In particular terminal 'N' is already connected with the ground of the 3.3V circuit. It means digital... [Read more]
Ok, so your brightness control already works from OBK, right? So, in which channel is the brightness? Can you run: addChannel 2 10 to, for example, add 10 to channel 2, to increase brightness... [Read more]
I'm completely new to openBK. I first had to remove some leftovers from my previous tries :-) Finally I setup everything new. What now works is: 'addChannel 2 10' increases the brightness by 10.... [Read more]
Now, the addChannel is smarter than just adding value. It can also wrap around. Look: https://obrazki.elektroda.pl/1520117900_1759317688_bigthumb.jpg What is the range of dimmer here? 0 to 1000? So,... [Read more]
nice! I first set tuyaMcu_setDimmerRange 0 1000 it appears something with wrapping is going wrong: AddChannel 2 10 0 1000 0 Debug:TuyaMCU:ApplyMapping: mapped dp 2 value... [Read more]
Ok, you also need to be able to do on and off. Do you have a command for that? Probably toggleChannel? And then, look here: https://www.elektroda.com/rtvforum/topic3946427.html You can script it to: -... [Read more]
ok, sometimes simply adding 1 by: AddChannel 2 1 causes huge steps in brightness change. The same with small negative values like 'AddChannel 2 -1' I first will have a look what's going... [Read more]