[CB3S/BK7231] Small and flat roller shutter controller for SB478/QS-WIFI-ECC02 box - batch change
TL;DR
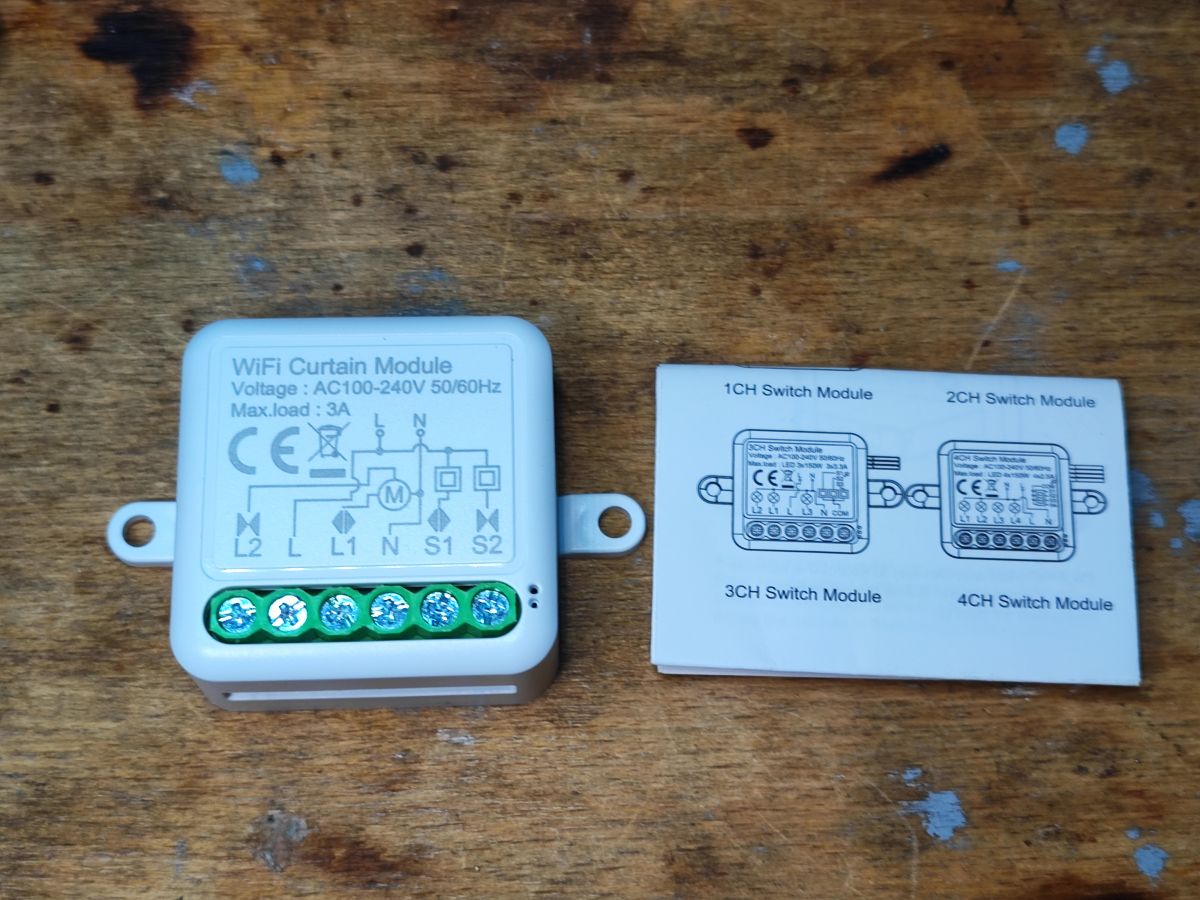
- SB478/QS-WIFI-ECC02 is a small Tuya roller shutter controller that looks like a repainted AVATTO WSM16-W2 dual-relay module in a flatter package.
- Inside, KP15051SP supplies 5V for the relays, a separate 3.3V LDO feeds the CB3S BK7231N WiFi module, and compact relays keep the height low.
- The Tuya mapping uses P24 for relay 1, P6 for relay 3, P9 for the WiFi LED, P8 and P7 for buttons, and P26 for Pair/Toggle All.
- OpenBeken flashing is straightforward through RX/TX, and the flasher correctly detects the Tuya configuration, but the shutter-specific curtain setup still needs further configuration.
Generated by the language model.
 .
.
Some time ago I showed how tightly Tuya packs two relays using the example of the AVATTO WSM16-W2 after-box module for PLN56. Here I will show how Tuya "repainted" this product as a roller shutter controller, i.e. the interior will be similar, but the function quite different....
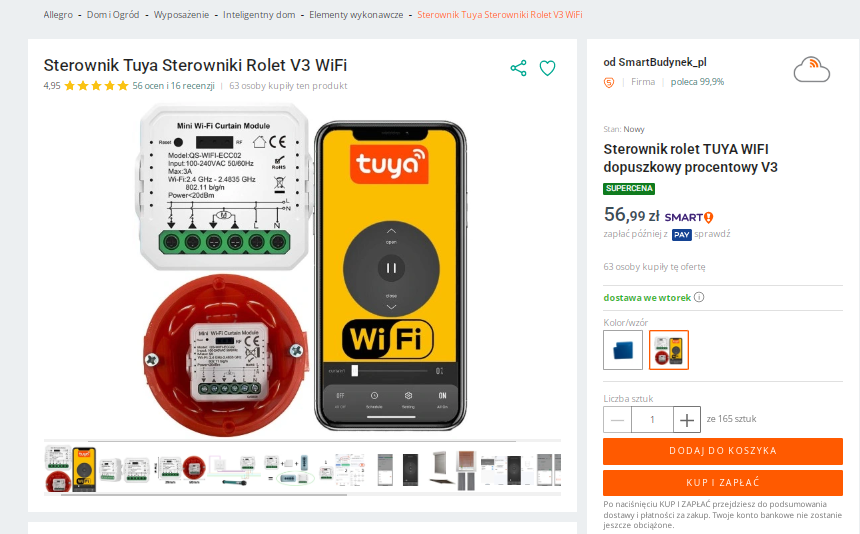
Purchase SB478/QS-WIFI-ECC02 .
Here, the price is almost identical to the lighting control version. This is a plus, the manufacturer does not artificially inflate the price for the roller shutter version. The marking QS-WIFI-ECC02 is visible in the picture:
 .
.
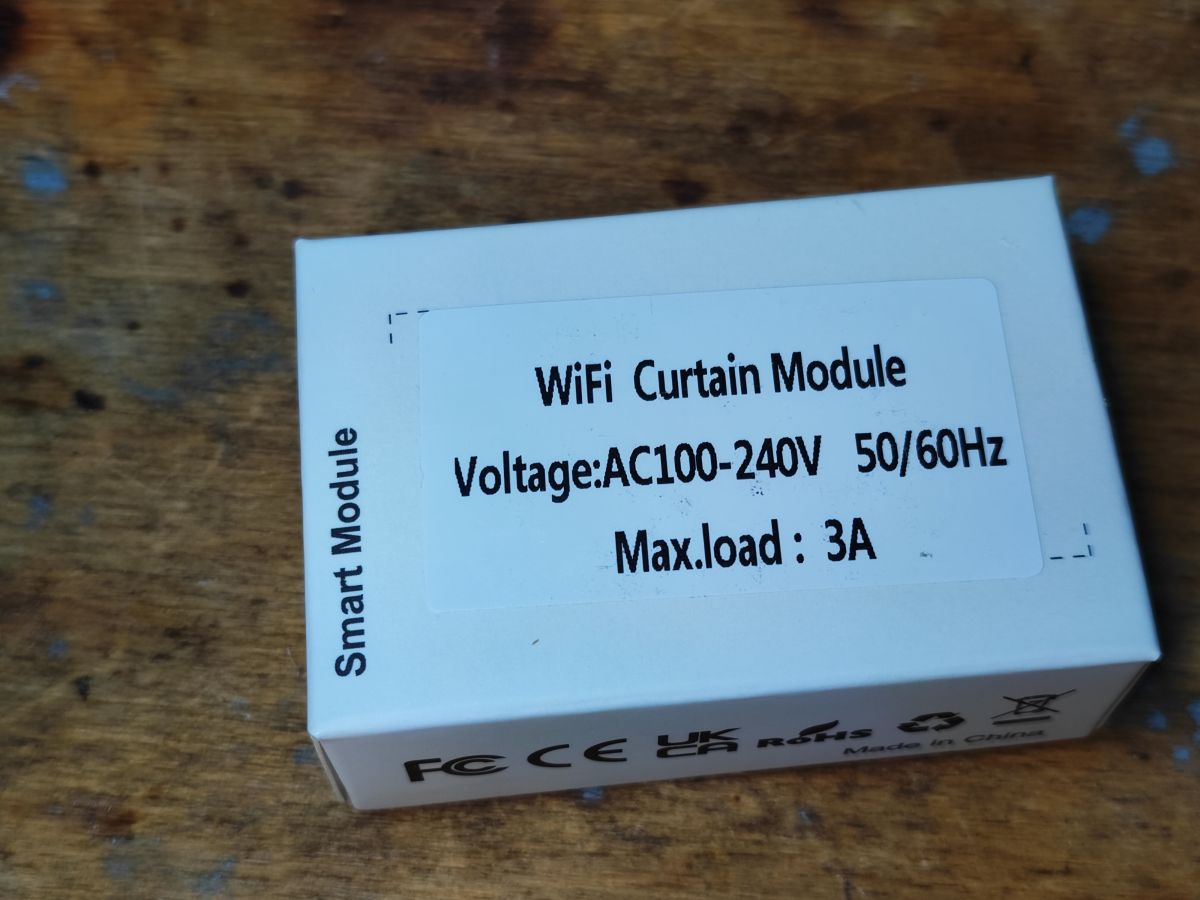
What we get in practice:
 .
.
No screws included this time. It's time to look inside, the tests with the Tuya application I skip because I've done many times.
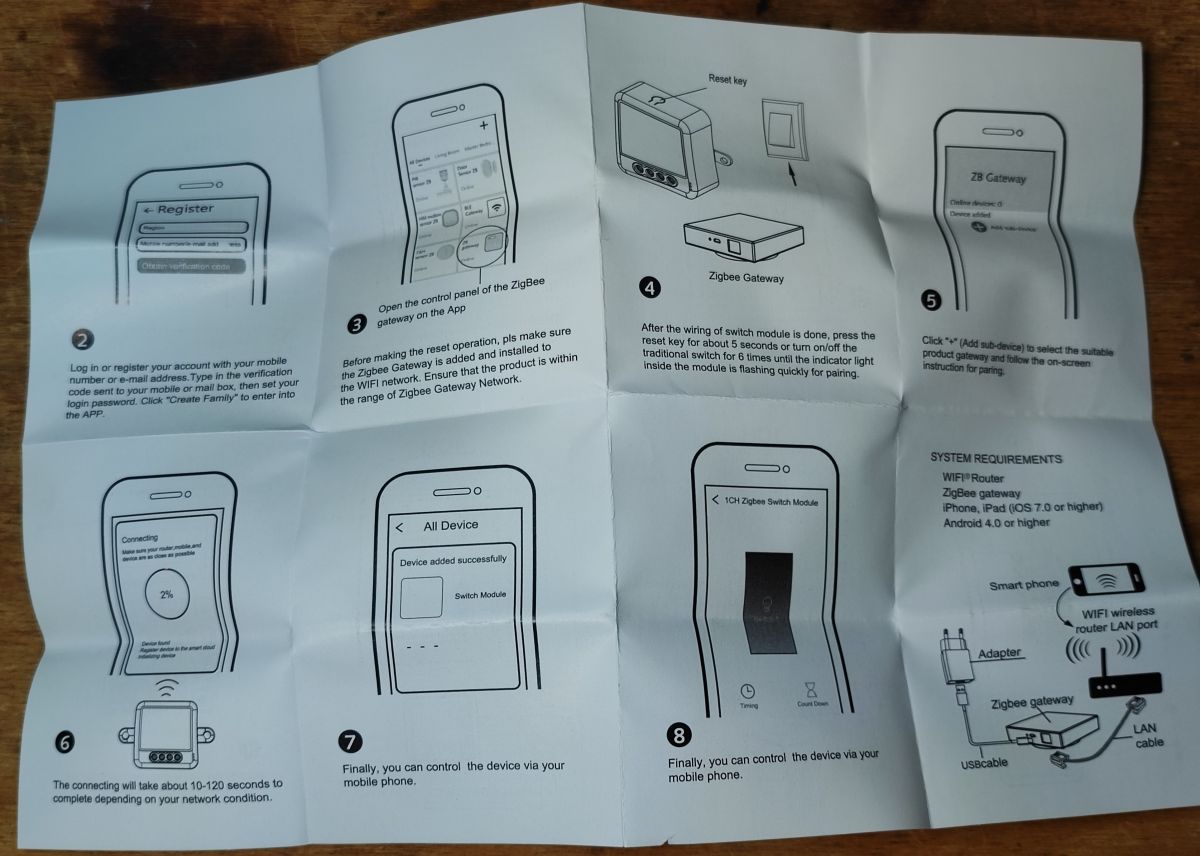
Instructions:
 .
.
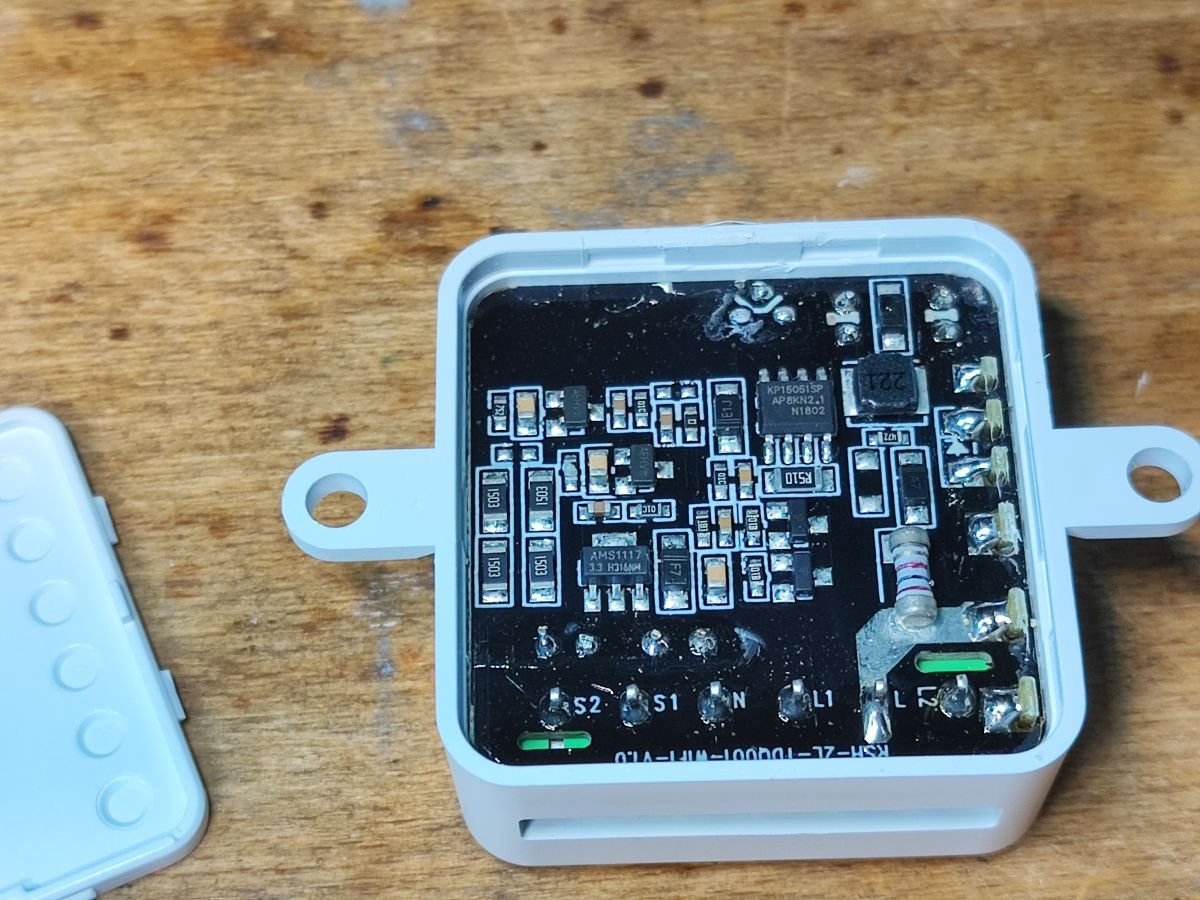
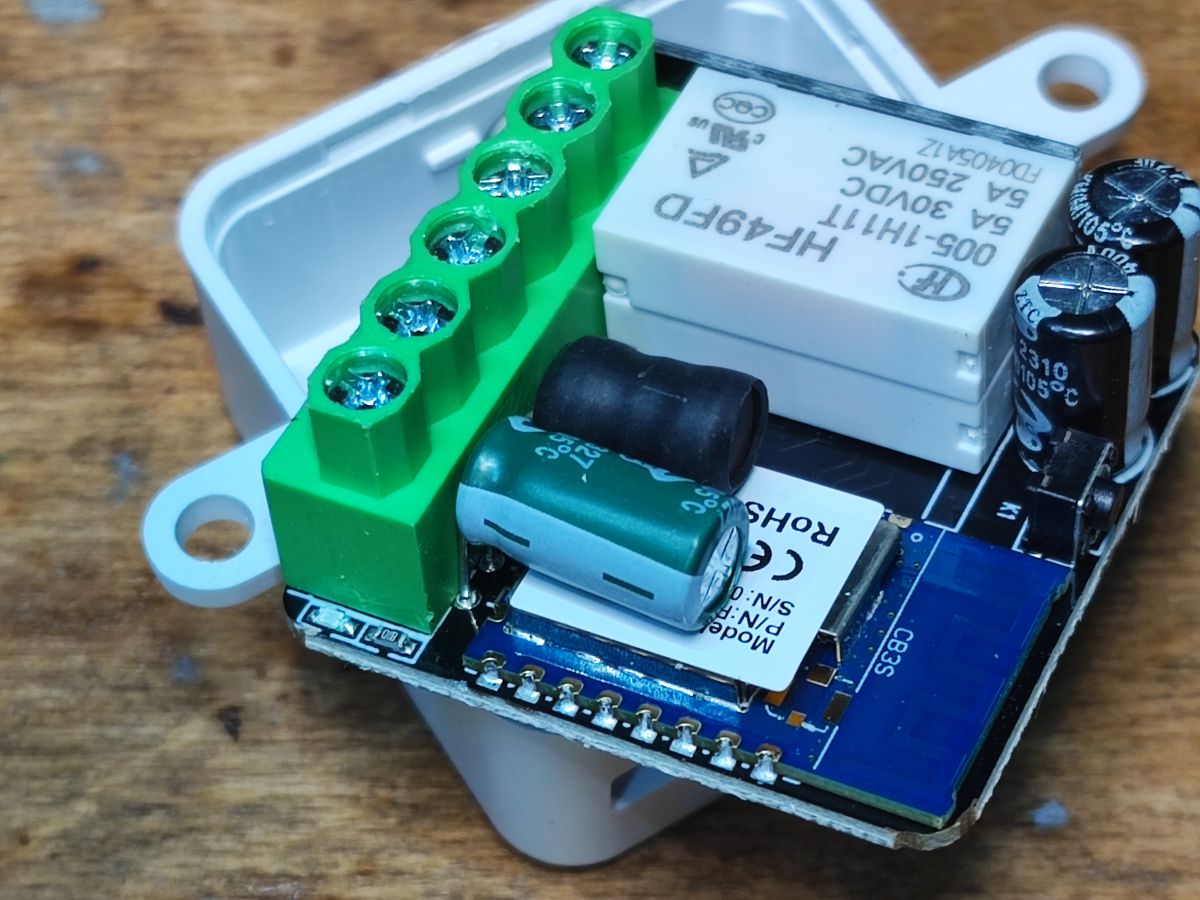
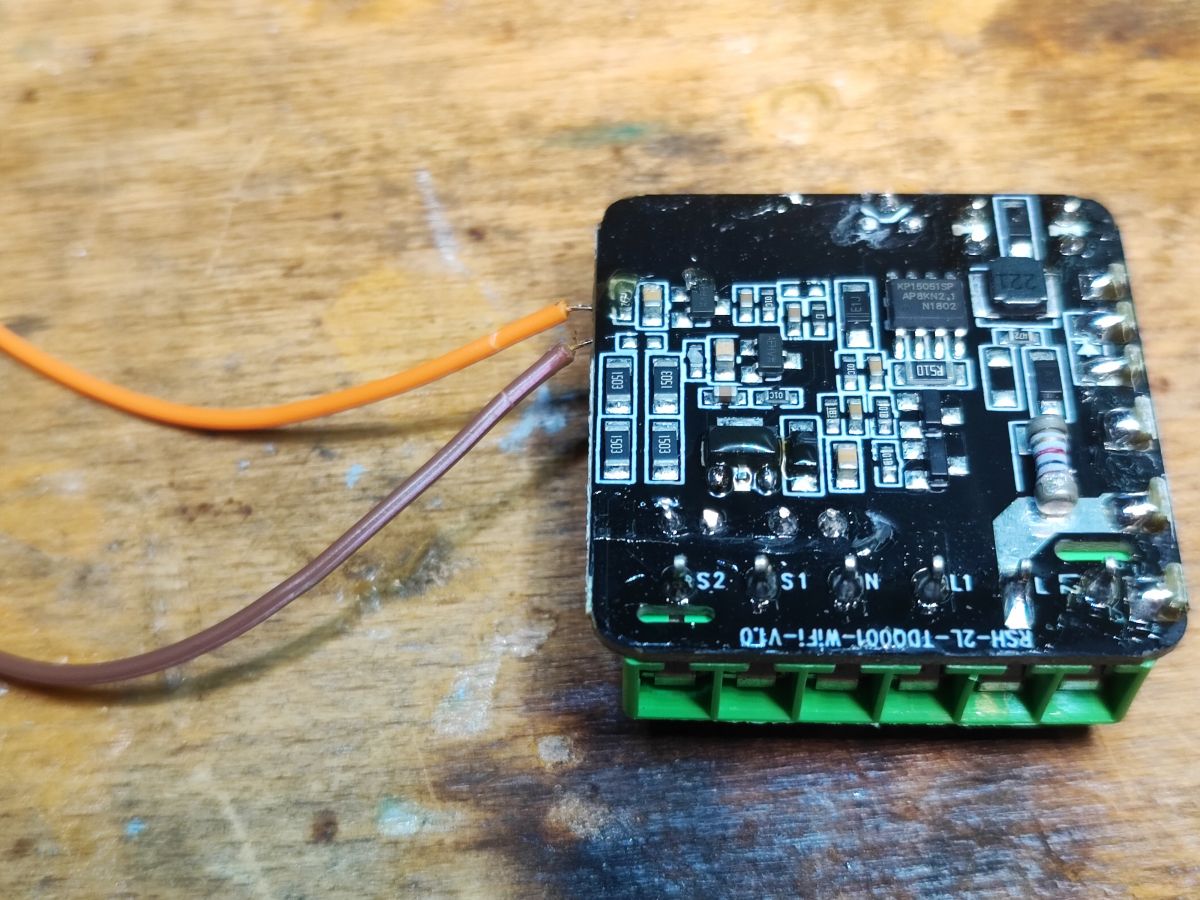
Interior of SB478/QS-WIFI-ECC02 .
The interior is similar, but not identical, to that of the AVATTO WSM16-W2 , I recommend you compare the photos for yourself.
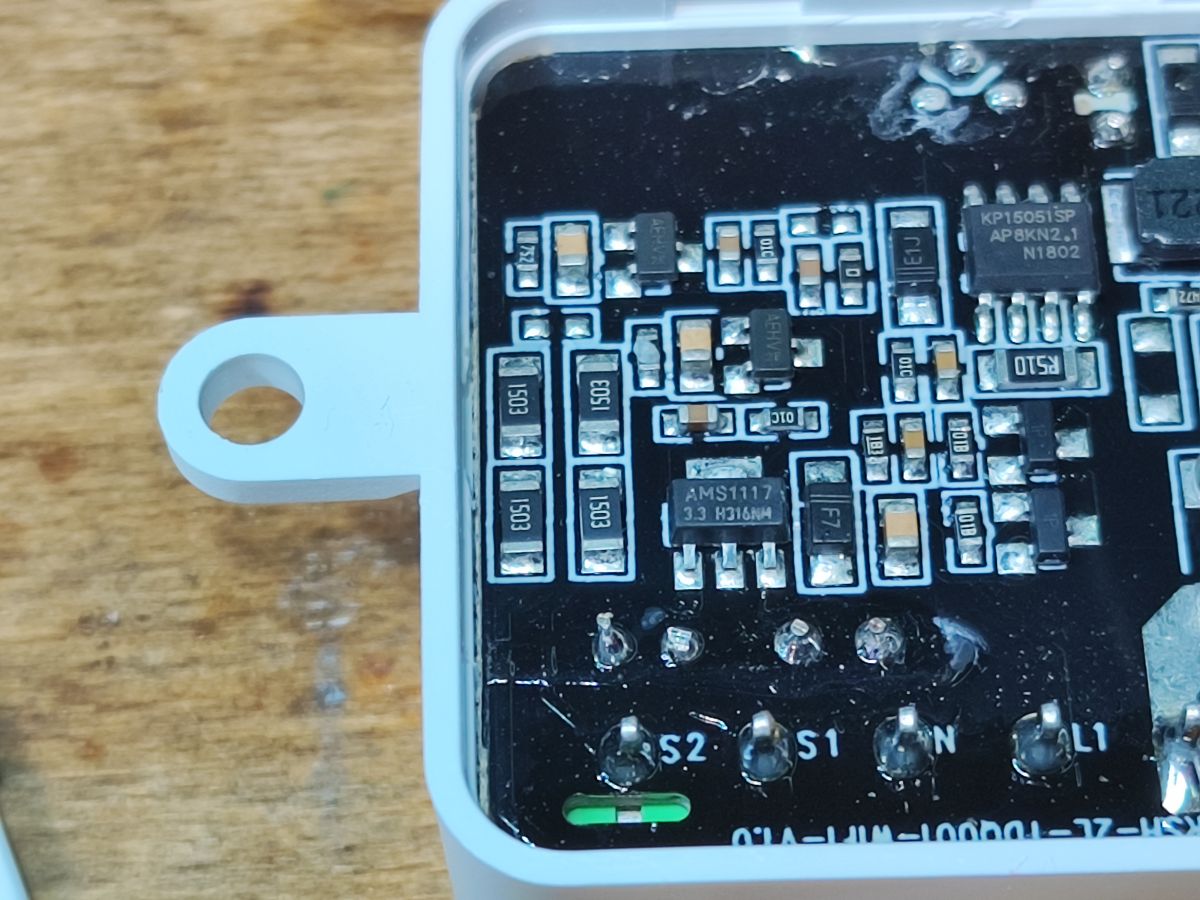
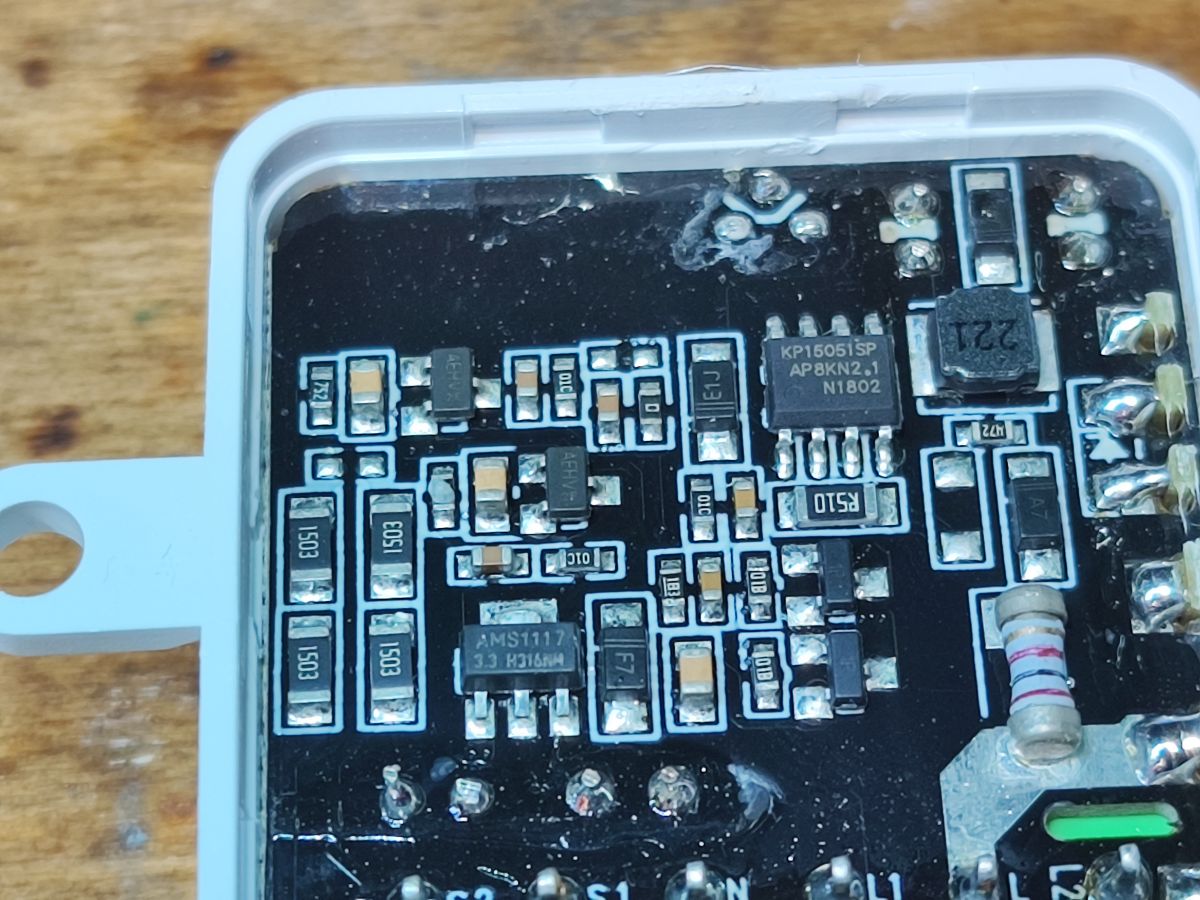
The power supply is based on the KP15051SP:
 .
.
I have also seen it in a Modemix product:
[BK7231N/CBU] Modemix MOD003 dual WiFi light controller .
It generates 5V for the relays, separately on the board is a 3.3V LDO for the WiFI modulus.
 .
.
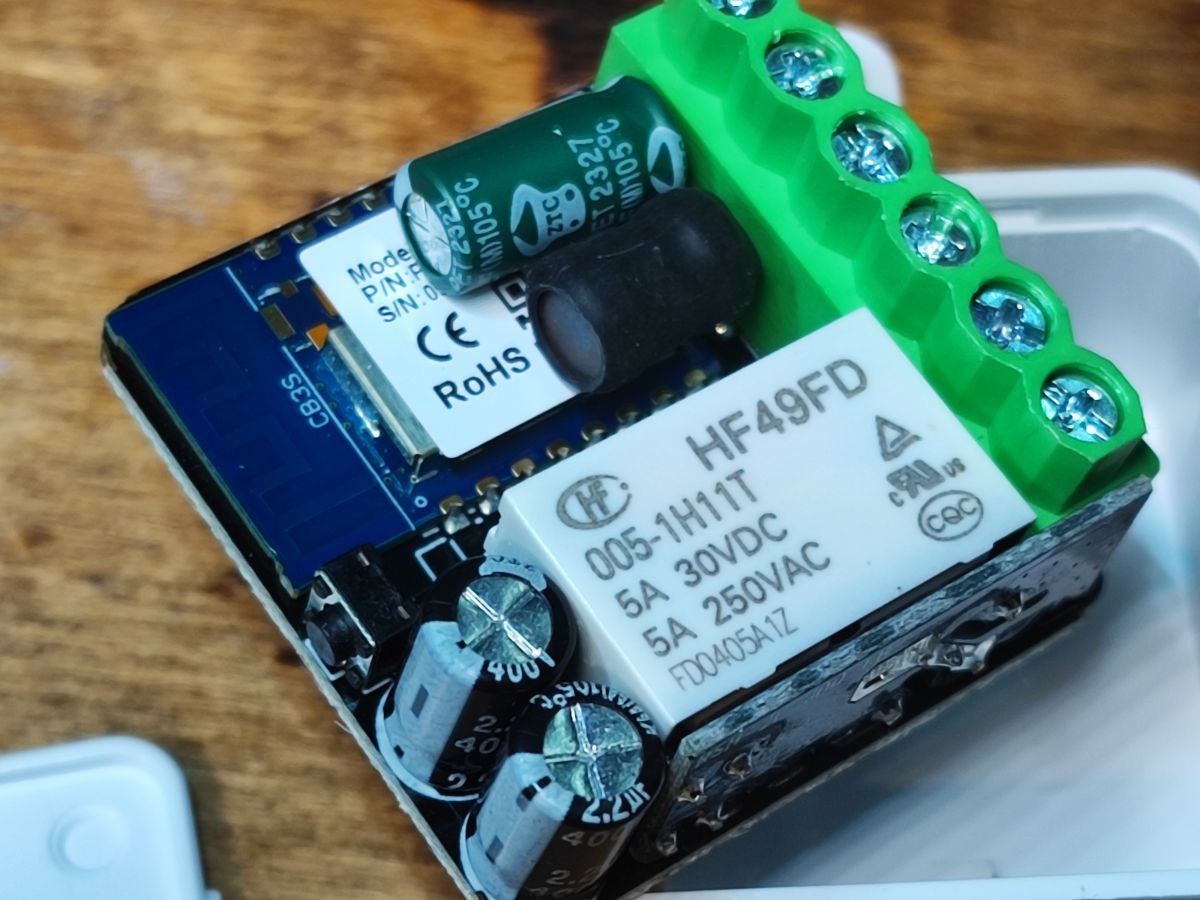
The whole system is based on the CB3S WiFi module, the BK7231N.
 .
.
Cleverly packed relays reduce the height of the module:
 .
.
Changing the SB478/QS-WIFI-ECC02 batch .
Upload OpenBeken , according to the flasher instructions:
https://github.com/openshwprojects/BK7231GUIFlashTool
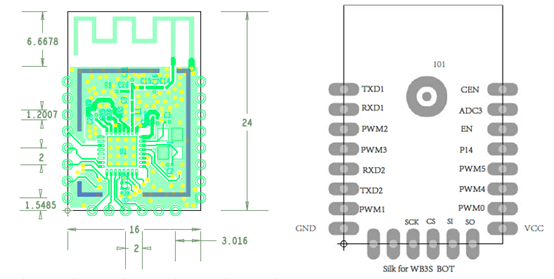
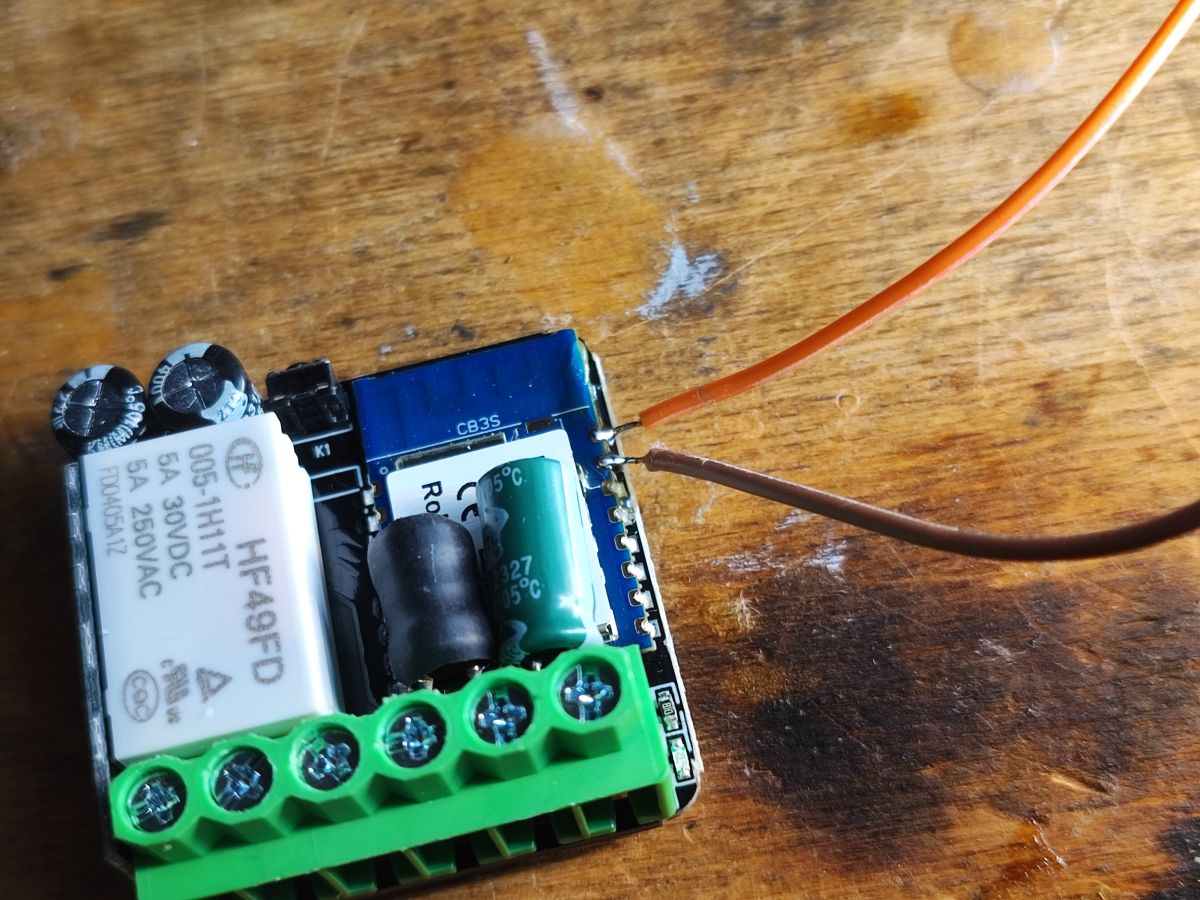
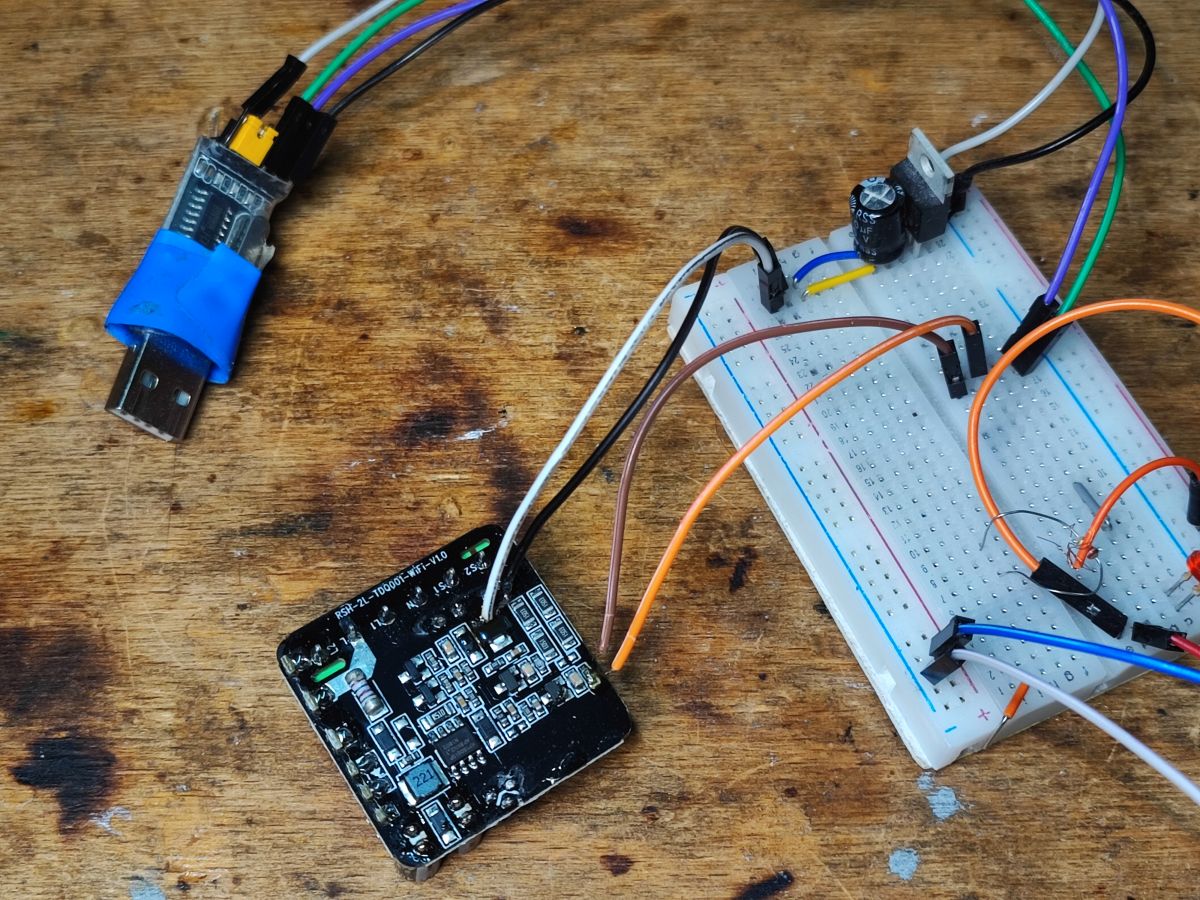
We solder the power supply and the TX and RX:
 .
.
 .
.
We can either solder the power supply to the AMS1117-3.3V output (check its leads in the datasheet note) if we have 3.3V, and if we want to supply from 5V, we solder to the AMS1117-3.3V input, so the WiFi module gets 3.3V anyway.
 .
.
 .
.
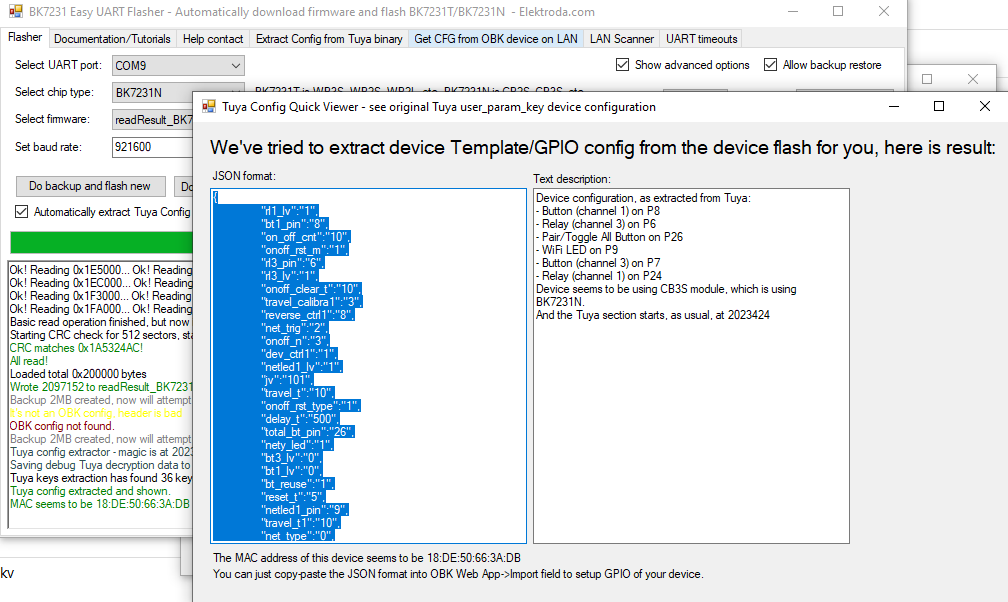
My flasher correctly detects the Tuya configuration:
Code: JSON
Verbal description:
Device seems to be using CB3S module, which is BK7231N chip.
- Relay (channel 1) on P24
- Relay (channel 3) on P6
- WiFi LED on P9
- Button (channel 1) on P8
- Button (channel 3) on P7
- Pair/Toggle All Pin on P26
OBK template:
Code: JSON
Depending on how you want to use this product, further configuration may be required. The configuration of the curtains is described in other forum topics, for example:
Teardown of a Smart Life Curtain (Shutter) switch, Flashing, Configuring and setting up with HA .
Summary
The product is quite similar to a simple two relay controller because it just basically is one - it's the batch that does most of the work. Changing the firmware is straightforward, there are no problems accessing the RX/TX, and my flasher decodes the Tuya configuration correctly, so we momentarily learn the GPIO roles. The only thing left is to configure the blinds, but about that another time. If anything, you can refer to other users' elaborations, as I haven't run the blinds myself yet.

p.kaczmarek2 wrote 14611 posts with
rating 12625 , helped 654 times.
Been with us since 2014 year.
Comments
Let me link to the topic. When it comes to IoT I'm a "layman" although I'm catching up fast.... unfortunately. Unfortunately because I have chosen the Tuya subsystem. And while it is ok with simple switches... [Read more]