logo elektroda
logo elektroda
X
logo elektroda

Tutorial mqtt.js, the Javascript MQTT client - how to connect your browser to Home Assistant

p.kaczmarek2  2 1044 Cool? (+4)
📢 Listen (AI):

TL;DR

  • MQTT.js connects a browser to a Home Assistant MQTT broker, letting a pure HTML page send and receive MQTT messages from the client side.
  • The setup uses WebSocket instead of direct TCP, with browser-side callbacks plus subscribe and publish actions handled in JavaScript.
  • Browsers use the ws prefix, and the Mosquitto broker in Home Assistant must support WebSockets, while the demo can run as static HTML from disk or GitHub Pages.
  • The connection works after entering valid credentials, and the page can both see Home Assistant publications and publish data back to Home Assistant.
  • A key limitation is that the username and password appear in the page source, so this approach is not suitable for every security scenario.
Generated by the language model.

Here I will show how to easily establish a connection to an MQTT broker from a web browser. I will use an off-the-shelf MQTT library that connects to the broker via a WebSocket mechanism and demonstrate how it can be used to receive and send data via Mosquitto installed together with Home Assistant.

Note: This presentation is about JS scripts running on the client side, i.e. in the browser itself. No Node.js or any similar mechanisms are needed here. All you need is a bulk HTML file running without any server, this will even work with static hosting such as GH Pages from GitHub.
Web browsers do not offer the possibility to establish a direct connection over TCP, so MQTT.js uses a mechanism called WebSocket. Fortunately, Mosquitto from HA used for presentations also supports WebSockets, although you may need to configure this in mosquitto.conf.

Note - the full code is in the appendix!

We start the adventure in HTML code - you can help yourself here with AI tools, so that you can quickly assemble the whole thing based on ready-made CSS styles, for example from Bootstrap. However, we are interested in MQTT itself. We include the library first:
Code: HTML, XML
Log in, to see the code

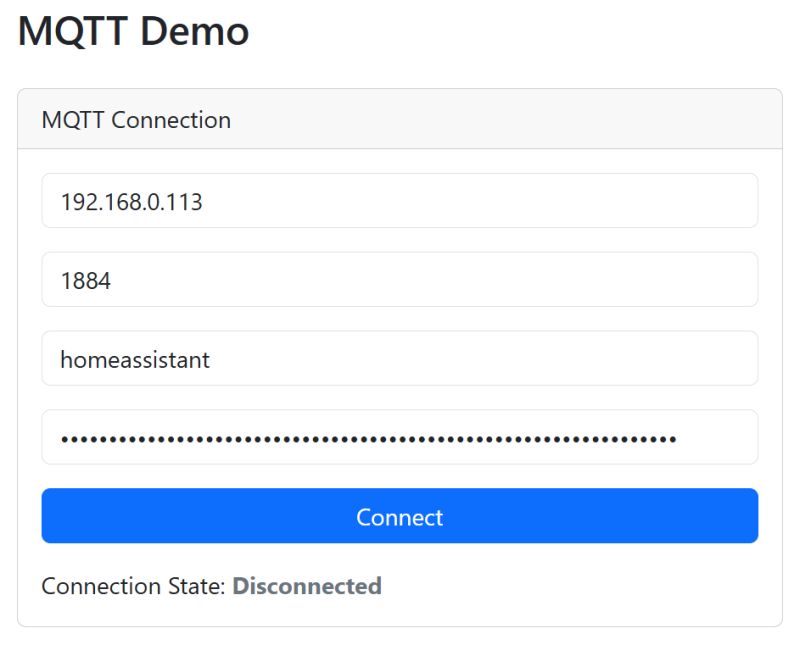
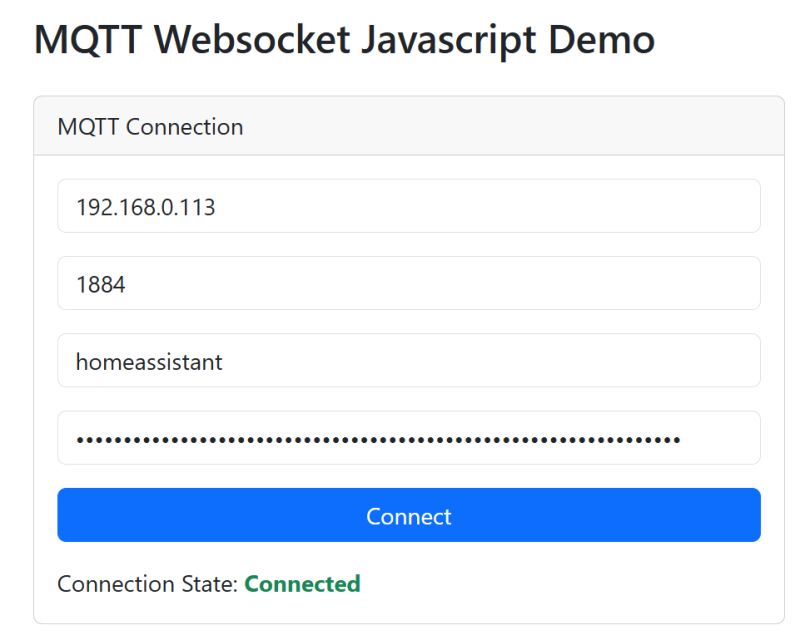
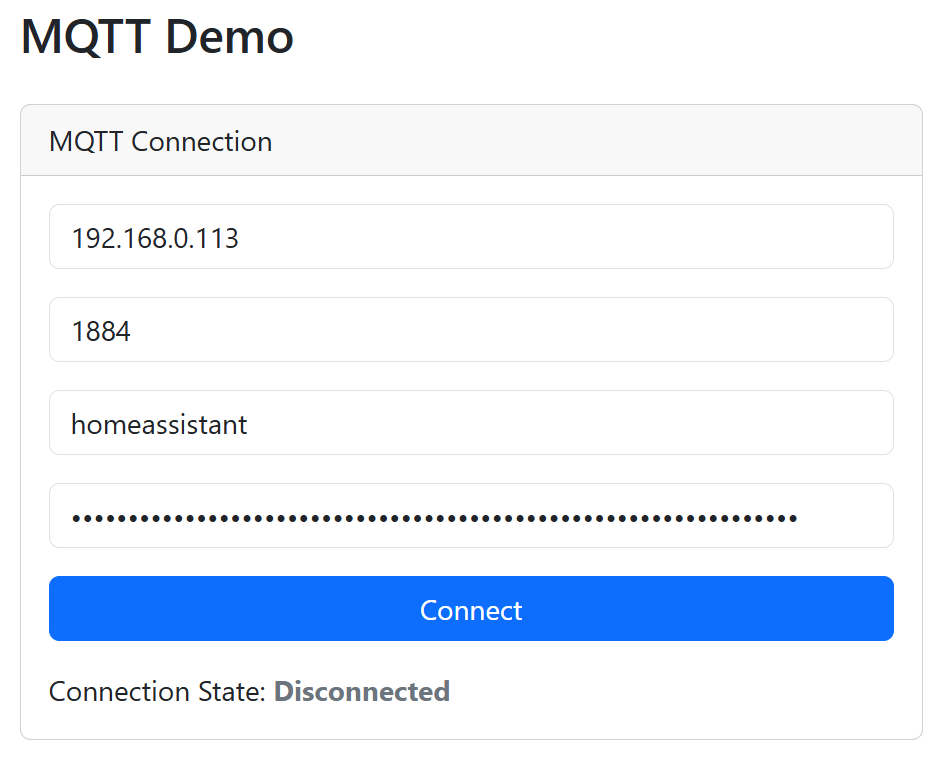
Here you will need to provide the username and password for our MQTT server. Note that everything will be visible in the page source to the client, so this approach won't work in some situations, but here I don't see it as a problem. I simply gave the user a field to enter their own information:

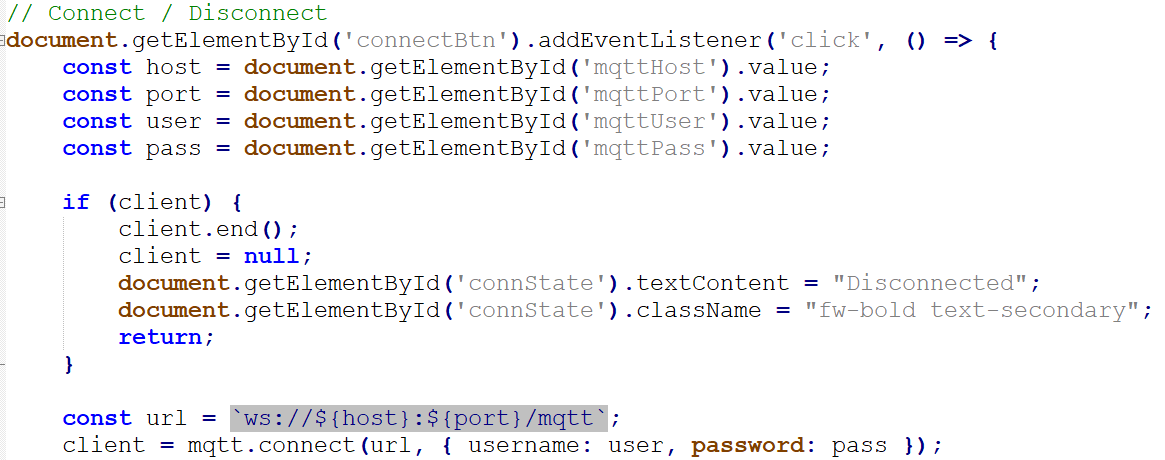
Now you have to handle the 'Connect' button, i.e. make the connection. The whole thing boils down to retrieving data from the DOM objects at the time of clicking:

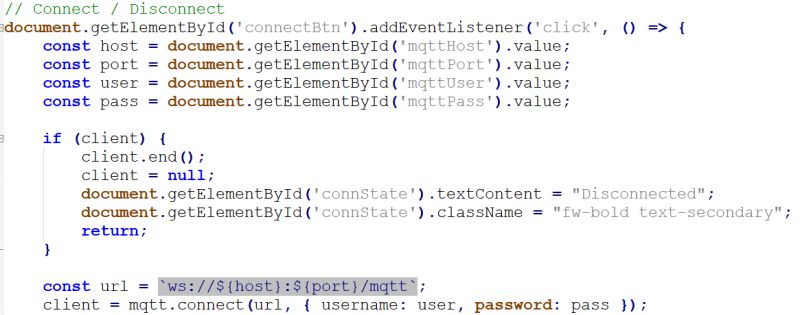
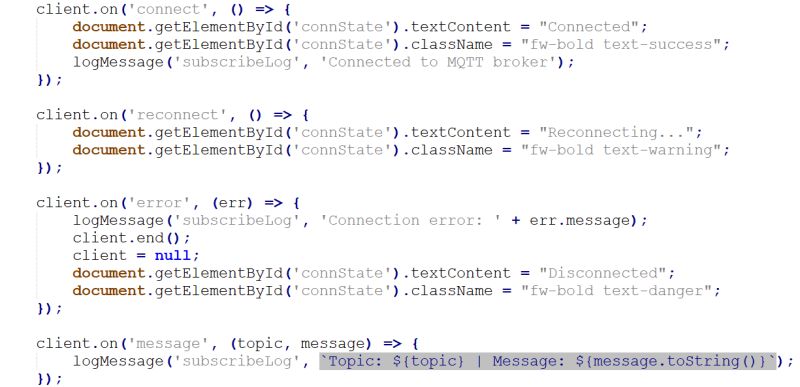
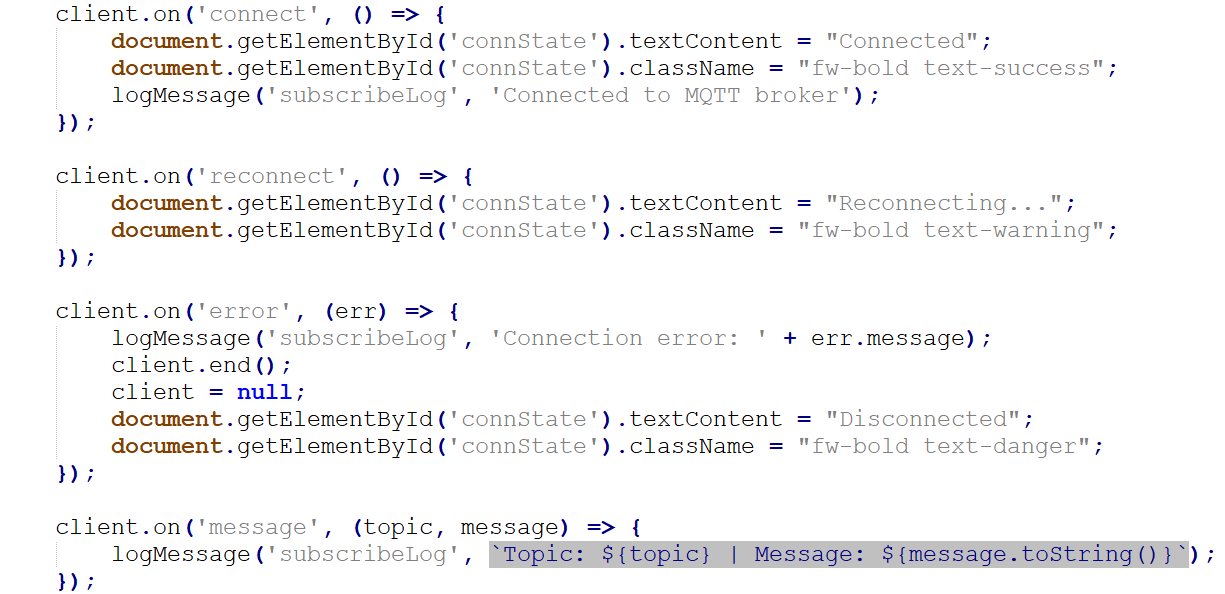
The link is created with the ws prefix, which is the WebSocket standard. A username and password are given as arguments. Once the connection is initiated (the connect function is non-blocking), callbacks can be set to handle various MQTT events. Here is an example implementation for a demo site:

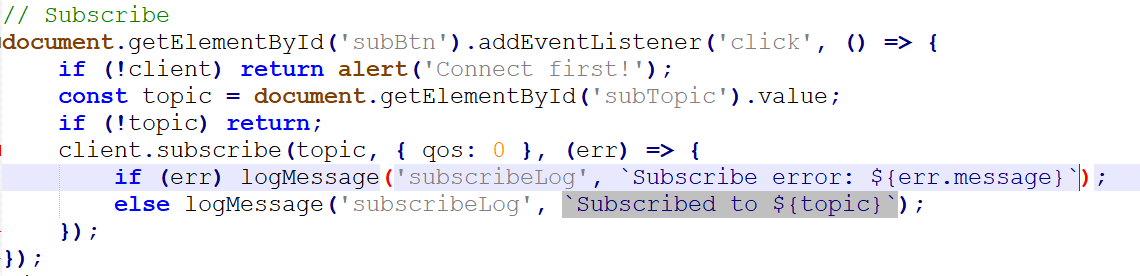
That leaves two operations that cannot be done via callbacks. First, the subscription for the topic (start listening):

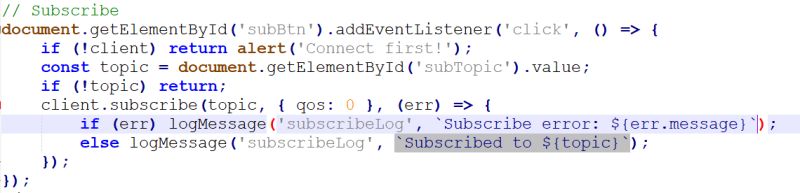
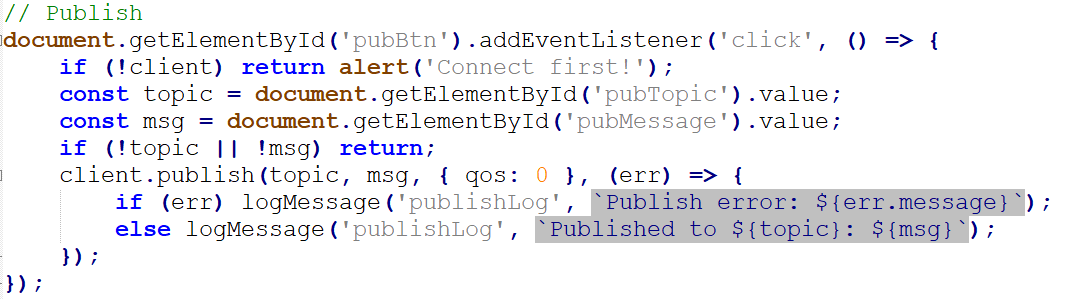
Then publishing data on the selected topic:

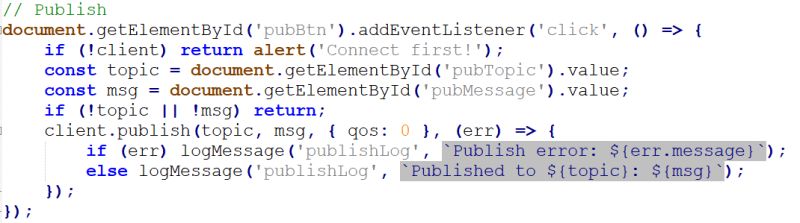
That's basically all of the implementation.

Now it's time for demonstrations .
Firstly the connection - once you have entered the correct details it should all work first time. I didn't have to configure anything in HA, I already had WebSockets support enabled there. I simply specified a port one larger than the one used for MQTT over TCP.

It is now possible to check that our site can see what Home Assistant publishes:

MQTT subscription interface with topic input and status logs
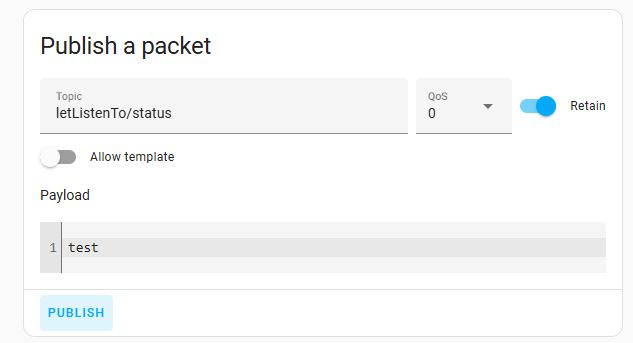
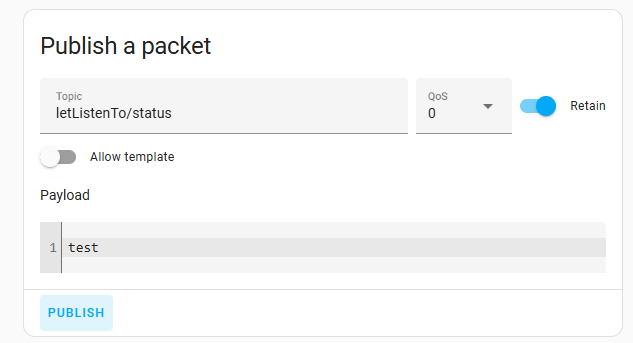
Then it remains to test the other way - site publishes, HA receives:
MQTT publish interface with topic and message fields and a yellow Publish button
MQTT message received in browser from topic someRandomTest/test

In summary , the support of the WebSocket standard in MQTT allows us to connect to the broker from a browser. In this way, we obtain full-fledged communication, including the ability to listen and publish data. Executing server-side scripts is then unnecessary - static HTML hosting is sufficient.
The example shown here could be expanded and made into a full sample device controller, but that's for another time.
Do you see a use for an MQTT connection established from the browser (client) level?

Full demo program attached - no server needed, you can download the HTML file and run it loosely from disk, or put it on some static hosting.
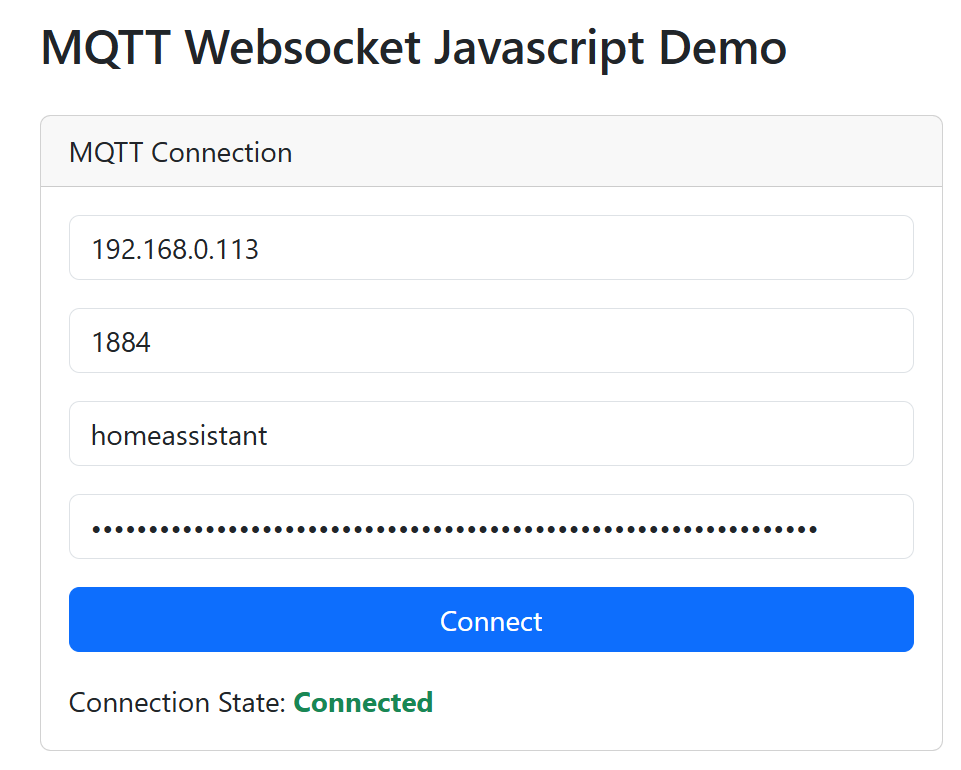
Attachments:
  • mqttjs.zip (1.69 KB) You must be logged in to download this attachment.

About Author
p.kaczmarek2
p.kaczmarek2 wrote 14405 posts with rating 12338 , helped 650 times. Been with us since 2014 year.

Comments

krzbor 23 Oct 2025 20:28

This is the biggest problem with this solution. It is suitable for testing, but for "production" use even at home it is dangerous. I in my solution used PHP, which is responsible for communicating with... [Read more]

krru 23 Oct 2025 23:22

a few months ago I rebuilt my weather station, built on malinca from a unified program into a set of three services communicating over MQTT. One of these services is a simple web server - it handles static... [Read more]

FAQ

TL;DR: A browser can talk to Mosquitto over WebSockets using mqtt.js; one user reports sensor pushes "every 10 seconds," and another notes that a WebSocket layer lets you limit messages. “WebSocket is an additional interface.” [Elektroda, krru, post #21729806]

Why it matters: This lets makers and Home Assistant users build no-server dashboards that publish and subscribe securely and fast.

Quick Facts

How do I connect my browser to Mosquitto with mqtt.js?

Load mqtt.min.js from a CDN, then call mqtt.connect with a ws:// URL, username, and password. Handle connection events via callbacks. Use separate actions for subscribe() and publish(). This works directly in the browser with no extra server. “That’s basically all of the implementation.” [Elektroda, p.kaczmarek2, post #21729033]

Do I need Node.js or any backend server?

No. The demo runs as a single HTML file from disk or static hosting. Browsers cannot open raw TCP, so mqtt.js uses WebSockets to reach the broker. This enables full publish/subscribe without server-side code. [Elektroda, p.kaczmarek2, post #21729033]

How do I enable WebSockets in Mosquitto for Home Assistant?

Ensure WebSocket listeners are configured in mosquitto.conf, then connect with ws:// to the WebSocket port. In the demo, the author used a port one higher than the TCP MQTT port. Adjust to match your setup and firewall. [Elektroda, p.kaczmarek2, post #21729033]

Is it safe to put MQTT username and password in the page?

No. Credentials in client HTML are visible to users and inspectors. One contributor calls this approach dangerous for production. Use it only for testing or local, trusted contexts. “It is dangerous.” [Elektroda, krzbor, post #21729640]

How can I hide credentials but keep a web UI?

Place a thin server layer (e.g., PHP) that holds the broker login and talks to Mosquitto. The browser calls the server endpoint instead. This hides the broker IP and credentials from users. [Elektroda, krzbor, post #21729640]

Can I restrict which topics the browser can publish or read?

Yes. Put a WebSocket endpoint that proxies to Mosquitto and enforces allowlists for inbound and outbound messages. “This ensures that there is limited access from the outside.” [Elektroda, krru, post #21729806]

What does a Home Assistant demo flow look like?

Enter broker credentials, connect over ws://, then subscribe to HA topics to see updates. Publish from the page and confirm HA receives the message. Screens show both directions working without extra HA changes. [Elektroda, p.kaczmarek2, post #21729033]

How often should a sensor service publish updates?

A practical example publishes current results about every 10 seconds. This keeps dashboards responsive without flooding the broker on small setups. Tune the interval to your network and device count. [Elektroda, krru, post #21729806]

Which mqtt.js events should I handle?

Set callbacks for connect, message, error, and close to manage UI state and logging. Subscriptions and publishing are explicit actions, not events, so wire buttons accordingly. [Elektroda, p.kaczmarek2, post #21729033]

How do I subscribe and publish from the page UI?

After connect, call client.subscribe('topic') to start listening. To send data, call client.publish('topic', payload). Wire these to form inputs and buttons for a simple dashboard. [Elektroda, p.kaczmarek2, post #21729033]

Can Mosquitto serve my web files too?

It can, but reported results are poor. Many prefer a simple web server for static files and a separate WebSocket proxy to Mosquitto. That split keeps access controlled and performance predictable. [Elektroda, krru, post #21729806]

What port should I use for WebSockets?

Use a dedicated WebSocket listener port. In the demo, the author picked a port one greater than the standard MQTT TCP port for clarity. Your exact port can differ. [Elektroda, p.kaczmarek2, post #21729033]

Quick 3-step: How do I build a zero-backend MQTT test page?

  1. Include mqtt.min.js from a CDN in your HTML.
  2. On Connect click, call mqtt.connect('ws://host:port', {username, password}).
  3. Add buttons to subscribe(topic) and publish(topic, payload), plus message event handlers. [Elektroda, p.kaczmarek2, post #21729033]

Who is this approach best for?

Makers, testers, and Home Assistant tinkerers who want instant dashboards without servers. Static HTML plus mqtt.js gives full publish/subscribe from the browser for quick experiments or local control. [Elektroda, p.kaczmarek2, post #21729033]

What’s a key limitation to remember?

Browsers cannot do raw TCP. You must use WebSockets for MQTT. Plan your broker and firewall accordingly, and configure mosquitto.conf for WebSockets. [Elektroda, p.kaczmarek2, post #21729033]

Any edge cases I should test?

Test that your proxy or gateway blocks disallowed topics, and verify HA still receives allowed messages. If you rely on Mosquitto to serve files, watch for poor performance. [Elektroda, krru, post #21729806]
Generated by the language model.
%}