Elektroda.com
Elektroda.com
X
This content has been translated flag-pl » flag-en View the original version here.
  • Wi-Fi weather station, Bascom and Arduino
    Hello
    I present the weather station on which I have been working for some time.
    The beginning of work is also my beginning of fun with Arduino.
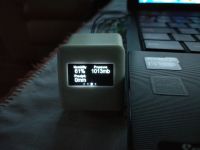
    It started with a ready-made project of a tiny station with an OLED display.
    Wi-Fi weather station, Bascom and Arduino
    Back then, just uploading the program to ESP8266 was a feat for me. Later I started to combine, improve this and that, try other soft. On the basis of this station, a data receiver from the network was created.

    The next step was to make an external weather sensor.
    Three versions were created.

    First version
    Wi-Fi weather station, Bascom and Arduino

    Complete failure. The system was powered by a Li-Ion battery through a 3.3V buck-boost converter. The battery is charged with the TP4056 system from a 2W solar cell. The system was also not cyclically put to sleep, which resulted in a continuous current consumption of 80mA. The results could be read on the display and by connecting to the device on the browser page. Such an arrangement had no right to exist.

    Second version
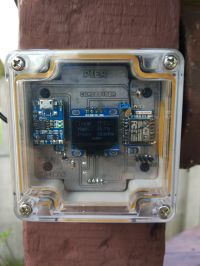
    Wi-Fi weather station, Bascom and Arduino

    Almost everything has been improved in this version. ESP8266 got cyclical awakening from the "Deepsleep" state every 30 minutes, I also gave up the converter for the LDO stabilizer, the measurement results are sent to the BLYNK and Thingspeak server, the possibility of reading on the OLED display remains unchanged. I also added a battery voltage reading.
    Now the system uses 80mA for a few seconds every half an hour, and about 2mA for the rest of the time, because the display is permanently on.

    Diagram
    Wi-Fi weather station, Bascom and Arduino

    The diagram also shows HTU21d and BMP280 in the final version changed to BME280.

    Third version
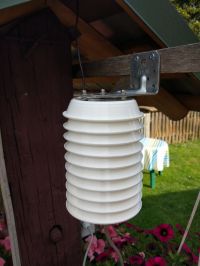
    Wi-Fi weather station, Bascom and Arduino

    In this version, only the sensor has been improved and changed. In earlier versions, the sensor was inside the housing, now it is in the radiation housing. HTU21d and BMP280 have been replaced by one BME280 sensor.
    The radiation casing is traditionally made of pot holders, bolted together on stainless steel M3 rods.
    Data from such a sensor can be read in four ways: directly on the display, with a smartphone using the Blynk application, on our Thingspeak channel, and at the weather station itself.

    Final program:
    Code: c
    Log in, to see the code


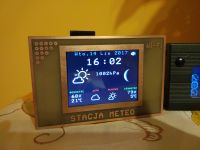
    Once I had the measuring part, it was the station itself.
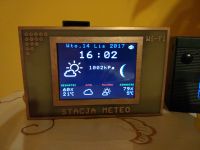
    For a long time, I had a 3.5 'display on the SSD2119 driver. I bought it because there is a Bascom service routine for it, and it stayed in a drawer for about two years. Now I would use a completely different LCD as this one is slow and needs a lot of I / 0 pins.
    The whole thing is controlled by atmega128 on a PCB. I don't even know what this album was for, I bought one. As the display only tolerates a 3.3V power supply and atmega is powered with this voltage, it is also heavily overclocked, 16Mhz at 3.3V. I know it's an inflection, but before the whole station was created, I tested the whole thing for a long time and nothing bad happened.
    HTU21d, BH1750 and RTC DS3231 sensors are connected to the atmega via I2C.
    By default, the mega reads data from them and sends it to the display. The light sensor is needed to automatically change the backlight intensity - atmega controls the PWM converter on the display board. I resigned from synchronizing the time with the server, because you still have to change the winter / summer time in the program yourself, anyway, the DS3231 offers a lot of accuracy. The controller also receives data from ESP via Serial-A.
    The wireless part is dealt with by ESP8266 with the program in Arduino. ESP connects to the Wi-Fi network, reads weather forecasts for the current day and two days ahead from the Weatherunderground server as well as the age of the moon, the latest values from my Thingspeak channel and the time from the NTP server. As I wrote earlier, he does not use his time. Then it formats this data and sends it via serial every minute. The atmega receives this data and presents it on the display.
    The program is mostly web-ready. I glued it together from probably four different ones and added sending data via the series.
    Bitmaps with icons for weather and moon phases are saved on the SD card.
    The phase of the moon is calculated from its age. Of course, atmega does this.

    Well, I know it could be easier. ESP alone would have done everything, but I wanted to use the parts I had. On the other hand, I do not think I saw a 3.5 'display that would work with ESP, and I do not know if it would be lacking pins.

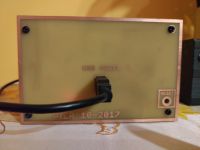
    5V power supply. Power consumption at the maximum brightness of 480mA backlight.
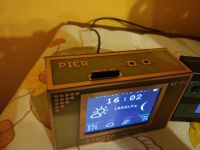
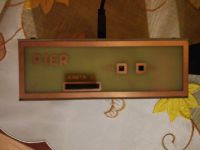
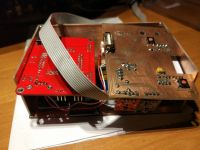
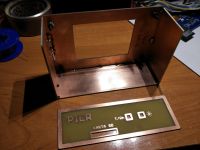
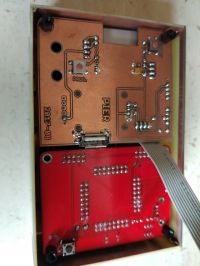
    The enclosure is made of laminate, its individual elements were designed in Eagle and made like ordinary pcb. Connecting individual elements by soldering. The rear part is fixed with screws. I just have to sprinkle it with some varnish so that the copper does not oxidize, but now I don't have the conditions for it.

    When commenting on programs, especially in Bascom, please take into account that I have never learned any programming language and it is written as is. The one for ESP is simpler, so also less messed up by me.

    Sources of the program for atmega will be in the attachment.

    Program for ESP8266:
    Code: c
    Log in, to see the code


    The station has been operating for several weeks and does not freeze. The only drawback I noticed is that sometimes the Atmega "does not see" the SD card after powering up the Atmega. This is indicated by a message on the display. A reset or restart of the power helps. This is probably related to overclocking.
    I know that the sensor itself was already presented in the DIY department, but then it was a stand-alone device, and now it has become part of the entire weather station.

    If I forgot something, write, ask.
    And something for the eye.

    Wi-Fi weather station, Bascom and Arduino

    Wi-Fi weather station, Bascom and Arduino

    Wi-Fi weather station, Bascom and Arduino

    Wi-Fi weather station, Bascom and Arduino

    Wi-Fi weather station, Bascom and Arduino

    Wi-Fi weather station, Bascom and Arduino


    Wi-Fi weather station, Bascom and Arduino


    Wi-Fi weather station, Bascom and Arduino

    Cool? Ranking DIY
    Do you have a problem with Arduino? Ask question. Visit our forum Arduino.
    About Author
    pier
    Level 24  
    Offline 
    pier wrote 2288 posts with rating 1767, helped 39 times. Live in city Biłgoraj. Been with us since 2006 year.
  • #2
    fotomh-s
    Level 24  
    There are routines or libraries for those OLEDs too, or any available code in Bascom?
    I am asking because they are quite cheap for graphic displays, but writing your own procedures just to display the string is a bit of an exaggeration, and I am thinking about getting such an OLED module. In addition, two-color (yellow-blue) versions are available at the same price. The prices of these modules are probably around PLN 20 or even less.
  • #3
    gdL
    Level 27  
    Greetings to the Meteo fan on the electrode. A very nice design. Are you planning its further development?
    As for the code, I've been trying to use classes for some time. It helps me to organize everything logically and return to the project painlessly even after a long time.
    Of course you have my vote.
  • #4
    Anonymous
    Anonymous  
  • #5
    macka2
    Level 10  
    Usually, most of the small sensors, screens etc. I buy directly from a Chinese on eBay.
    Recently, I paid about PLN 20 for the BH1750 and BME280 sensors together, and I bought small OLED displays for less than $ 3. Of course, you have to wait a bit for our post office to deliver them, because usually the customs office-> Polish post office-> customer takes the longest route. The route from China to Poland often takes less than shipping further by post.

    PS. Where did you get such a nice transparent waterproof box? Do you have any link, or maybe you did it yourself?
  • #6
    pier
    Level 24  
    macka2 wrote:
    PS. Where did you get such a nice transparent waterproof box? Do you have any link or maybe you did it yourself?

    Gainta housing from TME.
  • #7
    Jacek Rutkowski
    Level 27  
    fotomh-s wrote:
    There are routines or libraries for those OLEDs too, or any available code in Bascom?
    I am asking because they are quite cheap for graphic displays, but writing your own procedures just to display the string is a bit of an exaggeration, and I am thinking about getting such an OLED module. In addition, two-color (yellow-blue) versions are available at the same price. The prices of these modules are probably around PLN 20 or even less.

    The two-color is that the top, about 16 lines, is yellow and the rest is blue, etc. I haven't seen OLED with SSD1306 to change colors yet.
    If you are interested, I have an example of SSD1306 after I2C support under BASCOM AVR.
  • #8
    Anonymous
    Anonymous  
  • #9
    Jacek Rutkowski
    Level 27  
    Exactly, and two-color displays simply have part of the display, e.g. yellow, the rest blue.
  • #10
    krisRaba
    Level 31  
    pier wrote:
    The only drawback I noticed is that sometimes the Atmega "does not see" the SD card after powering up the Atmega.

    You did not give the station schematic, so it is impossible to check if you have resistors polarizing individual lines on the SD card. I used to have a problem that every time the card did not initialize correctly when turning on the device. There is a procedure for selecting the communication method on the card. If you do not have a separate control of its power supply, any transients occurring before the MCU gets up can mess up and you will not get along after SPI. In my case, the line polarization with pull-up resistors helped. Since then, as he took with his hand :)
  • #11
    kalarepah
    Level 9  
    Can the BME280 sensor in the form of a module be used outdoors?
    Will it not be destroyed too quickly?
    Is the accuracy and durability of such a sensor similar to SHT11?
    I am building a similar station, but I was planning to use the SHT11, and here I can see that the BME280 can be bought at a similar price, so I wonder what disadvantages it has.

    Moderated By Mirek Z.:

    I have removed the forbidden link to the auction (and unnecessary / incorrect spaces before the question marks). https://www.elektroda.pl/rtvforum/faq.php - p. 3.1.13, p. 3.1.18.

  • #12
    skgroup12598
    Level 2  
    Bosch’s BME280 is a precision sensor used in a myriad of applications ranging from weather monitoring to gaming controls to altitude measurement where accuracy of just a few feet is required. This sensor is simple to use, comes pre-calibrated, and requires no additional components, so you can start measuring relative humidity, temperature, barometric pressure, and altitude in no time.

    Measuring Temperature: The BME280 can measure temperatures ranging from -40°C to 85°C. Over the temperature range of 0 to 65°C, the accuracy is ±1.0°C; outside of that range, the accuracy drops to ±1.5°C.

    Measuring Humidity: The BME280 can measure relative humidity over a range of 0 to 100% with an accuracy of ±3%.

    Measuring Pressure: The BME280 can measure pressure between 300Pa to 1100 hPa with an absolute accuracy of ±1 hPa.

    Calculating Altitude / Elevation: The BME280 can measure pressure with such precision (low altitude noise of 0.25m) that it can also be used as an altimeter with an accuracy of ±1 meter.

    Hardware Overview: BME280 IC
    At the core of the module is the next-generation digital temperature, humidity, and pressure sensor from Bosch – BME280. It is the successor to sensors such as the BMP180, BMP085 and BMP183.