Hi All,
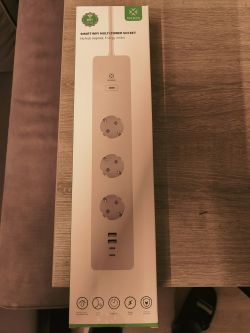
Today, I received my two Woox R6132 SMART WIFI MULTI POWER SOCKETS.
They were reasonably priced, and buying two saved me on shipping costs.
The device consists of 4 relays. Three of them control the power sockets, and one controls the power to the USB ports for charging your favorite devices.
Total charging power is 3A@5Volt. The device comes with 2 USB-C ports and 2 Classic USB ports.
Some pictures to start with:

Well, usually, I am okay with just configuring the device, preferably without cracking the case. However, Once I finished configuring the relays, I noticed it should come with a power meter. And that means looking for the chip that does the monitoring thing.
In this case, the screw heads were flattened, and there was no way for me to open the casing. So, I sacrificed one unit.
bottom plate ;(
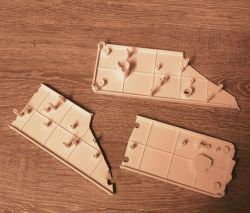
After opening the unit, the inside looks like this.
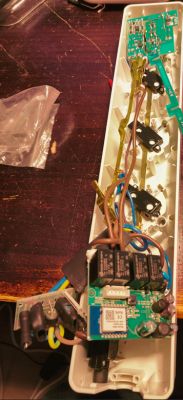
Main circuit
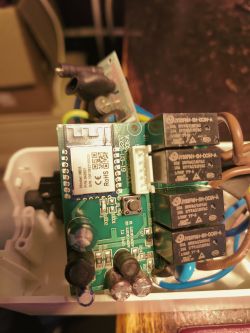
So, the technical details:
The unit comes with a WB3S (https://developer.tuya.com/en/docs/iot/wb3s-module-datasheet?id=K9dx20n6hz5n4) labeled board soldered on the main circuit board. Our trustful BK7231T module is doing its job.
The WB3S controls the four relays, the power meter circuit (BL0937), and mine ran Tuya v1.3.5.
Getting it into recovery mode is straightforward. Power it on. Push the button until the led starts blinking slowly. Release the bottom and press it again until it goes off. Bang. You're in recovery mode.
Run cloudcutter and flash it with BK7231t 1.3.5 firmware cutter and flash it the flavor of your choice.
Here is the template:
Once you have applied it, please remember to calibrate the power using a 60-watt light bulb and a multimeter.
PowerSet 60 (for the wattage of the bulb)
VoltageSet 231 (set your voltage from the multimeter)
CurretSet 0.261 (calculated 1000*(60/231)
Configure HomeAssistant, and it will nicely show up
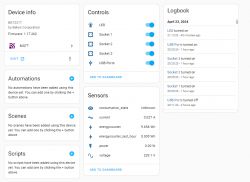
I played around with it, and it works like a charm.
I hope you enjoyed it, and if you have a device you want me to purchase and investigate, happy to do so!
Cheers
Today, I received my two Woox R6132 SMART WIFI MULTI POWER SOCKETS.
They were reasonably priced, and buying two saved me on shipping costs.
The device consists of 4 relays. Three of them control the power sockets, and one controls the power to the USB ports for charging your favorite devices.
Total charging power is 3A@5Volt. The device comes with 2 USB-C ports and 2 Classic USB ports.
Some pictures to start with:


Well, usually, I am okay with just configuring the device, preferably without cracking the case. However, Once I finished configuring the relays, I noticed it should come with a power meter. And that means looking for the chip that does the monitoring thing.
In this case, the screw heads were flattened, and there was no way for me to open the casing. So, I sacrificed one unit.
bottom plate ;(

After opening the unit, the inside looks like this.

Main circuit

So, the technical details:
The unit comes with a WB3S (https://developer.tuya.com/en/docs/iot/wb3s-module-datasheet?id=K9dx20n6hz5n4) labeled board soldered on the main circuit board. Our trustful BK7231T module is doing its job.
The WB3S controls the four relays, the power meter circuit (BL0937), and mine ran Tuya v1.3.5.
Getting it into recovery mode is straightforward. Power it on. Push the button until the led starts blinking slowly. Release the bottom and press it again until it goes off. Bang. You're in recovery mode.
Run cloudcutter and flash it with BK7231t 1.3.5 firmware cutter and flash it the flavor of your choice.
Here is the template:
Code: JSON
Once you have applied it, please remember to calibrate the power using a 60-watt light bulb and a multimeter.
PowerSet 60 (for the wattage of the bulb)
VoltageSet 231 (set your voltage from the multimeter)
CurretSet 0.261 (calculated 1000*(60/231)
Configure HomeAssistant, and it will nicely show up

I played around with it, and it works like a charm.
I hope you enjoyed it, and if you have a device you want me to purchase and investigate, happy to do so!
Cheers
Cool? Ranking DIY


