![[BK7231T] Connect 10W Smart RGB Bulb [BK7231T] Connect 10W Smart RGB Bulb](https://obrazki.elektroda.pl/5743401700_1680463883_thumb.jpg)
Hello, today I want to introduce the the Connect 10W Smart RGB Bulb, also known as the Laser 10W Smart RGB Bulb B22. I bought this bulb in 2021 and threw away the packaging earlier this year as a cleanup, so I don't have any packaging pictures. Sorry!
Teardown
![[BK7231T] Connect 10W Smart RGB Bulb [BK7231T] Connect 10W Smart RGB Bulb](https://obrazki.elektroda.pl/5743401700_1680463883_thumb.jpg)
![[BK7231T] Connect 10W Smart RGB Bulb [BK7231T] Connect 10W Smart RGB Bulb](https://obrazki.elektroda.pl/8207841100_1680463903_thumb.jpg)
The bulb has two product IDs: LSH-B22RGB10W and CSH-B22RGB10W. Laser Co seems to sell this bulb under its own brand and the Connect SmartHome brand it owns.
Multiple revisions of this bulb exist (ESP8266 chip, WB2L chip) but the manufacturer doesn't change the product ID. This means you need to open your bulb to find out what's actually inside. Because of this I don't recommend buying this bulb.
![[BK7231T] Connect 10W Smart RGB Bulb [BK7231T] Connect 10W Smart RGB Bulb](https://obrazki.elektroda.pl/6973686700_1680464026_thumb.jpg)
![[BK7231T] Connect 10W Smart RGB Bulb [BK7231T] Connect 10W Smart RGB Bulb](https://obrazki.elektroda.pl/4388902700_1680464030_thumb.jpg)
![[BK7231T] Connect 10W Smart RGB Bulb [BK7231T] Connect 10W Smart RGB Bulb](https://obrazki.elektroda.pl/1568651700_1680464036_thumb.jpg)
![[BK7231T] Connect 10W Smart RGB Bulb [BK7231T] Connect 10W Smart RGB Bulb](https://obrazki.elektroda.pl/9432942900_1680464214_thumb.jpg)
![[BK7231T] Connect 10W Smart RGB Bulb [BK7231T] Connect 10W Smart RGB Bulb](https://obrazki.elektroda.pl/9039550000_1680464219_thumb.jpg)
I didn't photograph the power circuit as it's just a 220v capacitive drop circuit that outputs 12v and passes through 220v to VIN.
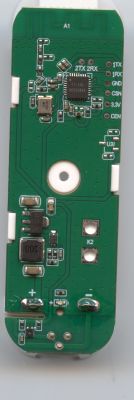
Here's a labelled collage of all the pins (click to zoom!):
![[BK7231T] Connect 10W Smart RGB Bulb [BK7231T] Connect 10W Smart RGB Bulb](https://obrazki.elektroda.pl/5826769900_1680464104_thumb.jpg)
The operation is fairly simple: The WB2L sends PWM signals to two LED drivers. One is a KP18055ESP and the other is a BP1633. The mapping goes like this:
| Pin | LED | PWM4 | Blue | PWM5 | Green | PWM0 | Red | PWM1 | Warm white | PWM2 | Cold white |
Install guide
Warning: Read all appropriate documentation and warnings for Tuya Cloudcutter and OpenBeken. If your bulb does not have the same chipset as mine it's possible you will brick your device. Follow their installation instructions instead of mine if possible.
Installation is roughly these steps:
1. Set up Tuya Cloudcutter using their instructions
2. Grab the BK7231T firmware in CCtr format from OpenBeken
3. Place it in the custom-firmware directory
4. Run Tuya Cloudcutter and select update firmware mode
5. Select a device by firmware (I used oem-bk7231s-light-ty-1.1.2-sdk-2.0.0-30.06)
6. Select the firmware you've downloaded
7. Follow the instructions
8. Connect to the bulb's Wi-Fi access point
9. Note your device's IP address
10. Change the noted IP's last octect to 1 (so if your IP is 192.168.1.20, use 192.168.1.1)
11. Open the IP in your web browser, in a URL like this: http://192.168.1.1/
12. Configure the bulb's Wi-Fi access point
13. Re-connect to your regular Wi-Fi network
Configuration is done using these steps:
1. Find the IP of your bulb using your router page
2. Open it in your web browser, in a URL like this: http://192.168.1.5/
3. Go to the configuration page
4. Go to the 'Configure Module' page
5. Set P6 (PWM0) to PWM role, channel 1
6. Set P7 (PWM1) to PWM role, channel 4
7. Set P8 (PWM2) to PWM role, channel 3
8. Set P24 (PWM4) to PWM role, channel 2
9. Set P26 (PWM5) to PWM role, channel 0
10. Save the configuration
11. Return to the original bulb page
12. Test that you can set the light colour
That should be it! If you manage to install OpenBeken but the configuration goes wrong you might need to ask online for some help.
Other notes
Sorry for the somewhat blurry and incomplete photos. I was in a hurry to have a working light again. I also couldn't find a datasheet for the BP1633 chip.
Full disclosure: I also want to note that this post is an abridged copy of my wiki page here: https://www.jookia.org/wiki/CSH-B22RGB10W . Nothing important is removed, just textual descriptions and general background on what Tuya mods are available.
Cool? Ranking DIY


